Dashnill
Participating Frequently
April 28, 2019
Answered

Color differnce after rendering

  • April 28, 2019
  • 6 replies
  • 14692 views

I finished my work on Premiere. Color graded it on sRgb and checked it on Rec709.

Everything Looks fine to me on all Color spaces.

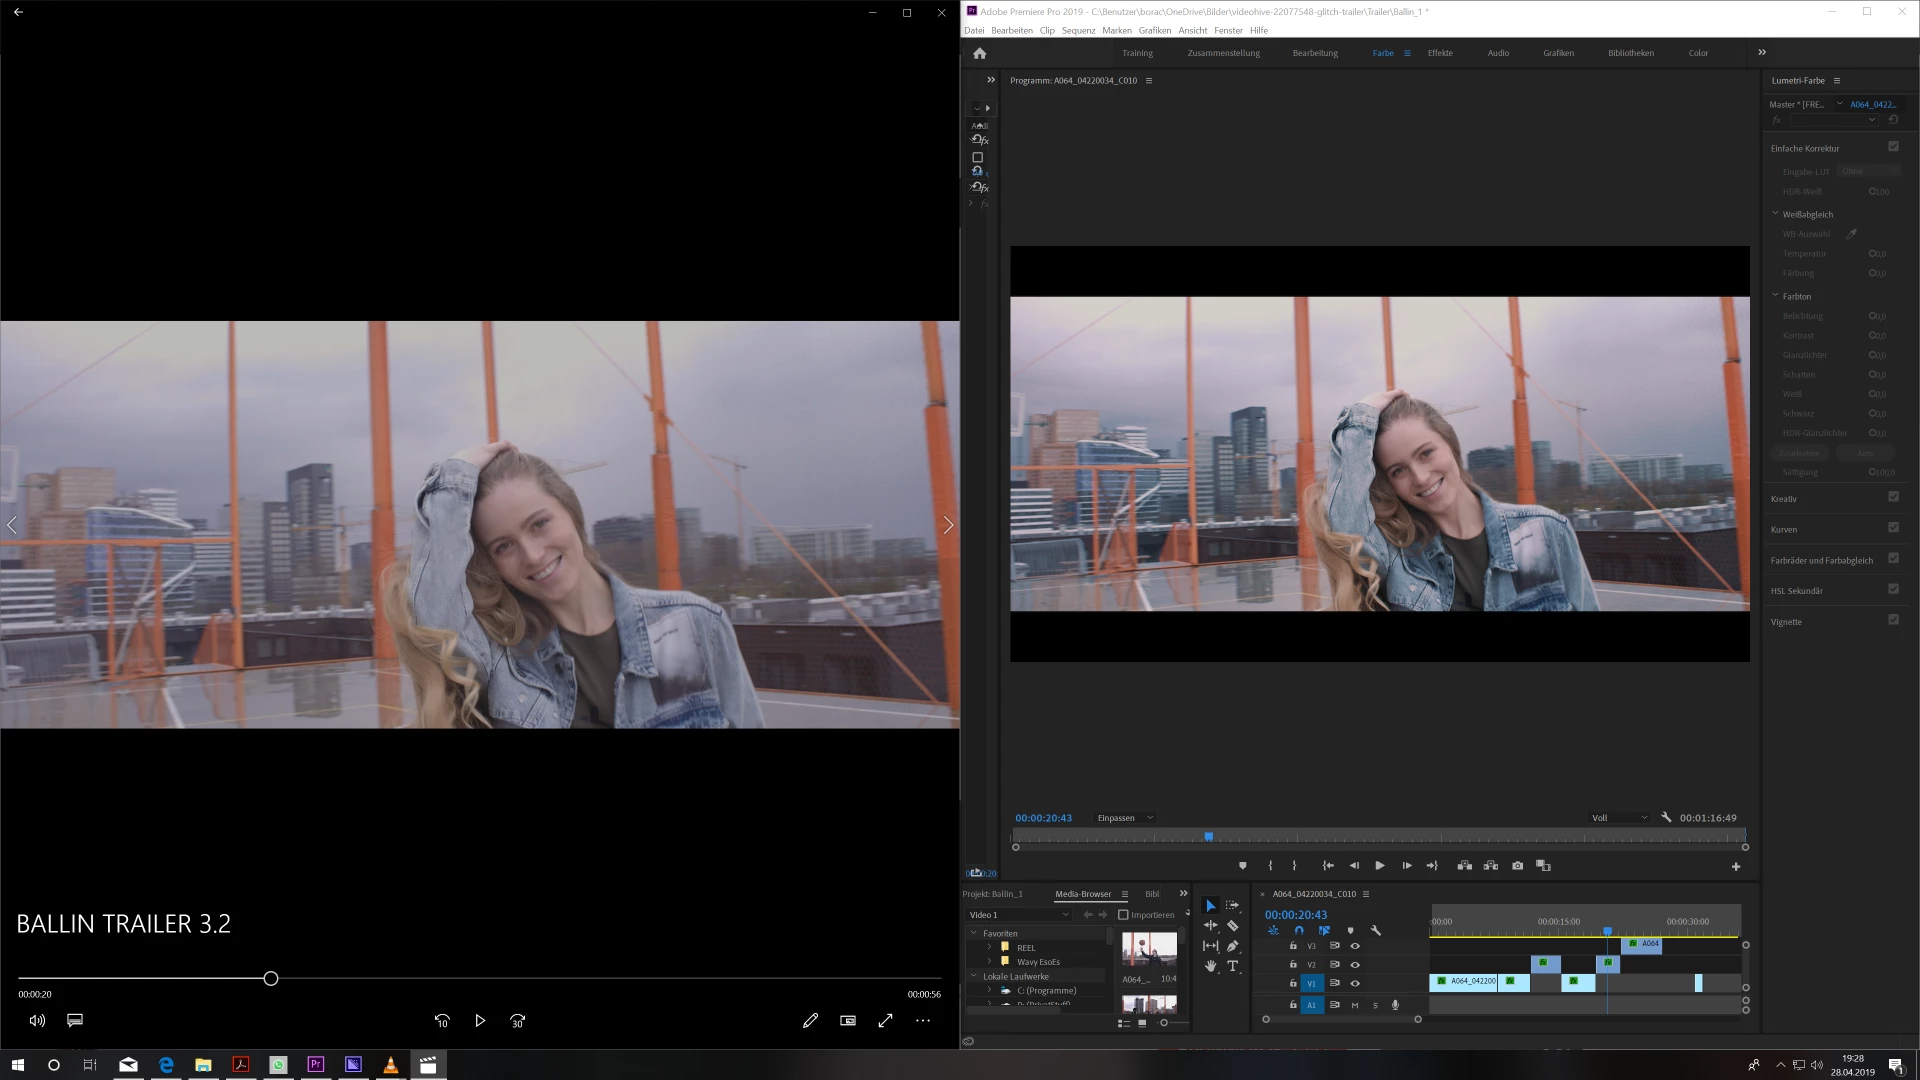
When i render it out : this happens.

That do not look nice to me.

Please help me guys.

My Footage was shot in HD 422.

This topic has been closed for replies.
Correct answer NRS-Media

Hi Dashnill,

I have a workaround solution for you, until this bug in Premiere is actually fixed.

In the sequence that you are going to export, add a new video track to the top of the stack. In that top video track, place an adjustment layer and make that adjustment layer cover the entire duration of your sequence. In the effects tab go to Lumetri Presets > Technical and drag the "Legal to Full Range, 12-bit" preset onto the adjustment layer. Now your sequence is going to look wrong to your eye and over range on the lumetri scopes but ignore it. Export your sequence with this adjustment layer enabled, this should cancel out the effect of the export bug.

Once the export is complete, bring the exported file back into Premiere and compare it to your sequence with the newly added adjustment layer track turned off. Your video export should match what you intended in your sequence.
6 replies

Known Participant
October 5, 2021

Actually I just found out that this is a problem from mac preview and quicktime player. After try out all the solutions proposed here, I just played the video in VLC and it preview like in the premiere window program. So the problem is the MAC OS unfortunally,

Shivangi_Gupta
Community Manager
Community Manager
October 6, 2021

Hi there,


Thanks for sharing your experience. We're sure it will be helpful for others too.


Regards,

Shivangi

NRS-MediaCorrect answer
Inspiring
April 29, 2019

Hi Dashnill,

I have a workaround solution for you, until this bug in Premiere is actually fixed.

In the sequence that you are going to export, add a new video track to the top of the stack. In that top video track, place an adjustment layer and make that adjustment layer cover the entire duration of your sequence. In the effects tab go to Lumetri Presets > Technical and drag the "Legal to Full Range, 12-bit" preset onto the adjustment layer. Now your sequence is going to look wrong to your eye and over range on the lumetri scopes but ignore it. Export your sequence with this adjustment layer enabled, this should cancel out the effect of the export bug.

Once the export is complete, bring the exported file back into Premiere and compare it to your sequence with the newly added adjustment layer track turned off. Your video export should match what you intended in your sequence.

Dashnill
DashnillAuthor
Participating Frequently
May 3, 2019

Yep it is workin. Whaat a struggle since days. The Client is Angry - i am Angry ^^.

do you know if this Problem is known by Adobe so they fix it with the next update ?

Inspiring
May 3, 2019

Hi Dashninll,

Mr. Haugen also let me know in another thread, that on export, checking Render at Maximum Depth is unnecessary when you have a dedicated GPU in your system. Premiere is always rendering at Maximum Depth when you have a dedicated GPU. That option is for systems rendering on the CPU only in software mode. So being sure to keep that box unchecked on Export also fixed the problem for me, without having to mess around with adjustment layers that only add to the render time.

Thank you Mr. Haugen for explaining this.

Inspiring
April 29, 2019

Hi Dashnill,

I am having the problem too. What seems to be happening, is that when I export, the colour looks like I have applied the lumetri technical preset "Full to Legal Range". When looking at the lumetri scope on a file that I have exported, the waveform shows that the range from black to white has been constricted as if that preset was applied, even though I had not.

I tried applying the "Legal to Full Range" preset to my original timeline before export, and the waveform shows black being below zero. But after export the output file looks like I expect and when I bring it into Premiere and look the scopes, black and white are where they should be.

I tried exporting the same materials in Premiere Pro 2017 which I still have installed, and everything worked perfectly without having to mess around with lumetri technical presets. This issue is a bug in Premiere Pro 2019 (13.1.2) and it breaks the ability to trust in its exports.

My colleague is still on 13.0.2 and does not have this problem, it was introduced in 13.1.0.

Legend
April 29, 2019

"Variants of this question have been covered to death on this and every other color grading forum. The answer is always the same.  The only way to get a [proper] image you can trust is to run SDI [or HDMI] out to an accurately calibrated reference monitor.  Grading by viewing the image in the GUI just doesn't work."  - Jamie LeJeune

DeckLink | Blackmagic Design

AJA Desktop I/O Tools: Work with the Products You Use Everyday

Dashnill
DashnillAuthor
Participating Frequently
April 29, 2019

I do not believe that. I mean that happens for the first time. I mean in Adobe Premiere it is like i want it, after Rendering it should not Change the Colors again.

Legend
May 3, 2019

after Rendering it should not Change the Colors again.

You can't know that it is until you watch it under controlled conditions.  That's my point.

Richard van den Boogaard
Community Expert
Community Expert
April 29, 2019

Which software player do you use to review the footage? Is the color shift apparent in other players and on other devices?

Dashnill
DashnillAuthor
Participating Frequently
April 29, 2019

i checked it with everything. Windows Media Player. the Windows app, quickt time and VLC

R Neil Haugen
Legend
April 29, 2019

What color space is your monitor set to in the OS?

Have you calibrated it with a puck/software system?

Everyone's mileage always varies ...
Dashnill
DashnillAuthor
Participating Frequently
April 29, 2019

ist set to sRgb. it is pre calibrated by BenQ

R Neil Haugen
Legend
April 29, 2019

I have a BenQ PD2720U. And yes, it comes with a "pre-calibrated" video sRGB mode.

Which is nowhere near usable for proper work with Premiere. Profiled in Lightspace, the whites were around 245 nits, more than double the proper 100 nits level ... the white point was way off D6500 ... and the gamma was off ... and the color profile up the scale was WAY above the delta-E max variant level of 2.3.

So I set the white point manually to D6500, checked through Lightspace (free) using my Xrite i1 Display Pro puck, at around 107 nits. This allowed enough headroom for the following calibration to move the three color channels and still make 100 nits after all corrections.

Then ... calibrated using the i1 Display Pro puck/software, THEN ran a profile using Lightspace{free} and Resolve together.

Perfect 2.4 gamma, perfect D6500 white point at 100 nits, and the delta-E variant curve had nothing even approaching the visible level of 2.3.

So ... after profiling, manual adjustments, and then calibrating/reprofiling, I have a wonderful 4k monitor.

Prior to my detailed, manual calibration/profiling ... it was not usable.

Premiere is built around the user setting up the exact, proper viewing environment. Video sRGB, gamma 2.4, D6500 and 100 nits. Then anything out of Pr will import say into Resolve in that app's RCM color managed mode ... spot-on.

IF you set up your system properly ... Premiere will work perfectly for color. If you don't ... all bets are off.

Neil

Everyone's mileage always varies ...