
FAQ: How to work with Variable Frame Rate (VFR) media in Premiere Pro?
What is Variable Frame Rate (VFR)?
Variable frame rate (VFR) is a term used when the frame rate changes over time for a media file.
Usually, this is done to maintain either a compression level or to have better performance while capturing or recording media. Common examples are the media recorded by smartphones, webcams, game-play recording software like NVIDIA ShadowPlay and other screen capture applications like OBS Studio.
How to determine if a media has VFR?
Follow one of these ways to check if a media has VFR:
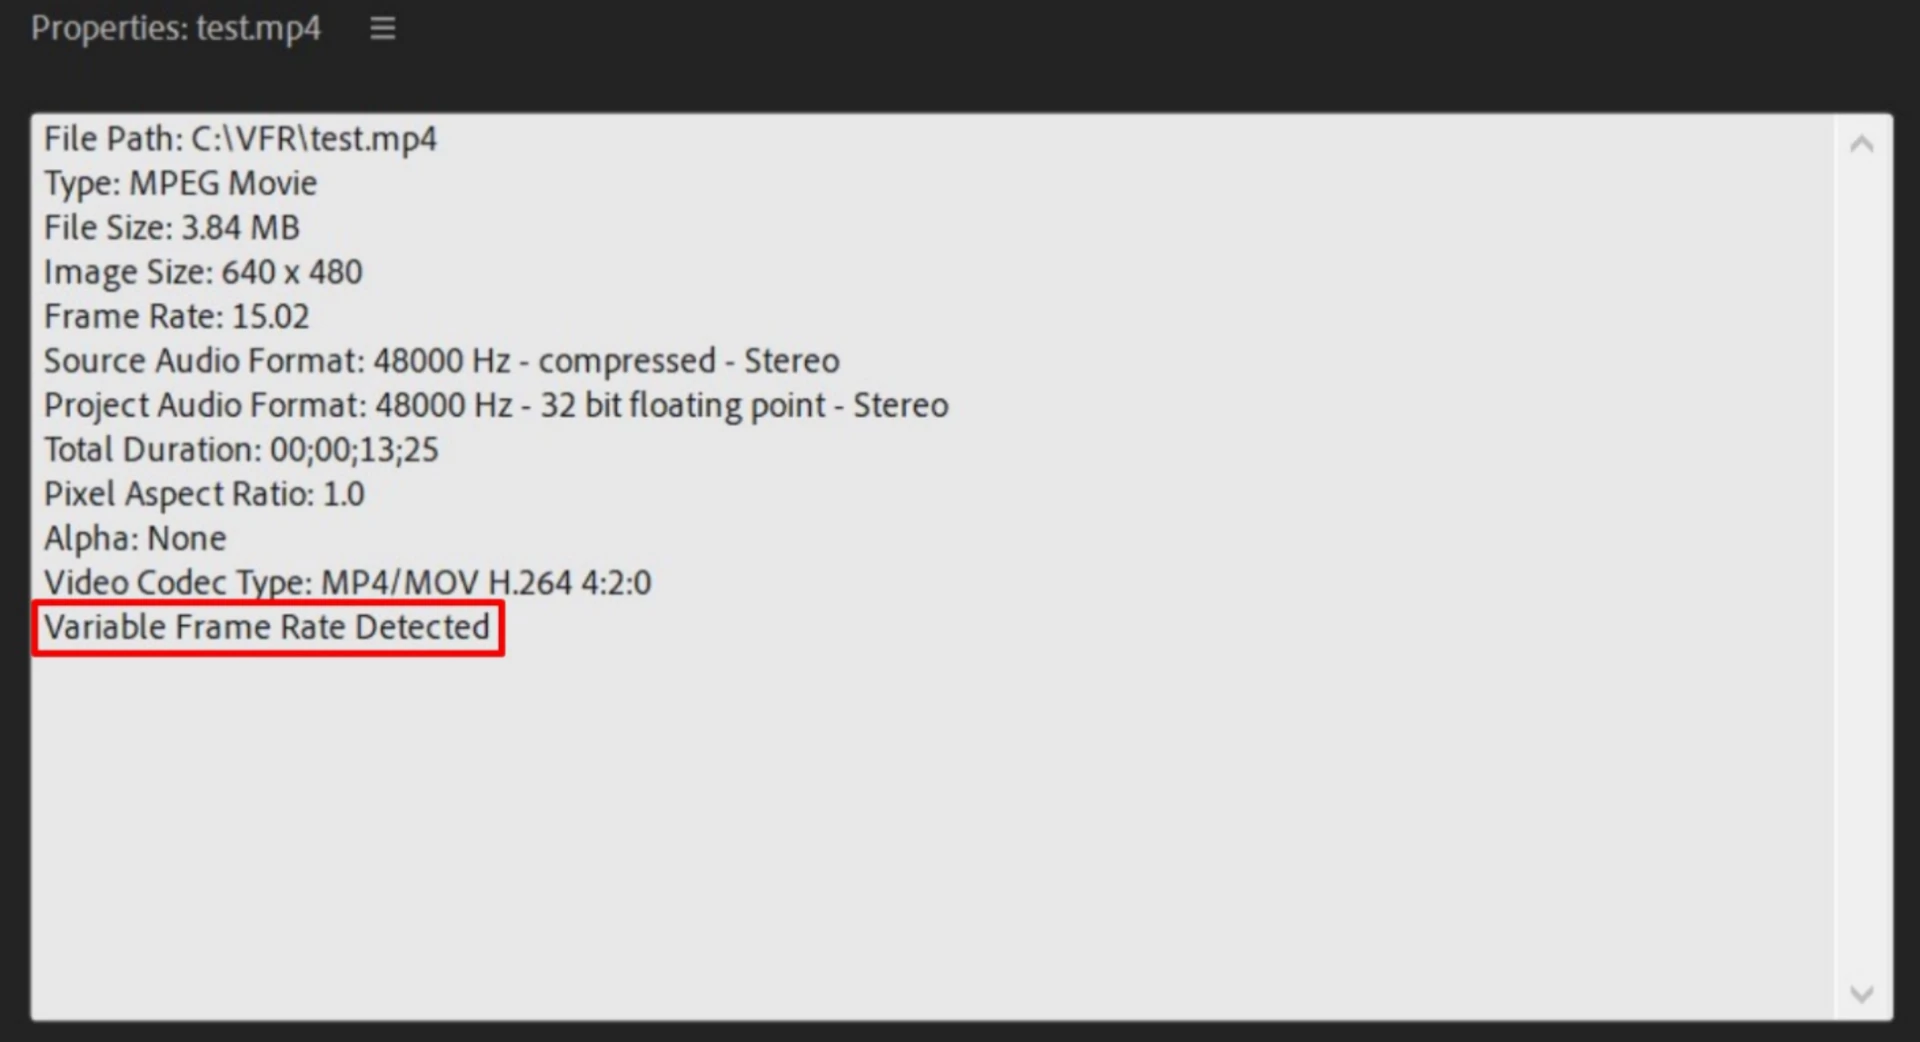
1) Using Premiere Pro
- Import the media file in Premiere Pro (version 12.0.1 or higher)
- Right click on the media file and select Properties
- In the Properties panel, you would see Variable Frame Rate Detected if the media has VFR.
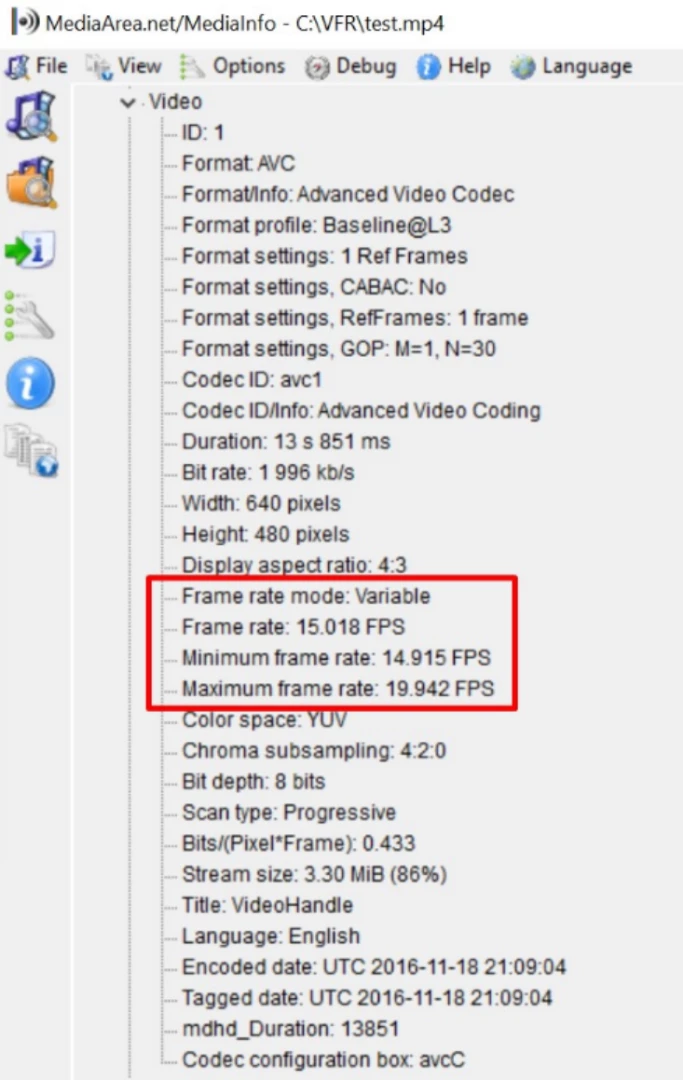
2) Using Mediainfo (a free and open-source program that displays technical information about media files)
You may open the file in MediaInfo, click View and then select Tree. Under the Video dropdown, if the Frame Rate Mode is listed as Variable, then it is a VFR media. It will also provide a Minimum and Maximum frame rate value.
How to address the audio-video sync issue?
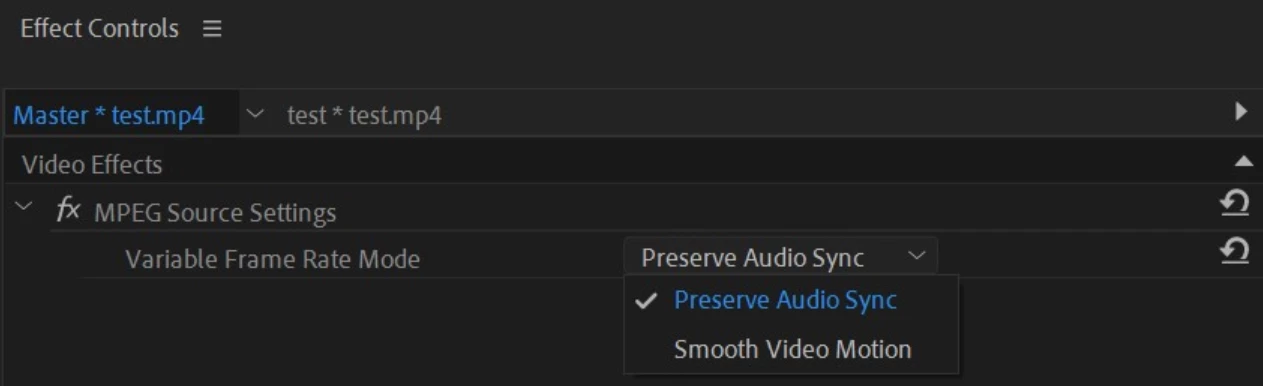
Playing VFR media in Premiere Pro may result in the audio being out of sync with its corresponding video frame. To address this audio drift, Premiere Pro has a new feature called Preserve Audio Sync.
To access this, open a VFR clip in the Source Monitor from the Project panel and switch to the Effect Controls panel.
You can toggle between the following options under MPEG Source settings:
- Preserve Audio Sync - This option decodes the source so that the audio and video are in sync. To accomplish this sync, the decoder adds or drops video frames. This may result in less smooth motion in the video. This is the default for all VFR sources with audio.
- Smooth Video Motion - This option decodes all the available frames in the source and does not make any effort to maintain AV sync. This results in smoother motion in the video. You can choose this setting if you are doing motion graphics work and care more about getting all the available video frames. If Premiere Pro does not detect any audio, this option becomes the default option.
Limitations
- If you plan to use proxy, consolidate or transcode workflows, it is better to transcode VFR material to a constant frame rate before editing.
- If you have manually synced VFR footage in previous versions of Premiere Pro, you need to resync that footage when opening the project in Premiere Pro 12.0.1 or later versions.
Note: With few VFR media files the Preserve Audio Sync function may not work as intended due to extent of variation between the Minimum and Maximum frame rate. In such cases, it is recommended to transcode these media files to Constant Frame Rate and then use them in Premiere Pro. These particular files may need to be transcoded in an "open source" application like Shutter Encoder. Handbrake also works but has fewer features.
Media Encoder can transcode certain files, but use Shutter Encoder or Handbrake if the files cannot be imported.
