vinnyc123
Participant
December 3, 2017
Answered

Why is my photo overlay not look right after export?

  • December 3, 2017
  • 3 replies
  • 1662 views

So i have a college logo over my entire duration of the video, its a PNG photo. nd for some reason after export it looks almost like the image cannot keep up with the motion of the video.

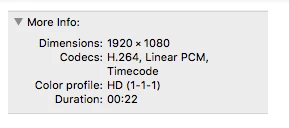
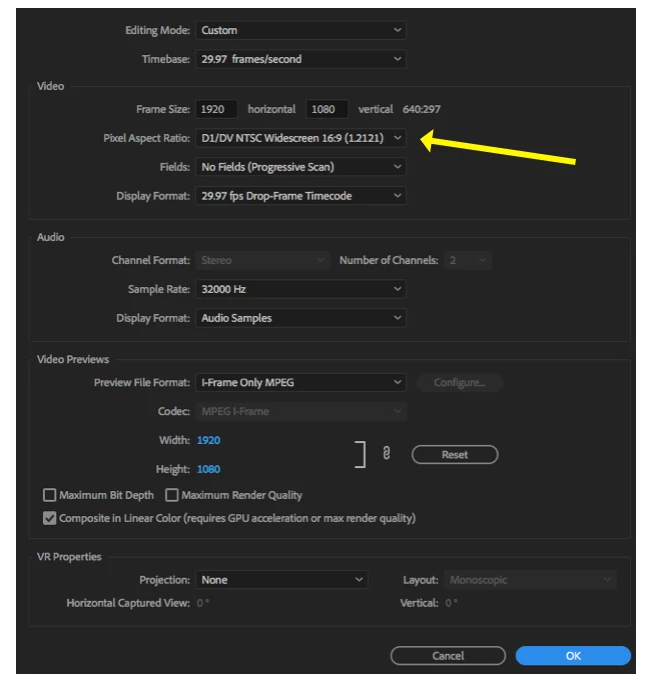
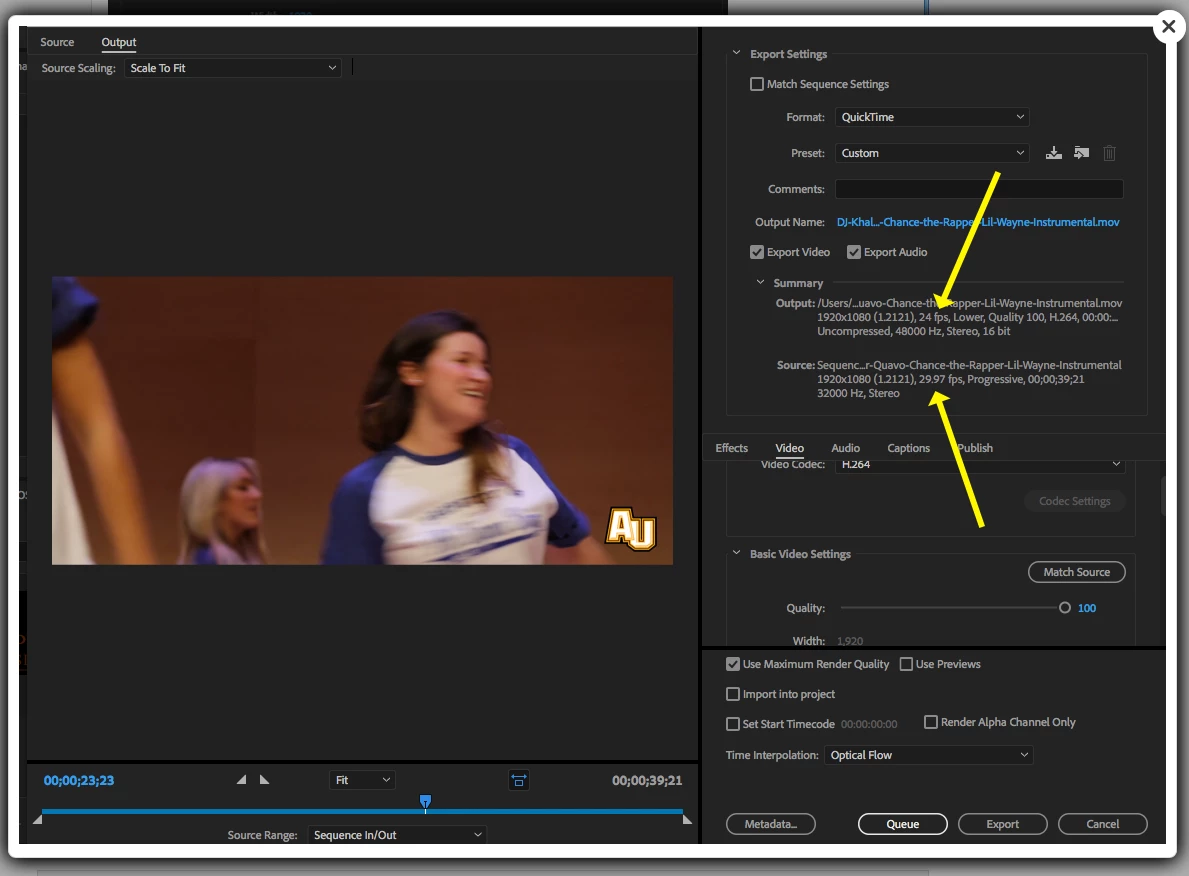
Also,  I cant figure out waht size to export this film out at for the best quality. But mainly this image overlay in the bottom right corner is whats causing me the most grief any ideas?

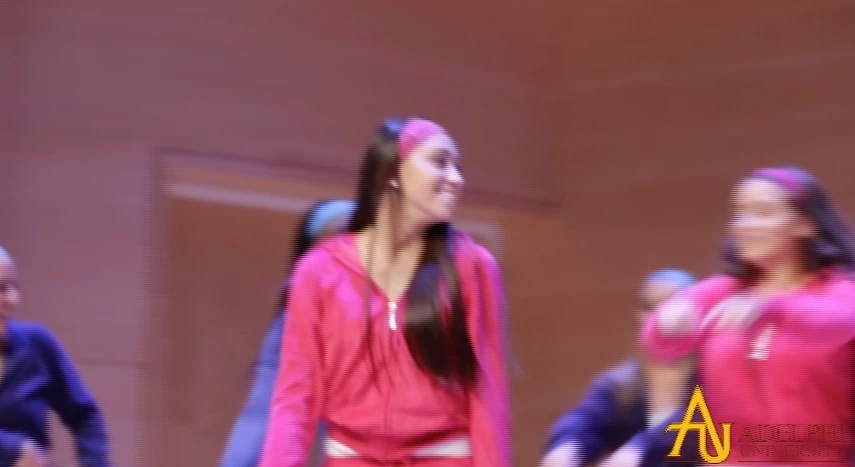
Here is a screenshot of when the camera is in motion...

And below is a screenshot of the logo with a static camera shot...

Any ideas why it isnt mapping well?Should it not be a PNG image?

thanks!

This topic has been closed for replies.
Correct answer Meg The Dog

You have a whole buffet of incongruities here.

Your source is HD, which has a Square Pixel aspect ratio:

But you are editing it on a  Sequence set with a Standard Definition Pixel aspect ratio, is this your intention?

If you did not intend to to that, your sequence should be set to Square Pixels (1.0).

Also, your audio sample rate should be 48000 Hz.

In your export, you have your export settings set to export as 24fps Lower Field Dominant Interlaced footage, but your Sequence that you are exporting is a 29.97fps Progressive sequence - is this your intention?

MtD

3 replies

vinnyc123
vinnyc123Author
Participant
December 3, 2017

Now im getting the same problem, but with the actual video tracking.. look below

heres the video info:

And the rest:

Meg The DogCorrect answer
Inspiring
December 3, 2017

You have a whole buffet of incongruities here.

Your source is HD, which has a Square Pixel aspect ratio:

But you are editing it on a  Sequence set with a Standard Definition Pixel aspect ratio, is this your intention?

If you did not intend to to that, your sequence should be set to Square Pixels (1.0).

Also, your audio sample rate should be 48000 Hz.

In your export, you have your export settings set to export as 24fps Lower Field Dominant Interlaced footage, but your Sequence that you are exporting is a 29.97fps Progressive sequence - is this your intention?

MtD

Participating Frequently
December 3, 2017

So what happened is the FIRST CLIP that you added to the sequence (rapper - Lil Wayne...) was used by Premiere to determine the parameters that would be used for the editing sequence. Not a good thing. It's all messed up! Based on a clip you probably downloaded from online, with who knows what settings in it.

What you want to do when starting a project is right-click a VIDEO clip from your CAMERA, and select New Sequence from Clip.

With current situation, go to Sequence Settings and change Pixel Aspect to 1.0, and audio rate to 48000. Assuming video camera footage is 1080p.

Then when you Export, use similar settings. We don't know the intended use of the exported video, but for example choose H.264 > YouTube 1080p 29.97

Right-click a video clip (from camcorder, not a clip you downloaded) in Project Bin and hit Properties - what does that tell you about the video clip? Make sure Sequence Settings match.

Thanks

Jeff

Ann Bens
Community Expert
Community Expert
December 3, 2017

Post screenshot of export settings with left tab to output.

Participating Frequently
December 3, 2017

Looks like an interlacing issue. What exactly is the source video, such as 1080i, 1080p?

Do the Sequence Settings match the source video?

What are you exporting as? A screen shot of the export settings panel will be greatly helpful here.

If source and sequence are 1080i, that's fine - but if exporting for computer/online viewing, then you do NOT want interlaced video as computers only display progressive video properly. Export as 1080p29.97 for instance and that should get rid of the lines you are seeing. Do a short sample export to try it.

About the logo - are you scaling in Premiere? Best results will be obtained by making the .png the same size as the video frame, example 1920x1080, in Photoshop. Position and scale the logo as you want it to look in the final video. Maybe add some transparency at that point also by adjusting opacity? Then save the image with alpha. When you place it in Premiere sequence, you will not need to do any scaling/positioning at all and that will provide optimum overlay quality without aliasing or other issues.

Thanks

Jeff Pulera