November 23, 2010
Question

Resize Width of the frame in BrowserBasedHelp

  • November 23, 2010
  • 2 replies
  • 950 views

Hi for All,

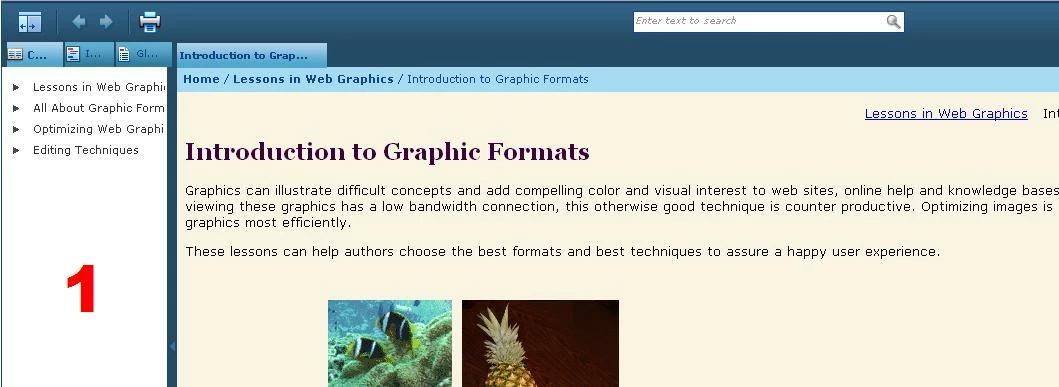
How can I do to resize the "width" of the frame as described in the example picture? The frame I want to increase the size is represented with a number (1) in the image.

Regards,

Christian

    This topic has been closed for replies.

    2 replies

    Jeff_Coatsworth
    Community Expert
    Community Expert
    November 23, 2010

    Found the thread link - http://forums.adobe.com/message/2006771

    November 23, 2010

    Hello Jeff,

    Thanks for your reply. However, this setting does not work for me. That's because I'm using Browser Based Help.

    Ragards,

    Christian

    Jeff_Coatsworth
    Community Expert
    Community Expert
    November 23, 2010

    Hi there

    Jeff gave you the information for WebHelp or FlashHelp and both of those are "browser based". Am I correct in assuming from your response that you are using the "Browser Based" version of AIR Help?

    If that's the case, I'm not sure I've ever seen anyone document how to modify that.

    Cheers... Rick

    Helpful and Handy Links

    RoboHelp Wish Form/Bug Reporting Form

    Begin learning RoboHelp HTML 7 or 8 moments from now - $24.95!

    Adobe Certified RoboHelp HTML Training

    SorcererStone Blog

    RoboHelp eBooks


    Yes, Christian, you got to stop calling it "BrowserBasedHelp" - it's known as browser-based AIR help (to distinguish it from the "regular" AIR help). As far as I've ever seen, there's no "skin" editing for either flavour of AIR help (yet - someday it will come, hopefully).

    Jeff_Coatsworth
    Community Expert
    Community Expert
    November 23, 2010

    Here's an answer off one of the other threads in the RH HTML subject:

    1. You can do this whole operation with the project open in RoboHelp. I would create a new custom skin first to try it on.

    2. If your project is in source control, check out the skin file first (example fred.skn).

    3. In Windows Explorer, find the .skn file - by default, it's stored in projectfolder\!SkinSubFolder!\skinfolder.

    4. Open the .skn file in any text editor. Notepad works fine.

    5. There are two lines that start with "frameset cols=" in the skin file. Default is <frameset cols="220,*"  etc.

    6. Change the 220 to the number of columns you want. Make sure you change it in both places.

    7. Save the skin file.

    8. Generate the project with the edited skin and display the project. (If you open it in IE and your settings suppress ActiveX content, you will need to allow active content before the TOC pane resizes.


    Good luck!