Known Participant
November 22, 2021
Question

Materials look FLAT.

  • November 22, 2021
  • 1 reply
  • 1056 views

Hi, 


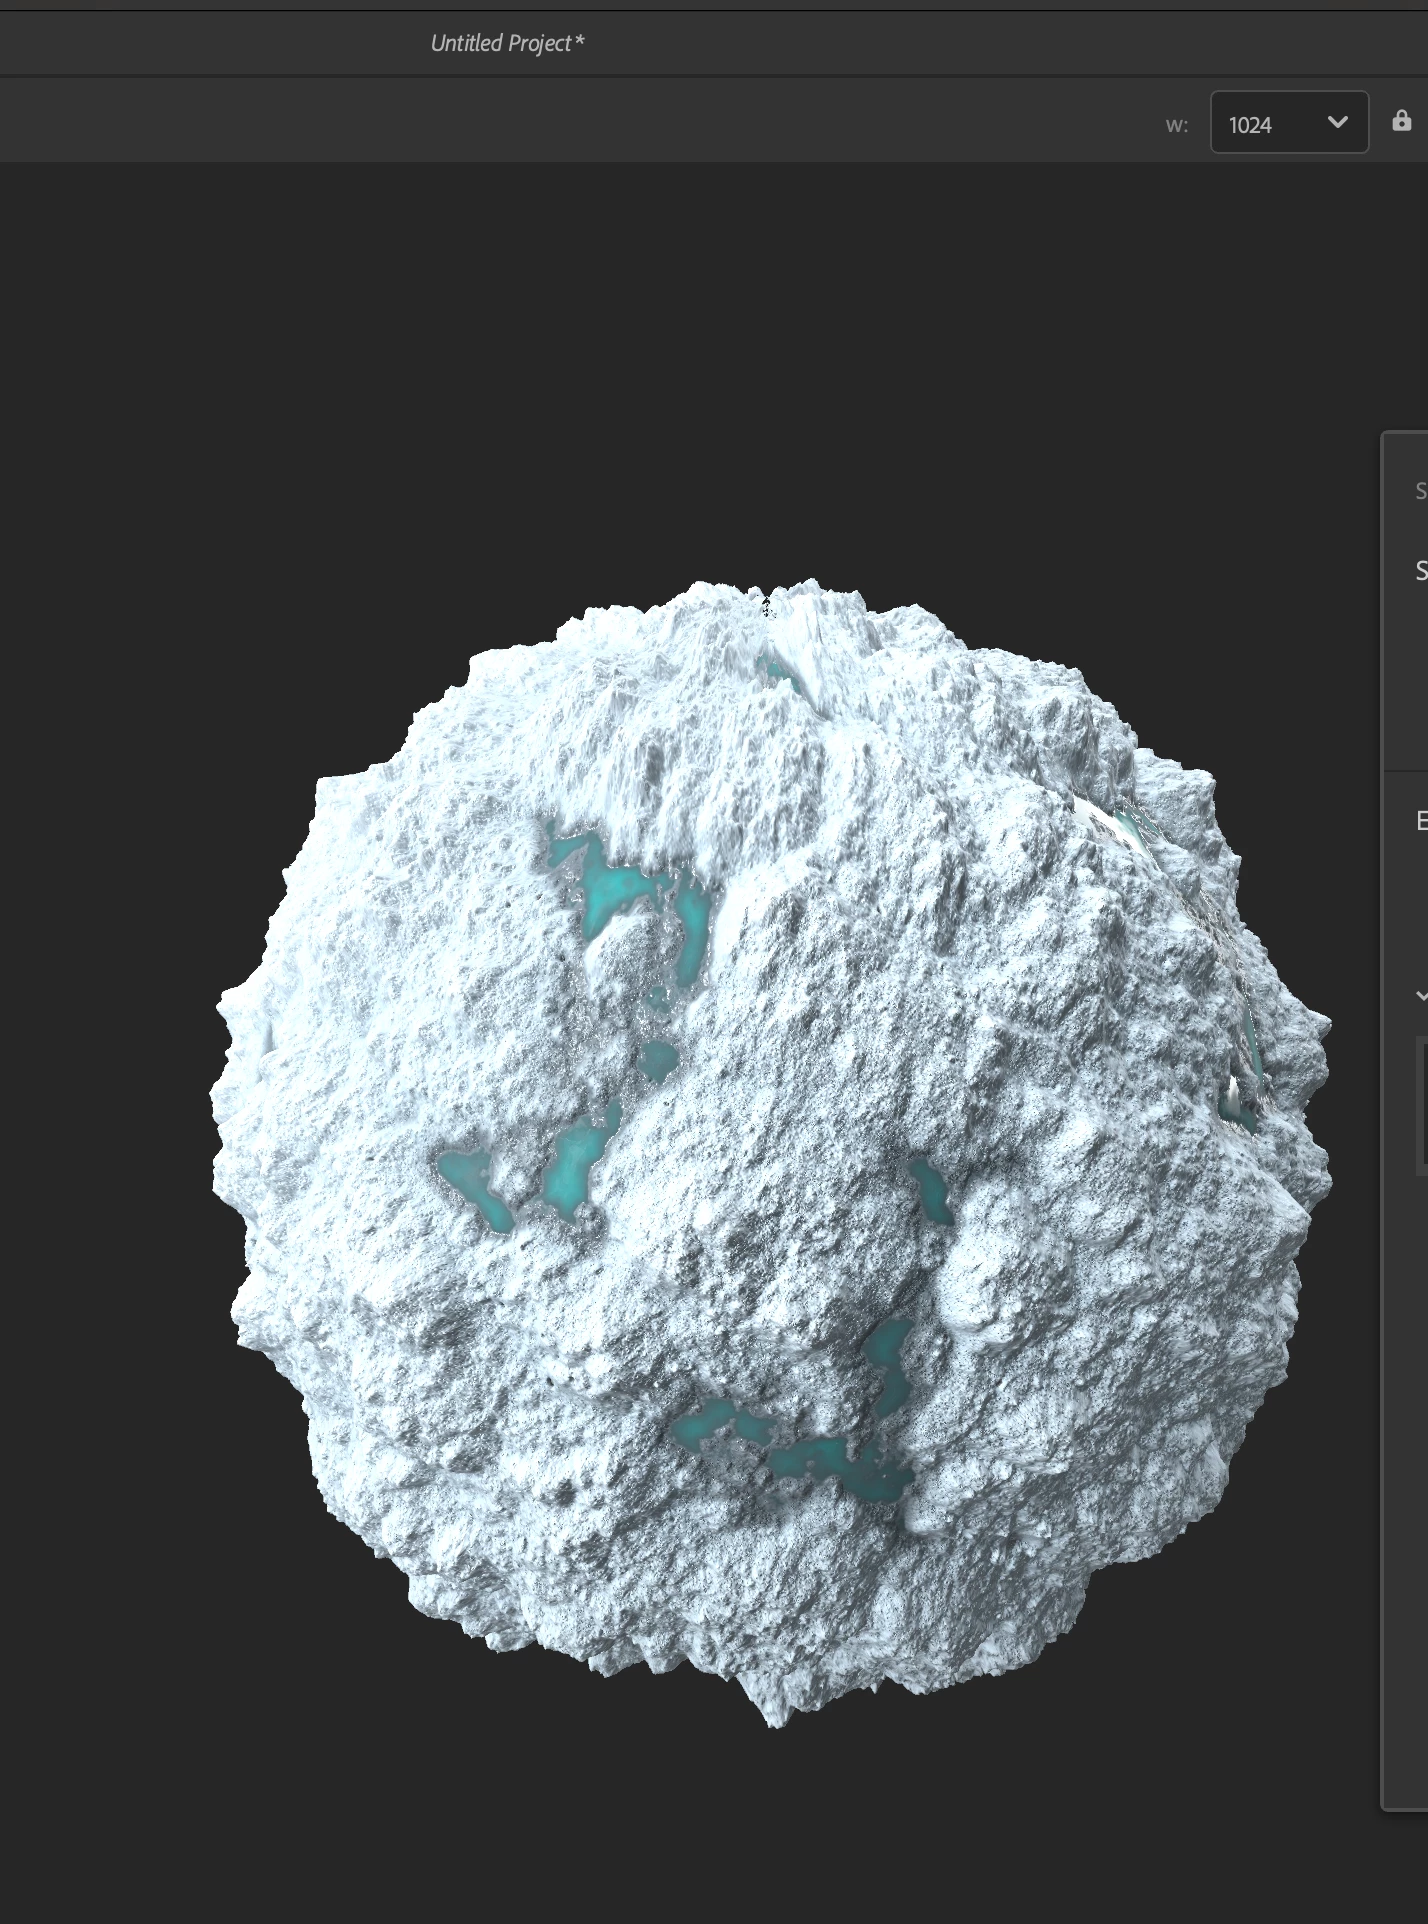
I've brought up this issue, but to no avail. I made a very simple material in Sampler. I added snow to a sphere, added height, turned up the normal map. I added a little bit of water. That's it. This is the result i was looking for: 

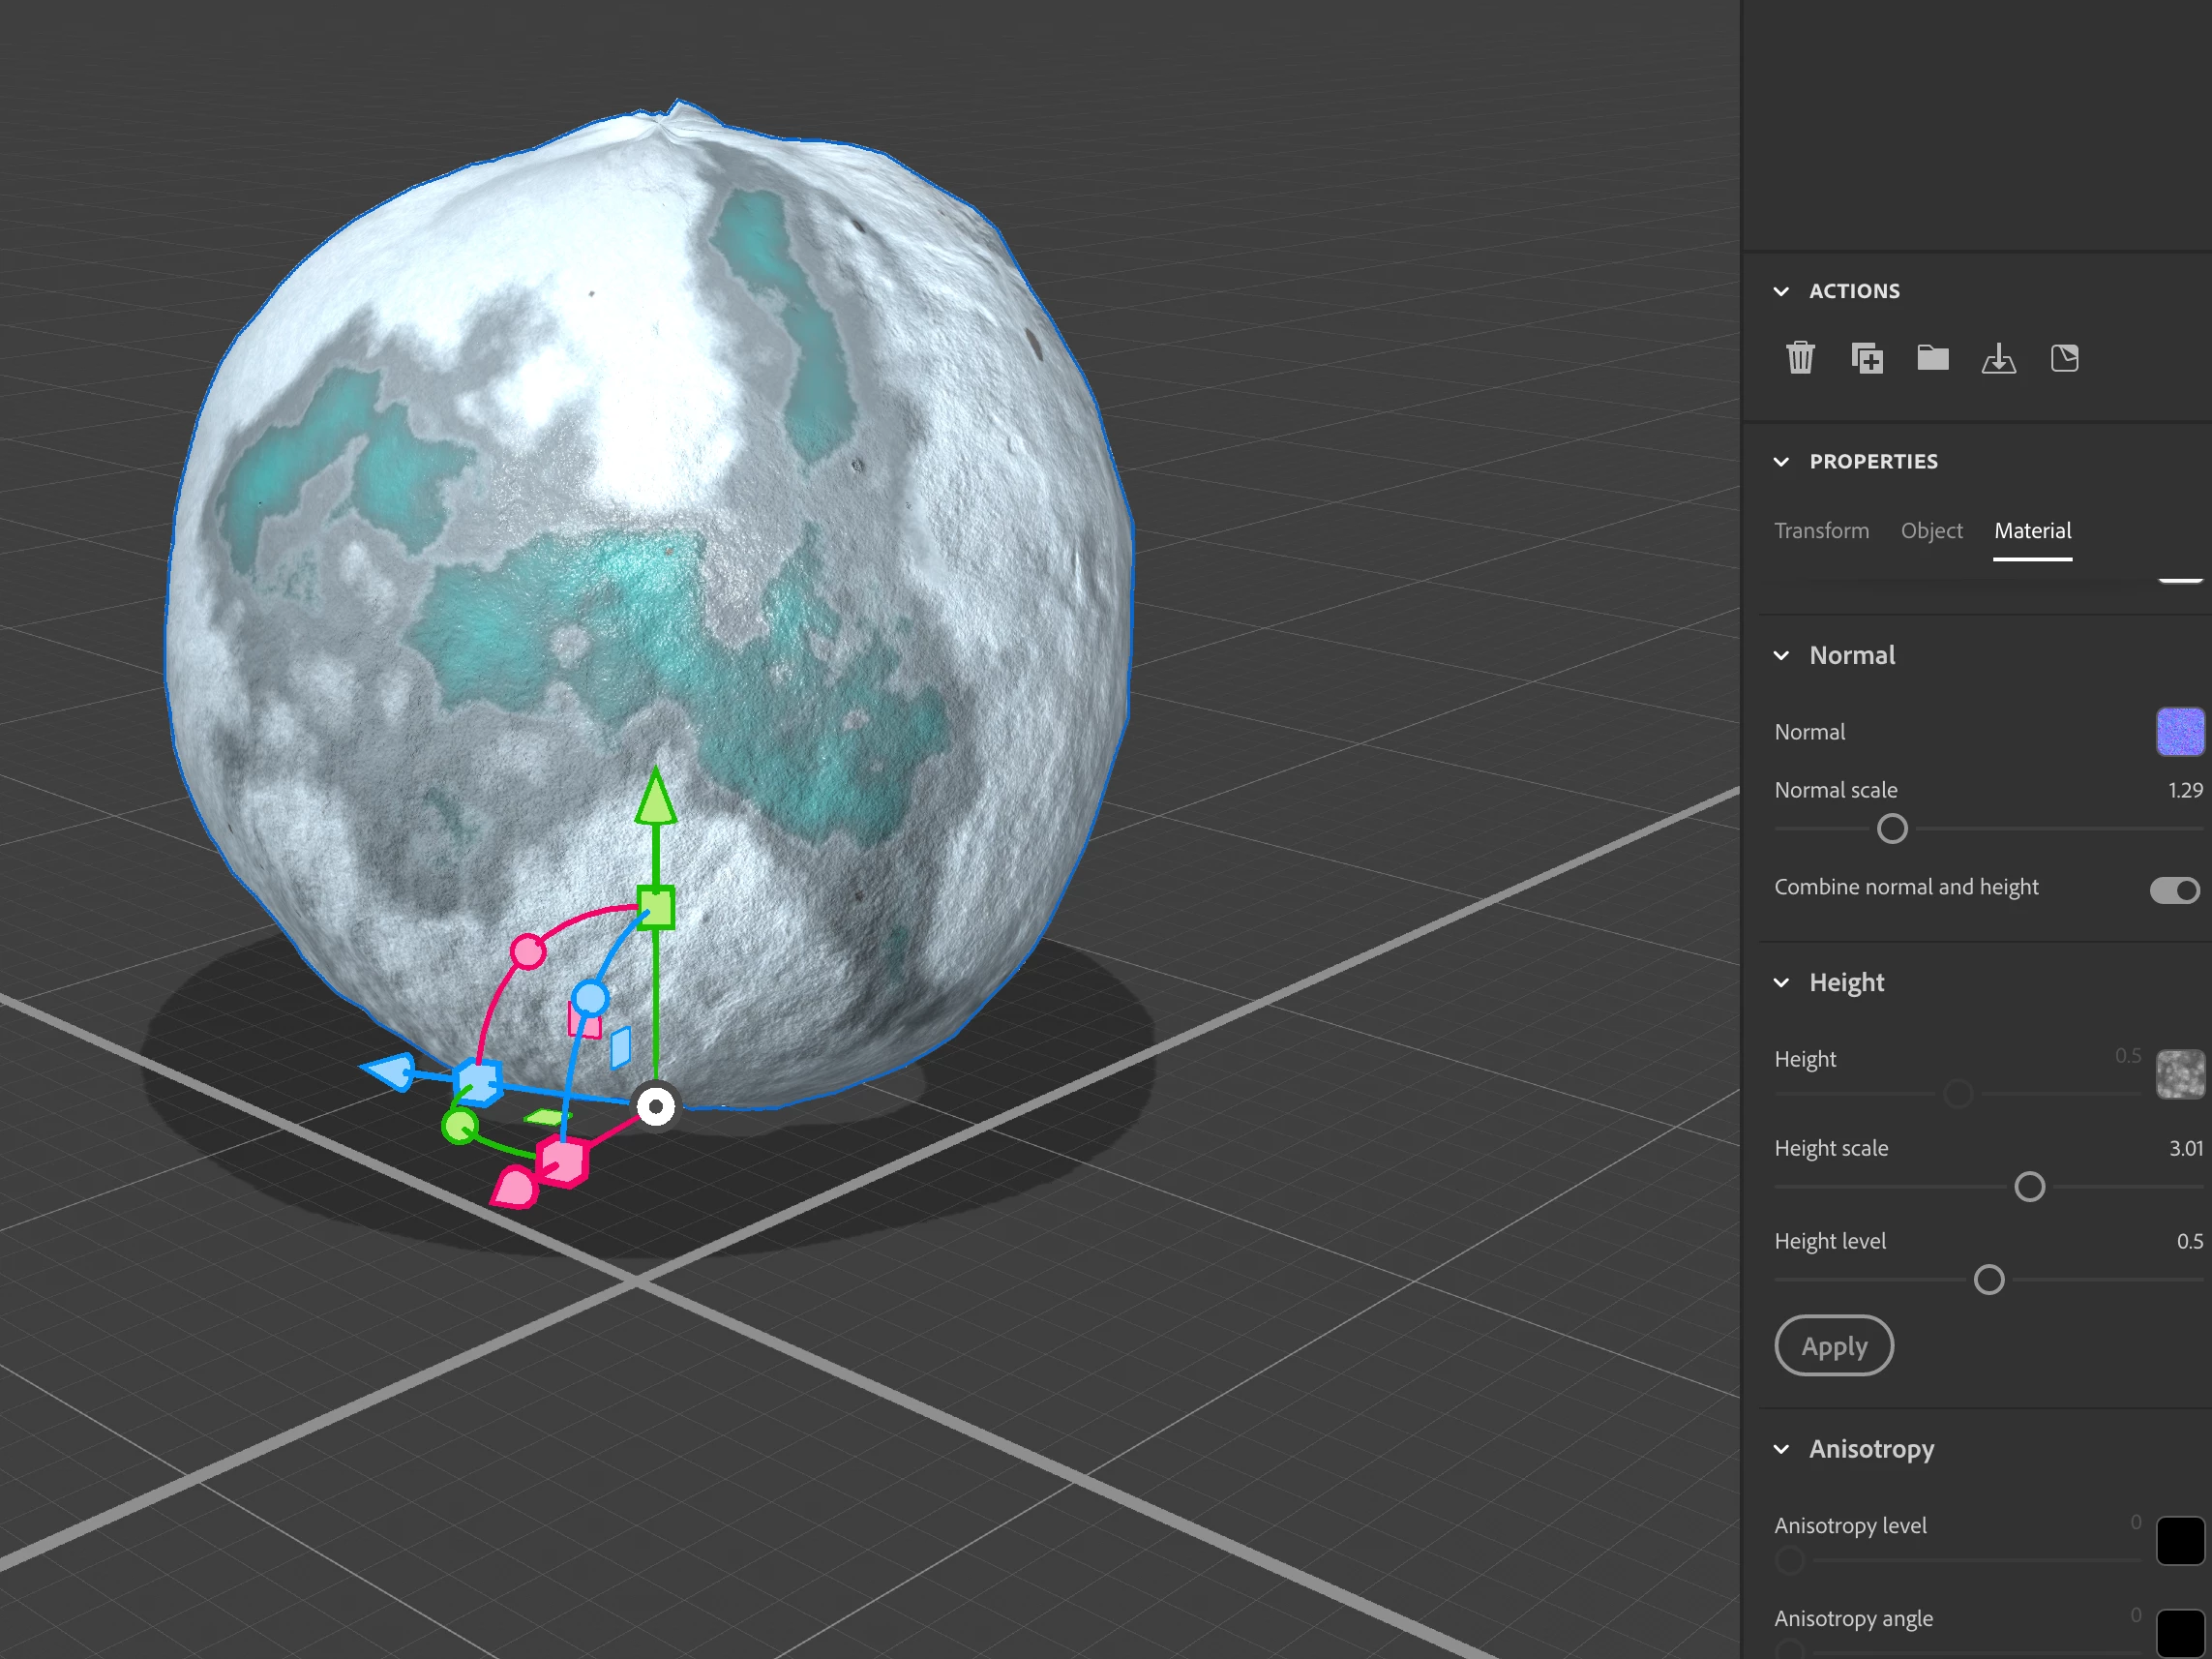
I exported this material as an sbsar but when I apply that sbsar to a sphere in Stager, it comes out as a flat, lifeless nothing. So I exported all the information as a PNG, which gave me Roughness, Height, Normal, BaseColor, Specular, Ambient Occlusion, AnistropyAngle/Level. I opened Stager and added all of the PNG files to each coresponding slot in the properties tab. Displacement on. This is the result. The same flat nothing.  

Is there some fundamental thing that I am overlooking? Can stager not produce the same results shown in Sampler? In an effort to teach myself these programs, I simply want to make a sphere in Stager look like the one in Sampler. 


Thanks for the help, 

A

This topic has been closed for replies.

1 reply

JMathews
Community Manager
Community Manager
December 4, 2021

Hi Alex!  Thanks for sending me your files to take a look at and apologies for the delay.  This helped us uncover a major issue in the way the apps are determining 'scale' and sending data, so really appreciate it.


Good news, there is a bit of a work around.  Bad news, it's a bit wonky.


So the issue is that the material from SBSAR has height and height scale information which controls the displacement.

But because it's an SBSAR file these parameters are considered 'taken' so when you import it into Stager the properties are hidden.  😞


Workaround #1:

Export from Sampler as textures instead of an SBSAR

When you use the Share/Export flow select the format as an image format instead (whichever you prefer, JPEG here for example).


Then in Stager, make a new scene with a default sphere. In the properties panel switch to the objet tab and enable displacement.


In the properties panel switch to the material tab.  Drag each texture into the appropriate material slot.  The names should match up exactly (Roughness map into roughness property).


In the height settings you can now adjust the height scale and height level to control the displaced material height effect.


Workaround #2: Adjust the object scale

The other way you can fix this is just using the scene you had originally.  The issue is essentially that the 'height scale' data was baked in for how big the sphere was in Sampler AND that Stager has two scales for spheres. 


Select the sphere object and on the properties panel go to the object tab.  Set the sphere radius to 1 cm.

Then go to the Transform tab and set the size to 1 cm. 

This should result in a 1cm radius/sized sphere.   Hit the "F" key to frame the object, and you'll see the displacement works better now.


You can adjust the 'scale' of the displacement by now slightly increasing the size of the object.  Use the transform 'size' contorl to make it a bit bigger or smaller and the height of the displacement will go up or down.  The first method takes more steps but will give you more control with the height level and height scale settings.  This method is faster, but you have to control it sort of indirectly by scaling the object.


This is all obviously very yucky and we're starting a discussion on how to resolve this.


Adobe Principal Product Manager, 3D & Immersive