

How to adjust White Balance in 3 easy steps!
Portrait editing: Adjust White Balance in Lightroom Classic
Would you like to adjust the colors in your photo so that it looks more natural? Do you want your photo to reflect the correct lighting conditions under which it was taken? Read on to learn about white balance and how to adjust it in your photos using Lightroom Classic.
What is White Balance?
White Balance is the process of removing unwanted color shift from a photo. Color shift can be caused from the reflection of light from a nearby object. For example, many photos taken using fluorescent lighting tend to have a greenish color cast.
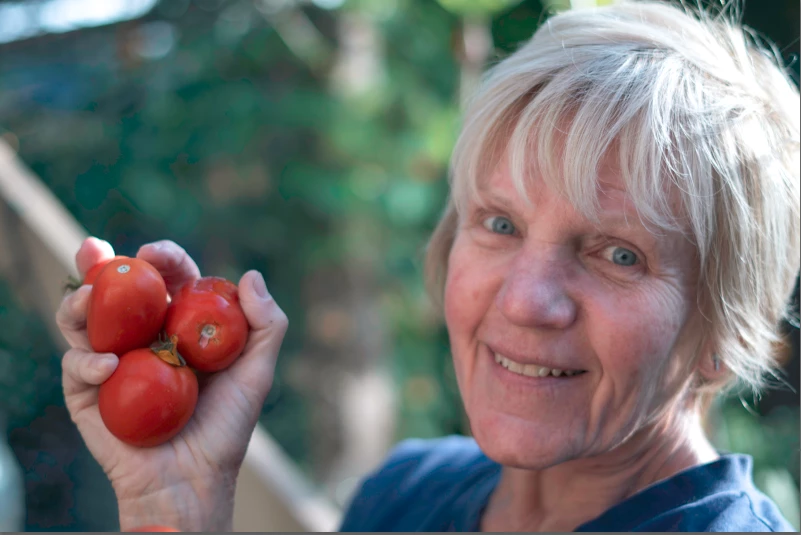
Follow these steps to adjust the white balance of the following portrait:
❶ Open the portrait in the Develop module
- Open the portrait in Lightroom Classic. If you do not have the portrait in Lightroom Classic, select File > Import Photos and Videos to import your portrait from your computer or local storage.
- Select Develop from the Module Switcher at the top.

❷ Specify a neutral area in the photo
- In the Basic panel of the Develop module, click the White Balance Selector tool
 to select it, or press the W key.
- Move the White Balance Selector into an area of the photo that should be a neutral light gray.
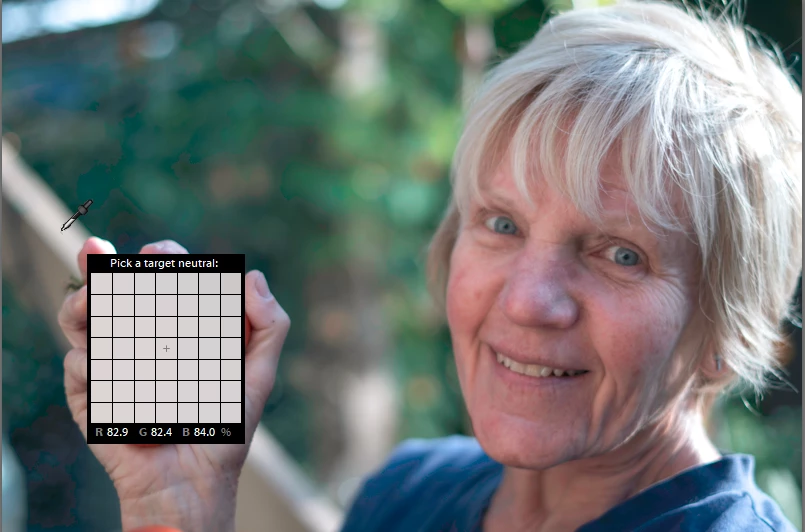
- When you find an appropriate area, click it.
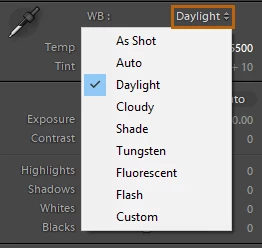
- Alternatively, you can choose a white balance preset option from the WB drop-down menu.
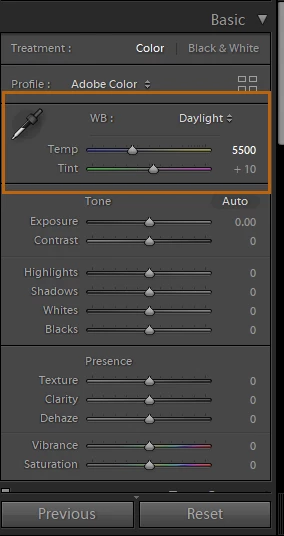
❸ Fine-tune White Balance using the Temp and Tint controls
In the Basic panel of the Develop module, adjust the Temp and Tint sliders.
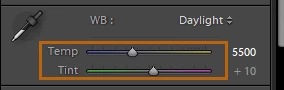
- Temp: Move the slider to the left to make the photo appear cooler, and right to warm the photo colors.
- Tint: Move the slider to the left (negative values) to add green to the photo; move it to the right (positive values) to add magenta.
To know more about Temp and Tint, see How to easily edit Temperature and Tint in Lightroom Classic.
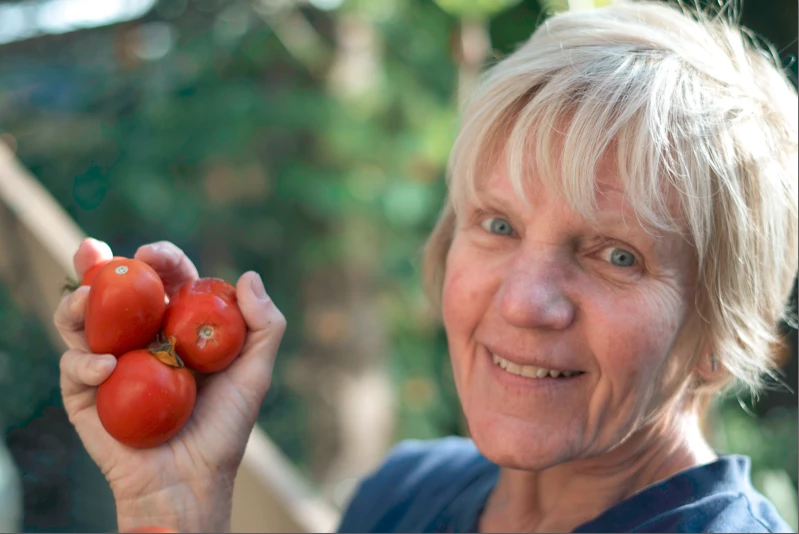
This is how the edited portrait looks now:
Related links:
