JP Agner
New Participant
February 25, 2023
Answered

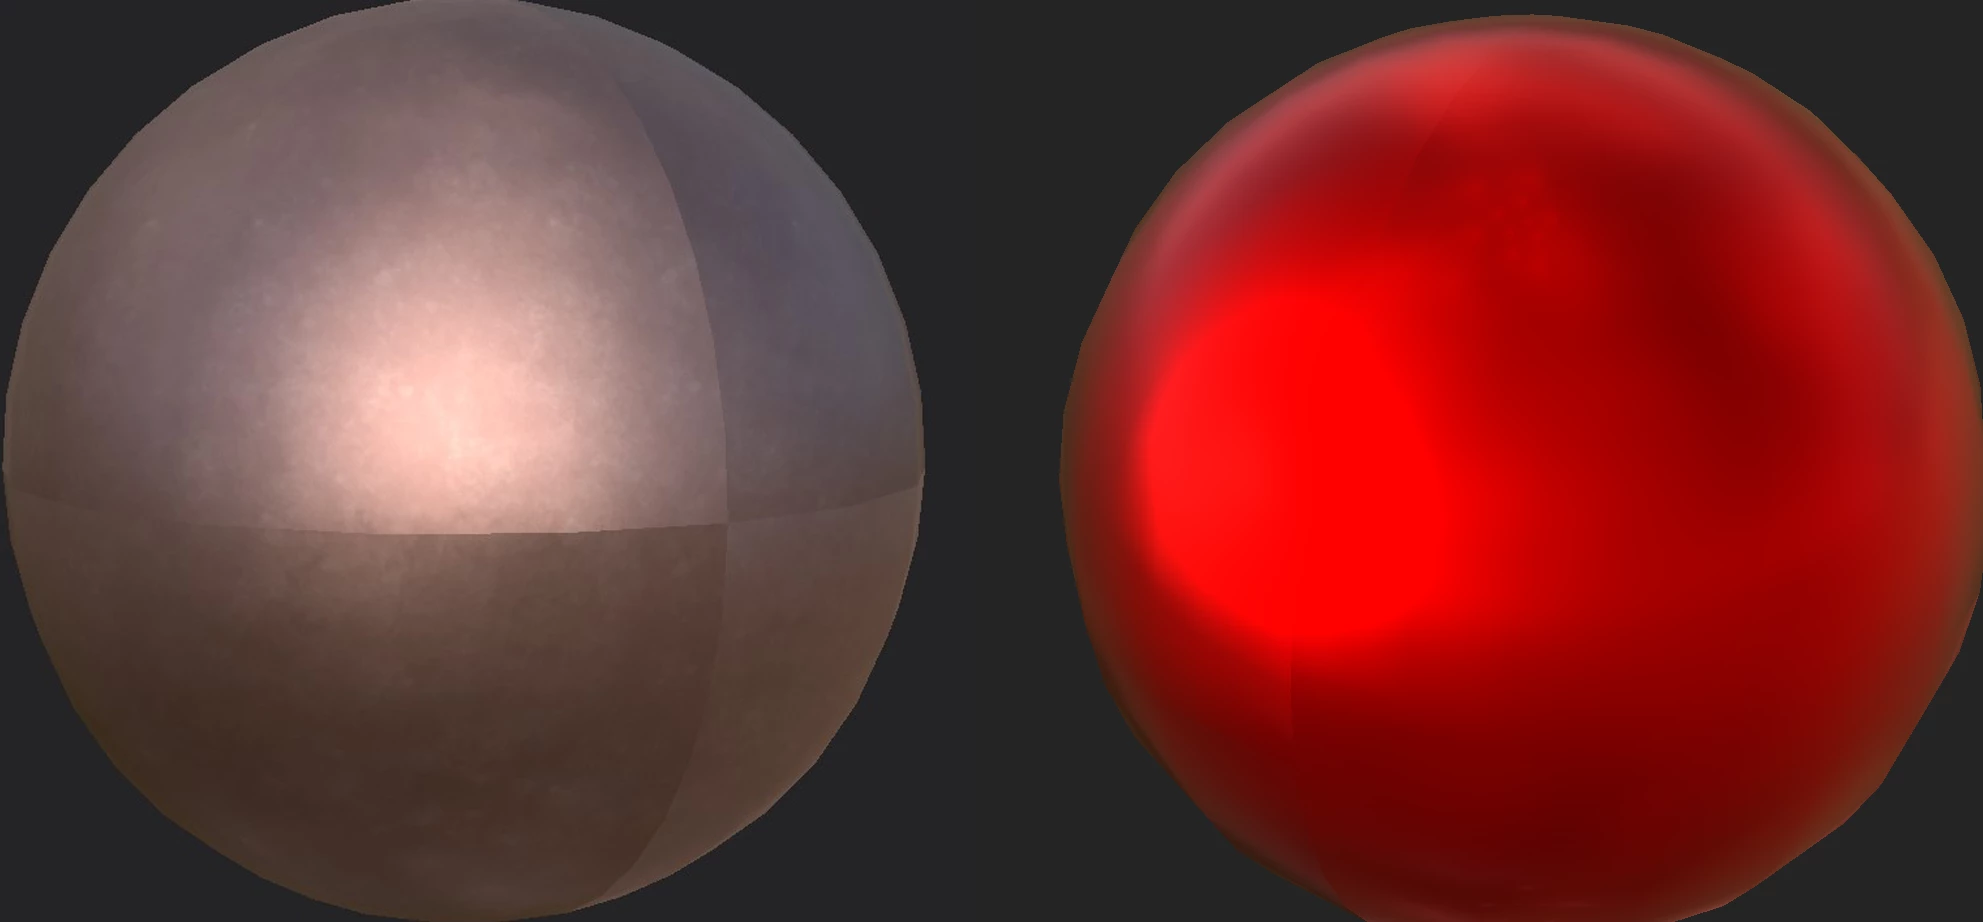
Visible UV seams on normal maps

  • February 25, 2023
  • 3 replies
  • 23324 views
Why does Substance 3D Painter make such visible UV seams? It's definitely normal map problem, because if I export the texture set and apply it in a 3D modeling program, the seam disappears if I disconnect the normal map.
 
Before you suggest:
  1. Hiding UV seams: it's not always possible, depending on the model, and it shouldn't be needed. Texturing and baking textures in Blender, for example, doesn't create these visible seams, so I don't understand why Substance does this.
  2. Blurring the seam using Clone tool or some other way: again, it shouldn't be needed, since Blender doesn't have this problem.
  3. Using tri-planar projection: doesn't help.
  4. Increasing shader quality: doesn't help.


This topic has been closed for replies.
Correct answer Cyril Dellenbach

Hello again @JP Agner,


Thanks for all the details, this way I was able to reproduce the issue with the same Smart Material.


You were perfectly right, this specific issue isn't due to the shader quality, but to the way we handle certain filters and specifically the MatFinish. These filters are affecting directly the normal map, not trough the height as we usually do inside Substance 3D Painter, but directly the normal map. Unfortunately, the normal map is a bit more complicated to turn seamless. We can see it clearly with the Perforated Circles Filter.


We are aware that these filters aren't seamless, but for the moment, when using these types of filters with visible seams, you'll  need to find a workaround. I'll suggest to look for a grunge/alpha/texture that acts like expected and play with the height more than the normal map. As a simple example, you can get close results with the Metallic Grate Round Texture rather than the MatFinish Perforated Circles Filter.


For your question about UV shells orientation, this is accurate, but this shouldn't be a problem inside Substance 3D Painter. You can always make sure your UVs are well oriented to avoid any unexpected behavior.


Best regards,


3 replies

New Participant
August 19, 2024

Paint Padding (Dilation): In Substance Painter, make sure that the padding (paint dilation) is properly configured. This allows the colors to "bleed" beyond the edges of the UVs, reducing the visibility of seams. This setting can be found in the baking or texture export settings.

Cyril Dellenbach
Community Manager
Community Manager
February 27, 2023

Hi @JP Agner,


Thanks for the message.


A visible UV seam can be due to many things. In general, that’s why we try to hide them, but as you said: it’s not always possible.


For the example you sent here, this is in fact a Shader Quality issue. As you can see, if I increase the value the seams disappear.


Also, in the rendering view of Substance 3D Painter there is no visible seam, neither in Blender.


The suggestions you made up there are all useful depending on the case. I can give you more general suggestions like:

Try to keep your UV straight (when it’s possible). Avoid specific smoothing groups on your Low Poly model. Avoid too close UV shells.

But this is generic, therefore if the problem persists, feel free to share your project here, so we may try to give you a specific help.


Have a nice day.


Cyril Dellenbach (Micro) | QA Support Artist | Adobe
JP Agner
JP AgnerAuthor
New Participant
February 27, 2023

Hi @Cyril Dellenbach, thanks for replying.

quote

For the example you sent here, this is in fact a Shader Quality issue. As you can see, if I increase the value the seams disappear.


No, it's not. And I mentioned in the initial post that increasing quality doesn't help. Seams are also visible in the rendering view and in other 3D software upon texture export.

However. I did a lot of experiments and found out that there are two types of visible normal map UV seams.

In one case, the seams are only visible in Painting mode and are not visible in Iray mode or in other 3D software upon texture export. In other cases, the seams are visible everywhere (Painting mode, Iray, and in exported textures).

Increasing shader quality can get rid of visible seams in Painting mode, but only if you're dealing with the kind of visible UV seams that does not affect exported textures or Iray mode. Enabling anisotropy for some reason also does the trick.

Unfortunately, I've been dealing with the second type of visible UV seams issue. I used Copper Red Bleached smart material in my example, and it seems the problem is with the finish_rough filter. Maybe it doesn't work well with tri-planar mapping, I'm not sure.

Also, I've noticed a problem with visible UV seams in baked normal mesh map (when baking details from high to low poly). For some reason, it's much more noticeable compared to when I bake details in Blender. I bake at the same resolution of course.


One more thing. I was told that UV shells orientation matters, because

"the tri-planar is projecting details in xyz <...> Where as tangent space is correcting your normals to compensate for UV seams and UV island rotations. Imagine if you have a UV seams down the middle of a crater on your geo. You've orientated your UVs to maximize space but by doing so they are rotated opposite to one another. Tri-planar says Green is up so when baking the normal map the green channel will always be coming from top-down on the texture, this would screw up the UV orienated in the wrong direction. However tangent space has compensated for your UV rotation so for the green channel it will appear in the direction of where up should be on the geo to your UV. These two methods conflict each other right? One always says green on your texture will come from top-down. The other says Green will come from wherever the top is on the geo."

Is that accurate? 

New Participant
December 12, 2023

Hello again @JP Agner,


Thanks for all the details, this way I was able to reproduce the issue with the same Smart Material.


You were perfectly right, this specific issue isn't due to the shader quality, but to the way we handle certain filters and specifically the MatFinish. These filters are affecting directly the normal map, not trough the height as we usually do inside Substance 3D Painter, but directly the normal map. Unfortunately, the normal map is a bit more complicated to turn seamless. We can see it clearly with the Perforated Circles Filter.


We are aware that these filters aren't seamless, but for the moment, when using these types of filters with visible seams, you'll  need to find a workaround. I'll suggest to look for a grunge/alpha/texture that acts like expected and play with the height more than the normal map. As a simple example, you can get close results with the Metallic Grate Round Texture rather than the MatFinish Perforated Circles Filter.


For your question about UV shells orientation, this is accurate, but this shouldn't be a problem inside Substance 3D Painter. You can always make sure your UVs are well oriented to avoid any unexpected behavior.


Best regards,


Hello, 

Sorry to bump this post. Not sure if it's been solved. I'm experiencing a similar problem. I believe it's correlated with the orientation of the UV and the Height map adding to the Normal Map. 

If the detached UV island is facing somewhere else, I've noticed Height projects differently onto the normal map. In my normal map channel everything looks okay, but in normal+Height+Mesh, the normal map looks inverted on the island. If I invert the height, the normal corrects, but the seam line is still visible from the contrast of the inverted height maps.  

Hope that it was clear. I can't share screenies of my current project 😞 (NDA)

JP Agner
JP AgnerAuthor
New Participant
February 25, 2023

5. Flipping green channel on the normal map: I've tried both DirectX and OpenGL formats, doesn't help.