Hi Dan, great image and thanks for sharing, really helps to make clear what you're wanting to do. This is definitely possible, but to be honest, it's not straightforward yet. It is something we're actively working on, but here's the sort of roundabout method for now:
- You'll want to create a transparency mask for the material.
- Easiest way to do this is to open the model's UVs in a 2D app.
- If you have the UVs exported already you can just open the image in Photoshop or Illustrator to create your mask image.
- If you don't have the UVs then import the OBJ into Photoshop.
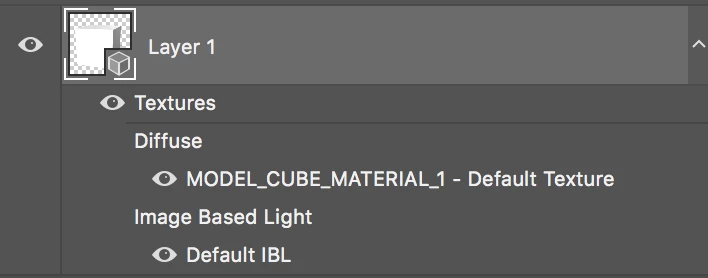
After importing the .obj to Photoshop you'll see a list of textures attached to the 3D model. Double click on the one under the diffuse section. In this example it's called "MODEL_CUBE_MATERIAL_1"
This should open a new image document that has the existing texture for the model and the UVs displayed. If you don't see the UVs by default you can use View > Show > UV Overlay
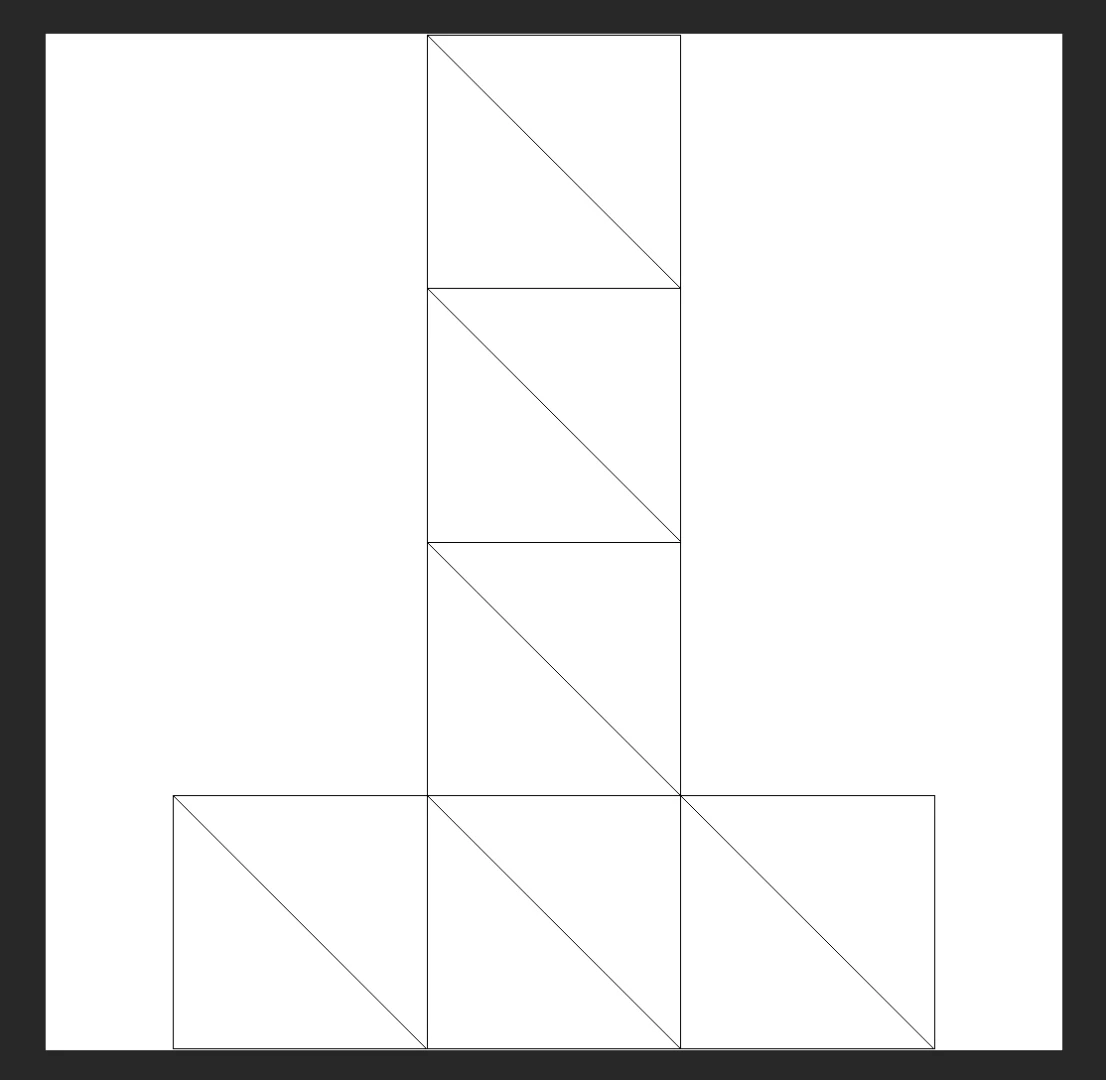
You can now use this guide as a template for laying out details on your model. In this case you want to create a black and white image where white = solid areas and black = cutout areas. For this cube I want it on the front panel which is at the bottom. It can take a little trial and error to figure out where things are. You can tab between this document and the 3D document to see the placement in 3D.
Save this as a new .jpg image. Back in Dimension double click the model you want to add it to and insert the image into the Opacity image slot.
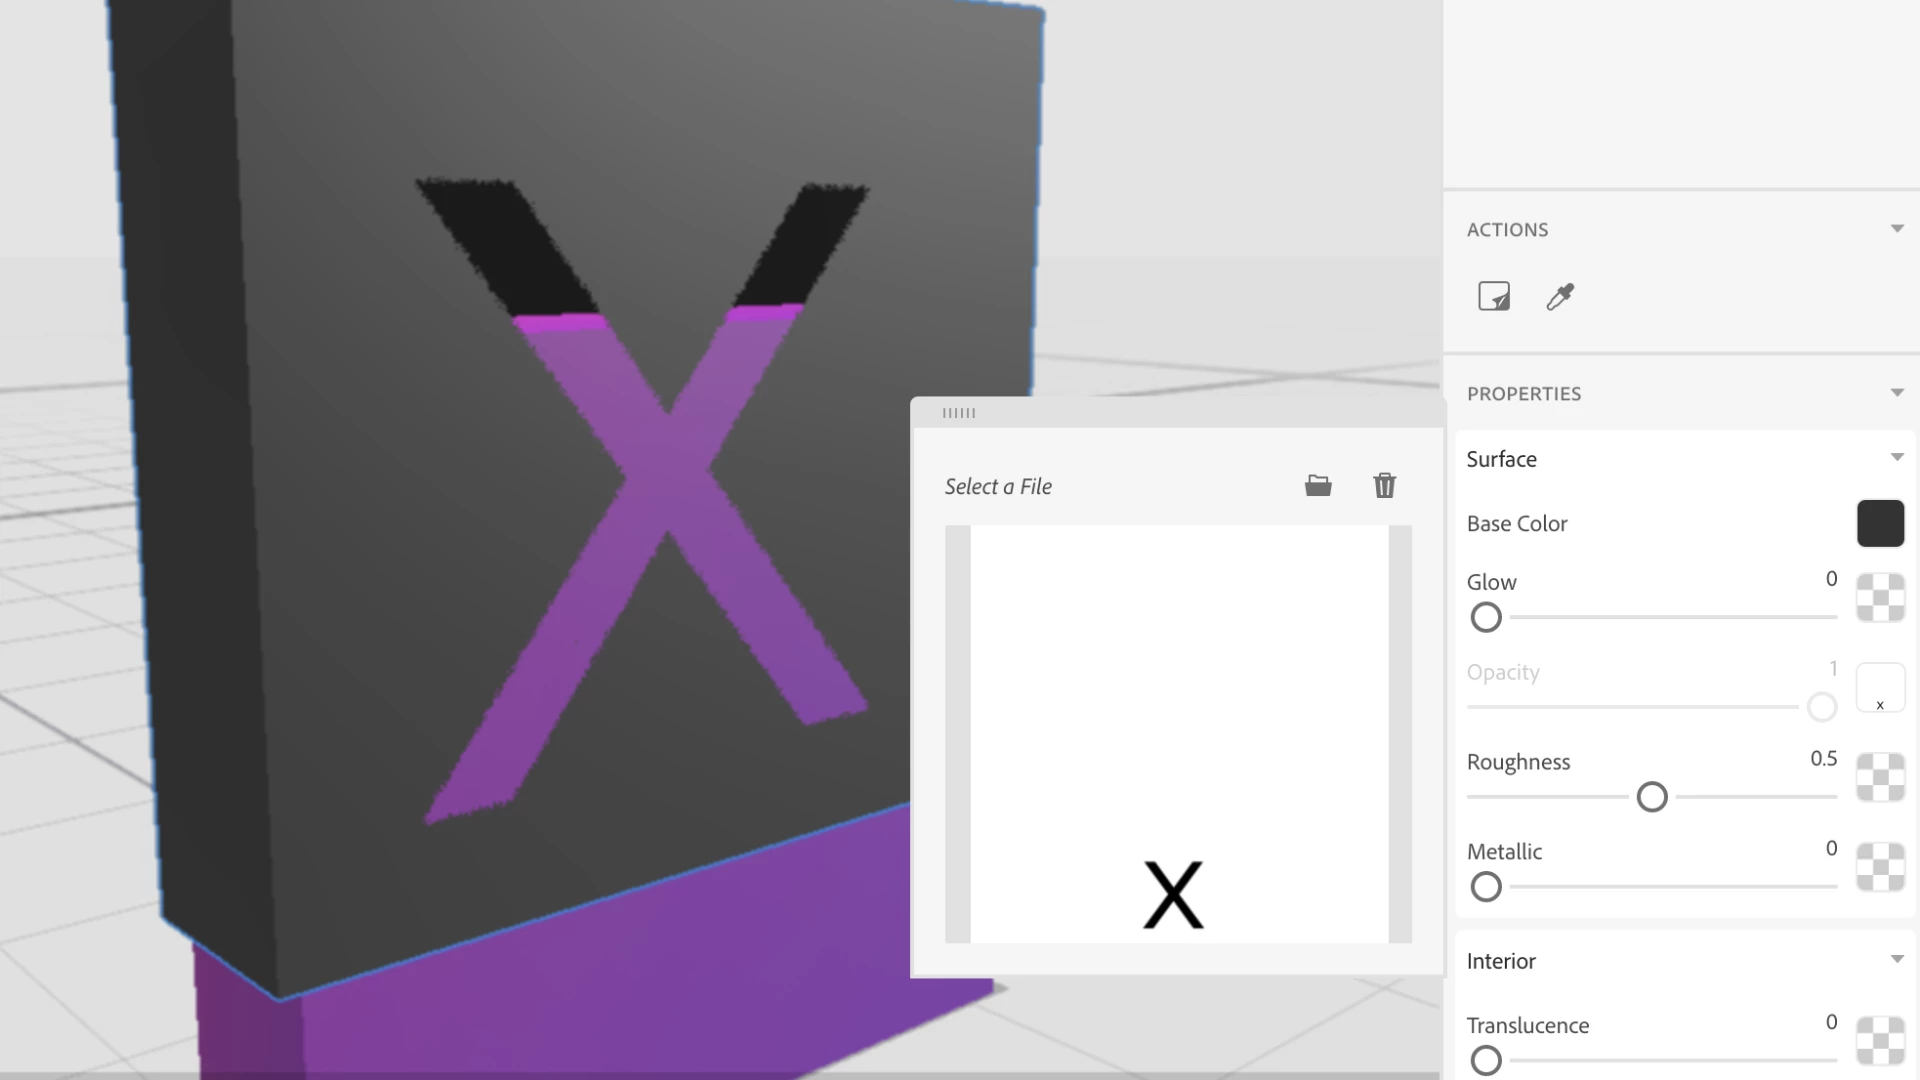
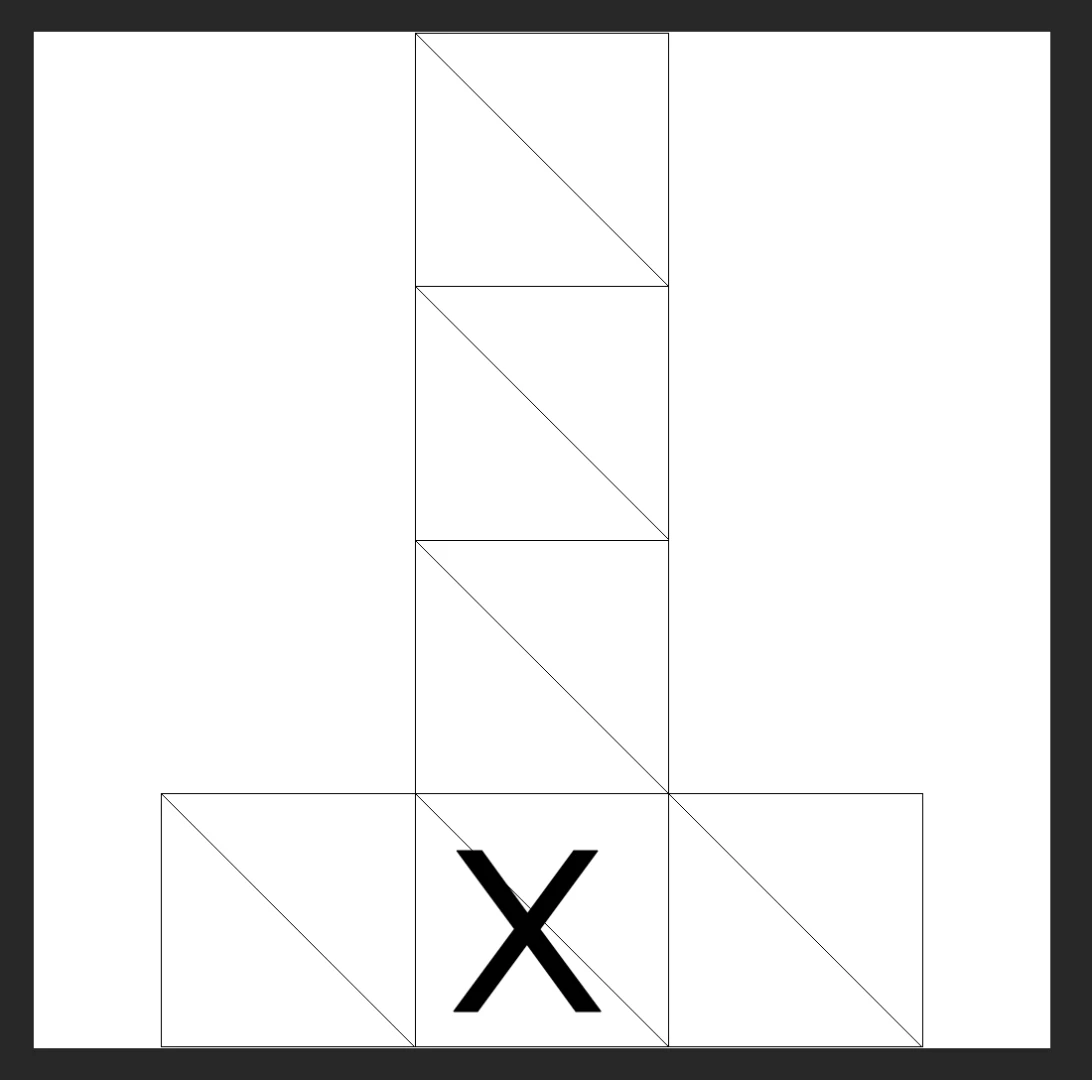
The result should be a cutout on the part of the model where you have black and solid where you have white. One thing to note is that it will not add a realistic "inner" depth to the cutout at this time (where the x is in the Dimension canvas of my screenshot above).