Known Participant
October 16, 2017
Question

Resize/reposition objects for different screens in Captivate 2017

  • October 16, 2017
  • 2 replies
  • 660 views

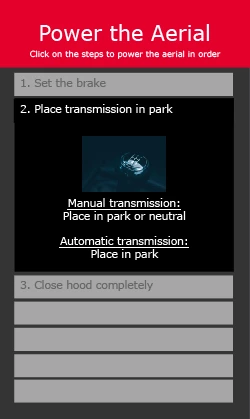
I finally downloaded Captivate 2017, and really like the updates.  One thing I can't seem to figure out though...in previous versions, I could create a smartshape and change its size/position in the various views.  Here is an example of a layout I used to explain a checklist:

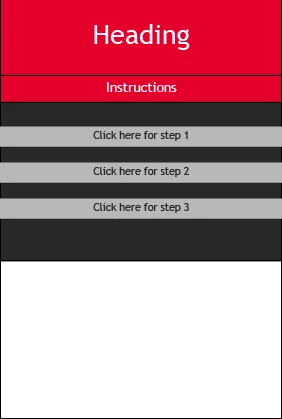
I really want to use the new version because of the way it treats text in fluid boxes.  But I can't figure out a way to move those Smartshape buttons around the way I did previously - whether or not they're locked to a fluid box:

Any ideas?  Or do I need to decide between using Captivate 9 and rethinking layouts completely?

    This topic has been closed for replies.

    2 replies

    Lilybiri
    Legend
    October 17, 2017

    It is totally up to you. In CP2017 you have two ways of developing responsive projects, each with its advantages and disadvantages. I recently presented about the difference of the two approaches, and when to use them. In the near future will try to publish a blog post:

    • Fluid Boxes will allow a quicker development but you'll lose control over the layout. The way you set( up the fluid boxes, will define how the layout will change over the different screen resolutions. Several objects are not allowed because everything has to be perfectly 2-dimensional, which means no Highlight boxes, no Zoom object, no line object, no stacking of objects in the same position (not even when they appear at different times). However  Text will rescale, you don't have to create object styles which define the font size in all the breakpoint views. It is NOT possible to use the main master slide, because it doesn't accept fluid boxes and setting the position/size properties doesn't work.
    • Breakpoint views is still possible in the same way as in CP9. Development will take more time but you have total control over all layouts with the Position Properties panel. No limitations for stacking, it doesn't have to be 2 dimensional. You can also replace objects or omit them on lower screen resolutions. With the first method you can only make object optional, but replacement isn't possible.
    Known Participant
    October 17, 2017

    Thank you!  I save every one of your blog posts.  Just like them, this response was incredibly helpful. 

    Lilybiri
    Legend
    October 17, 2017

    In that case you will have seen my posts about using rulers/guides to set up fluid boxes on master slides as well. For some unknown reason no one seems to use them, weird...

    Paul Wilson CTDP
    Community Expert
    Community Expert
    October 17, 2017

    Check out this video. You might find it helpful:

    https://youtu.be/tINyfgcWthI

    If you happen to be attending the Adobe Learning Summit in Vegas next week, this is my exact topic that I will be speaking to. If you are not going to be there. I will probably make a version of that session for my YouTube channel. Feel free to watch the other videos I have on Captivate 2017 as well.

    Paul Wilson, CTDP
    Known Participant
    October 17, 2017

    Thank you!  I found it yesterday and it did help me understand quite a bit more about fluid boxes.  I plan to view your other videos as well, and will be super grateful if you post a version of the your presentation at the Learning Summit.  I wish I could be there!  

    Lilybiri
    Legend
    October 17, 2017

    I plan to make it available after the conference so stay tuned.


    You can use Breakpoints in CP2017. Look under Project to switch