New Participant
March 6, 2018
Answered

Decal Around Multiple Sides of Object

  • March 6, 2018
  • 2 replies
  • 6177 views

Hello,

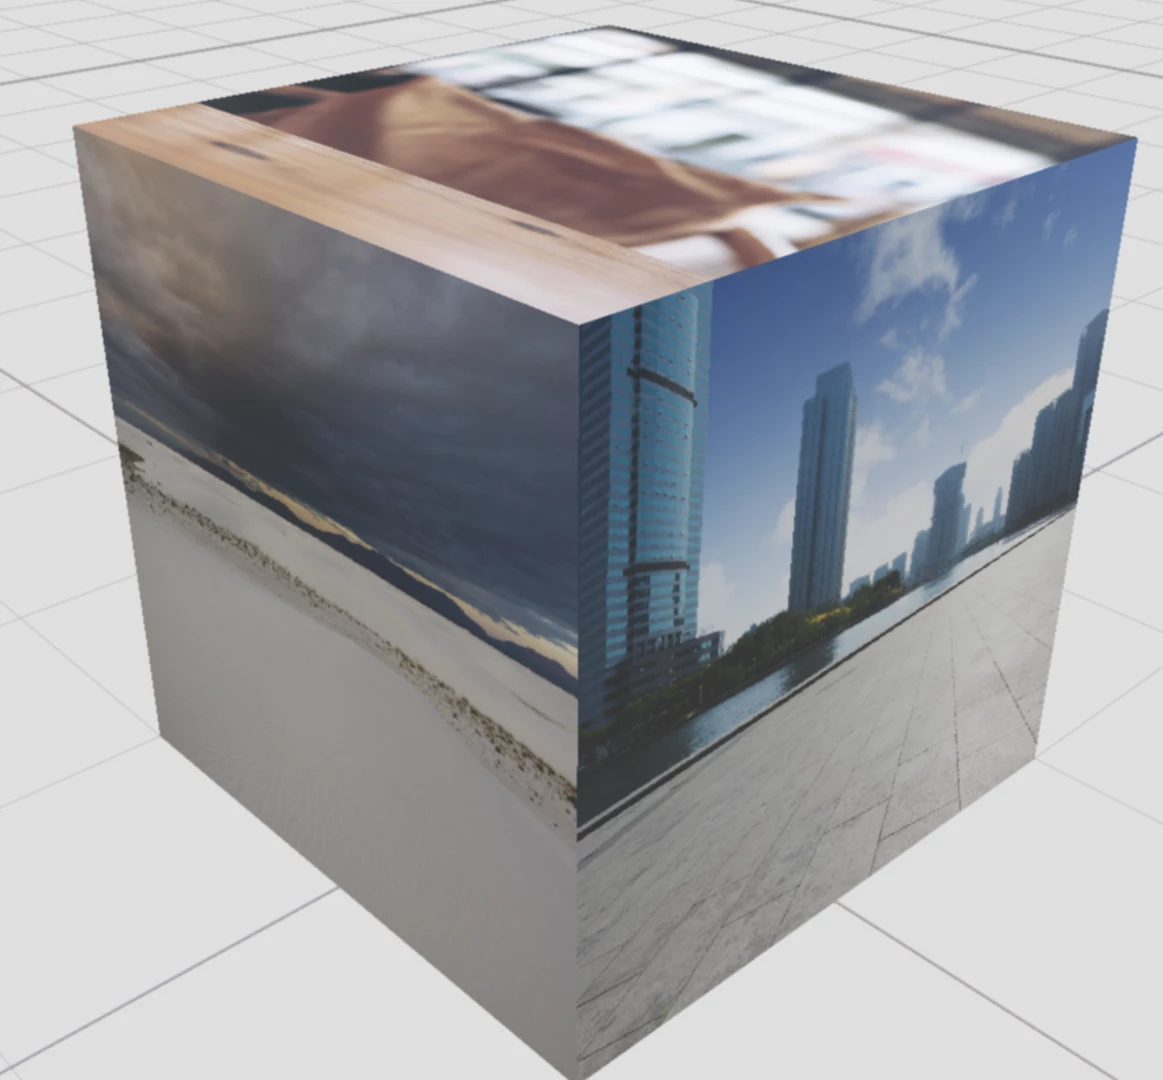
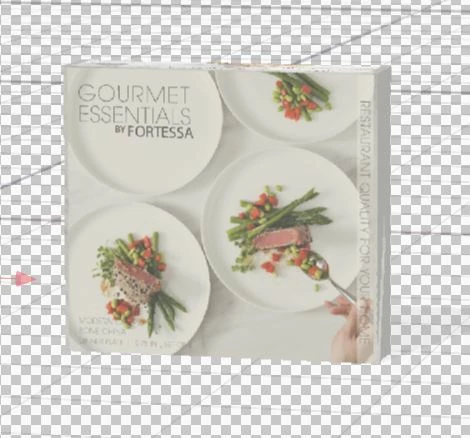
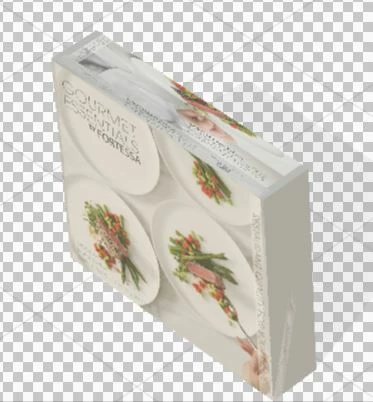
I'm trying to wrap a decal around an object in Dimension, but I'm getting some odd results with the decal wrap. The front will scale correctly, but the artwork for the back and sides of the box becomes compressed.

Front (scaled normally)

Top (top artwork and back artwork is compressed on to one panel)

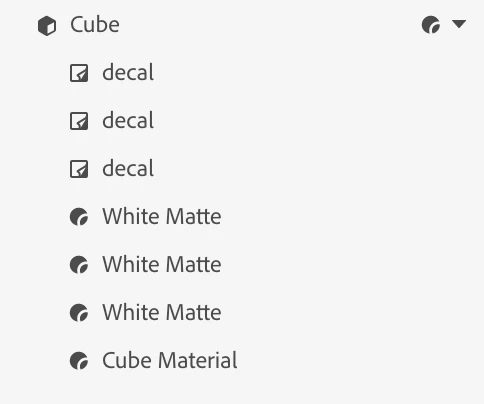
I am currently using the 'cube' model, not the cube box ( got the same results with the cube box, but I assumed that was because the cube box had more 'faces' than my artwork).

Any thoughts on how to resolve this? I'm eager to use Dimension for my organization, but I really need to get these decals sorted!

Peace+Thanks for your help!
Erica SS.

This topic has been closed for replies.
Correct answer JeanetteMathews

Unfortunately Decals can't really perfectly wrap around sharp corners on multiple sides of an object well.  In this case I'd recommend making images per side and assigning them individually.  Since there's a limit of 1 decal per material you'd need to do this:

  • Add the Cube model to the scene
  • Resize the Cube to the box you want to use
  • Use the Magic Wand to select each side of the cube
  • With a single side selected add a new material from the asset panel (use the white matte or something as your base).
  • Apply a decal to each side.

here's a simple example of what it should look like.  In the scene panel you should see multiple material regions and you can have 1 decal applied per region.  Here I have 4 regions the Cube Material which is the default (applied to the back and bottom sides) and then 3 copies of the White Matte material which I applied with the magic wand 3 individual times to the front and top sides.  Then I applied a decal to each of the front and top sides.  If I wanted a shot of the back I would just move my camera and keep magic wand, assign material, apply decal to each side.

In the future we plan to allow multiple decals per material region and better workflows for full wrap designs.

2 replies

acameron1
Participating Frequently
October 16, 2020

Hello! There's an update now which allows you to export an object's UVs.

https://youtu.be/ZjZKkBqUrmU

New Participant
October 24, 2024

what a lifesaver! thx


JeanetteMathews
Adobe Employee
JeanetteMathewsCorrect answer
Adobe Employee
March 6, 2018

Unfortunately Decals can't really perfectly wrap around sharp corners on multiple sides of an object well.  In this case I'd recommend making images per side and assigning them individually.  Since there's a limit of 1 decal per material you'd need to do this:

  • Add the Cube model to the scene
  • Resize the Cube to the box you want to use
  • Use the Magic Wand to select each side of the cube
  • With a single side selected add a new material from the asset panel (use the white matte or something as your base).
  • Apply a decal to each side.

here's a simple example of what it should look like.  In the scene panel you should see multiple material regions and you can have 1 decal applied per region.  Here I have 4 regions the Cube Material which is the default (applied to the back and bottom sides) and then 3 copies of the White Matte material which I applied with the magic wand 3 individual times to the front and top sides.  Then I applied a decal to each of the front and top sides.  If I wanted a shot of the back I would just move my camera and keep magic wand, assign material, apply decal to each side.

In the future we plan to allow multiple decals per material region and better workflows for full wrap designs.

New Participant
March 7, 2018

Thank you so much! This worked perfectly.