Copy link to clipboard
Copied
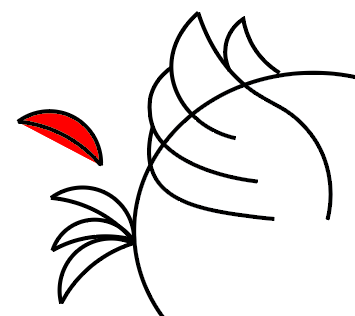
Hello, I apologize if this is a simple question but I am a beginner to Illustrator and am having some trouble with the curvature tool. I am creating a character for an app and have come across two problems I can't seem to solve.
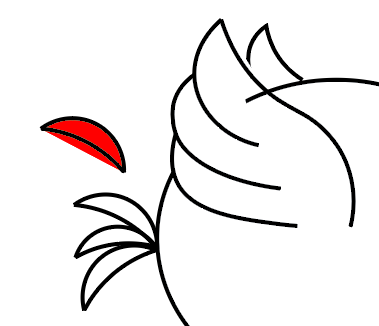
1) I made the wing using the curvature tool with stroke set to black and no fill. I want the wing to be on top of the character's body making the line of its main body hidden behind the wing. I brought the wing to the top layer and the problem still proceeds. When I apply a white fill I expected this to be solved but as you see in the second attached picture the white fill goes farther than the strokes in some places and some parts have no white fill. I don't understand why this is.
2) For the red feathers on the back I have a similar problem. I made those with the curvature tool as well, two separate curves that I grouped together and copied 3 times. But when I set fill to red the red color goes outside the curve (as you see on the additional feather i pasted and filled next to my character)
Again apologies if this is a basic fix but if anyone could help it would be much appreciated.
Matt


 1 Correct answer
To add to what Micheal says
For the front main wing
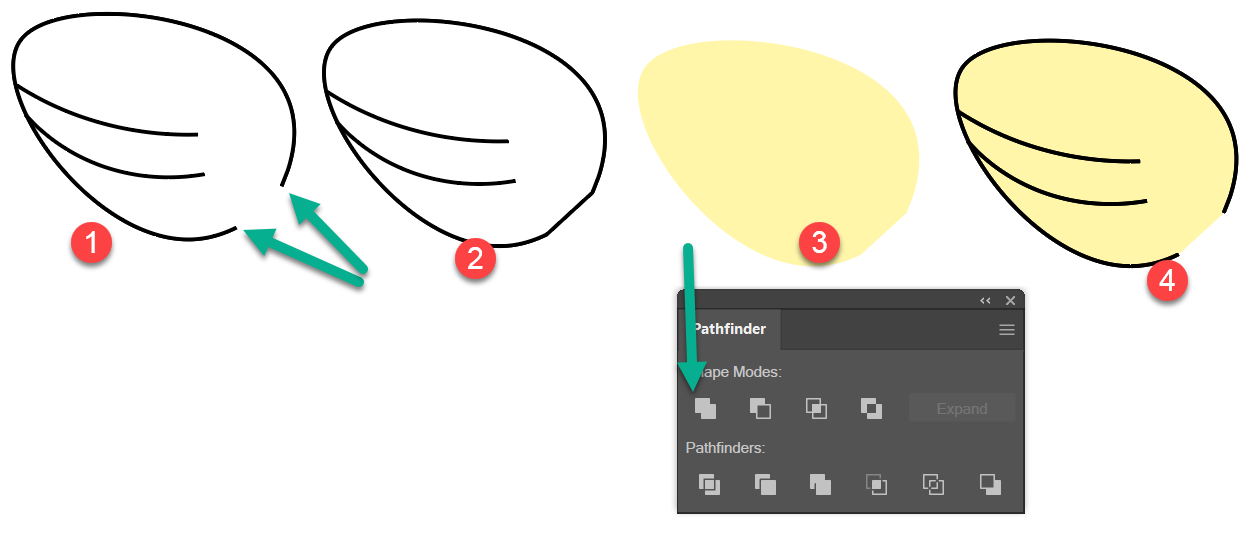
It would be easier to make it a closed shape, but to get the gap in the outline:
Select all the parts
Edit > Copy
Deselect all
1
To Close the gap
With the Direct selectiom Tool ( the white arrow )
Select one of the gaps anchor points
Shift click to select the other.
2
Oblect > Path > Join
3Select sll the wing parts
open pathfinder Window > Pathfinger
Pathfinder > Unite
Give a Fill, but no stroke
4
Edit >Paste in front
to paste back in the copy made earlier
...Explore related tutorials & articles
Copy link to clipboard
Copied
I believe much of the problem is that while you think you are dealing with shapes you are dealing more with a series of individual lines with their own individual fills.
Below are a few things which might help but they won't solve all your issues.
Transparency grid
It can be difficult to differentiate what is what when dealing with white fills. While your background may appear white it is actually transparent. To view the transparency grid go to View > Show Transparency Grid. To turn this off to go View > Hide Transparency Grid.
View Outline
With overlapping paths containing fills it can be difficult to know where lines end. To preview just the underlying paths go to View > Outline. To reverse this go to View > Preview.
Joining paths
Using the above tricks you should hopefully have a better idea of what paths might need to be joined. There are many methods for doing this and this is one place you might like to start.
Live Paint
If you have a series of overlapping lines and you are not wanting to apply fills to the individual lines but rather to the "shapes" those lines appear to define, check out this tool.
How to create and work with Live Paint groups in Illustrator
Copy link to clipboard
Copied
To add to what Micheal says
For the front main wing
It would be easier to make it a closed shape, but to get the gap in the outline:
Select all the parts
Edit > Copy
Deselect all
1
To Close the gap
With the Direct selectiom Tool ( the white arrow )
Select one of the gaps anchor points
Shift click to select the other.
2
Oblect > Path > Join
3Select sll the wing parts
open pathfinder Window > Pathfinger
Pathfinder > Unite
Give a Fill, but no stroke
4
Edit >Paste in front
to paste back in the copy made earlier above
Give a Stroke no fill
Select all the wings parts and Object > Group
In the layers panel rename group to Front Wing.
make a copy rename Back wing etc

For the red feather ,
With what you have done already, select all the parts, and click with the ShapeBuilder Tool to make a single object.
Then use the selection tool to and colour.
From scratch, with the Curvature Pen tool Tool,
Click to start, click again (for middle of curve ) double click at end of curve - to make a sharp corner,
Finally move the mouse cursor back to where you started, and when the tiny icon next to the cursor turns to a hollow circle . double click to close.
Deselect. Select with the selection tool to gice fill etc
The curvature Pen tool is tricky to use
If you want to place an new anchor point on an existing line , you can place it near, then not letting go of the mouse, drag it into position.
Find more inspiration, events, and resources on the new Adobe Community
Explore Now