- Home
- Illustrator
- Discussions
- Editing text in a Stock Vector Logo
- Editing text in a Stock Vector Logo
Copy link to clipboard
Copied
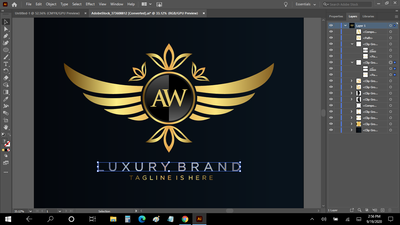
Hello. I am 100% new to AI so bear with me. I have gotten as far as opening the .ai file in Illustrator. I need to be able to edit/change the text and leave everything else alone. I read numerous threads and watched numerous videos. I keep seeing vids that show cutting the text and retyping what I want. Simple right? Nope. Doesn't work. Others have said to click on Create Outlines and take it over to a Fonts page and recreate it. Huh? No way I'm going to "recreate" when I see EXACTLY what I want, I just need it to allow me "to put my text here."
I've highlighted one line of text here. But I can not delete and change any letters. "Ungroup" is grayed out. I can not use it. "Create Outlines" is grayed out. Can't use it. Also "Type on a Path" is grayed out.
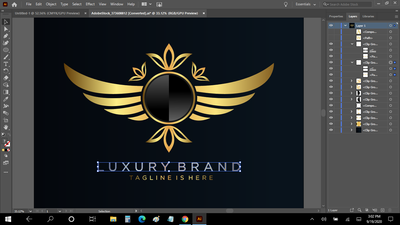
I was able to open the Layer Option and as you see here I can make a letter disappear but still can not change it to another letter.
If I click on the Text Tool and go to the text i want to change, ANY click of my mouse just inserts this teeny tiny bunch of black Latin language. Why? What is that?
I will tell you my final product if it is easier?
The A & W needs to be H M. The line of "LUXURY BRAND" needs to be "HALEY MOORE FOUNDATION" The "TAGLINE IS HERE" needs to be "DREAM BELIEVE ACHIEVE"
Help? TIA
 2 Correct answers
The stock art contains text that has been converted into outlines which means it is no longer text. Those are shapes now. Astute Graphics makes a plugin for Illustrator called Vector First Aid that can convert outlined text back into editable text, but you have to have that font on your machine. Because it was stock art, you might not have that font.
It would probably be better to find a similar font and retype what you want. The text Illustrator is adding is called "Lorem Ipsum." It's placeho
...Always make a copy of the original file ( Save As > rename ). This will allow you to make changes and still have the original file intact. Your newly renamed file becomes your logo file. Delete the Layers that hold the previous text elements ( or delete the text itself ). What I usually do is print the original file and spec the type in that print. You will, over time, build your own font book ( if you have not done so yet ) for reference. It is always a good idea to have a reference to yo
...Explore related tutorials & articles
Copy link to clipboard
Copied
The stock art contains text that has been converted into outlines which means it is no longer text. Those are shapes now. Astute Graphics makes a plugin for Illustrator called Vector First Aid that can convert outlined text back into editable text, but you have to have that font on your machine. Because it was stock art, you might not have that font.
It would probably be better to find a similar font and retype what you want. The text Illustrator is adding is called "Lorem Ipsum." It's placeholder text to give you an idea of what the text will look like. You can turn off placeholder text in the preferences (Edit > Preferences and in the Type tab deselect "Fill New Type Objects With Placeholder Text") if you don't like it. Then once you get it the size and spacing (it looks like they added quite a bit of tracking. Adjust that in the Properties panel in the Character section. You can hover over the options to see which one sets tracking. Its icon looks like a V and A with a horizontal, 2-sided arrow below it.) Then you can add the metallic look with a Graphic Style. Go to Window > Graphic Styles. In the upper right of the panel, click on the panel menu. Go to Open Graphic Style Library and try some of those. In the Image Effects one, there is one called Metal Gold that you could try. You can make adjustments to the appearance of the style by going to Window > Appearance to open the Appearance panel. It'll show what has been applied to whatever is currently selected. The strokes, fills, and effects are editable. Just click on it to open its options.
Copy link to clipboard
Copied
Thank you so much for recommending Astute Graphics Vector First Aid. Absolute game changer!
Copy link to clipboard
Copied
Always make a copy of the original file ( Save As > rename ). This will allow you to make changes and still have the original file intact. Your newly renamed file becomes your logo file. Delete the Layers that hold the previous text elements ( or delete the text itself ). What I usually do is print the original file and spec the type in that print. You will, over time, build your own font book ( if you have not done so yet ) for reference. It is always a good idea to have a reference to your available fonts so that you can spec type in a design such as yours. I myself use a type ruler to get the sizes I need, but in your case it will probably be try as you go. For instance, the monogram font could be something like 72pt Times Bold; HS ( horizontal scale ) 85%; Tracking 120%. These are terms you will become accustomed to seeing on a daily basis. So, basicly you want to use the Type tool, click somewhere close to where you want the type to land, and type H.M. ( I would not use any placeholder text ). In your Character palette, select Times Bold ( you can also set your HS and Tracking in the Character palette ). Do these steps for the remaining text elements. When done, save another copy of your logo file and convert the text you just created to "Outlines" ( always keep a copy of the file with "live" text just in case you have to change or edit anything in the future, you have the live version intact ). I notice "HALEY MOORE FOUNDATION" is considerably longer than "LUXURY BRAND" 12 characters vs. 20. "LB" looks as though it has been or is a wide font. There are things you can do to sort of match within reason. But, if that font was set without any modification in the HS, then you could condense it to fit ( HS @ 85%, 75%, 66%, etc., etc. ). There are limits to how much you can condense. This is where your design sense will become very useful in solving the problem. Good luck. I understand you are just starting out, so let me know if you have any other questions.
Find more inspiration, events, and resources on the new Adobe Community
Explore Now
