

- Home
- Illustrator
- Discussions
- Re: exporting seamless pattern tile for output?
- Re: exporting seamless pattern tile for output?

Copy link to clipboard
Copied
Hi,
The new Pattern Maker is great in Illustrator CS6 but can it be of any use for textile design? Once the pattern is created I just need the actual pattern tile which I can send for output as seamless pattern. There does not seem to be any export option for the actual tile? Hope this makes sense. Tried creating an artboard to match the size of the pattern tile and fill that with that pattern but that does not work and the pattern is not seamless afterwards


 1 Correct answer

I think it can be even simpler to save the pattern tile only. No need to delete paths (that can indeed be tricky).
I created a new Web document. Dragged the pattern named Jive to the artboard.
This is a complex pattern. To see the rectangle that defines the pattern it's easier to go to Outline View.
Select all and Ungroup.
Select the rectangle.
Select the Artboard tool (zoom in enough to be able to only click the rectangle) and double click the selected rectangle.
Or go to Object/Artboards/Fit to Se
...Explore related tutorials & articles
 67
Replies
67
67
Replies
67
Copy link to clipboard
Copied
export does not work for me, but save for web, yes!!! thanks!
Copy link to clipboard
Copied
Don't forget the Use Artboards checkbox on export...
Copy link to clipboard
Copied
ha! that was missing! works beautifully!

Copy link to clipboard
Copied
Kociara7,
This is what I do for online fabric printing like at Spoonflower: make the artboard the exact size of the repeat unit and then export and a png or jpeg. (like Ton showed). For art to hand off to a client, you may not really have to trim it - but if they are requesting an .ai file exactly the size of the repeating unit, you could do what Wade suggested, but first Expand all the strokes in your art before trimming. Object > Expand
They will then be closed shapes that you can trim without "re-rendering" like strokes do. It's not a perfect solution, because other things may "re-render" too like gradients, but it's pretty close. I've managed to work with clients using Ai for repeats, but I work more in paper goods (gift wrap, gift bags) than in fabric.
Copy link to clipboard
Copied
And just to add to this discussion... I like the new CS6 pattern feature in some ways, but one serious limitation is the ability to work on the pattern with a background color other than white. Maybe I'm missing something, so I'd love to hear back. While in pattern editing mode, you are launched into something like isolation mode, so the layers panel is internal to the feature - menaing that even if you placed a big red square on your background layer in your file, you won't see the background in pattern editing mode.
If you try to create a repeating background by placing a solid color tile behind your pattern elements (in pattern mode), you get to work with a background color - but the overlap causes lots of problems for the repeating elements above the background. For a complex pattern like a floral, this is pretty difficult - even as a temporary work-around.
Copy link to clipboard
Copied
Thanks for your contribution!
With CS 6 I found with the pattern maker it works fine on 'grid' mode just to place a pattern in the rectangle equal to you repat tile to have the repeat pattern. Im not quite sure, as haven't tested properly, but with other modes it can render unpredictable results, even by going with your or Ton's method. I did one piece with this hex efect and something went really wrong with the reapeat afterwards and I could not get the 'artboard' but need to do more work to investigate for me to comment .
As to the background, yes I noticed that, and even when you create a backround in the Pattern Maker it will still give you 'stitch area' around or overlap as you describe. The way to do it is create a pattern and then afterwards drop your seemless background pattern behind and export the artboard. So in a way the 'pattern maker' makes the top layer of the pattern with all the design elements making a repeat but background is another matter..
Copy link to clipboard
Copied
I was just testing with a half-drop repeat - and I agree with you that anything more complex than a grid repeat is going to have serious overlap issues when using a solid background. The workaround of creating the pattern and adding the background later works fine, but it's not ideal, it would be better to be able to guage the contrast and color as you work. Maybe they will add this feature in a future version. I'm enjoying this new feature a lot, but I'm still getting used to it! I think there are a few improvements that could make this even better for surface designers.
Copy link to clipboard
Copied
@kociara7
I do not see problems with other repeat modes, it is just a matter of selecting the right (most inner) rectangle to create the artboard (Object / Artboards / Fit to Selected Art)
Adding the background colour when exporting the pattern is easy.
With the rectangle still selected, fill it with a color.
@coyleart
Adding a background colour during the creation of something like a Hex repeat does probably not give you what you would expect.
This is a good feature request and you can do that here:
https://www.adobe.com/cfusion/mmform/index.cfm?name=wishform
regards,
Ton

Copy link to clipboard
Copied
@coyleart
In regard to background colour for patterns, here's what I do:
After clicking 'done' in the pattern tile tool options, and once the pattern swatch has been saved in the palette, I drag the swatch from the palette to the artboard and then select just the bounding box and make a copy behind it, then fill the front bounding box with a selected colour. Then drag the whole swatch back to the swatch palette.
@kociara7
To create a seamless tile or 'technical box repeat', I drag the pattern swatch from palette to artboard as above, then copy and paste the bounding box elsewhere on the artboard (so you have a rectangle or square of same exact dimensions as the tile repeat), then fill with the pattern from the swatch palette.

Copy link to clipboard
Copied
Ton,
I created "Jive" pattern for Adobe. The limitation of the pattern tool is that there is NO way to export out a single tile for use in texile patterns. The tool in Ai is geared for print and web use. The only reason you can derive a tile from the "Jive" pattern is I created that pattern tile from scratch so from the beginning it was a tile. Other wise you wouldn't be able to isolate a tile if you just used free floating art and pattern tool itself.
This is why it's important to still know how to create a tile from scratch because the pattern tool is very limited. The pattern tool needs these features desperately before it'll be a serious tool for textile surface designers:
- Export out a single tile of pattern
- Layers within the pattern tool
Von
PPLLUVProcess.com
Copy link to clipboard
Copied
Von,
I love the patterns you created for Illustrator CS6! Your work is wonderful.
And I agree completely with you that the pattern tool is not yet a serious tool for surface designers. The single tile issue, and being forced to design on a white background (or deal with serious background shape overlap issues when working with half-drops), left me scratching my head. It seems as if Adobe didn't consult with any surface design people.
I teach a class that presents some workarounds for both of those problems. For exporting the single tile, I drag the finished swatch to the artboard and reset the size of the artboard to the bounding shape of the swatch art. Then you can export the artboard in a pixel based format which will work for on-demand fabric printing services, or for use in Photoshop or as a website background. The result is a grid repeat tile, no matter what repeat style you started with, so that's something to consider for fabric designers, not a perfect solution, but great for people who use Spoonflower and other digital fabric printers (and web designers).
This is the class: http://www.reneepearson.com/classes/patternpower.php
Many of my students are crafters and designers who love digital fabric printing. I still teach them the "old fashioned" way of making swatches because I think you still need lots of "tricks" for working with patterns in Illustrator CS6, CC. I hope Adobe improves on this feature in the future, because it's a great start. I make a lot of patterns for my work and the pattern tool has saved me many hours!
I'm just glad to hear your commentary on the pattern tool, hopefully Adobe will listen. I love your books and I refer them to my students. Thanks for all you do!
Laura
Copy link to clipboard
Copied
Laura,
Thank you for sharing this information regarding the work around. I never even thought about dragging the swatch back out onto the art board? Duh? That is simple enough to do and yes it will work with spoonflower perfect. I've noticed when I rasterize a bitmap from Ai I still need to go into Photoshop and clean up the edges where it might anti-alias poorly though. I usually also offset it to test to make sure it looks good too in Photoshop. I kind of use offset to beta test the repeat if that makes sense?
And yes I agree with you that Adobe really doesn't consult the people they should on things like this. Because not having an export for a single tile is a glaring flaw in this tool.
I'm sending you an email regarding something else too so check your inbox. Thanks.
Von
PPLLUVProcess.com
Copy link to clipboard
Copied
Hi Von,
first my compliments for your beautiful patterns. I used one earlier in this thread as an example.
There I also described the method for exporting a single tile by dragging it to the artboard and fitting the artboard to the bounding box of the pattern tile (as also described by Laura).
The cleaning up the edges can be avoided by aligning the artwork to the pixelgrid. You will avoid anti-aliasing artefacts because the artwork then falls exactly on the pixel instead of partially overlapping a pixel.
So when you drag your pattern from the swatches panel to the artboard, make sure it is still selected.
Go to the Transform panel and check the Align to Pixel Grid checkbox.
Then select only the bounding box of the pattern and select Object > Artboards > Fit to selected art.
Export with the Use Artboards option.
regards,
Ton
Copy link to clipboard
Copied
Ton,
Thanks for that work around. In theory it does work in terms of a step by step process to work around the limitations of the pattern tool but in reality even when doing this step by step the artwork even when aligned to pixel grid can and usually still does produce anti alias artifacts in the artwork. If it has to be aligned to the pixel grid than the HAS to be created on whole pixel coordinates. You can't just create something and align to pixel grid and hope it works because it's a crap shoot. I tried it on about five different tiles and out of those 4 of them had artifacts.
So I'm guessing you'd have to build using pixel preview mode on in Ai from the start at least to establish the title bounds than everything built based on that should work fine when exported.
In all honesty though I'm not sure a 1 pixel subtle anti alias shift would even show up in a printed repeat on fabric since the output resolution they print from at Spoonflower.com at least is 150 dpi. But I'm anal about my files, I have to know it's exact so I take them into Photoshop and fix all of them before I use the art.
I really hope it doesn't take years for Adobe to address limitations like this as they have other features when released than never get back to refine them. When ever my creative work flow is degraded because I have to stop creating and figure out why the damn tool won't work the way it should it really costs me money. The more time that passes until Adobe thinks it's a priority to fix these flaws, bugs, or add lacking features that should have been in the initial release just means it'll cost me more time and money in the long run.
BTW, when snap to point is hit or miss that doesn't help either. They need to fix that so it's absolutely dependable ALL THE TIME.
But I digress.
PPLLUVProcess.com
Copy link to clipboard
Copied
Hi Von,
You were right: the only objects that will snap to the pixelgrid are rectangles, unless the objects were created with snap to pixelgrid on for new artwork.
I think I found a solution to get a good pattern (actually my colleague Pieter van Helvoirt came up with the smart object idea).
The method I described (with snap to pixel) seemed OK for low res (72ppi) pattern tiles for web pages, at least it got rid of the anti aliased lines at the edges.
i got better results for high res pattern tiles by scaling the pattern up a lot in Illustrator before exporting as a pixel file
But the easiest and as far as my tests have shown the best method without artifacts is using Photoshop and Smart Objects.
Drag the pattern from the Swatches panel to the Artboard.
Select the rectangle that encloses the pattern tile (if it's hard to see go to View > Outline.
Choose Object > Artboards > Fit to Selected Art.
Save the file as an Illustrator file.
In Photoshop choose: File > Open as Smart Object.
Select Crop To Art Box from the Options.
Because it is now a Smart Object it can be scaled to any ppi or size.
But even at the default size it looks OK.
Let me know if you can shoot holes in this method.
regards,
Ton
Copy link to clipboard
Copied
Yeah the larger you go the less problem it is because the less interpolation is needed to translate a curve into pixels. This is why designing 16x16 icons is more of an art and science otherwise you get blurry fast. I think you're right though the proper staging ground for the final export should be Photoshop and not Ai IMO.
Your recommends make sense though, so thanks.
PPLLUVProcess.com

Copy link to clipboard
Copied
That means your printer is probably reading the pdf part of the ai file and not the postscript. Is the rip for your printer postscript if so then it would be odd that it does not read the eps.
Copy link to clipboard
Copied
no, not sure why that is. With CS4 it worked for both eps and ai, now it reads eps but creates a white background around the tile. Not a big problem, I can use ai files

Copy link to clipboard
Copied
Triggered by this discussion I've uploaded a tutorial, dealing with a situation where you like to create your pattern swatch & artboard in a specific size.
I hope this is helpful: http://www.youtube.com/watch?v=IEt7Q0iqONE
Regards, Wim

Copy link to clipboard
Copied
I ended up on this thread because I have been using Illustrator since Illustrator88, but this new "feature" has me stumped. Is there a way to simply make patterns the way we could before??? I have TONS of patterns in AI that I sometimes need to create simple pattern fills from to use when designing other products.
Before, I would simply create a bounding box the size of the page (now artboard), choose "create pattern" and be done with it. Is there a way to do that now?
I see that in the pattern editor you can choose to make the pattern tile the same size as the artboard which in essence *should* tile only what is on the artboard, but it shifts it ever so slightly so this is not the case and I cannot find a way around that. Anybody? Any help is apreciated.
I love it (not) when Adobe so over-engineers an "upgrade" that, instead of just working, you have to spend time finding out how to do something you used to do effortlessly.....

Copy link to clipboard
Copied
You can still create patterns the old way. Just create everything and drag into swatches panel.
Copy link to clipboard
Copied
Thanks, Monica. That does work, however it does leave a hairline where the edges of the pattern are. Also, I have a few that simply will not drag into the swatch pallete..I make sure everything is unlocked, that there is a bounding box, that everything is selected and when I grab to drag to the swatch pallete, they just continue to drag across the workspace, not into the pallete.... Still, however curious about how to not get the pattern maker tile box to offset when using that particular tool. Just seems odd that it does that.
Copy link to clipboard
Copied
very tiny seams are quite normal (they won't be there when printing). But maybe you can show what you have.
Copy link to clipboard
Copied
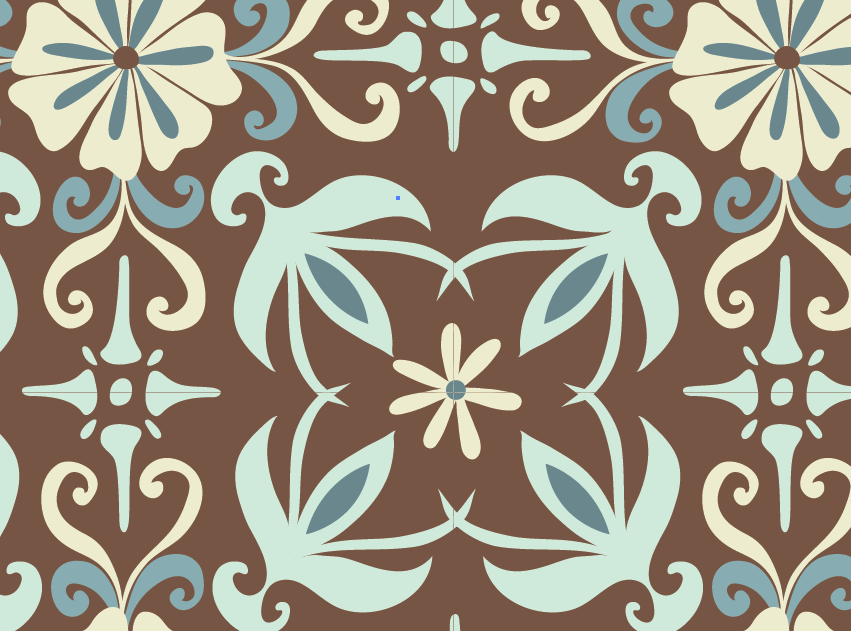
Thanks. I did save this below and then opened in PS at 300 dpi and didn't see the lines. (you can see them running through the light blue "crosses")
Still curious about why the tile box offsets in the new pattern making tool, though.
And why I would have some patterns that I cannot drag onto the swatch palette. Weird.
Copy link to clipboard
Copied
You should check if the lines are still there when you uncheck "Anti-Alias" in preferences.
I don't know what you mean with the offset.
Will need the original art to validate why it won't create a pattern.

Find more inspiration, events, and resources on the new Adobe Community
Explore Now
 AdChoices