Inspiring
January 9, 2021
Answered

How Do I Create an Object That Conforms to Another Object's Shape?

  • January 9, 2021
  • 5 replies
  • 7894 views

Hi there!

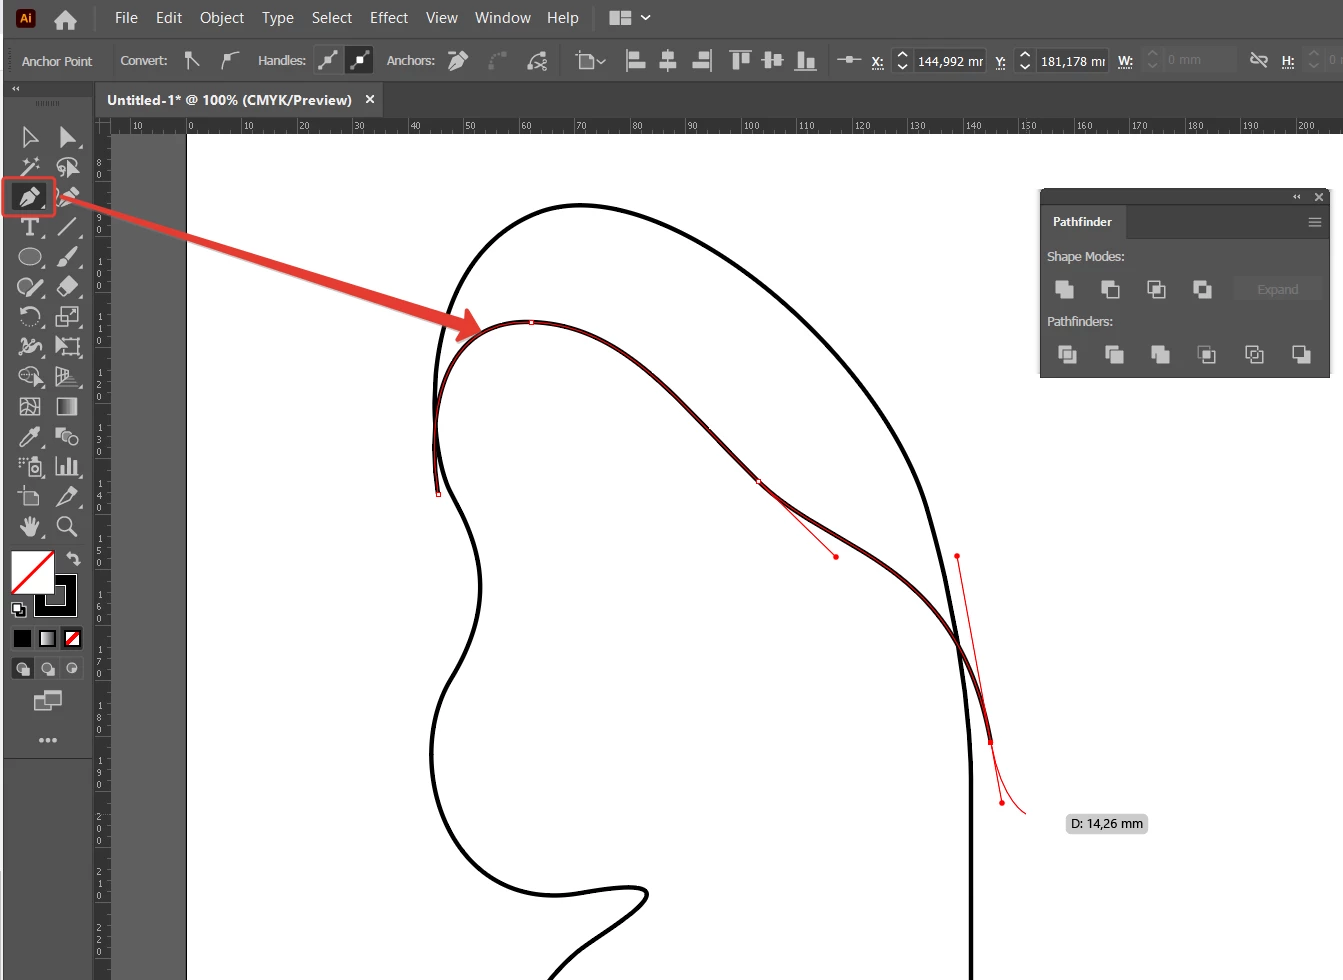
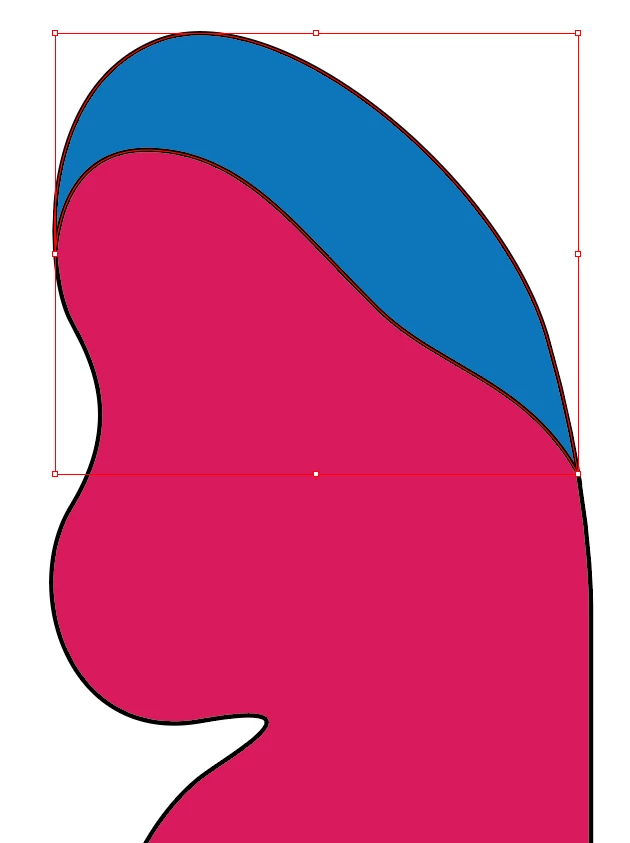
I would like to have some information about how to make an object that would follow the exact path or shape of another object in Illustrator.

Here I have an example of an object (not the exact one that I want to create and use, but similar to the one in blue) that I want to create that would conform to the top part of the butterfly wing that I could later combine with the wing (but keep them both as two separate shapes).

Please let me know how best to accomplish this ...

Thank you!

Correct answer Anna Lander

Another way to make areas:

1. Create the main (outer) shape.

2. Using Pen tool, draw the needed line through the shape. Press Esc to stop drawing. Make sure that the line has only Stroke, no Fill.

3. Select both shape and line and click Divide button on Pathfinder panel. It creates a group of 2 closed shapes.

4. Ungroup and set the attributes like you want.

5 replies

Anna Lander
Anna LanderCorrect answer
Inspiring
January 10, 2021

Another way to make areas:

1. Create the main (outer) shape.

2. Using Pen tool, draw the needed line through the shape. Press Esc to stop drawing. Make sure that the line has only Stroke, no Fill.

3. Select both shape and line and click Divide button on Pathfinder panel. It creates a group of 2 closed shapes.

4. Ungroup and set the attributes like you want.

Inspiring
January 10, 2021

Thanks. That worked well.

Anna Lander
Inspiring
January 9, 2021

in addition to Tromboniator's post: his workflow is the best if you want to create some area with the certain edge line. But if you want just a line (some "highlighting" for the edge), you can use the following way:
1. Copy your main shape

2. Use scissors to create an open path from the shape. Delete an unwanted part.

3. Set the needed Stroke color, width and profile.

4. Paste the copied shape above (Ctrl+F) or under (Ctrl+B) the line.

Inspiring
January 9, 2021

Thanks so much ... I will try this.

Monika Gause
Community Expert
Community Expert
January 9, 2021

If you want a shape that is roughly the same, you could draw a lines along that butterfly wing and then apply a blue stroke and add a variable width profile to that.


Inspiring
January 9, 2021

Yes, I tried doing that but could never get the stroke to be perfect if I did things free handedly this way. That's why I wanted a better approach. Maybe in time I will be able to accurately draw out lines that are a lot more accurate, but I always seem to have to edit a lot afterwards and I find that to be time consuming. 

Thanks

tromboniator
Community Expert
Community Expert
January 9, 2021

This is one way. As with most things in Illustrator, there are multiple possibilities.


(1) Draw the path for the shape you want for the top of the wing, and close the path so that it overlaps the pink portion.

(2) If you did (1) as a stroke, swap stroke and fill.

(3) Copy the pink wing shape, paste in front. Object menu > Arrange > Bring to Front. ( I've changed the color only to indicate that it's no longer the same path as the original pink.) Select the path from (2) and the front wing shape from (3), and in the Pathfinder panel (Window menu > Pathfinder) click Minus Front, as indicated.

(4) The shape from (3) is gone, and the path from (2) now perfectly matches the top of the pink shape.

(5) Shows the paths with matching edges separated.


I can't promise that it's the best way, but it is a way.


Peter


Inspiring
January 9, 2021

Thank you ... I will look into this process ... if I have any questions, I will let you know. 

Inspiring
January 9, 2021

Inspiring
January 10, 2021

UPDATE: There are multiple right answers to this question. Thanks so much to all who have replied to this post 🙂

Anna Lander
Inspiring
January 10, 2021

you can mark all the right answers as correct 😉