Daniel,
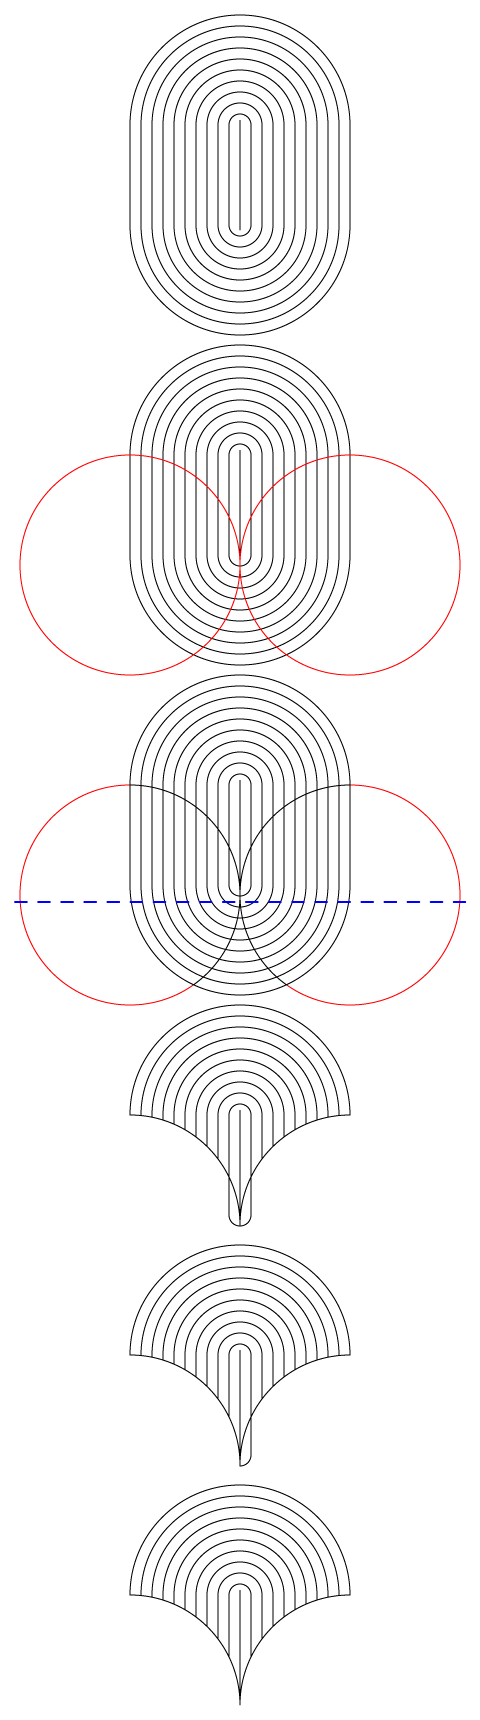
Here is a screenshot of different steps. The simplest way to remove unwanted parts may be the Pathfinder>Divide with a wee bit of cleanup. All measures are in pt, 1 pt corresponding to 1 mm. Am I right in believing that the grout lines are actually 1 mm (otherwise the measures will be a bit different, 0.1 mm would look much thinner than in your screenshot))?
The 1st part is a vertical line with a length of 110 (the radius of the circles), and the first rounded rectangle is 22 x 122 round the line, and the offset is 11, so the largest rounded rectangle is 220 x 320 after Object>Path>Offset Path 9 times.
The 2nd part has the two cutting circles (W = H = 220) added in red.
The 3rd part is after Pathfinder Divide, showing the upper limit of the area to ClickDrag with the Direct Selection Tool in the next step in blue dashed.
The 4th part is after (deselecting everything and) ClickDragging with the Direct Selection Tool over the bottom area and pressing Delete twice.
This leaves two unwanted bits, on either side at the bottom.
The 5th part is after Clicking the left unwanted bit with the Direct Selection Tool and pressing Delete twice.
The 6th part is the same, only for the right unwanted bit.
The final cleanup, invisible in the screenshot, can be done in the expanded Layer in the Layers panel, and consists of two things:
A) Selecting and Releasing the Compound Path that forms the pointy bottom, so the original line and the surrounding closed path become simple paths as all the others in the Group forming the template;
B) Deletion of the (possible) path at the very tip that is different to all the others by appearing solid black.
Click/RightClick to see in full, Click again to get close


