Inspiring
September 24, 2018
Answered

How to add bleed to a Ai file

  • September 24, 2018
  • 2 replies
  • 4409 views

Hello All,

Thanks for taking time to read my post - I just simply want to add bleed to a file. I have researched thoroughly, but it still isn't doing what I want it to.

So basically I have created a 130cm by 30cm poster and I want to add 3mm of bleed all around the edges, which overlaps the crop marks when in a PDF form.

Here are my settings:

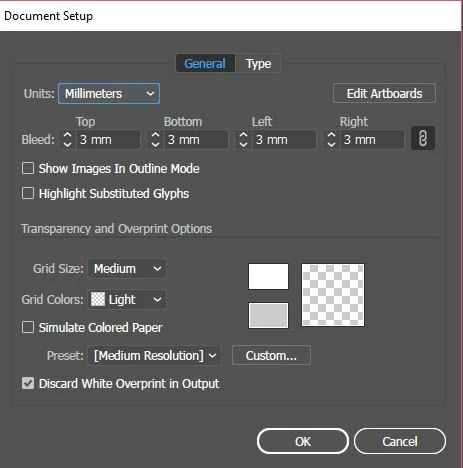
It seems to be what is suggested online.

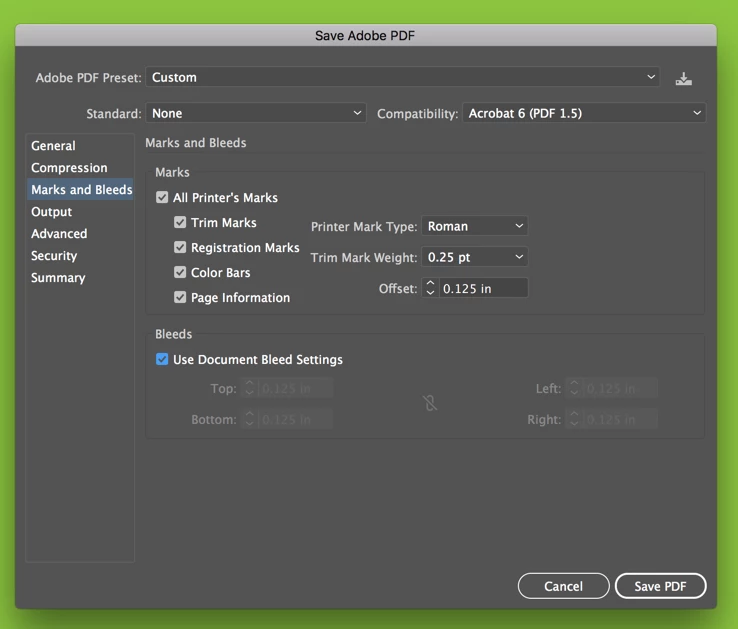
However. This is what I'm getting when I try those suggested settings:

You can see the bleed isn't overlapping the crop marks - I want it to be bigger than the crop marks so when it is trimmed once printed, like below diagram i made.

I want it to be all the same colour green but I just made it darker green to show where I want the bleed to go - Which is beyond the crop marks.

Instinct tells me i need to put minus figures in the Bleed Settings but that isn't an option.

Please could anyone help? I'm sure its doable! Thank you in advance x

This topic has been closed for replies.
Correct answer KelseyW99

Ahhh. I think I understand your problem now. So when you are printing or exporting to PDF, in the Marks and Bleeds category, increase your offset value to 3mm as well. This will force the marks to offset from the trim to that amount (equal to your bleed). See figures below.


Thank you Chad! Looks like I have managed to do it - My issue was my artwork wasn't extended to the bleed line, meaning it was just blank white space that was showing in the bleed, and I adjusted the offset to the same value and that worked as well! So thank you to both of you for your help..

Charles, in regards to the overlap, It was something that was put in the request for the artwork finish...Nothing to do with me!

2 replies

hammer0909
Community Expert
Community Expert
September 24, 2018

What version of Illustrator are you running? It looks like your running an older version since bleed was a new feature added in a fairly recent version of Creative Cloud.

KelseyW99Author
Inspiring
September 24, 2018

Hi Chad, I'm using 2018 version...!

KelseyW99AuthorCorrect answer
Inspiring
September 24, 2018

Ahhh. I think I understand your problem now. So when you are printing or exporting to PDF, in the Marks and Bleeds category, increase your offset value to 3mm as well. This will force the marks to offset from the trim to that amount (equal to your bleed). See figures below.


Thank you Chad! Looks like I have managed to do it - My issue was my artwork wasn't extended to the bleed line, meaning it was just blank white space that was showing in the bleed, and I adjusted the offset to the same value and that worked as well! So thank you to both of you for your help..

Charles, in regards to the overlap, It was something that was put in the request for the artwork finish...Nothing to do with me!

cinziamarotta
Participating Frequently
September 24, 2018

Hi,

saving in PDF from Illustrator, set the MARKS AND BLEEDS option:

KelseyW99Author
Inspiring
September 24, 2018

Hi thanks so much for your post -

Unfortunately

A) Copying That method exactly doesn't give me the trim marks,

B) and it still seems to not give me extra bleed.

As i said, I'm sure minus figures would make it work, but they aren't possible...

Really is confusing. I'm sure its simple! Does anyone know of a way to do it on photoshop?

Legend
September 24, 2018

If you require Trim marks then you can tick the first checkbox;

Will give you the desired effect;

Obviously, you can increase the bleed - I've just added 3px

Not sure what you mean by minus bleed, there is no such thing - You either have a bleed or you don't.