Known Participant
January 11, 2013
Answered

How to create a wavy line with consistent wave regardless of anchor point spacing?

  • January 11, 2013
  • 5 replies
  • 94826 views

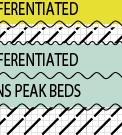
The above image shows my problem. All have the same zig zag effect setting, but due to inconsistent anchor point spacing there is inconsistent waviness. Is there a way to make a wavy line that is not a distortion based on anchor point distances? I'd like all my wavy lines to look nice and consistent like this:

The only reason they're so consistent is the absolute setting has been used but these lines are all straight and have only 2 anchor points, start and finish, hence the wave is consistent. It's harder when the lines are curvy and have a different number and spacing of anchor points.

This topic has been closed for replies.
Correct answer Kurt Gold

You could also use the graphic style inside this sample file (AI-CS-5 format, ca. 1 MB):

https://docs.google.com/file/d/0B-IWkNSl4y_3RVVaT0Fkb3RaTzQ/edit

5 replies

Known Participant
February 11, 2018

This came up on a google search and is really helpful, but I seem to have something wrong with my pattern setting as you can see.

Any suggestions as to why it's not seamless? Thanks in advance!

Monika Gause
Community Expert
Community Expert
February 11, 2018

Your edges don't align.

Needs to be like this:

Known Participant
February 11, 2018

Thanks! My original line was not straight when I applied the zig zag. Appreciate the help and now I feel a little foolish for not realizing it.

Kurt Gold
Community Expert
Kurt GoldCommunity ExpertCorrect answer
Community Expert
January 12, 2013

You could also use the graphic style inside this sample file (AI-CS-5 format, ca. 1 MB):

https://docs.google.com/file/d/0B-IWkNSl4y_3RVVaT0Fkb3RaTzQ/edit

ndthl123Author
Known Participant
January 14, 2013

Hey Kurt,

Thanks you're the man.

Everyone is so helpful here, it's great.

Wil

Jacob Bugge
Community Expert
Community Expert
January 11, 2013

ndth,

Or you may:

1) Create a straight path with the Line Tool with the length of a single full wave;

2) Filter>Distort>Zig Zag (or is it in Effect now?) with 1 Ridge per segment and the desired height;

3) Brushes>New Brush>New Pattern Brush, keep the defaults Scaling 100% and Spacing 0%;

4) Apply.

tromboniator
Community Expert
Community Expert
January 11, 2013

There may be easier, better ways to do it

tromboniator
Community Expert
Community Expert
January 11, 2013

If you want the fill to follow the boundary, here's one way to do it, more easily done than demonstrated:

ndthl123Author
Known Participant
January 11, 2013

Wow this is really helpful, thanks for helping me with this, as the image looks kind of bad without the fill following the boundary :-)

tromboniator
Community Expert
Community Expert
January 11, 2013

You're welcome. There may be easier, better ways to do it, but I've been pretty happy with this method. These patterns are just the black shapes, so it's easy to add any color behind them by adding a new fill in the Appearance Panel and dragging it below the pattern fill.

Larry G. Schneider
Community Expert
Community Expert
January 11, 2013

Work with the minimum of anchor points possible. Adjust the number of points in line to be a number divisible by the number of zig-zags. you will need to make it consistent. You can continue to adjust the number of zig-zags and the amplitude by double-clicking on the Effects line in the Appearance panel.