New Participant
November 5, 2014
Answered

How to wrap different objects along a circular path

  • November 5, 2014
  • 3 replies
  • 36500 views

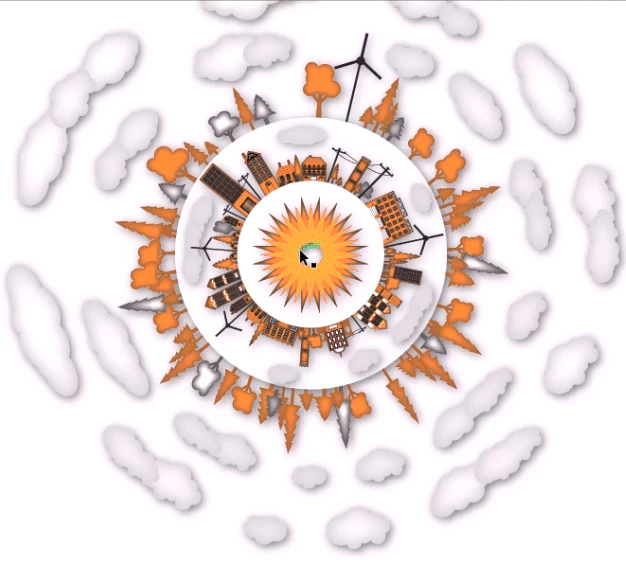
I've searched for this method but can't seem to figure out how to wrap different objects along a circular path. Many tutorials simply show patterns or the same object being rotated but I wanted to produce a city landscape such as the one shown below. Any tips or tricks to get started is greatly appreciated. Thanks!

    This topic has been closed for replies.
    Correct answer Doug A Roberts

    pattern brush might work better. your mileage may vary

    3 replies

    New Participant
    March 16, 2023

    Did anyone ever manage to perfect this paricular issue? My own, albiet brief, experiments using a pattern brush left objects filled with hundreds more points than in the original objects. This looks like a very poor solution to this issue.


    Monika Gause
    Braniac
    March 16, 2023
    quote

    Did anyone ever manage to perfect this paricular issue? My own, albiet brief, experiments using a pattern brush left objects filled with hundreds more points than in the original objects. This looks like a very poor solution to this issue.


    By @Gerard28908883dtps


    This thread is ten years old.

    Please create a new thread and show your objects

    Jacob Bugge
    Inspiring
    November 5, 2014

    jaygoo,

    When you wish to have undistorted objects distributed and you know the number, you may use the 1 step fake blend foe each set of objects, with some preparation to make things fit together:

    1) First place the objects on a straight horizontal line as they would be on a straight path, with a copy of the first object as the last object;

    2) With the centre Reference Point selected in the Transform palette use the X values of the first and last objects to establish the total width for the next steps;

    3) Create the circle, copy it in front of itself and cut the copy where you want the centre of the first/last object and establish the total circumference (length) (you should be able to see it in the Document Info palette);

    4) Adapt the size of the objects 1) or the circle 3) so that the width and the circumference become identical;

    5) Object>Blend>Options>Specified steps, set the value to 1 and set Orientation to Align to Path;

    6) Select all the objects and Object>Blend>Make, create a copy just in case (now you have some distorted shapes between the objects, but not for long);

    7) Select the Blend from 6) and the circle from 3) and Object>Blend>Replace Spine;

    8) Object>Blend>Expand and Ungroup, and delete the distorted shapes, and the copy of the first object (which is on top of it) if you wish;

    9) Enjoy.

    jaygooAuthor
    New Participant
    November 6, 2014

    Jacob,

    I tried to follow your method but I cant get it to work from Step 5-8. Not sure what I'm doing wrong but here is what happened...

    obviously im doing something wrong. thanks anyways for your help. greaty appreciate it.

    Jacob Bugge
    Inspiring
    November 6, 2014

    jaygo,

    Did you set Orientation to Align to Path in 5), and what does the Blend look like in 6)?

    Doug A Roberts
    Braniac
    November 5, 2014

    you could draw your cityscape on a straight plane and then make it into an art brush. (and then apply that to a circle. just make sure the ends match up).

    Doug A Roberts
    Doug A RobertsCorrect answer
    Braniac
    November 5, 2014

    pattern brush might work better. your mileage may vary

    jaygooAuthor
    New Participant
    November 6, 2014

    doug,

    Thanks for the advice. Yeah, pattern brush works better and I still need to tweak it so that it wraps around perfectly. Here's what I came up with.