Build up your text
Look for a matching typeface to that shown, )it's not needed to convert to outlines).
(I would not retouch and erode those letter corners, yet).
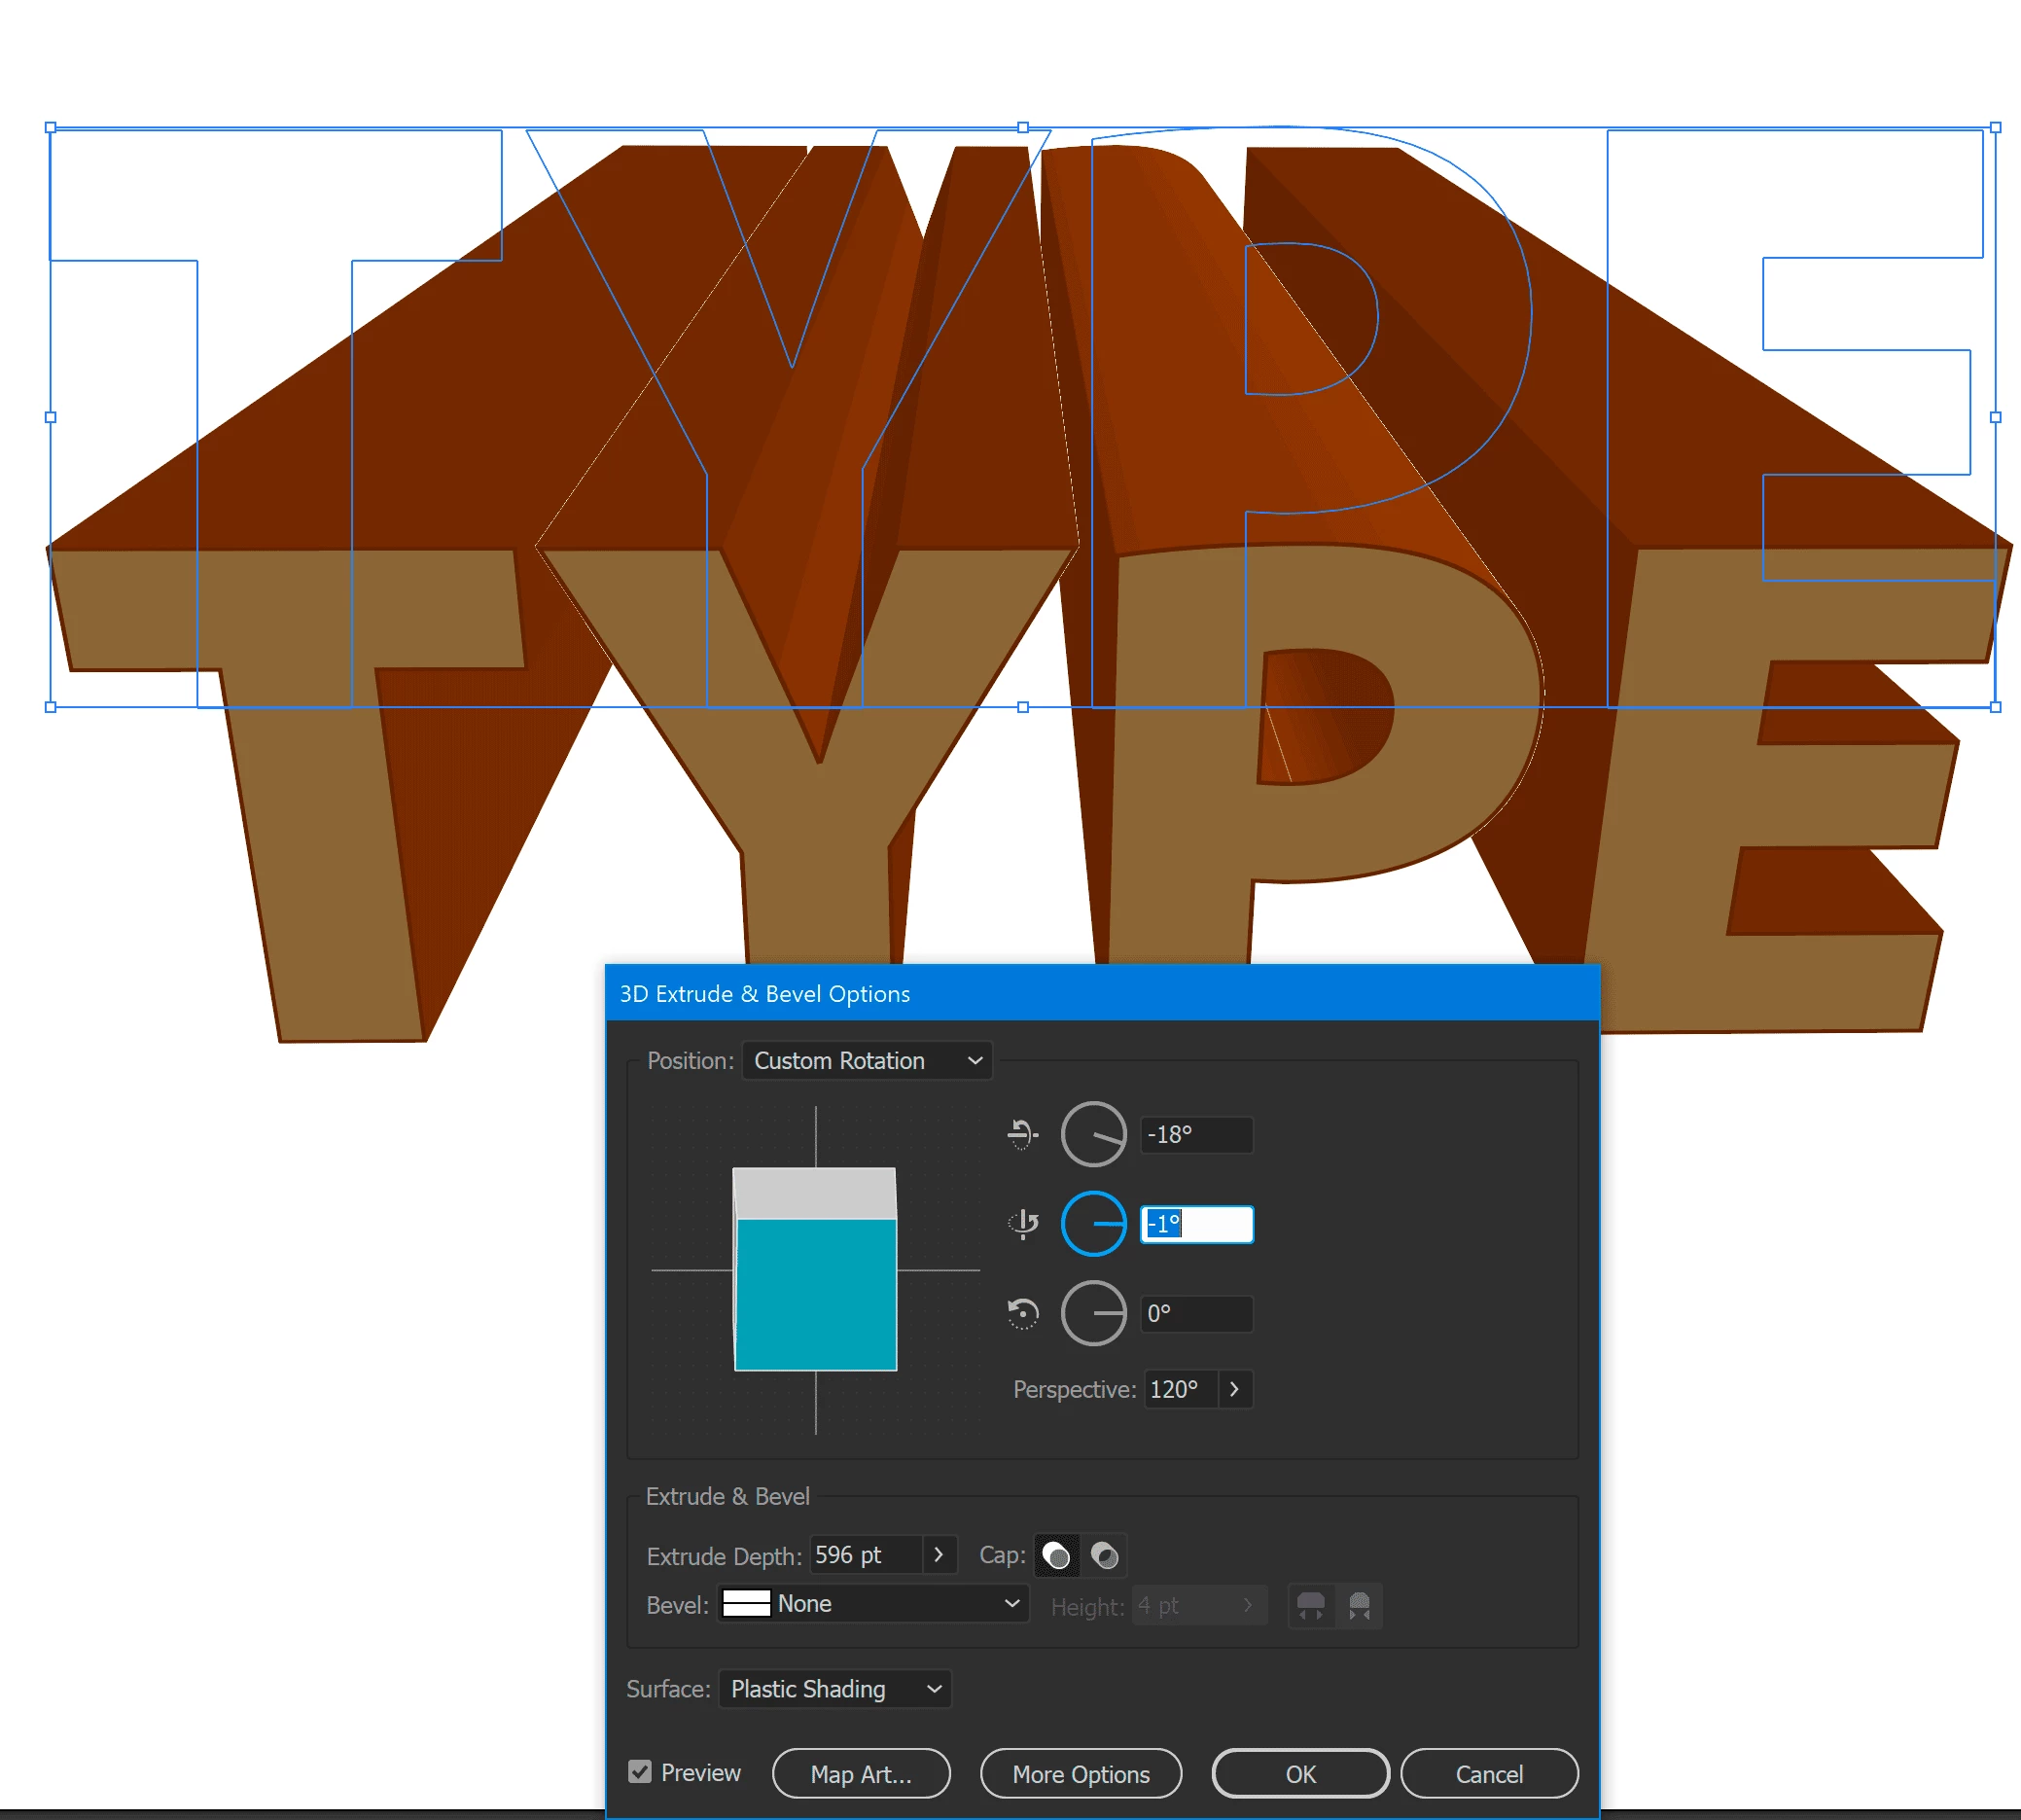
Select the text and apply Effects>3D>Extrude with values as shown:
Extrude Depth controls the length or deepness, the convergence to be back side is controlled by the Perspective, and the vertical inclination or balance is from the first rotation control (18 degrees in my example). others should be close to 0.
Use to two line from both extremes to converge in the back the perspective endpoint.
Now duplicate the 3D text object(s) and Obejct >Expand Appearance and remove the perspective lines and surfaces, just keep the front text, move it aside if needed and erode or modify the corners, using the Erase tool, the Pencil tool, the knife, add or delete points using the Pen tool,.... When happy with it change also the color or grey tone and move it back on top of the 3D
You are only left to draw those lines that converge to the perspective endpont.
Draw a sinle line (use a black or any color to preview it. On the Control bar on top right of the stroke width you have a window for Variable Width Profiles, use one that suits the drawing or create a new one.
Draw those lines poyecting to the endpoint with the width profile applied, select the endpoint and suing the samrt guides shorten their lengthg to keep it inside the 3D bloock.
That's all.
(If you have that original drawing made, use it initially, place it as a template.

