

- Home
- Illustrator
- Discussions
- Re: Strokes are placed inside the image instead of...
- Re: Strokes are placed inside the image instead of...

Copy link to clipboard
Copied
Hi all,
I am trying to place strokes on the outside of this dog image that I downloaded on shutterstock. However, every time I attempt to do so, the strokes get added to the inside of the dog structure as well as on the outside. I would only like the strokes to be placed on the outside.
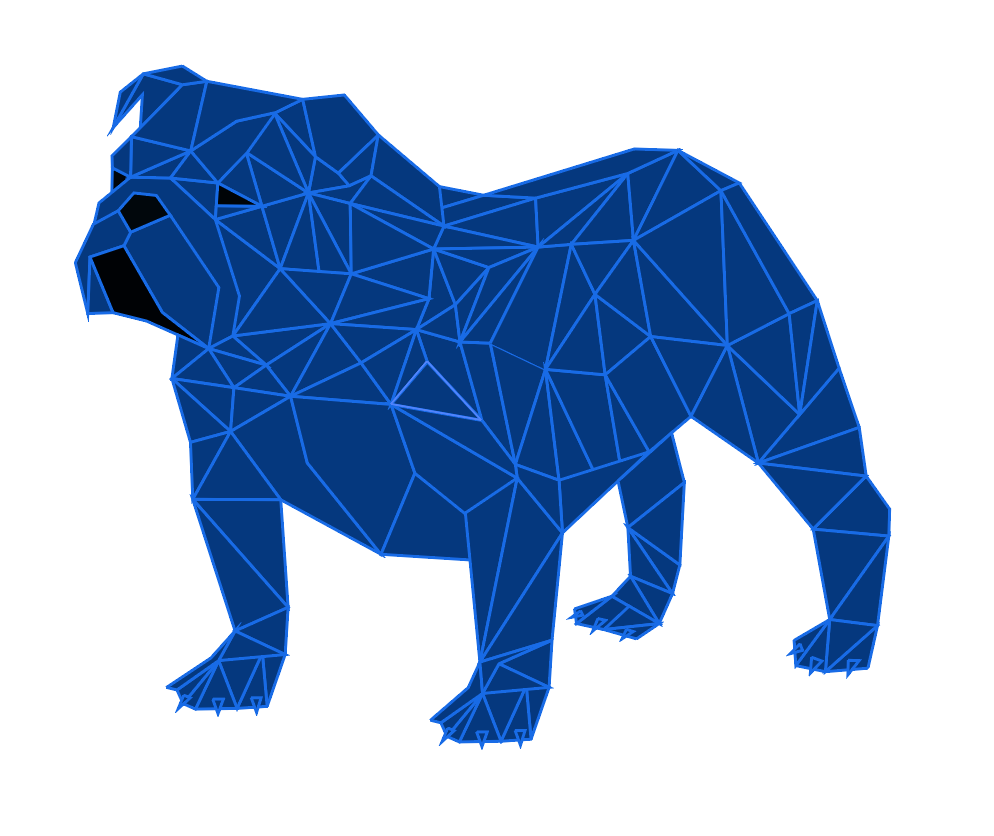
This is my first time using Adobe Illustrator software so I cannot accurately describe what is happening with respect to the strokes. The original image is made up of polygons, and when the stroke techniques are applied they follow along the various paths that exist within the image. I ONLY want the strokes to be placed along the outside edges. If anyone could help me with this issue, I would greatly appreciate it.


 1 Correct answer

Hi. When adding strokes to items, Illustrator considers each item as separate, by default. However there is one workaround you can try, and one that will definitely work (but will eliminate the polygons - although that might be fixable, too). There're several other methods that can be used, but I'm offering what I consider the simplest solutions.
1) Select all the polygons (you can use the selection tool to drag a rectangle around all of them and they'll all be selected. Now, I haven't tried this
...Explore related tutorials & articles
 7
Replies
7
7
Replies
7
Copy link to clipboard
Copied
Hi. When adding strokes to items, Illustrator considers each item as separate, by default. However there is one workaround you can try, and one that will definitely work (but will eliminate the polygons - although that might be fixable, too). There're several other methods that can be used, but I'm offering what I consider the simplest solutions.
1) Select all the polygons (you can use the selection tool to drag a rectangle around all of them and they'll all be selected. Now, I haven't tried this on something like yours, but it may work. Go to the Object menu> Compound Path> Make. Then, try the stroke again. Compound path makes Illustrator "think" of many objects as one object, while maintaining all the individual components of the compound object separate (you can see it in the layers panel)
2) OR, you can make Illustrator combine all the shapes into one total shape. This will eliminate the individual polygons, but you'll have a single shape you can stroke. You could use the Pathfinder>Unite button, but I'm going to tell you a simpler way...
There's a tool in the toolbar that looks like a trident - it's called the Shape Builder tool (hover for tooltips to find the name). With all shapes selected, you can use the Shape Builder to drag from one polygon to the next, to the next. Each drag will combine those shapes into one, cohesive shape. You'll end up with one whole shape - no polygons, which you can stroke. NOW, what I'd do if I wanted to KEEP the polygons is to do exactly what I just described on a duplicate layer above the original. Lock the original layer so you can't touch it, and run the shape builder on the layer above. Stroke THAT layer and leave the fill empty. That way, the stroke appears to be around the polygons, but you can still manipulate the polygons on the original layer after you've unlocked it.
Adobe Community Expert / Adobe Certified Instructor
Copy link to clipboard
Copied
Thank you for your help.
Option 1 does not work.
Option 2, I do not see the unite button under pathfinder. Perhaps there is a different function?
Option 3, do you mean the shaper tool and not the shape builder tool?

Copy link to clipboard
Copied
Dave,
As I (mis)understand it, you may:
1) Select the Layer in the Layers palette, you should now see Contents in the Appearance palette;
2) In the Appearance palette flyout click Add New Stroke and set it as desired, then in the main Appearance palette window drag it down beneath Contents.

Copy link to clipboard
Copied
I think maybe you want the dogs insides to stay but also to have a single outline stroke of the whole dog that you can manipulate on its own.
Maybe make copy the whole layer in the Layers pallet
Then with just the copied layer selected and
In the Pathfinder panel ( Windows > Pathfinder)
click Unite, which is the first of the Shapes mode
then turn off the fill for that layer and select and adjust the stroke ,
It is a hard learning curve...,
Some youtube videos (of various quality) may help, search
low poly illustrator tutorial
Copy link to clipboard
Copied
Thank you so much. Your explanation, along with S-Gans', helped me to resolve this matter.
I am deeply grateful for both your help.
Copy link to clipboard
Copied
Dave,
Just out of curiosity, did you ever try just adding an outer stroke to the layer (behind the contents)?
Copy link to clipboard
Copied
I'm sorry it took me so long to get back to this - I'm glad you resolved it. I DID make a quickie video to describe the ideas, just had to leave before it was done rendering. I'll post it here, just in case it can help someone else. Not my most "finished" work, but I think it may explain to others. I'm just so glad you got it done!
Adobe Community Expert / Adobe Certified Instructor

Find more inspiration, events, and resources on the new Adobe Community
Explore Now
 AdChoices