• Global community
    • Language:
      • Deutsch
      • English
      • Español
      • Français
      • Português
  • 日本語コミュニティ
    Dedicated community for Japanese speakers
  • 한국 커뮤니티
    Dedicated community for Korean speakers
Exit
1

Converting logos and white colour for spot colour in Indesign document

Community Beginner ,
Jul 10, 2023 Jul 10, 2023

Copy link to clipboard

Copied

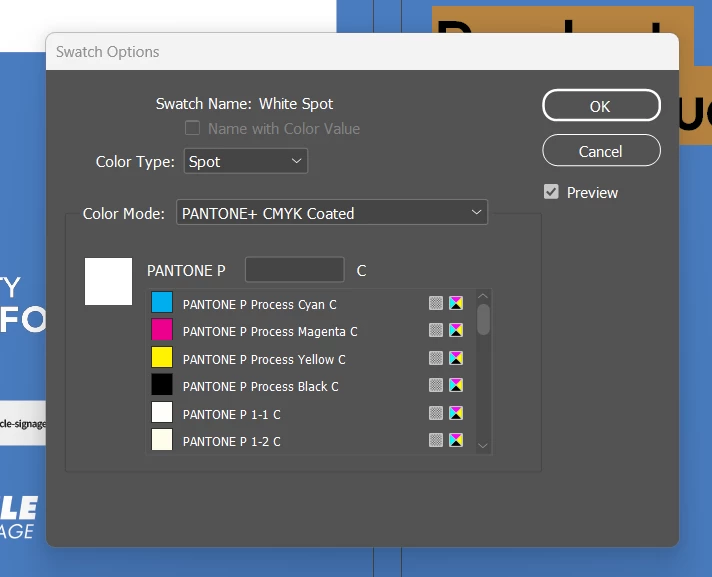
Hi, so I've created a catalogue, sent to print but they've said we need to provide the spot colours. Please dumb it down for me, how do I do this? Is this right? 

And I have a logo that needs to be spot, please help me out! And once I've figured this out do I export as normal?

Jessika25375768nzuu_0-1689055875144.png


TOPICS
Import and export , Print

Views

701

Translate

Translate

Report

Report
Community guidelines
Be kind and respectful, give credit to the original source of content, and search for duplicates before posting. Learn more
community guidelines

correct answers 1 Correct answer

Community Expert , Jul 11, 2023 Jul 11, 2023

Yes, this is not embossing, it's the application of a UV varnish to certain parts of your artwork.

(Check that your printer offers this service.)

This video will help you set up your InDesign document for the spot varnish: 

https://www.youtube.com/watch?v=Lo6087ejqIg

Votes

Translate

Translate
Community Expert ,
Jul 10, 2023 Jul 10, 2023

Copy link to clipboard

Copied

Are you sure the logo needs to include additional spot colours? That would be unusual because, apart from the additional cost of printing, the logo wouldn't be able to be reproduced accurately in use in media that's printed in CMYK such as the company's advertisements in magazines and so on. 

(By the way, opaque white can't be printed by most printing processes.)

Votes

Translate

Translate

Report

Report
Community guidelines
Be kind and respectful, give credit to the original source of content, and search for duplicates before posting. Learn more
community guidelines
Community Beginner ,
Jul 11, 2023 Jul 11, 2023

Copy link to clipboard

Copied

We're wanting the logo and the white text on the cover to be raised - if that makes sense. So what's the best way to achieve this?

Votes

Translate

Translate

Report

Report
Community guidelines
Be kind and respectful, give credit to the original source of content, and search for duplicates before posting. Learn more
community guidelines
Community Expert ,
Jul 11, 2023 Jul 11, 2023

Copy link to clipboard

Copied

You can create raised text/logo embossed effect in Photoshop or have it physically embossed, which you will need to discuss with your printer or finisher which methods they offer and how they'd like the artwork supplied (and check the extra cost with your customer!).

Votes

Translate

Translate

Report

Report
Community guidelines
Be kind and respectful, give credit to the original source of content, and search for duplicates before posting. Learn more
community guidelines
Community Beginner ,
Jul 11, 2023 Jul 11, 2023

Copy link to clipboard

Copied

Ok, so in what circumstances would you use spot colours?

Votes

Translate

Translate

Report

Report
Community guidelines
Be kind and respectful, give credit to the original source of content, and search for duplicates before posting. Learn more
community guidelines
Community Beginner ,
Jul 11, 2023 Jul 11, 2023

Copy link to clipboard

Copied

Update, so the correct term i should be using is spot gloss colours.

" Spot Gloss is a flat, high gloss, clear coating which is applied to a selected area of your printed artwork. Spot UV is often used as a design technique to draw attention to a particular element such as a logo or as a creative background to give the appearance of texture." 

How do i set up my cover page so the printer knows which parts I want spot gloss applied to?

Votes

Translate

Translate

Report

Report
Community guidelines
Be kind and respectful, give credit to the original source of content, and search for duplicates before posting. Learn more
community guidelines
Community Expert ,
Jul 11, 2023 Jul 11, 2023

Copy link to clipboard

Copied

Yes, this is not embossing, it's the application of a UV varnish to certain parts of your artwork.

(Check that your printer offers this service.)

This video will help you set up your InDesign document for the spot varnish: 

https://www.youtube.com/watch?v=Lo6087ejqIg

Votes

Translate

Translate

Report

Report
Community guidelines
Be kind and respectful, give credit to the original source of content, and search for duplicates before posting. Learn more
community guidelines
Community Beginner ,
Jul 11, 2023 Jul 11, 2023

Copy link to clipboard

Copied

Thank you so much this was very helpful! I think I've worked out all the text, but not sure how to ensure my logo will print with Spot UV.

Votes

Translate

Translate

Report

Report
Community guidelines
Be kind and respectful, give credit to the original source of content, and search for duplicates before posting. Learn more
community guidelines
Community Expert ,
Jul 11, 2023 Jul 11, 2023

Copy link to clipboard

Copied

Re the logo, open a copy of the logo in Photoshop, make it solid (no tints), delete any parts of the logo (if any) you don't want the varnish to apear on and then place it back in position on your varnish layer in InDesign,

If you're uncertain, post a screen shot of the logo on here.

Votes

Translate

Translate

Report

Report
Community guidelines
Be kind and respectful, give credit to the original source of content, and search for duplicates before posting. Learn more
community guidelines
Community Expert ,
Jul 11, 2023 Jul 11, 2023

Copy link to clipboard

Copied

First: do you want the logo to be white/colour with spot varnish on top or JUST the spot varnish.

If your logo is vector (i.e. Illustrator). you simply add a new layer with a copy of the parts of the logo you want varnished, apply the Spot UV to those, and then (importantly) set these objects to Overprint, otherwise the Spot UV objects will knockout the logo below it, as well as anything in your InDesign page it's placed upon.

If you just want the logo to be in varnish ONLY,  just create a file where your logo is coloured Spot UV... just make sure the Spot UV objects are set to Overprint.

Votes

Translate

Translate

Report

Report
Community guidelines
Be kind and respectful, give credit to the original source of content, and search for duplicates before posting. Learn more
community guidelines
Community Beginner ,
Jul 12, 2023 Jul 12, 2023

Copy link to clipboard

Copied

Ok, so this is how it's looking at the moment. As per the tutorial I followed, I've created another layer called Spot UV, put all the objects and text that I want Spot applied to in it. Made them pink as per the tutorial, but I the logos I couldn't make pink, since they're in the Spot layer will this still work? How do I ensure they're all set to overprint?

Jessika25375768nzuu_0-1689223665797.png


Votes

Translate

Translate

Report

Report
Community guidelines
Be kind and respectful, give credit to the original source of content, and search for duplicates before posting. Learn more
community guidelines
Community Expert ,
Jul 13, 2023 Jul 13, 2023

Copy link to clipboard

Copied

If your "spot layer" is white, you don't need to print it as a spot colour as the substrate (paper or card) will provide the white!

Assuming you want the logo (indicated in blue in your screenshot) overprinted with the varnish, duplicate it and colour it pink and have it on the same layer as the lettering.

Votes

Translate

Translate

Report

Report
Community guidelines
Be kind and respectful, give credit to the original source of content, and search for duplicates before posting. Learn more
community guidelines
Community Expert ,
Jul 13, 2023 Jul 13, 2023

Copy link to clipboard

Copied

Hi @Jessika25375768nzuu , You can view your Spot color relative to the process colors using Separation Preview—Spot colors always show as an extra plate, if yours is not showing you haven’t actually created a spot color. Also, the Spot color definition can be whatever you want—it’s only used for the preview:


Screen Shot 11.png


Here I have the CMYK plates’ view turned off showing just the EmbossPlate:


Screen Shot 12.png


With just the process Yellow plate turned on I can see the affect of Overprint vs. Knockout. With the KO text set to knockout I don’t need an extra text layer below because the EmbossPlate Spot color is going to knockout the printed process color:


Screen Shot 13.png

Votes

Translate

Translate

Report

Report
Community guidelines
Be kind and respectful, give credit to the original source of content, and search for duplicates before posting. Learn more
community guidelines
Community Expert ,
Jul 13, 2023 Jul 13, 2023

Copy link to clipboard

Copied

Can you share the ID file and logo?

Votes

Translate

Translate

Report

Report
Community guidelines
Be kind and respectful, give credit to the original source of content, and search for duplicates before posting. Learn more
community guidelines
Community Beginner ,
Jul 13, 2023 Jul 13, 2023

Copy link to clipboard

Copied

LATEST

I'd be happy to, but it's massive. I've attached the logo, in colour and white. But here's some screenshots of the setup, the spot UV is showing as an extra plate. Then when I click off the artwork later, in the last image you can see what shows. So am I correct in assuming the text is set up correctly but it's the logo I need to fix?

1.png


2.png


3.png


Votes

Translate

Translate

Report

Report
Community guidelines
Be kind and respectful, give credit to the original source of content, and search for duplicates before posting. Learn more
community guidelines