How to find/change size of multiple text boxes of same size
Copy link to clipboard
Copied
Hello!
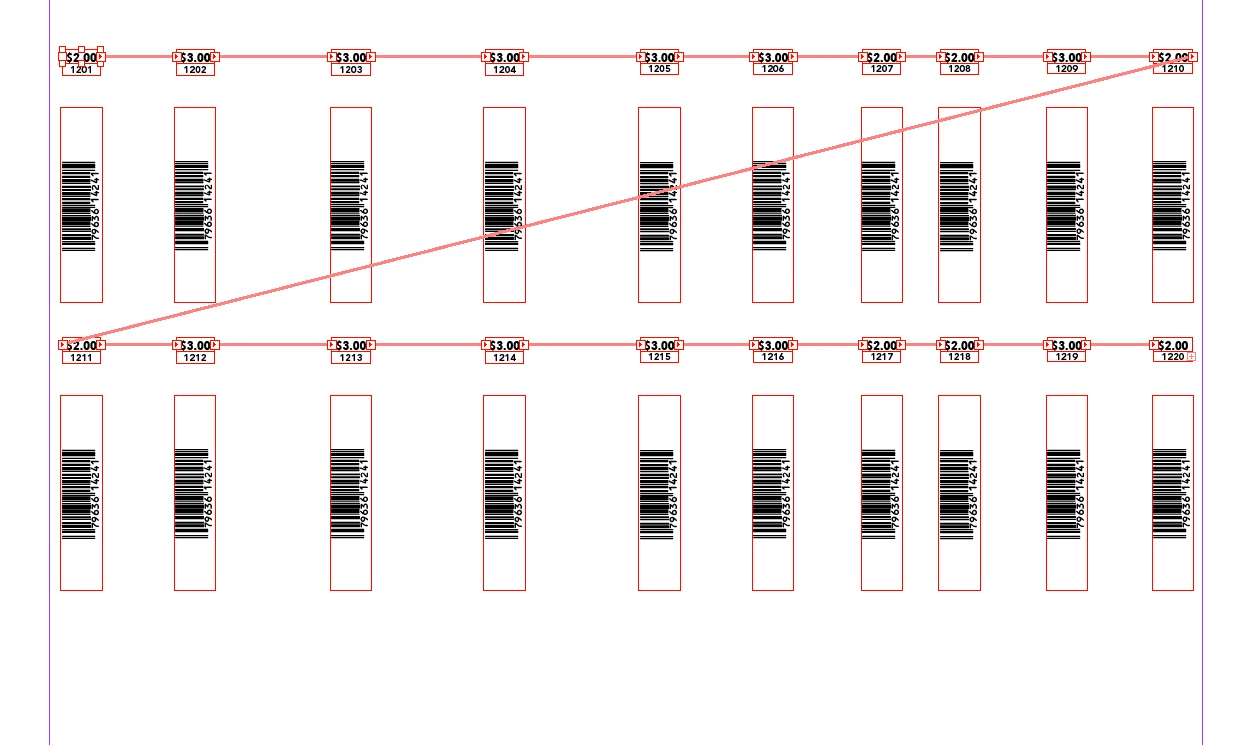
I am doing large layouts of shelf tags that incorporate multiple threaded text boxes to hold prices, upcs and position numbers of items. All of the price boxes are threaded in one thread, the upcs in another, and the position numbers on a third.
My question is this: I have to increase the size of the prices, which is knocking them out of their individual text boxes. Is there any way to do a find/change of the boxes en masse? I have tried searching by the size, but ID isn't able to find anything by the criteria I have tried. Below is a screenshot of how the files are set up and threaded (this is just a sample--I have literally thousands of these boxes to alter).
I am working in CC 2015. Any help would be GREATLY appreciated!
Thanks-
Nita
Copy link to clipboard
Copied
Hi,
Does this mean their text frames would be bigger? …
(^/)
Copy link to clipboard
Copied
An Object style in InDesign CC 2018 allow you to define the Height and Width of these same boxes. A great help for your project!
A Find/Change can hunt for your textboxes. Go to the Object tab.
Copy link to clipboard
Copied
… But we are in CC 2015, Michael!
(^/)
Copy link to clipboard
Copied
… And a small script -- very time-saver -- could be useful!
Just place the cursor in the "prices" story ["blue"], 1 click … and it's done!
(^/)
Copy link to clipboard
Copied
https://forums.adobe.com/people/Michael+Witherell wrote
An Object style in InDesign CC 2018 allow you to define the Height and Width of these same boxes. A great help for your project!
A Find/Change can hunt for your textboxes. Go to the Object tab.
Hi Michael,
even the new feature in CC 2018 would not help that much in this case.
If you'd create a new object style with height and width values and apply that to already made text frames, you'll end up with overrides you have to remove individually for all elements.
What will help is the following method ( no script involved 😞
1. Resize one of the text frames, change e.g. the height.
2. Select others and do:
Object > Transform Again > Transform Again Individually
From my German InDesign:
One text frame selected. New values for height typed:
Successfully changed height:
Select all other text frames of the same story.
Transform Again Individually:
Done:
Regards,
Uwe
Copy link to clipboard
Copied
Hi Uwe,
Imho, just a small problem! … Not sure the op only plays on one single page!
That's why I use a script.
(^/)
[Such a script is not proposed for free because I think such a gratuity no longer values scripters' real work and knowledge, as it may have been the case by the past!]
Copy link to clipboard
Copied
You guys are right. I mentioned 2018 version because I am impressed with the new aspects of the Object Style feature. I figure if someone is in 2015, they can easily upgrade to 2018, and move the project into that version.
Copy link to clipboard
Copied
Here is a commercial plugin that does this same sort of work:
Indiscripts :: Equalizer PRO 3.0 released!
Copy link to clipboard
Copied
Equalizer won't do it for the same reason I indicated!
(^/)
Copy link to clipboard
Copied
https://forums.adobe.com/people/Michael+Witherell wrote
… I mentioned 2018 version because I am impressed with the new aspects of the Object Style feature. …
Hi Michael,
basically I agree. But one has to select the items spread by spread to change the applied object style.
A script could perhaps help to do it on document level. But that would require a sample document one could inspect.
Regards,
Uwe
Copy link to clipboard
Copied
https://forums.adobe.com/people/Michael+Witherell wrote
… I mentioned 2018 version because I am impressed with the new aspects of the Object Style feature. …
And there is another hurdle with the new feature in CC 2018.
Let's assume the height of a text frame should grow in a distinct direction.
If the direction is not from top to down we could not use the new feature without repositioning every text frame after applying the object style.
For height and width we simply have no option where the fixed-point is.
The fixed-point is always on the left upper corner of an object.
Regards,
Uwe
Copy link to clipboard
Copied
A video is always clearer for understanding! … even if this one is not truly spectacular!
(^/)

