

- Home
- Lightroom Classic
- Discussions
- Re: LR BUG? More noise in LR than in Photoshop whe...
- Re: LR BUG? More noise in LR than in Photoshop whe...
LR BUG? More noise in LR than in Photoshop when loading JPG

Copy link to clipboard
Copied
Hi all!
When loading JPEG in lightroom, I can see noise shaped like short horizontal segments of lines.
This does not appear in other images viewer such photoshop or GIMP. Is it a Lightroom BUG ?
how to avoid this bad looking noise ?
Here is the comparison, I increased the contrast so you can see it easily:
Left: Lightroom (Classic CC Version 1.4, Camera Raw 10.4), top right: photoshop.

GIMP behave like photoshop.
Here is the original picture:
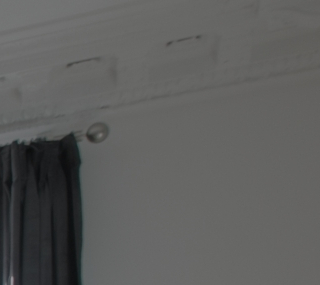
Thanks for your help.


 28
Replies
28
28
Replies
28

Copy link to clipboard
Copied
Does this happen with all JPGs?
Does it happen if the GPU (Graphics Processor) is turned off or on, whatever is different than now?
Can you provide a link to the original JPG on somewhere like dropbox or googledrive or onedrive and let us see if the same happens for us?
Copy link to clipboard
Copied
It happens on LR develop, on all JPG, with or without GPU, same kind of noise
Here is the image:
https://drive.google.com/file/d/1YFW5jr0rHjdCynY6aOWk4BuAK8gufHfv/view?usp=sharing
Copy link to clipboard
Copied
That link is private, for you only, not public, for everyone, or access to that image needs changed to public, at least temporarily.
Here is what I see logged in as me when I click on it, and I'm not going to request permission:


Copy link to clipboard
Copied
In your catalog settngs, what do you have previes set for? Size and quality.
Copy link to clipboard
Copied
This is in Develop which doesn't use previews, right?
Copy link to clipboard
Copied
Here is the link with read access: photo-47299817-001-002-003-reworked(1).jpg - Google Drive
I'm viewing it in Develop yes !
Thanks a lot for your help
Copy link to clipboard
Copied
I see the same thing with the JPG you shared:
In LR 8.0 and PS 20 / ACR 11.0 plug-in the banding occurs.
In PS 20 / ACR 11.0 *filter* there is no banding.
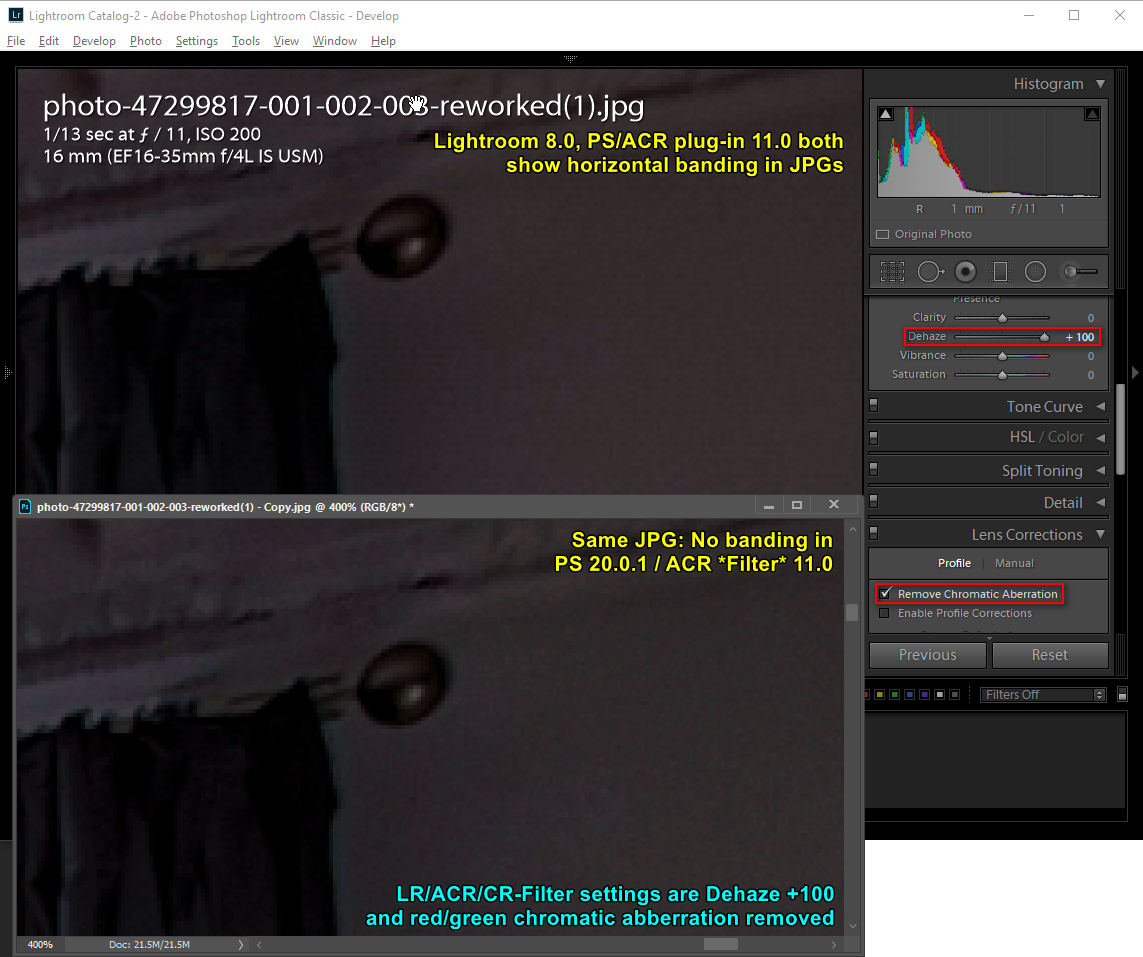
The JPG didn't appear to have any embedded Camera Raw settings. I mostly added Dehaze +100 to make the banding more visible but also removed most of the red/green chromatic aberration that was a bit distracting. but the CA removal didn't affect the banding.
Can you upload the original raw to the same Google drive and share it? Or maybe a DNG with the settings embedded?
Copy link to clipboard
Copied
Develop uses previews, every image you see in LR is a preview.
One followup, the Library module and the Develop module use different color space, Library uses one as to allow that module to function quicker, Develop uses a more robust one as to have more accurate colors. Always view the image in Develop when you are inspecting them for quality.
In certain situations, images with lots of noise is one, heavy nasty contrast another, the Library module can look so different from the Develop module , you would think something is broken. (learned that yesterday)

Copy link to clipboard
Copied
Quote "Develop uses previews, every image you see in LR is a preview."
Just so you are aware when you access image files in the Develop Module, Lightroom renders the original imported file and applies any develop or other edits you have applied to the image and displays the results on your screen utilising a variant of Pro Photo RGB working color space. This is the default and there is no option to change this option. Every change you make in the develop module Lightroom will re render the original file and the display will change. If the original file is not available you will have to have built Smart Previews to work in the Develop Module.
When you work in the Library and other Modules Lightroom will work with the Lightroom previews built at import and adjusted when you make adjustments in the Develop Module. The Preview files are in AdobeRGB color space. Again there is no to change the color working space. This is why you may see a slight differences on your monitor even if it is profiled and calibrated. Working with the previews allows the Library Module to move from image to image more quickly than when you are in the develop module.
Copy link to clipboard
Copied
Try your sample again, this time comparison (Lightroom) in Develop Module (sure looks like your were in Library Module)

Copy link to clipboard
Copied
matthieug84604588 wrote
Here is the comparison, I increased the contrast so you can see it easily:
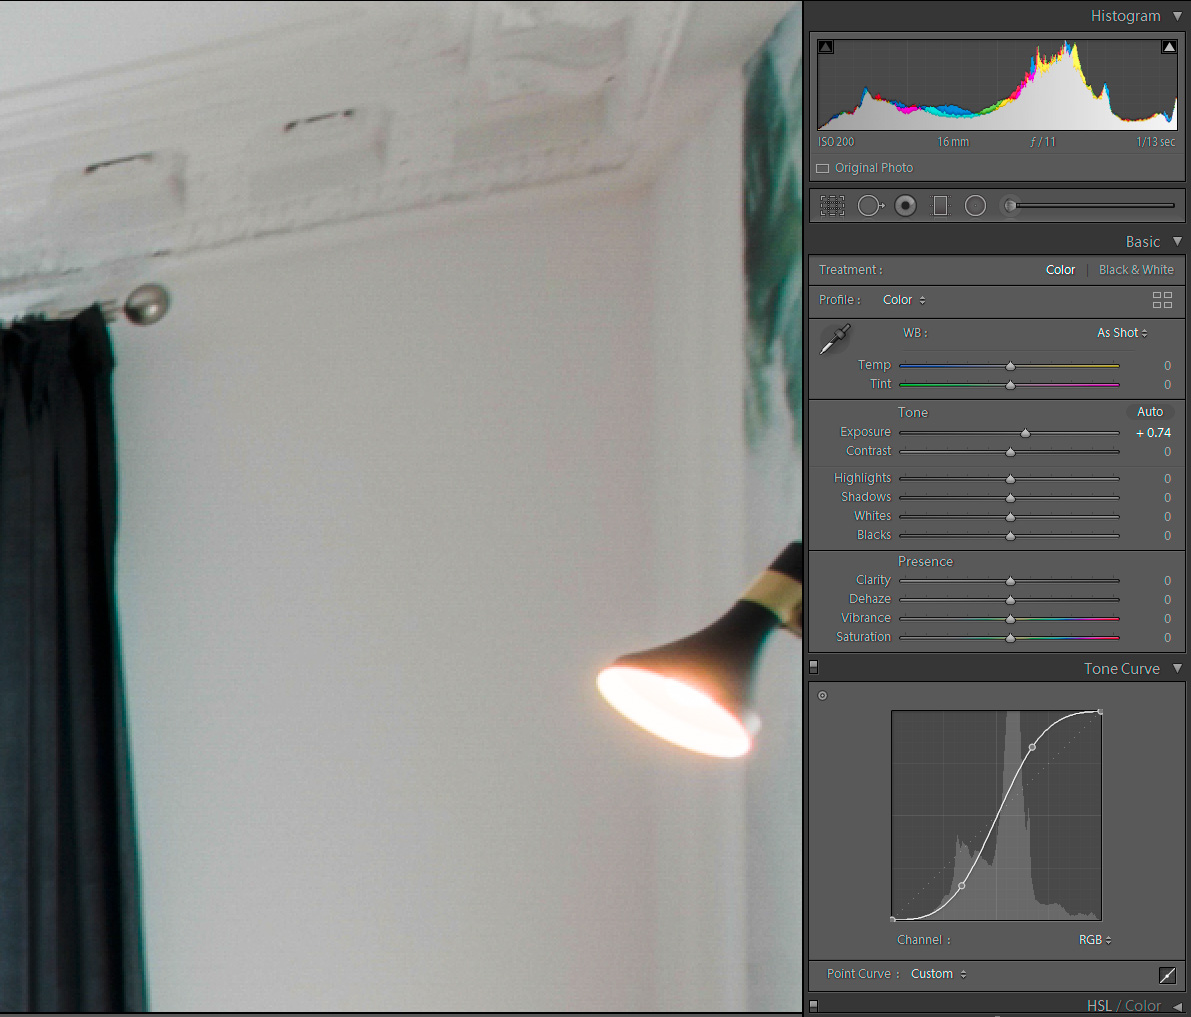
The JPEG you uploaded has very low contrast, exposure, and sharpness. This requires increasing the exposure, contrast, and sharpening inside LR, which reveals sensor noise and JPEG compression artifacts. You can work around this issue by using LR's Basic and Detail panel controls as shown below.
A better solution is to adjust the camera's settings to obtain an image file with normal exposure, contrast, and sharpness.

_Edits.jpg)
Copy link to clipboard
Copied
Exactly the sort of image that can look different in Library as opposed to Develop.

Copy link to clipboard
Copied
The interface in your screenshot looks incredibly strange. Extremely high contrast also in the interface elements like the menu bar and the buttons. Do you have a mode turned on such as increased display contrast? This is done in the system preferences on your mac in Accessibility->Display. You should not have anything enabled and the display contrast should be set to normal. It looks as if you have it dialed up. This will mess with the image display in Lightroom otherwise.
Copy link to clipboard
Copied
Sorry you wrote that you increased the contrast on the screenshot. I checked your file and you are right if you dial in an extreme tone curve on it it will show stripes. Doing the same thing in Photoshop does not show the stripyness. This looks like a weird bug to me. Nothing to do with the GPU. No clue what causes it. Please report at https://feedback.photoshop.com
Copy link to clipboard
Copied
https://forums.adobe.com/people/Jao+vdL wrote
I checked your file and you are right if you dial in an extreme tone curve on it it will show stripes.
Jao I'm not seeing that on my Windows 7 system.
I also need to add sharpening and a high Dehaze setting to reveal any pattern artfacts, which look like sensor noise and JPEG compression artifacts.
Copy link to clipboard
Copied
I’ll show a screenshot later when I am at my computer. You need to dial in
an almost vertical tone curve adjustment in the higher range of the image
and you get al kinds of striped artifacts that don’t happen with the same
curves in photoshop. They’re invisible without the extreme curve so it
seems this is related to how Lightroom is reading the jpeg file somehow.
I’ve never seen anything like this in my own files.
On Wed, Nov 14, 2018 at 5:45 PM Todd Shaner <forums_noreply@adobe.com>
Copy link to clipboard
Copied
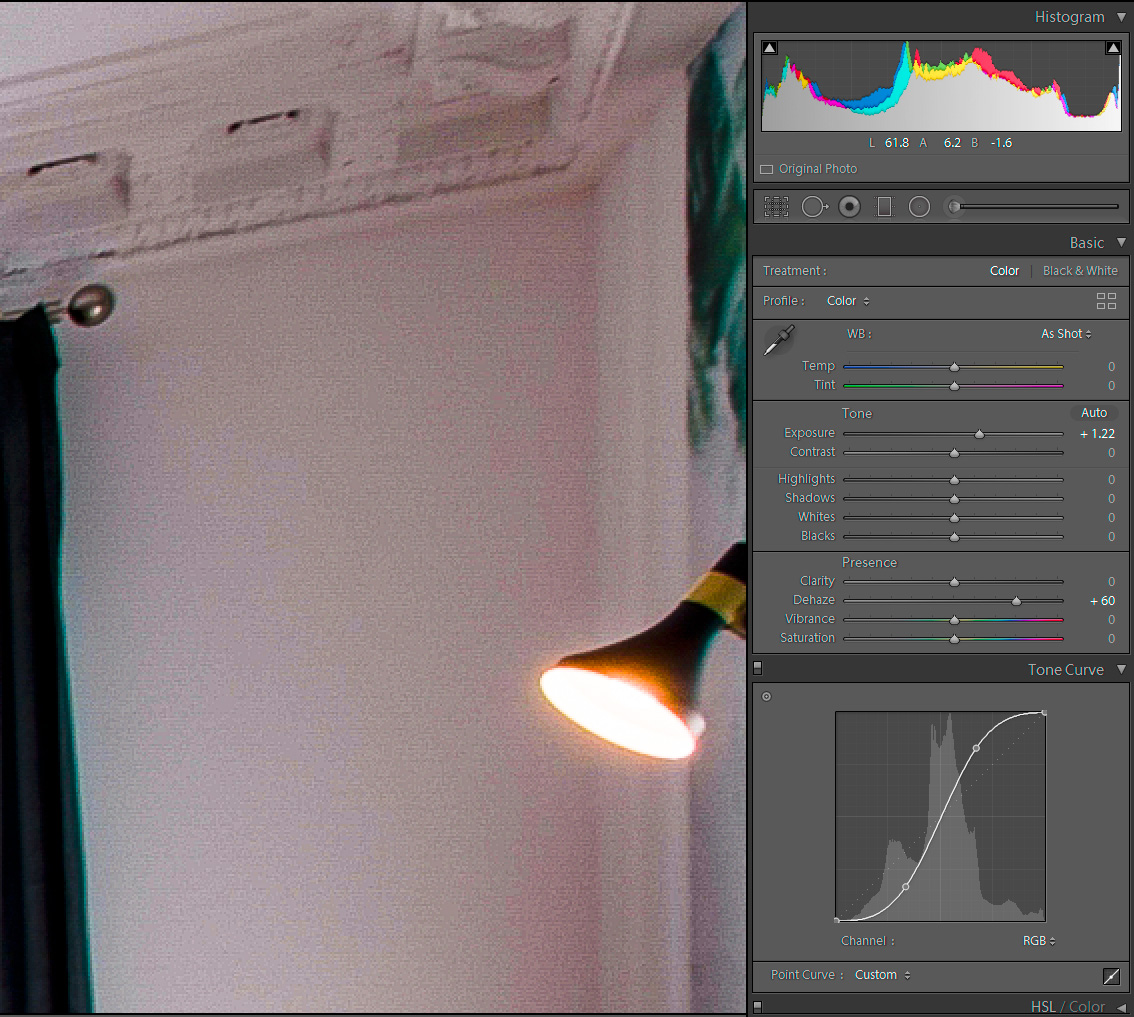
Just Dehaze + 100 is enough to show the stripes. No need for tone curve and sharpening.
Copy link to clipboard
Copied
Did you edit the image in Photoshop, create some layers in Photoshop, then save with the layers? Then back to Lightroom?
Copy link to clipboard
Copied
It doesn't matter what was done to create the JPG.
The point is that the same JPG is being used as input to LR/ACR-plug-in vs ACR-filter with the same settings applied and it looks different between the two.
Copy link to clipboard
Copied
ssprengel wrote
It doesn't matter what was done to create the JPG.
The point is that the same JPG is being used as input to LR/ACR-plug-in vs ACR-filter with the same settings applied and it looks different between the two.
The only difference between the two methods is what code read the jpeg. If you use ACR as filter, the image data was already loaded into a Photoshop buffer and that data gets run through the ACR code. If you open the jpeg directly in ACR or Lightroom, it uses it's own jpeg decompression code instead of Photoshop. That is perhaps where the problem occurs.

Copy link to clipboard
Copied
https://forums.adobe.com/people/Jao+vdL wrote
ssprengel wrote
It doesn't matter what was done to create the JPG.
The point is that the same JPG is being used as input to LR/ACR-plug-in vs ACR-filter with the same settings applied and it looks different between the two.
The only difference between the two methods is what code read the jpeg. If you use ACR as filter, the image data was already loaded into a Photoshop buffer and that data gets run through the ACR code. If you open the jpeg directly in ACR or Lightroom, it uses it's own jpeg decompression code instead of Photoshop. That is perhaps where the problem occurs.
There is another possible difference. Comparisons are being done at 400% and it can't be assumed that PS and LR/ACR use the same up-sizing algorithms. I find it hard to react seriously to artifacts and "bugs" that are only visible at 400%.
Copy link to clipboard
Copied
In my reply #9 I was able to get a good rendering after making some LR adjustments so perhaps not a "big issue." However, there's no question LR/ACR and PS are rendering the JPEG image data in this file differently.
I can clearly see the artifacts at 100% view in PS. Using 'Edit in PS' with 'Edit a copy with LR Adjustments' shows the same line-artifacts inside PS. I checked ProPhoto RGB 16 bit and sRGB 8 bit 'External Editing Preferences' with no settings applied. This eliminates the LR display path as the source so it appears LR is reading the JPEG image data differently than PS.
(click on image to see full-size)

Copy link to clipboard
Copied
Thanks Todd, you have my point: JPEG is a standard, two different image viewers should show the same image the same way. I tried a bunch of viewers and all agree with photoshop. Only LR differs, there must be a bug in the code reading JPEGs in LR.
Are you guys working inside Adobe ? could you report the bug to the Lightroom team ?
Thanks for you help!
Copy link to clipboard
Copied
You can report this as a 'Problem' at the below forum, which is monitored by Adobe Engineering. You'll need to provide more information on how the JPEG file was created and if the original is a raw file. You'll need to upload both files to a file sharing site and provide the share link in your report. Please also place a link to this LR forum post in your report and when completed place a link to the Photoshop Family report in a reply back here. Thank you!
-
- 1
- 2

Find more inspiration, events, and resources on the new Adobe Community
Explore Now
 AdChoices