Exit
  • Global community
    • Language:
      • Deutsch
      • English
      • Español
      • Français
      • Português
  • 日本語コミュニティ
  • 한국 커뮤니티
0

3D Text Help

Explorer ,
May 06, 2018 May 06, 2018

Hi everybody!

I need help with Adobe Photoshop 2018 CC, I'm really good at editing and photoshopping but I'm new to 3D Text and I created a fake box art image of "Super Mario Sunshine HD for Nintendo Switch" just for fun but I want the "HD" text part in the text to be 3D and I know how to covert it to 3D and rotate it around and stuff but as you can see from the picture down below, I made the "HD" text look like the original logo and I even have the same Gradient as the original logo but I just want the "HD" part to be a little bit more 3D-Ish and have a black & white outline like the original logo. I have tried watching/reading Tutorials about 3D Text but none of them help because they aren't that clear and usually most of the footage they show is on older versions of Adobe Photoshop. If somebody could comment detailed clear instructions down below I would extremely appreciate it! Thank you, have a great day and God bless!

Super Mario Sunshine HD.jpg

1.3K
Translate
Report
Community guidelines
Be kind and respectful, give credit to the original source of content, and search for duplicates before posting. Learn more
community guidelines
Adobe
Community Expert ,
May 06, 2018 May 06, 2018

Hi

You can make the "HD" lettering into a 3D extrusion by tracing with the pen tool,  copying it onto it's own layer and making a 3D extrusion from the pen path. To get the black line around the whole extrusion use Layer Effects >Stroke after rendering.

Dave

Translate
Report
Community guidelines
Be kind and respectful, give credit to the original source of content, and search for duplicates before posting. Learn more
community guidelines
Explorer ,
May 06, 2018 May 06, 2018

Hi Dave!

Thank you for responding!

I found your answer a little helpful but it's confusing to me since I'm an idiot, haha.

You made the "HD" text look awesome and you made it look just like to original logo!

Do you mind giving me a "Step-By-Step" reply with tons of pictures or a video so I can understand it more.

I apologize and I'm not new to photo editing and I'm pretty tech savvy and great with computers and I can even make NES games but usually the only way I learn new stuff is by reading/watching really detailed instructions because I get so confused or distracted..

If you have a YouTube Channel I will give you a shoutout and tell everybody to Subscribe to you!

Thank you, have a great day and God bless!

-Pikamon101

Translate
Report
Community guidelines
Be kind and respectful, give credit to the original source of content, and search for duplicates before posting. Learn more
community guidelines
Community Expert ,
May 07, 2018 May 07, 2018

Hi

Here are the steps I used:

1. Trace the Lettering with the pen tool to create a path

2. In the paths panel click to make a selection from the path

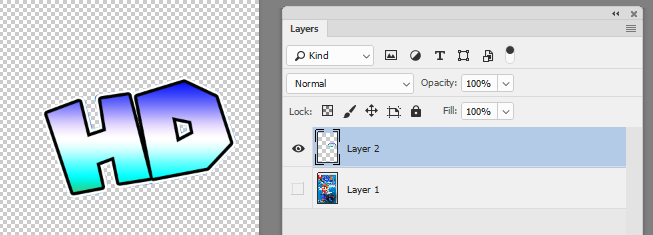
3. Press Ctr+C to copy the selection  then Ctrl+J to create a new layer with just the lettering copied to it. Temporarily turn off the image layer

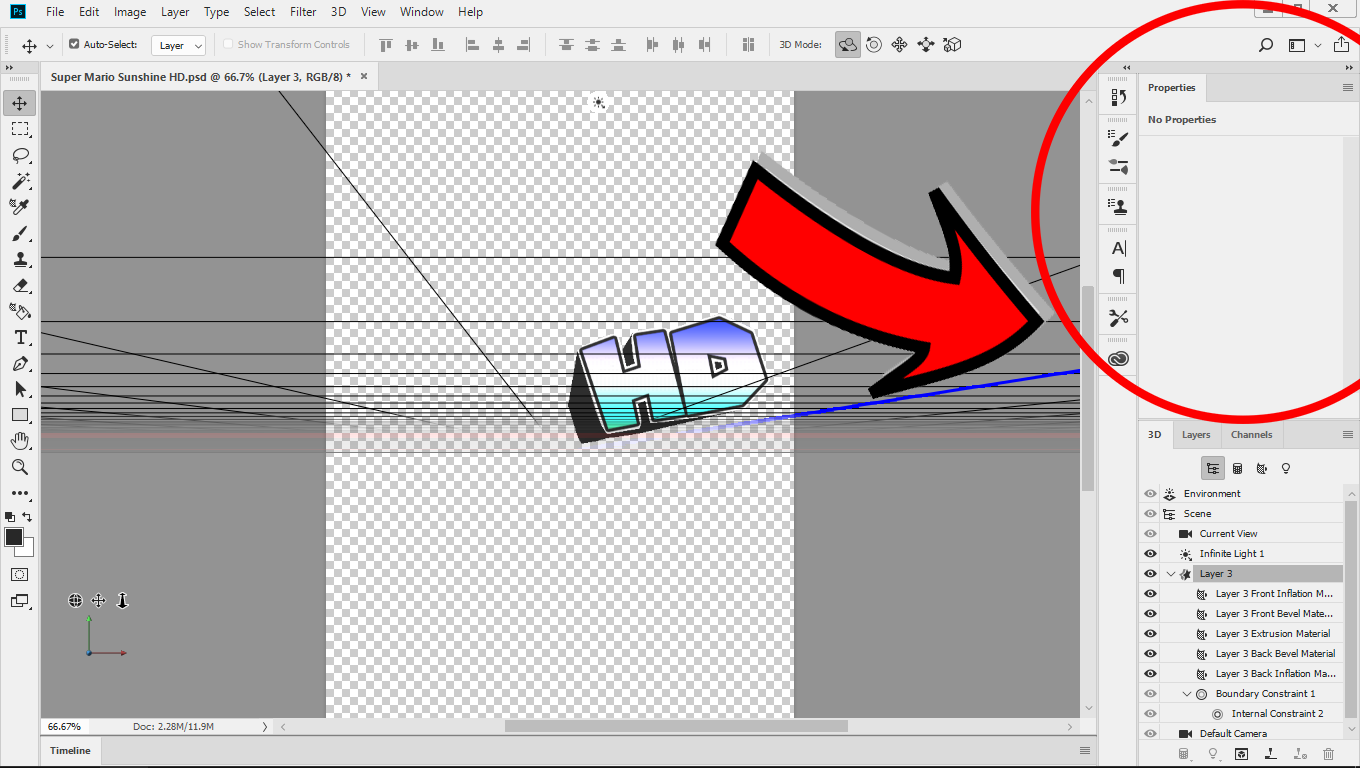
4. In paths panel - click on the path then use 3D > New 3D Extrusion from Selected Path

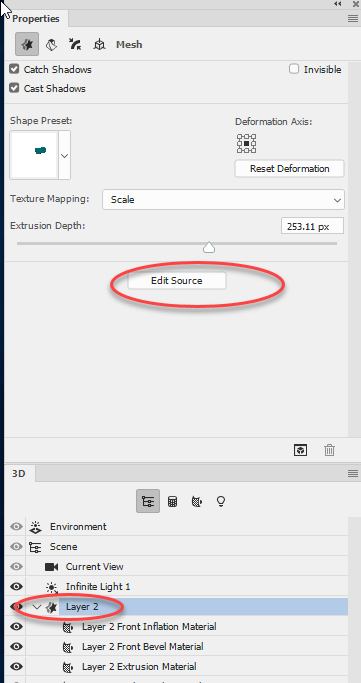
5. In the £D panel select the mesh and in properties adjust the extrusion depth

6. Select the extrusion material and in properties set the diffuse color to blue. I also added an illumination set to dark blue just to cheat and fill the shadows

7. Add an infinite light and adjust its position and brightness to light the side (there will already be an infinite light lighting the front

8. Go to Environment and turn ground plane shadows to 0%

9. 3D>Render 3D layer

10 In the layers panel - right click the layer and choose Blending Options. Add a stroke set to outside, multiply Fill type color and black

11. Done

Dave

Translate
Report
Community guidelines
Be kind and respectful, give credit to the original source of content, and search for duplicates before posting. Learn more
community guidelines
Explorer ,
May 07, 2018 May 07, 2018

Hi Dave!

Thank you for responding and thank you for making it really detailed and for giving tons of pictures!

I did all the steps until Step 4 because the menu's/windows were keep jumping around and closing and now my Adobe Photoshop 2018  is messed up because all the windows are gone and I can't get it back to normal and I want to make the UI/Menu's easier to use and maybe remove some useless stuff from the UI.

I know I'm probably making you really frustrated and annoyed at me but I really appreciate your help and I need somebody like you to teach me to make Adobe Photoshop easier.

Thank you, have a great day!

-Pikamon101

PS: This is what my Adobe Photoshop 2018 currently looks like

Screenshot (12).png

Translate
Report
Community guidelines
Be kind and respectful, give credit to the original source of content, and search for duplicates before posting. Learn more
community guidelines
Community Expert ,
May 07, 2018 May 07, 2018

You can reset any of the workspaces (and also save your own).

Go to the top right of the options bar and click on the down arrow. Select the workspace e.g. 3D  then click reset 3D (or reset whatever workspace you chose)

Dave

Translate
Report
Community guidelines
Be kind and respectful, give credit to the original source of content, and search for duplicates before posting. Learn more
community guidelines
Explorer ,
May 07, 2018 May 07, 2018

Hi Dave!

I had it at this menu and was changing the Extrusion Depth...

pastedImage_4.png

And then this happened and I tried Window > Workspace > Reset 3D and it still didn't do anything...

Screenshot adobe photoshop.png

Translate
Report
Community guidelines
Be kind and respectful, give credit to the original source of content, and search for duplicates before posting. Learn more
community guidelines
Community Expert ,
May 07, 2018 May 07, 2018

Hi

That is a bug which occasionally surfaces in the recent versions of Photoshop. Just click on the 3D camera in the 3D panel and the properties should re-appear. Then go back to the mesh/material

Dave

Translate
Report
Community guidelines
Be kind and respectful, give credit to the original source of content, and search for duplicates before posting. Learn more
community guidelines
Explorer ,
May 07, 2018 May 07, 2018

Hi Dave!

Good news! I followed all of your steps and it turned out pretty good!

Tell me what you think! (Also I added a Rainbow Marker Scribble Gradient behind the "HD" text just like on the "Super Mario Sunshine" logo)

Super Mario Sunshine HD.jpg-1.png

I only have 2 problems...

1: For some reason I can't change the Gradient or the Gradient Angle on the "HD" 3D text anymore..

2: Is there a way to make the Extrusion look more like a "Blue Crystal" style like the original logo?

If you see something I should improve/fix or if you have anymore tips let me know!

Thank you, have a great day and God bless!

-Pikamon101

Translate
Report
Community guidelines
Be kind and respectful, give credit to the original source of content, and search for duplicates before posting. Learn more
community guidelines
Community Expert ,
May 08, 2018 May 08, 2018
LATEST

1. You can edit the texture for the front material by clicking here :

2. Play around with the materials , the lights and perhaps add a bevel. (If you do add a bevel you will need to alter the path of the extrusion so it is not hidden by the existing material.
You can edit the path by clicking here :

Dave

Translate
Report
Community guidelines
Be kind and respectful, give credit to the original source of content, and search for duplicates before posting. Learn more
community guidelines