Copy link to clipboard
Copied
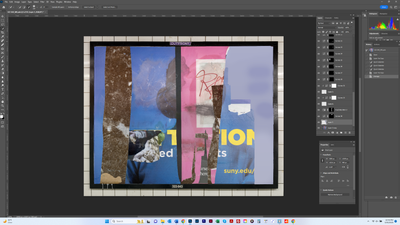
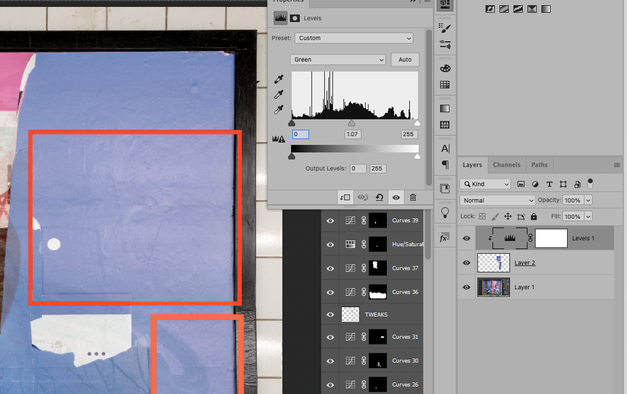
I'd be interested in hearing how folks might solve this problem: In the image of a poster below, the areas inside the red rectangles were affected by lighting such that the exposure and color of the poster shifted in those areas from what was above and below them. I tried applying a curves adjutsment layer and playing with exposure and color inside the adjustment layer but it was a lot of work and still imperfect. Is there a better way? I want more or less uniform color of blue, brightness and saturation for the blue area on the right. Thanks.
 1 Correct answer
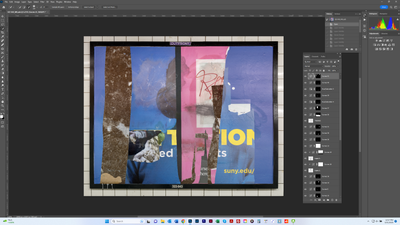
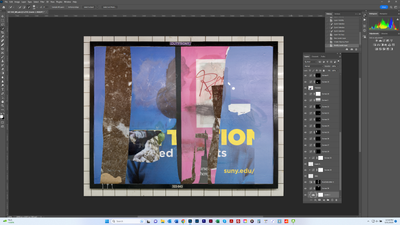
Thanks for that. I ended up going back to my original solution - which was to add adjustment layers to incrementally match up color, brightness and saturation. I'm not sure it was the best method - or at least the quickest - but I'm fairly happy with the result - before and after shots below. It's good to know about the different options for matching color. Dave's solution also looks quite good - he's probably better at frequency separation than I. My problem is that I rarely separate textu
...Explore related tutorials & articles
Copy link to clipboard
Copied
You might duplicate the layer first. Then select the portion of the image where you want the color to be more uniform and use Filter > Blur > Average. Photoshop will blend the colors in the selection to that average color. It'll be a solid color, so you might lower the opacity of that layer in the Layers panel to make it look more natural.
Copy link to clipboard
Copied
Thanks, but the result was not quite what I wanted. I selected just the drak blue area on the right of the image, and copied it to its own layer, and then applied the Filter>Blur>Average. Actually, I don't really want a solid color - if that means getting rid of texture, as in the result below. Also, I want to preserve the darker areas of blue, and just make the parts that are blown out towards the middle and lower portions conform to the darker blue. If you have any other suggestions, please let me know. Thanks again.
Copy link to clipboard
Copied
You might try making the content a Smart Object and then using the Camera Raw filter on it. Here's how:
- Select the poster layer, right-click, and select Convert to Smart Object or go to Layer > Smart Objects > Convert to Smart Object
- With the Smart Object layer selected, go to Filter > Camera Raw Filter...
- In Camera Raw 15.2, on the far right side, click on the Masking icon (3rd icon from the top)
- Use any of the masking tools (likely the Objects one) to select the portion of the blue that you want to change (You might us the brush to feather the selection if you want it to blend with the blue that is the color you want).
- Below the mask in the same panel, use the sliders to adjust the color of the selected area
- Try dragging the Exposure setting to the right and adjusting the Color Temperature and Tint
Copy link to clipboard
Copied
Hi,
I think you can do the color change you want with Levels. You will probably need to do a little Cloning to cover the edges, but I hope what I'll show you below gets you most of the way there.
First make a selection of the area you want to change and move it to a new layer (Control-J). The better the selection you create, the less work you will have to do to clean up.
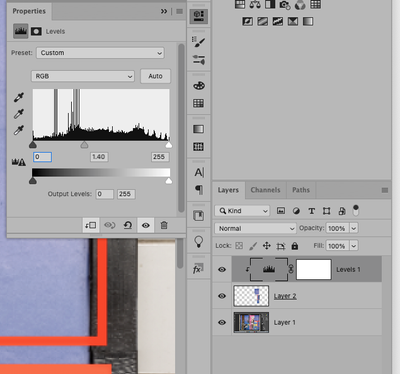
Then create a Levels Adjustment Layer by clicking on the Levels icon in the Adjustments Panel. Create a clipping group by holding down the Alt key and clicking on the bottom edge (Line) between the Adjustment Layer and the layer you copied. in the Layers Panel. While holding down the Alt key you should see the cursor turn inPo a arrow pointing down, click and this will clip the Adjustment Layer to only affect the layer beneath it and not the whole document. You will see the Adjustment Layer Icon move to the right and a little down arrow on the layer to show it is clipped to the layer below.
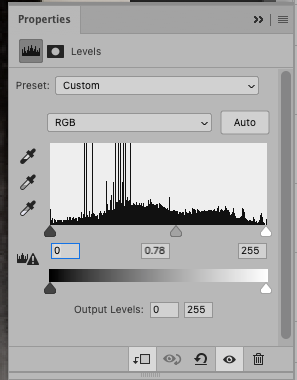
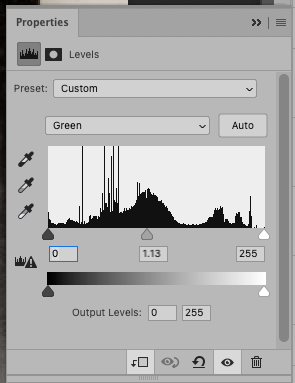
In the Levels Adjustment Properties (if it's not open, click on the Levels Adjustment Layer to open it) move the Gray cursor in the middle to the left to 140:
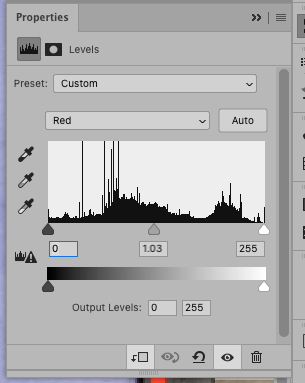
Then change the RGB dropdown just above the Histagram to Red and change the middle Gray slider to 103
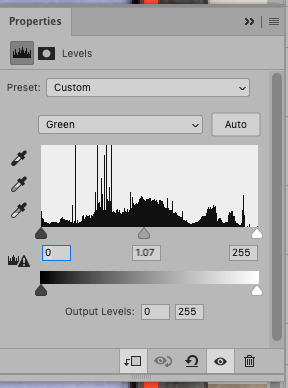
Next Select Green from the pop down menu and change the middle slider to 107.
This will be the result. Now you may have to make a few adjustments because I was working with a low resolution image and work around the red lines. But this should get you most of the wah there.
If you are happy with the color I would suggest merging all of the layers to a new layer. Control-Shift-Option-E. This will create a new layer on top of all of your existing layers. The next thing you will want to do is some cloning stamp work to fix edges and continue some of the textures into this new area you created.
Let us know if this helps or if you have any questions?
Michelle
Copy link to clipboard
Copied
Hi Michalle, thanks for your help. I'm attaching before and after screen shots of my work. My suspicion is that you thought I wanted the dark blue section of the poster on the right (shaped kind of like the left half of a "T") so match the lighter blue in the rest of the panel. But these were actually 2 different poster layers and I wasn't wanting to match them. What I wanted to match were the same blues within the darker blue section on the right. These were the areas in the middle and lower middle of the poster that were blown out due to the lighting conditions and shown inside the red rectangles in my screenshot in the first post. I just wanted to make them more or less the same values as the dark blue right above and beneath them. I am guessing that this might be more than Photoshop can handle, although I had thought it might be possible. Thanks again for your help.
Copy link to clipboard
Copied
You could also use Selective Color or desaturate reds/magentas in that area. Or, paint over it (or on another layer) with a blue brush set to color mode at a low opacity.
Copy link to clipboard
Copied
I think Photoshop can do it, I just need to know which color you want. 🙂
Circle the area/color you want to duplicate and then circle the area/color you want to replace so I know what to shoot for?
Thanks,
Michelle
Copy link to clipboard
Copied
Thank you, Michelle. The areas inside the red rectangles reflect what I want changed, and the area inside the green rectangle reflects the values I want them changed to, in temrs of exposure, hue and saturation, more or less.
Copy link to clipboard
Copied
I think this gets close, with the exception of highlighting on the paper, the overall tone is close to the area in the green outline
Let me know what you think?
Michelle
Copy link to clipboard
Copied
Thanks,. Michelle. It's kind of hard to know without a side by side comparison of before and after. I think it's closer but there is still the highlighting, as you mentioned. I'm alspo not suirfe what you did - made a selection of the area you showed, copied it to its own layer, and applied the changes to that layer?
Copy link to clipboard
Copied
Yes--the change I applied to the layer was an Levels Adjustment layer and applied the changes to the RGB channel, th Red Channel and the Green Channel. (see the steps above).
I'd like to offer one more suggestion. Unless you can't live without that paper type texture, I would suggest, deleting all of the area in blue, and finding a texture you like and put that in the background. I think it would be easier to select the blue paper and delete it than try to fix it. You could probably find a paper texture that is reallly close and then use an Adjustment layer to get it to the deep blue if you specifically want that color. Then the texture would be on it's own layer and look much cleaner.
Let me know if you need help with the process, or if you have any questions, and I will be happy to help.
Michelle
Copy link to clipboard
Copied
Hi, @bartonlew do you still want to have the texture in those areas? Then you might want to sample the wanted color, then paint in color mode to get the same hue, but keep the texture intact
If you want to get rid of the texture, exploring Frequency Separation might be a venue to explore: https://www.adobe.com/max/2020/sessions/frequency-separation-20-part-1-photoshop-fs20-reto-l6153a.ht...
Copy link to clipboard
Copied
If it were me, I would probably use curves to desaturate a bit and then a brush in color mode to change the color. I'd have that fixed up in about five minutes. 🤷:male_sign:
Copy link to clipboard
Copied
Set the brush to Color blending mode. Blending modes are one of the semi-hidden but REALLY useful features in Photoshop.
Copy link to clipboard
Copied
Yes, I absolutely want to retain the texture, which is why I did not go the frequency separation route. I am unfamilair with color mode, which you and Lumigraphics both recommended. Seacrhing youtube for "color mode" produces a variety of results, like "color management," "color matching" and "LAB Color Mode" - and nothing very recent (most vids at least 5 years old). Can you point me to a more recent tutorial on this tool and also where it is? Thanks.
Copy link to clipboard
Copied
Hi again,
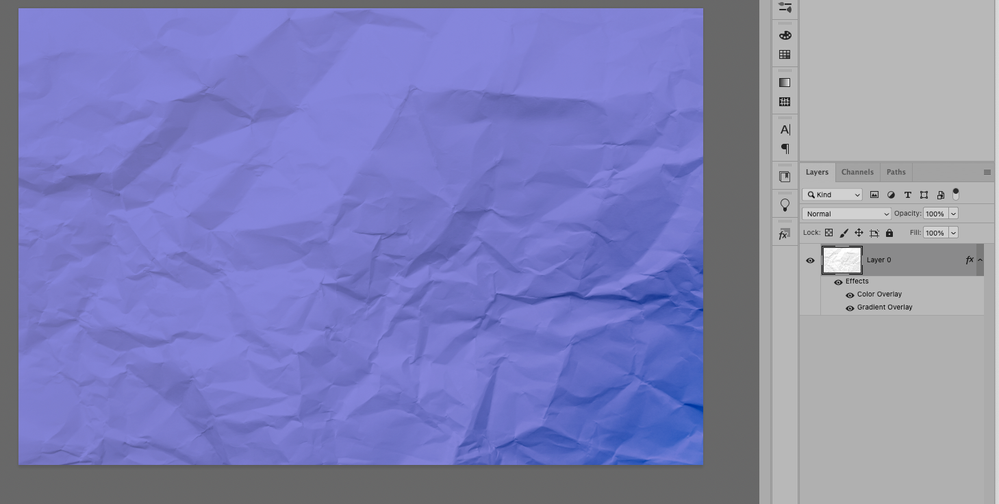
I downloaded a Free stock paper texture from the adobe website and added two layer styles--1 color overlay and 1 Gradient overlay. You can get some interesting textures and then color them to the way you want. That way, you don't have to work so hard at fixing the texture that you have. Here is the sample:
Let me know if you want the specfics that I added in the Color and Gradient overlay.
Michelle
Copy link to clipboard
Copied
Thanks, Michelle, I don't want to use another image for the problem areas, so I will just find a way to make do with what I have. I do appreciate your help, and believe I will at least be able to improve it, using your suggestions and the others here.
Copy link to clipboard
Copied
I'm not sure I understand exactly what you want, but here is a suggestion.
Select the areas you want to change.
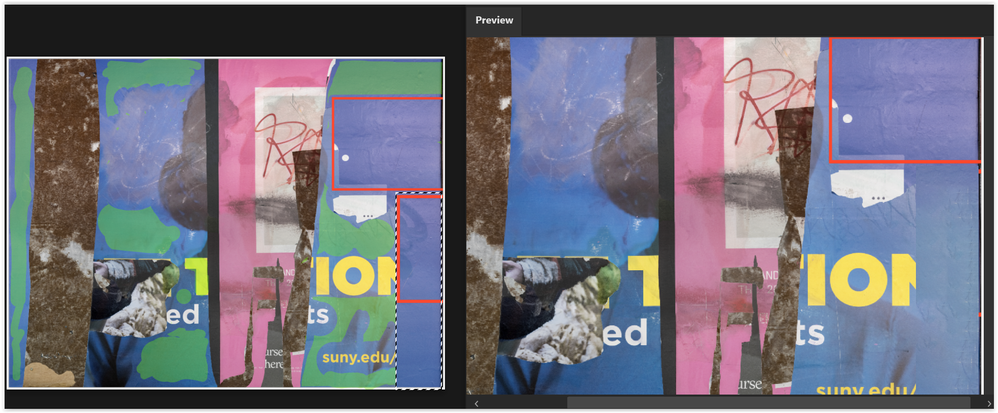
Choose Edit > Content Aware Fill.
The fill will be taken from whereever the image is highlighted. The Preview window shows the results.
Drag over the highlighted area with the Sampling Brush to remove parts of the highlighted areas that you don't want to copy from. Hold down Alt/Option to add to the highighted areas.
When you click OK, the program defaults to putting the adjustment on a new layer.
You can see below that I selected a rectangular area in the lower right of the original. Green highlight shows where the pixels are copied from and the Preview shows what it will look like when you click OK.
Copy link to clipboard
Copied
Thanks, Barbara. I didn't completely understand how this works but from what I could tell, it samples pixels from other areas of the image, and I really don't want to do that. I just want to affect color, saturation and exposure without copying from other parts of the image. Other posters have referenced "color mode" but I have not been able to determine where that tool/feature is or if it is under some other name. Do you know what they are talking about? Thanks.
Copy link to clipboard
Copied
You are exactly right about the way it works.
Thanks for the further explanation.
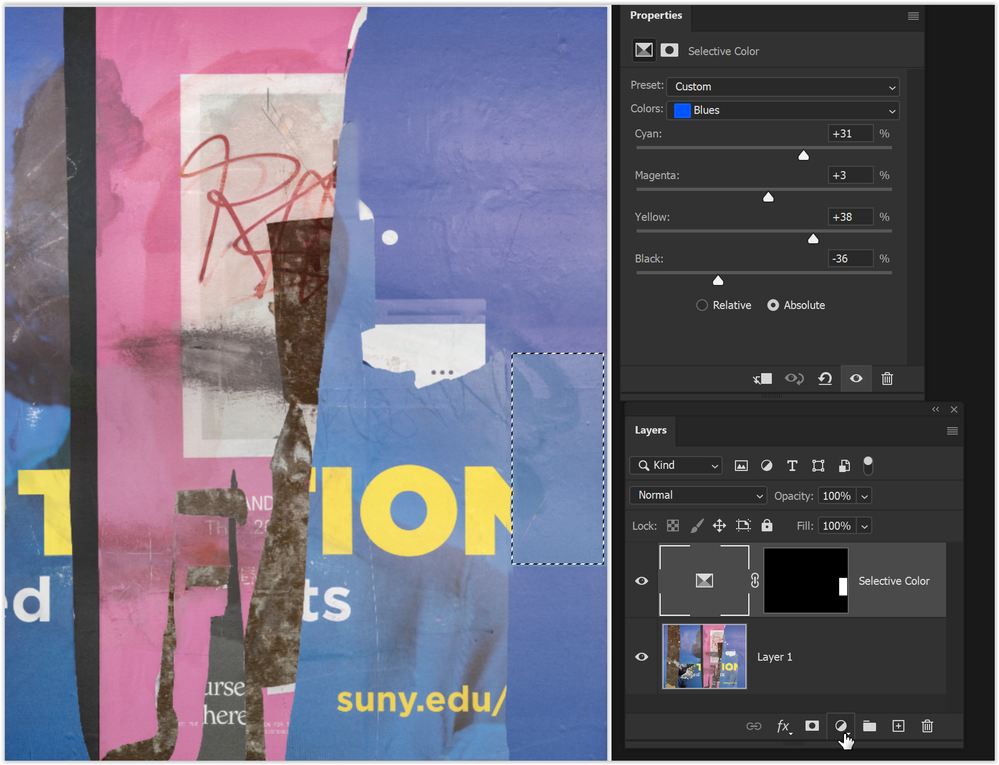
Here's another technique you could try. Select an area you want to change.
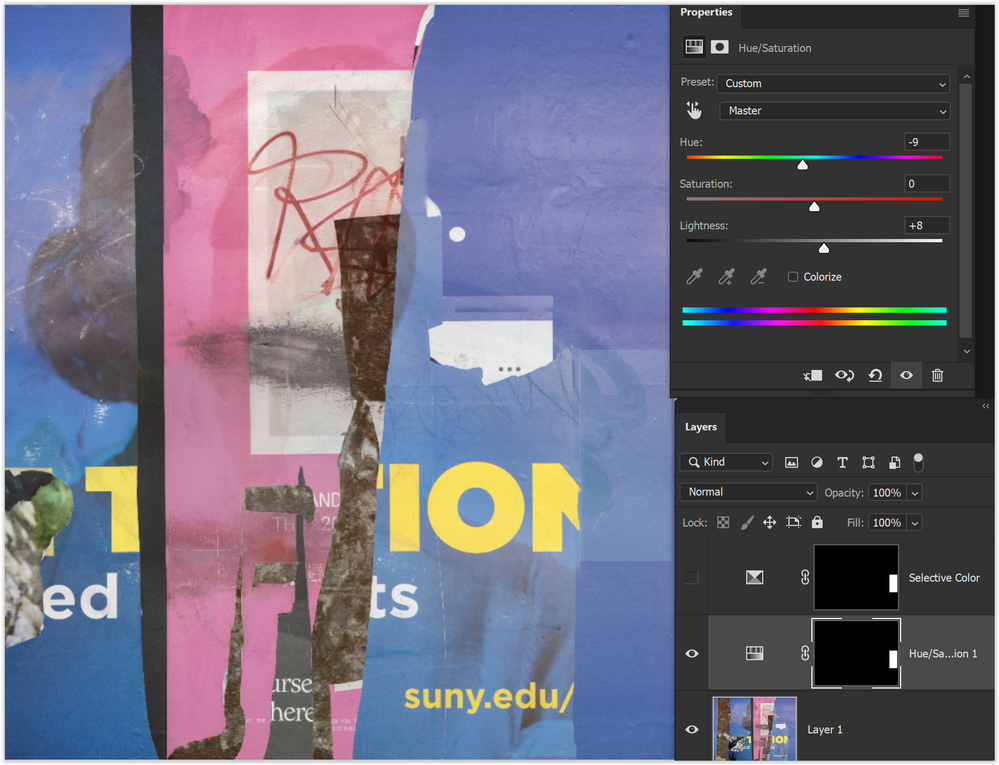
Create a Selective Color adjustent layer. These are the settings that I used:
You'll probably need to make 3 or 4 separate selections using this technique because of the color changes in the area that needs adjustment.
A Hue/Saturation adjustment layer could also work.
If the selection isn't perfect, you'll need to touch up the transition areas. You could do that by applying the adjustment layer, selecting the transition area, and Edit > Fill, Content Aware.
Copy link to clipboard
Copied
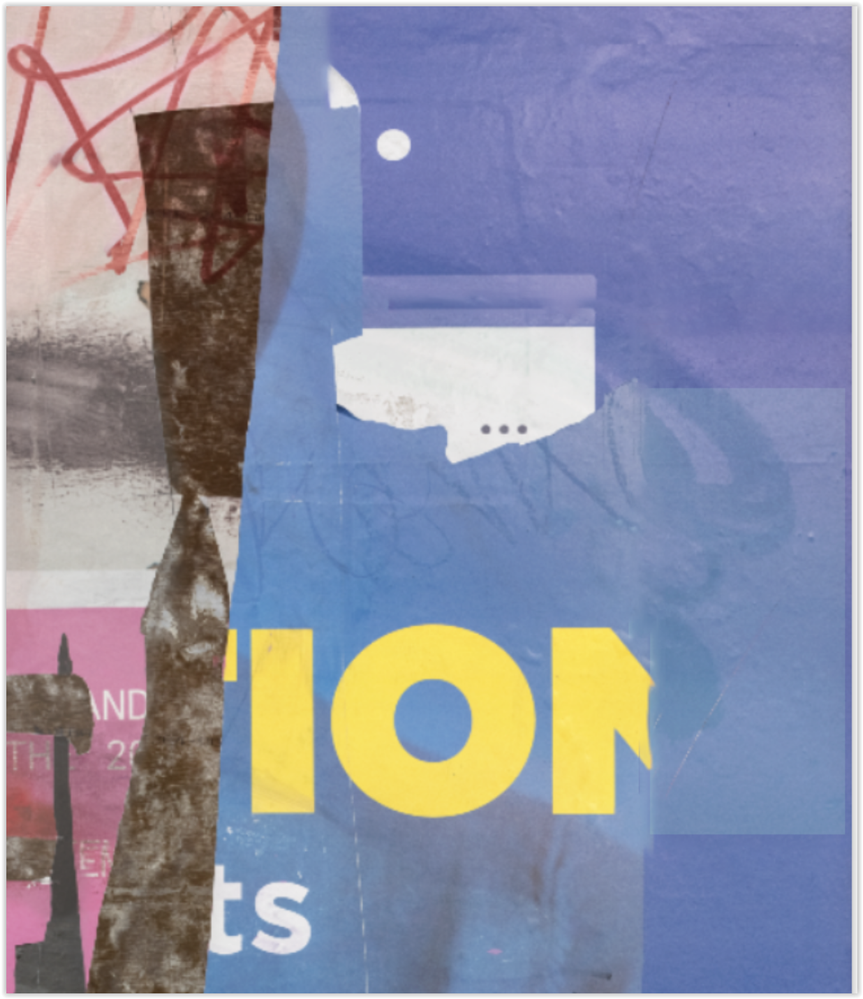
Thanks for that. I ended up going back to my original solution - which was to add adjustment layers to incrementally match up color, brightness and saturation. I'm not sure it was the best method - or at least the quickest - but I'm fairly happy with the result - before and after shots below. It's good to know about the different options for matching color. Dave's solution also looks quite good - he's probably better at frequency separation than I. My problem is that I rarely separate texture and color to my satisfaction - I always seem to bring in (replace) more pixels than I want. I never did find out what was meant by "color mode" - but I suspect it's shorthand for blending colors, which I don't think is the same as matching colors but I need to do some tutorials. Thanks to all who helped out with this.
Copy link to clipboard
Copied
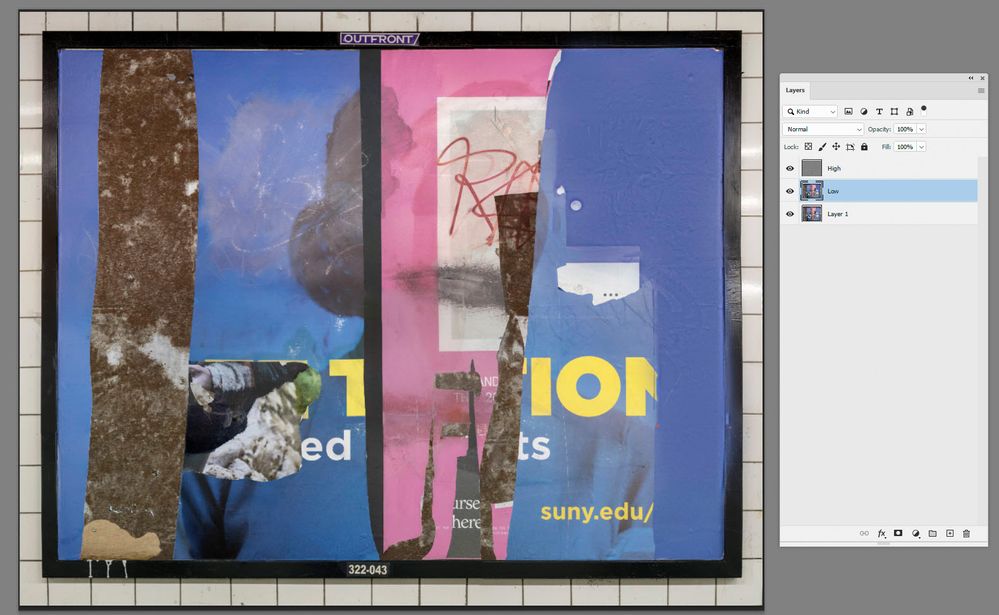
I would use frequency separation and just paint the required colour on the low frequency layer with a soft brush at medium opacity. The texture will be retained on the high frequency layer. Quick and dirty example below:
Dave
Find more inspiration, events, and resources on the new Adobe Community
Explore Now

