

Converting grayscale image to transparent not working correctly
So I've been creating transparent pngs for years now in Photoshop - in every version since as long as I can remember. Here is how I've always done it:
1. Convert image to grayscale if it isn't already
2. Go to Channels and command-click the Gray layer
3. Invert the selection
4. Make a new layer and fill the selection with 100% black
5. Delete the background layer
So by doing this, I should be left with a layer that has nothing but a grayscale version of the image where all of the white is now completely transparent (I'll call it "grayscale layer"). So if I put a layer under that grayscale layer and fill it with 100% black, the image should look 100% black (since there is no white in the file anymore). If I fill that bottom layer with white, it should look like what I did when I started - 100% grayscale again. But for some reason now this method I've always used (or any other I try) leaves me with an image that looks like it's maybe 80% opacity overall. When I save the png, tho, it looks correct in the Finder preview. In fact, when I open the png or place it in any other program - Illustrator, Preview, Affinity Photo, Safari, etc., it looks correct. The only program where it looks wrong, is in Photoshop, where it was created in the first place. What is really weird is if I put a color, even 100% white, on a layer under the grayscale layer, it looks correct. Attached is a screenshot of the psd file showing white under just the left half of the grayscale layer so you can see what I mean...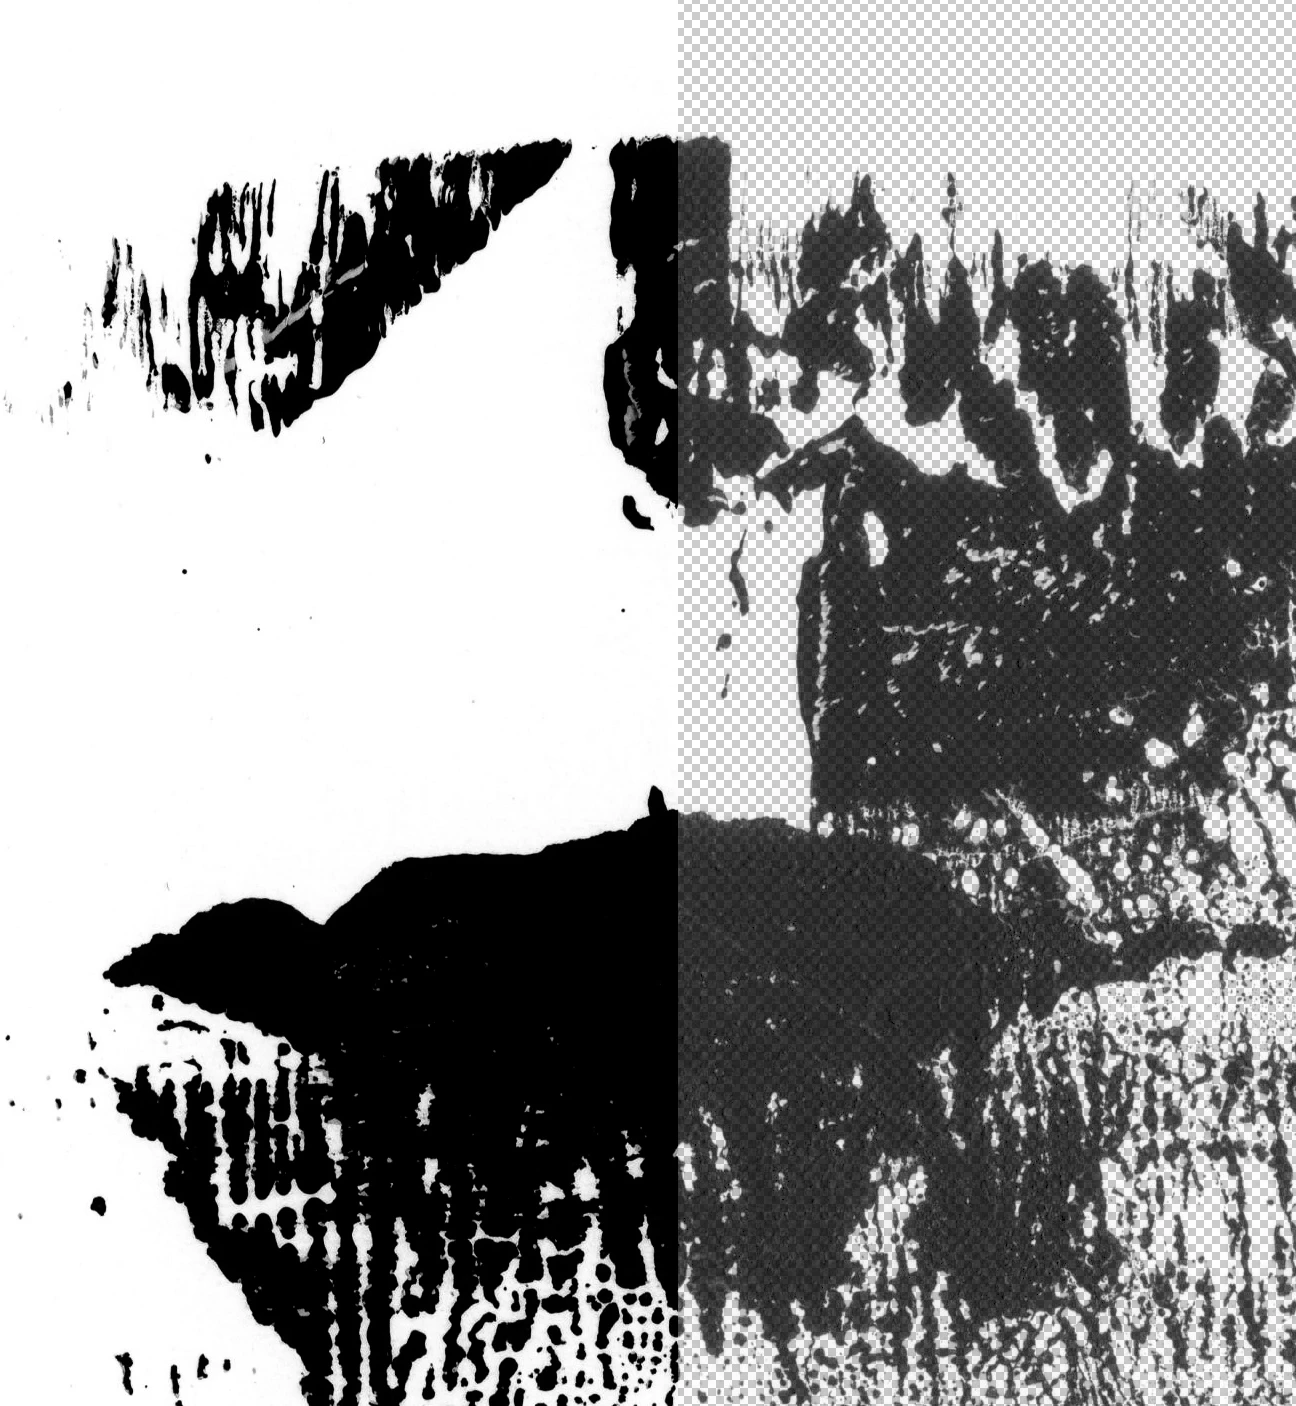
You can see that the opacity of the transparent side on the right looks like it's maybe 80% opacity or so. But it's not. When I sample the deepest part of the black in that area, the file/info pallette shows it as 100% black. Even if it really were 80% opacity, why does it look like it's 100% opacity over the white on the left side? I'm on an iMac using Photoshop CC 21.1.1. But this is also happening in Photoshop 2019 as well. And it's not happening with just this image. I've tried many different images - some even years old - same issue. So I'm baffled. Anyone have any idea as to why this would be happening? This is a crucial component of what I do. So any insight would be greatly appreciated.