Copy link to clipboard
Copied
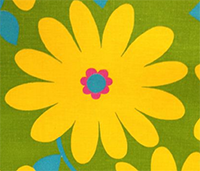
Here is the inspiration:

I want to crop a large number of photos into a kind of a "mod daisy" shape.
I guess I'm probably using "crop" incorrectly, because as I understand it, PS will only make square or rectangular images. But inside that square or rectangle I want just the "daisy shape" of pixels, with the negative space transparent. So maybe it is a mask?
My original photos are all different sizes, and I'd like the option of moving the daisy frame around in order to find the best portion of the image to apply it to.
 1 Correct answer
Hi Marie
There are two ways
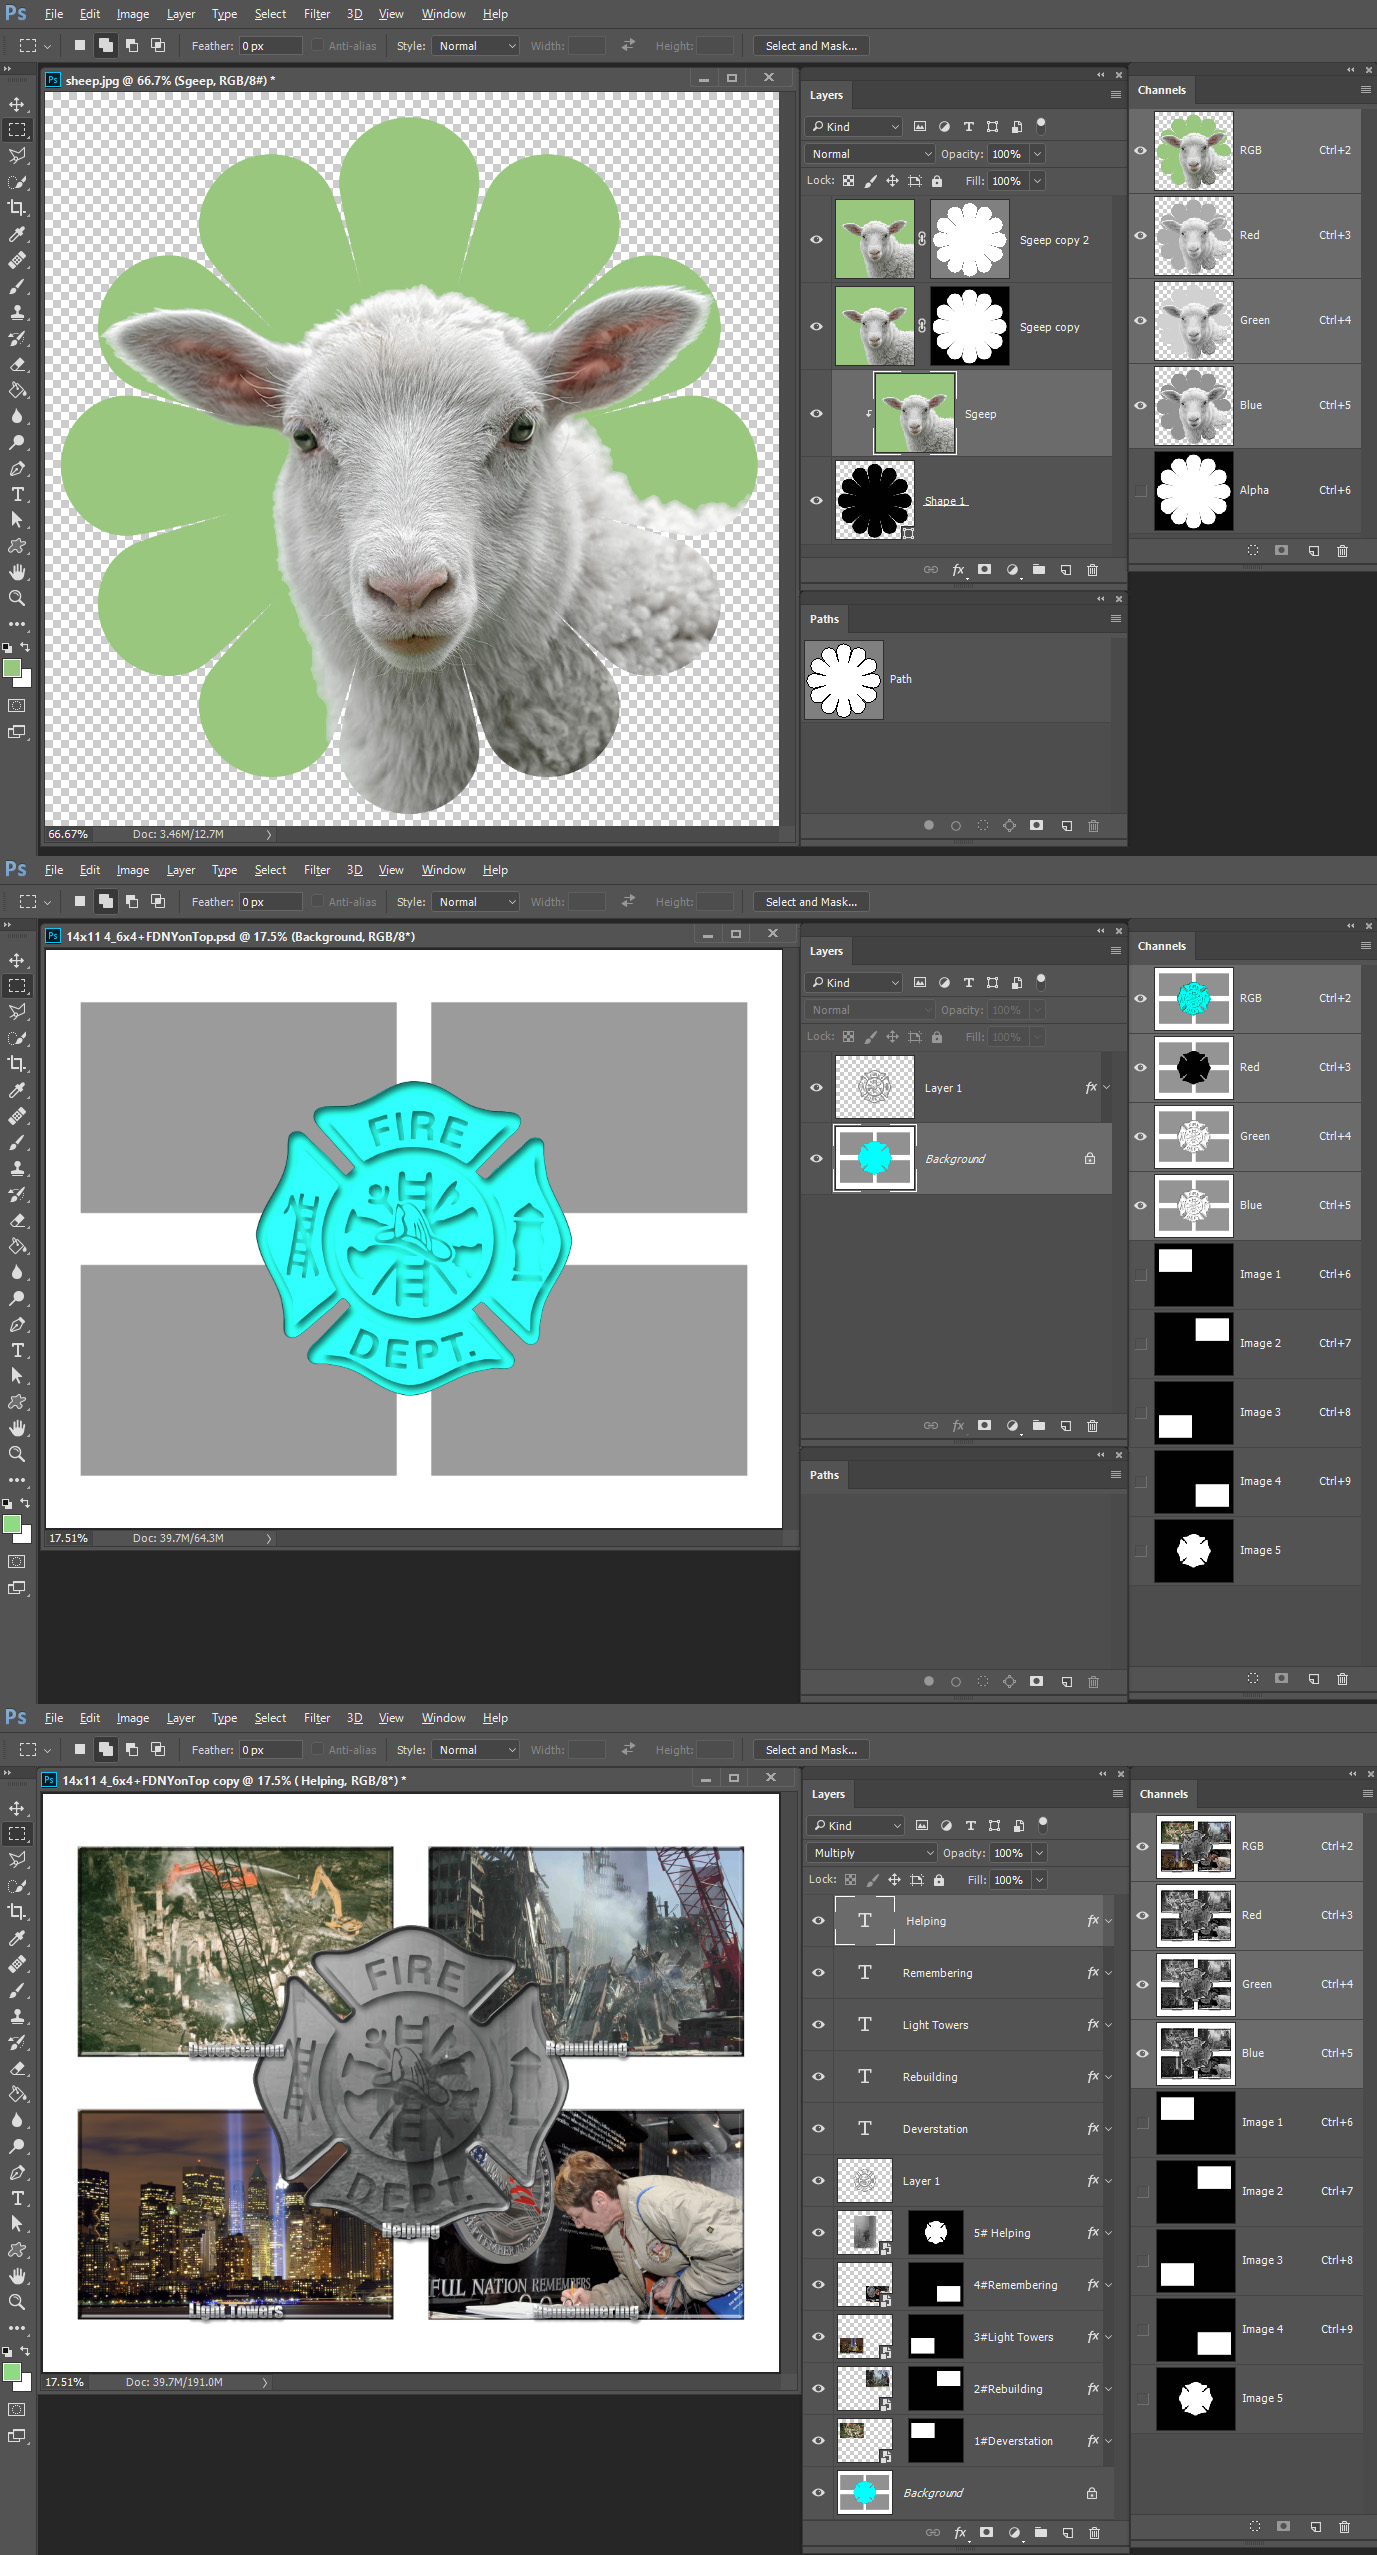
The first is to create your flower shape as a mask - save it as an Alpha channel and copy it to your other images.
The second is to create it as a shape. Then put your image on top and Alt click on the border between the layers. This will cause the image to be clipped to the shape and only show where the shape is solid below.


Don't forget if you want to save the transparency you need to save in a format that supports it (jpeg does not)
I hope that helps
Dave
Explore related tutorials & articles
Copy link to clipboard
Copied
Hi MarieMeyer,
yes its exactly a mask what you need. Or more simply, in this case, you will need a selection. My suggestion is (since you have so many different sizes of the images) is to create a vector with bezier curves (pen tool) of your daisy shape and then convert it into a selection. Then simply erase the unwanted part of your image and save it as psd or png (transparent pixels).
Copy link to clipboard
Copied
I can see that working for one file - but how would I make that same selection available in other files?
Copy link to clipboard
Copied
as davescm brilliantly showed ![]()
Copy link to clipboard
Copied
Hi Marie
There are two ways
The first is to create your flower shape as a mask - save it as an Alpha channel and copy it to your other images.
The second is to create it as a shape. Then put your image on top and Alt click on the border between the layers. This will cause the image to be clipped to the shape and only show where the shape is solid below.


Don't forget if you want to save the transparency you need to save in a format that supports it (jpeg does not)
I hope that helps
Dave
Copy link to clipboard
Copied
Doesn't the sharing of the alpha channels require that all the images have the same pixel dimensions?
Copy link to clipboard
Copied
You can resize a mask just as you can an image.
The easiest way is the way I showed with a shape.
Drop that into your images underneath the image layer - it will scale cleanly as it is a vector - and you can move your image around on top
Dave
Copy link to clipboard
Copied
Well yes and no. But that's why you should go for the vector shape. So you will be able to scale it without any problem.
Copy link to clipboard
Copied
OK, I'll definately give this a try. I assume that I should copy the shape from Illustrator and paste it as a shape layer in PS. How to scale the shape to match the pixel dimensions of my photo?
Copy link to clipboard
Copied
You could copy the shape from illustrator or make it in Photoshop with the pen tool.
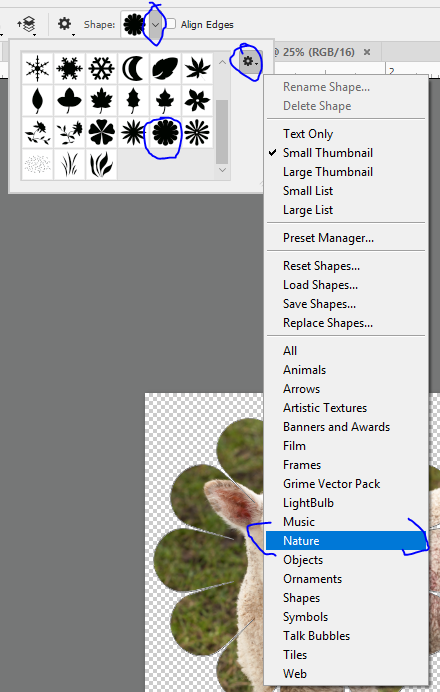
I didn't even make the one I used above to demonstrate. I just used the custom shape tool and selected the shape from the nature set


To resize a shape - click on the shape layer then go to Edit - Transform Path - Scale.
Dave
Copy link to clipboard
Copied
OK, so I've drawn my shape in AI, copied and pasted it as a shape layer, and now I see how to scale it. One last thing: right now my shape is solid black. I want it to be transparent pixels surrounded by black - in other words, a knockout - so that I see exactly how I am framing my subject. Can you explain how I would do that?
Copy link to clipboard
Copied
Hi Marie
To do what I showed, you want your shape to be black and surrounded by transparent pixels. What is it currently surrounded with ?
Put your image layer above the shape and then Alt-click on the border between the layers. This will cause the layer to clip. That means that the image will only show where there are solid pixels below it. So you move your image layer around and it fills the shape below with image pixels.
If the result in my earlier post is not what you want - please come back.
Dave
Copy link to clipboard
Copied
OF course! I was thinking I had to size the shape first - but of course I can do it after.
Thank you!!!!
Copy link to clipboard
Copied
You're very welcome ![]()
Dave
Copy link to clipboard
Copied
The power of Photoshop lies in layers and selections. You make composites. Selection in Photoshop are all over the place. That clipping mask is a selection. It could has also be in single layer when that shape path was added the image layer as a vector layer mask or a normal layer mask. The normal layer mask could have been made from an Alpha channel. Selection can contain transparency. Not everything is black and white there is that gray. Like that gray matter between your ears is powerful. The gray matter in Photoshop is very powerful. Learn to use both gray areas when you use Photoshop. Thinking is important.

