

- Home
- Photoshop ecosystem
- Discussions
- Re: Dashed Line - Thickness from Small to Big o vi...
- Re: Dashed Line - Thickness from Small to Big o vi...

Copy link to clipboard
Copied
Hi there, as the title of the discussion sugests im here to try and get some help on how to create a dashed line that goes from a big thickness to a small one, ive tryed asking on discord chat's no luck, teachers dont reply ... and i cant stay stuck on Creative CV that im making just cuz i want to know if it is possible or not to create what im trying to create.
Anyhow ... this is my life line ... so i hope i can get some help or definite reply that this cant be done.
Im going to give examples of what im trying to acomplish so it can be simpler ti you guys and girls 
Example:

As u can see i can do normal dashed lines fine, but i wated to give an effect on the title below, with a horizontal dashed line that went as the red letter on the image say, and thats my problem i just cant figure out how to change the thickness of the dashed lines to give that effect.
Can some one help me please ??
Regards ASilva
PS: if there is already a place where this was already replyed ... please let me know cuz i didnt find it.


 1 Correct answer

No need to close it, you found a way that works. Other people might find this discussion useful.
I might have created a dashed line set to the widest desired size, then masked it which is really easy to do and is all editable later.
Explore related tutorials & articles
 18
Replies
18
18
Replies
18

Copy link to clipboard
Copied
That is not possible with the current tools in PS. The only way I can see to work around this would be to write a script that creates rectangle shapes in a line and reduced the horizontal width with each placement.
Copy link to clipboard
Copied
One rather tedious option would be to use a grid script that I created that can set guides at a progressive distance then draw rectangles between those guides. Then move one of the end shapes and distribute the shapes to create spaces.

Copy link to clipboard
Copied
what about brushes or shapes for photoshop with the effect i want ?? do u think there are shapes or brushes like that ??
Anyways i think i might just try and create the effect by hand one square or circle at a time.

Copy link to clipboard
Copied
My suggestion (by Photoshop, personally I would use PostScript):
For the right line:
1. draw trapezoid with line color, left height a, right height b, a>b
2. draw one rectangle with background color, width for the gap, height >a
3. copy and paste multiple, as often as necessary
Scale width and height as required, mirror or rotate for the left line.
Best regards --Gernot Hoffmann

Copy link to clipboard
Copied
You could stroke a path with a square Brush, with Roundness set to Fade in Shape Dynamics:

Copy link to clipboard
Copied
Here are my $0.02 If you know thickness of line then do the following - you can also record action after first step in case that you change mind about thickness:
- Draw first dash using Rectangle tool.
- With shape layer in the Layers panel selected Press Alt/Opt + Ctrl/Cmd + T what will enter free transform with copy.
- Use arrow key -> to nudge shape into position, that should be copy of original or first shape created in step 1.
- Confirm on Enter/Return.
- Press Alt/Opt + Shift + Ctrl/Cmd + T as many times as needed what will create new dash every time and move it for the same increment as you did in step 3.
Ups, it appears that I didn't understand what is your problem, please ignore my answer although it can be used successfully with addition to change dash thickness in addition to move it in step 3. The next step would be to copy all layers and rotate them so you have from thin to thick.
Copy link to clipboard
Copied
You can try this script. you need to set the sizes you want, and a starting selection for the height of the dashed lines and how long you want it. It would be best to do this on a separate layer then transform your results to fit.
var oldPref = app.preferences.rulerUnits;//stores old measurement preferences so that they can be reset when the script is done.
app.preferences.rulerUnits = Units.PIXELS;
var startingSize = 70//set starting size of dash
var minSize = 2//set minimum size of dash, just so they don't get too small
var dimStep = .95//set how much the dash decreases in size with each step
var dashSpace = 10//set space between dashes
var selArray = new Array();
var doc = activeDocument;
var selBounds = doc.selection.bounds;
var top = selBounds[1];
var bottom = selBounds[3];
var selW = doc.selection.bounds[2]-doc.selection.bounds[0];
var selH = doc.selection.bounds[3]-doc.selection.bounds[1];
var startD = doc.selection.bounds[0];
var endD = startD+startingSize;
var dashSize = startingSize
while (endD< selBounds[2] && dashSize> 1){
//for(var i=0;i<3;i++){
selArray = new Array([startD,top],[endD,top],[endD,bottom],[startD,bottom]);
doc.selection.select(selArray);
fillForeground ();
startD = endD + dashSpace;
dashSize *=dimStep
endD = startD + dashSize
}
selArray = new Array([selBounds[0],top],[selBounds[2],top],[selBounds[2],bottom],[selBounds[0],bottom]);
doc.selection.select(selArray);
app.preferences.rulerUnits = oldPref;
function fillForeground(){
var idFl = charIDToTypeID( "Fl " );
var desc2 = new ActionDescriptor();
var idUsng = charIDToTypeID( "Usng" );
var idFlCn = charIDToTypeID( "FlCn" );
var idFrgC = charIDToTypeID( "FrgC" );
desc2.putEnumerated( idUsng, idFlCn, idFrgC );
var idOpct = charIDToTypeID( "Opct" );
var idPrc = charIDToTypeID( "#Prc" );
desc2.putUnitDouble( idOpct, idPrc, 100.000000 );
var idMd = charIDToTypeID( "Md " );
var idBlnM = charIDToTypeID( "BlnM" );
var idNrml = charIDToTypeID( "Nrml" );
desc2.putEnumerated( idMd, idBlnM, idNrml );
executeAction( idFl, desc2, DialogModes.NO );
}

Copy link to clipboard
Copied
damn alll these replys are making me confused specialy the code ones ... dont understand squat of that ... anyway im gona try and do what i can using rectangle and circles shapes ... see to see if i can give it the effect i want.
O i might just do a huge dashed shape, then create a shape for the effect i want a do a cliping mask and see how it looks.
Any how thaks for trying to help guys
Copy link to clipboard
Copied
Assumed, the thickness of the line varies continuously from large to small
(opposed to a stepwise variation), I would use a Postscript programm, like this:

Save as textfile *.eps and load by Photoshop in mode RGB, e.g. with 144ppi, with anti aliasing.
Note: the original text is not garbled.
Download the file here:
http://docs-hoffmann.de/dottrapezoid.eps
Best regards --Gernot Hoffmann
%!PS-Adobe-3.0 EPSF-3.0
%%BoundingBox: 0 0 500 85
%%Creator: Gernot Hoffmann
%%Title: dotted trapezoid
%%CreationDate: August 18 / 2019
/mm {2.834646 mul} def
% trapezoid
/xa 10 mm def % left
/ya 15 mm def
/xe 170 mm def % right
/ye 15 mm def
/ha 10 mm def % half height left
/he 3 mm def % half height right
% dots and gaps
/N 10 def % number of dots
/g 6 mm def % gap width
/h ha 2 mul def % gap height
%d=((xe-xa)-(N-1)g)/N % dot width
/d xe xa sub N 1 sub g mul sub N div def
/e d g add def % distance of dots
/trapezoid
{newpath
xa ya ha sub moveto
xe ye he sub lineto
xe ye he add lineto
xa ya ha add lineto
closepath
fill
} def
0.9 0.9 0.9 setrgbcolor
% trapezoid % can be enabled for test
newpath % outer clipping path, b-box
0 0 moveto
500 0 rlineto
0 85 rlineto
500 neg 0 rlineto
0 85 neg rlineto
/x xa d add def
/y ya ha sub def
1 1 N % inner clipping path, gaps
{pop
x y moveto
g 0 rlineto
0 h rlineto
g neg 0 rlineto
0 h neg rlineto
/x x e add def
} for
eoclip
0.0 0.6 0.4 setrgbcolor % 1.0<-->255
trapezoid
showpage

Copy link to clipboard
Copied
Hi ASilva:
Do you have a full CC subscription, or the Photography subscription?
I'm asking because this is very straightforward in Illustrator, even for a brand new user using the Width tool and defining dashes. Photoshop is great at photo editing (along with many other tasks), but you are using it for layout, which is better suited to InDesign or Illustrator.
~Barb


Copy link to clipboard
Copied
Adding to what Barb says, if you draw the stroke in Illustrator and use the Width tool and dashes, you can copy and paste it to Photoshop as a Shape Layer. You can play with the Illustrator settings until you get the look you want.
Jane
Copy link to clipboard
Copied
I dont know if one would call this the full sbscription tough, im using a trial version of photoshop so it must be the complete versio but for 30 days.
As for Ilustrator and indesing ... thouse are softwares that honestly i dont like to use ... i use more Photoshop, premiere and after effects and audition from time to time. Ilustrator would be a last resort only thing.
Anyhow i kinda use Photoshop for almost everting from puting stuff together to creating CV's desing style.
Ex: my latest work made on Photoshop ... im still amature and from portugal so everting i know is basicaly school/ self taught.
Copy link to clipboard
Copied
Also i want to thank people for trying to help but this is turning to not what i want i tried doing some of the exmples, not counting the code ones cuz i dont know how and where the code works on PS. Also Illustrator didnt try that ither cuz i dont have that 
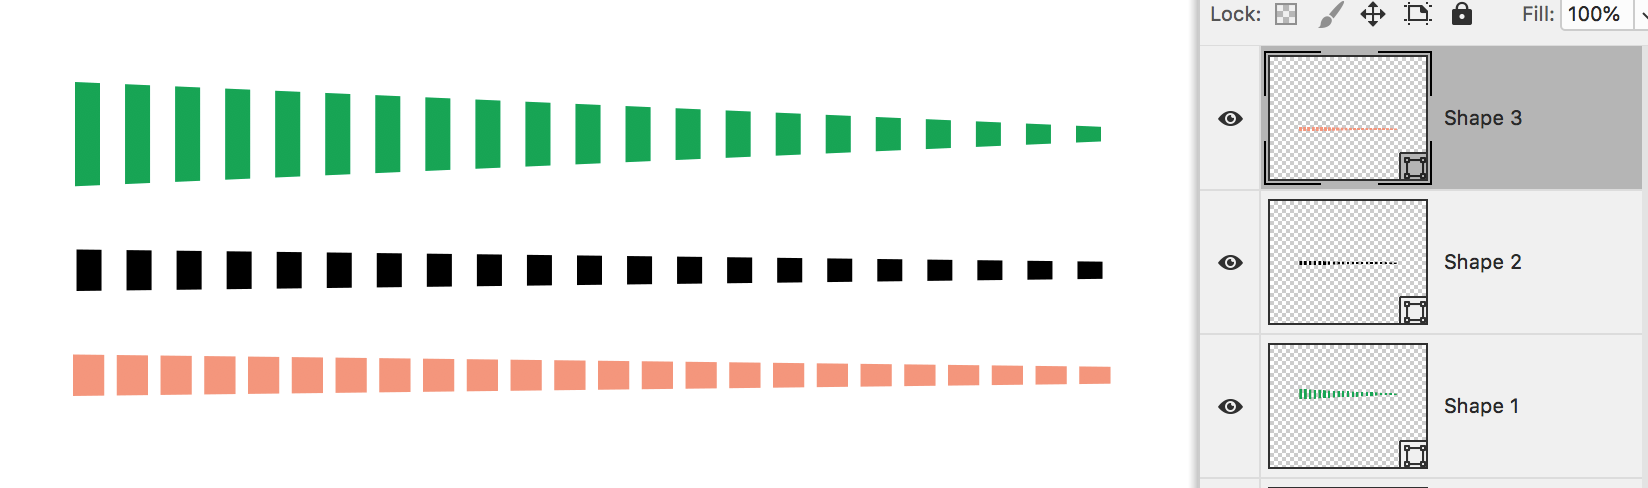
Any how ... i kinda opted to go a diferent route on my desing and just use 3 simple lines that im going to show u

Once again i say thank for the people that tryind to help ... but i opted to go with this.
Regards ASilva
PS: How does one close the discusion ?
Copy link to clipboard
Copied
No need to close it, you found a way that works. Other people might find this discussion useful.
I might have created a dashed line set to the widest desired size, then masked it which is really easy to do and is all editable later.

Copy link to clipboard
Copied
Copy link to clipboard
Copied
WoW that was exactly the effect i wanted to give i just wasn't able to get, that made me go another route ... i think im going to try and replicate that on my project and see how it looks cuz from ur Tutorial it look awesome ... it was so simple im amazed by the fact i didnt reminded to create it like that ... im so noob sometimes.
Anyways thanks a lot once again

Copy link to clipboard
Copied
Might be a bit late but this seems very easy to do. Consider these stroke settings.

Copy link to clipboard
Copied
Sorry, forgot to say this is in Illustrator, but use it as a Smart Clip in Photoshop and it's really flexible.

 AdChoices