Erase Portraiture Effect
Copy link to clipboard
Copied
Hi All
Any help on how to erase portraiture effect from portions of an image in PS? I'm a beginner. I like to smooth the whole image but brush portraiture off certain areas...I thought I'd done it successfully before but it must've been dumb luck because I can't replicate it. Appreciate your help!
Explore related tutorials & articles
Copy link to clipboard
Copied
Did you apply it as a Smart Filter?
Could you please post screenshots with the pertinent Panels (Toolbar, Layers, Options Bar, …) visible?
Copy link to clipboard
Copied
Hi Courtney. As c.p. is saying, we need to know we are understanding your question. I am not sure what you mean by 'portraiture effect' so if you paste a screen shot of the image with further explaination, I am sure we'll work it out.
Be aware though, that if this is a single layer flat image then it is not possible to erase part of it and expose the original image, If we can see your entire workspace with the image and layers panel, we'll know how best to help you.
Copy link to clipboard
Copied
Hi Everyone
so I apply imagenomic portraiture effect using a PS plugin and on this image I ran it super high it would be obvious if erasing it worked. Here is the screenshot showing the history. Essentially I need to be able to run it on its own layer so I can erase parts of it and I thought that's what I was doing but I'm messing it up somehow.
Copy link to clipboard
Copied
Please check this out:
https://www.take-a-screenshot.org
Apparently one can apply as a Smart Filter
Otherwise apply on a duplicate Layer and apply a Layer Mask to that and paint out the regions where you want to reduce the effect.
Copy link to clipboard
Copied
This is going to be super easy.
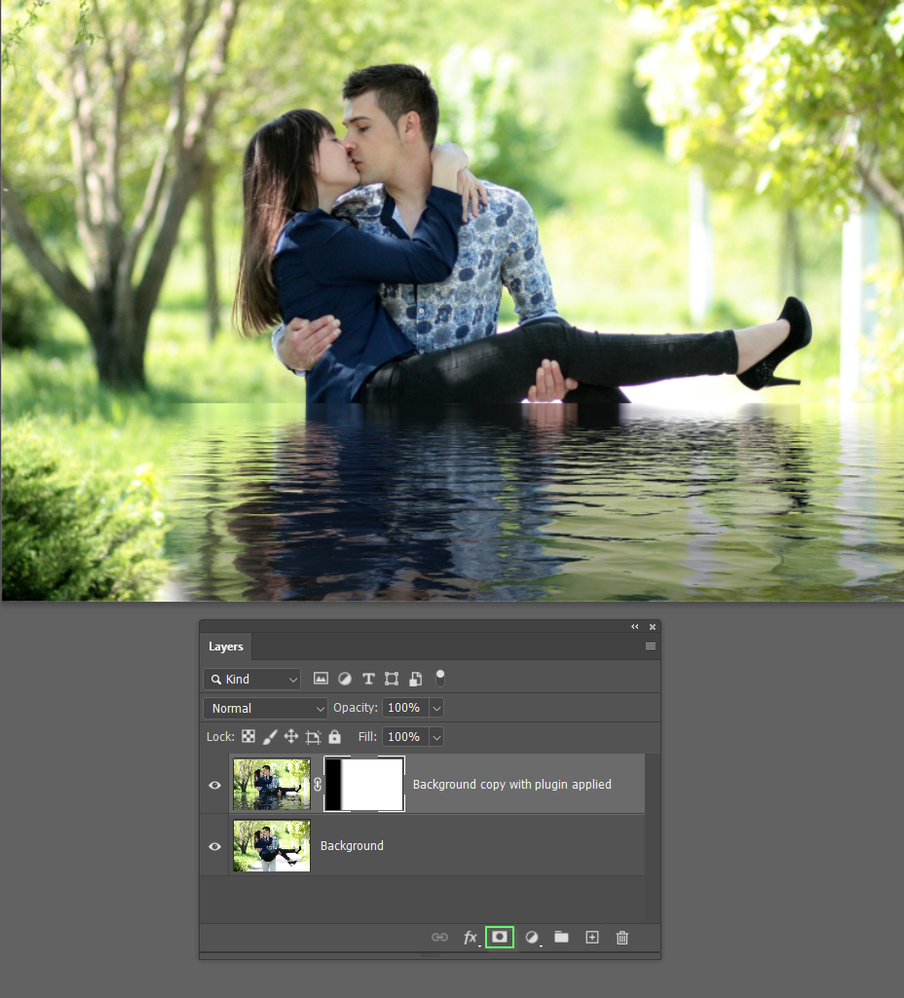
Make a copy of the background layer (Ctrl J or Cmd J on a Mac)
Run the plugin on the copied layer
Add a layer mask using the icon I have highlighted in green.
With the layer mask selected (it will have a white border in the Layers panel as below) use a soft round brush and paint of the area you want to remove the effect of the plugin with black.
The black will hide that part of the layer revealing the original layer underneath it.
If you go too far, change to white and paint it back in again. The saying we use is Black conceals and white reveals.
Note: I don't have the portraiture plugin so I used Flaming Pear's Flood 2 plugin. Let's hope he doesn't drop her because that will kill romance stone dead.
Copy link to clipboard
Copied
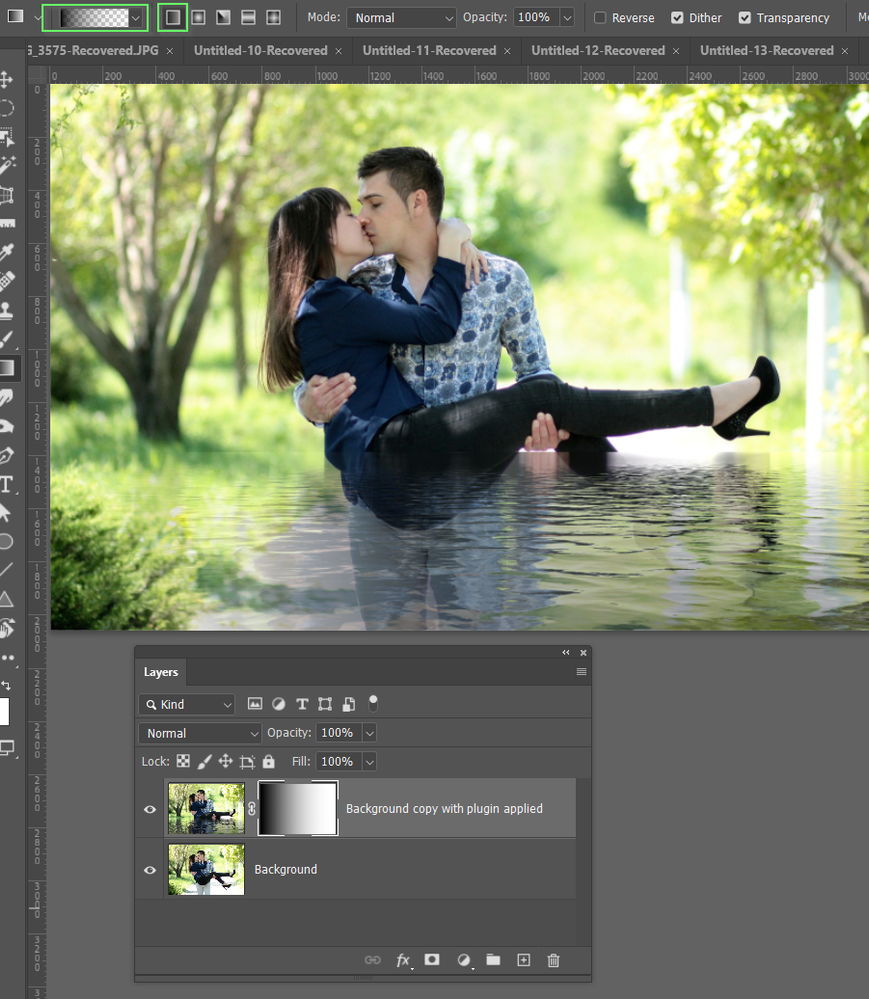
I should probably mention that I did not use a brush above, but instead used the gradient tool using black to transparent. That lets us make smooth transitions, and with it being black to transparent, we can build the effect by running multiple gradients. The other option is to use black to white, but that causes each new gradient to overwrite the previous gradients.
I have re-done the mask below running the gradient the full width of the image. You can see the smooth gradient in the mask and the more gradual hiding of the plugin effect. Please ask if you have any questions.
Copy link to clipboard
Copied
Thank you so much for your help with this!


