Force snapping to pixels when placing image? Placed embedded images look messed up
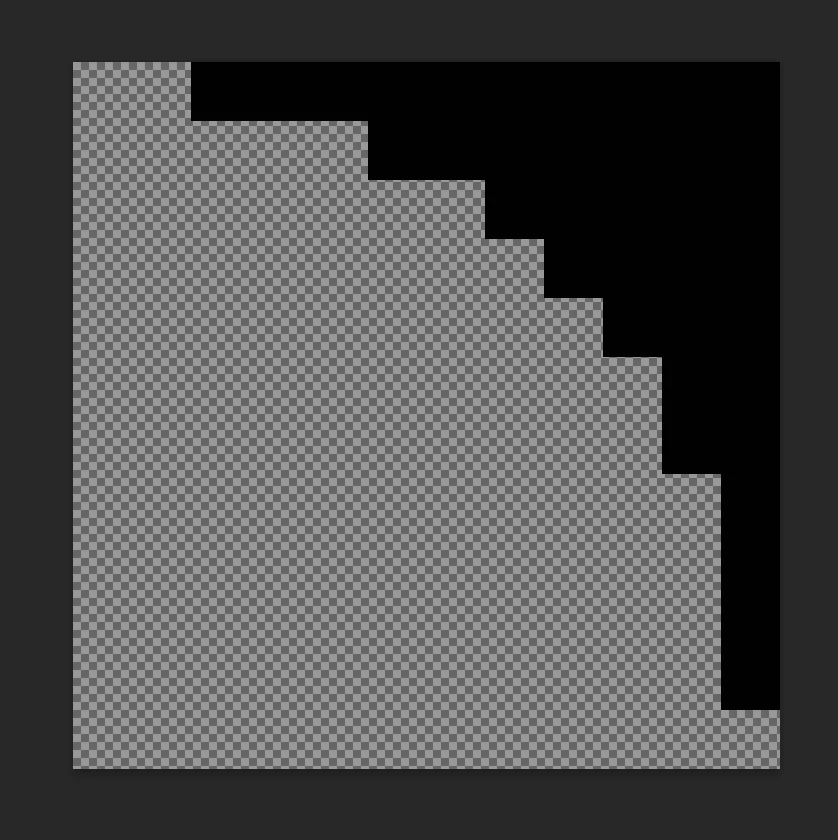
For Context: I have an action that is meant to cut off the rounded corners of windows in screenshots. For this I use a small "mask" image that looks like this and is 12x12 px, and the action basically is multiple steps to align this image to each corner and use it update the layer mask of the base layer so the corners look rounded using transparency. The whole thing is automated with the action except for the placing of the image for the reason described below.
Here is what it is supposed to look like:

But here's the problem:
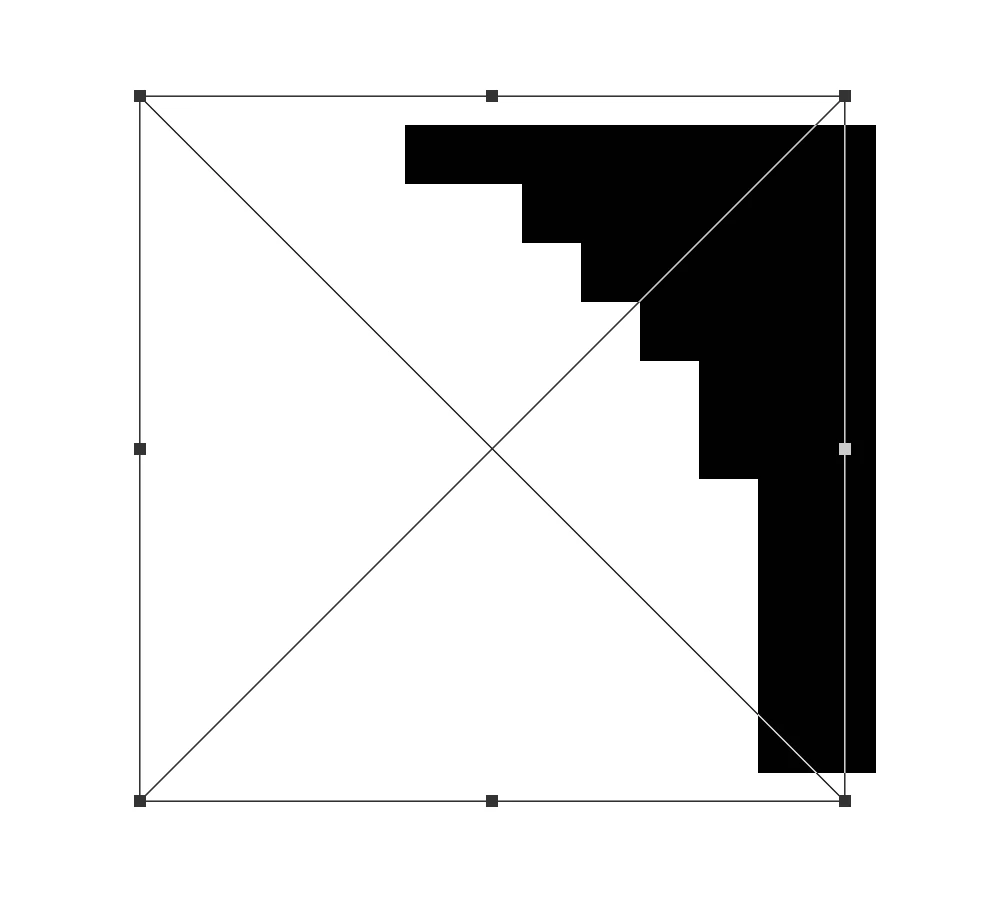
For an image this small, when I go to place it via File > Place Embedded, apparently photoshop tries to apply to the center, but uses subpixels, so often times it "lands" in between pixels and looks messed up:

When not using an action, I can fix this by simply dragging the image a bit and then it aligns it. But I can't do that with an action, because the action always records the transform relatively, looking like this:

Because it's relative, that just lands me in the same problem of it completely depending on chance of the resolution of the project image and the zoom level for whether it will "land" centered or not.
I even tried using the "corner" mode, but it seems to ignore this, it still gets placed at the center of the view.
Note that the placed image here actually does look too thin with the left chopped off - it's not just that I cut it off while screenshotting.

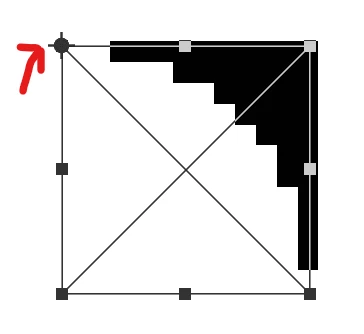
It seems like "corner" actually refers to like the corner of the bounds of the Free Transform box, not the canvas? Which again causes the same problem because that might land in betwen pixels. Notice the anchor point and the bounding box when set to corner:

Here's the contents of the a test action of just placing the image, maybe someone has an idea of what needs to be edited to force an absolute location of the placed image? It doesn't matter where it goes since it will be auto aligned by a later step, it just needs to not be in between pixels!
<ActionFile key="ActionCornerTest.atn" file="~/AppData/Local/Temp/ActionCornerTest.atn">
  <ActionSet version="16" name="ActionCornerTest" expanded="false" count="1">
    <Action key="1" name="Action Corner Test" expanded="false" count="1">
      <ActionItem key="TEXT" expanded="true" enabled="true" withDialog="false" dialogOptions="0" identifier="TEXT" event="placeEvent" name="Place" hasDescriptor="true">
        <ActionDescriptor key="placeEvent" count="4">
          <DescValueType.INTEGERTYPE key="1231318644" id="1231318644" symname="Identifier" sym="Idnt" integer="24"/>
          <DescValueType.ALIASTYPE key="1853189228" id="1853189228" symname="Null" sym="null" path="/c/example/path/WindowCorner.png"/>
          <DescValueType.ENUMERATEDTYPE key="1179935603" id="1179935603" symname="FreeTransformCenterState" sym="FTcs" enumeratedTypeString="QuadCenterState" enumeratedType="QCSt" enumeratedValueString="QCSCorner0" enumeratedValue="Qcs0"/>
          <DescValueType.OBJECTTYPE key="1332114292" id="1332114292" symname="Offset" sym="Ofst" objectTypeString="Offset" objectType="Ofst" count="2">
            <ActionDescriptor key="1332114292" id="1332114292" symname="Offset" sym="Ofst" count="2">
              <DescValueType.UNITDOUBLE key="1215461998" id="1215461998" symname="Horizontal" sym="Hrzn" unitDoubleTypeString="Pixels" unitDoubleType="#Pxl" unitDoubleValue="0"/>
              <DescValueType.UNITDOUBLE key="1450341475" id="1450341475" symname="Vertical" sym="Vrtc" unitDoubleTypeString="Pixels" unitDoubleType="#Pxl" unitDoubleValue="0"/>
            </ActionDescriptor>
          </DescValueType.OBJECTTYPE>
        </ActionDescriptor>
      </ActionItem>
    </Action>
  </ActionSet>
</ActionFile>
This is the image itself for testing:

I have already have the "Snap vector tools" option enabled. I also tried enabling legacy transform, enabling/disabling "resize image during place", and "skip transform while placing".
-------------------
UPDATE:
I figured out a work around at least, it takes an extra step and requires placing it as a linked object instead of embedded.
For the action, record:
- File > "Place Linked" (Not embedded)
- Layer > Smart Objects > Reset Transform
The "Reset Transform" step might not be recorded if there wasn't a transform done, but you can force it by just doing a transform on the smart object yourself while recording, then reset transform, and delete the step where you transformed it, leaving only the reset transform step.


