- Home
- Photoshop ecosystem
- Discussions
- Re: Healing brush tool for fairly large object in ...
- Re: Healing brush tool for fairly large object in ...
Copy link to clipboard
Copied
Hello all,
I'm pretty new to Photoshop, have been learning the last few weeks with a Udemy course. I am very familiar with other Adobe software - have been using Premier Pro for years and Illustrator as well.
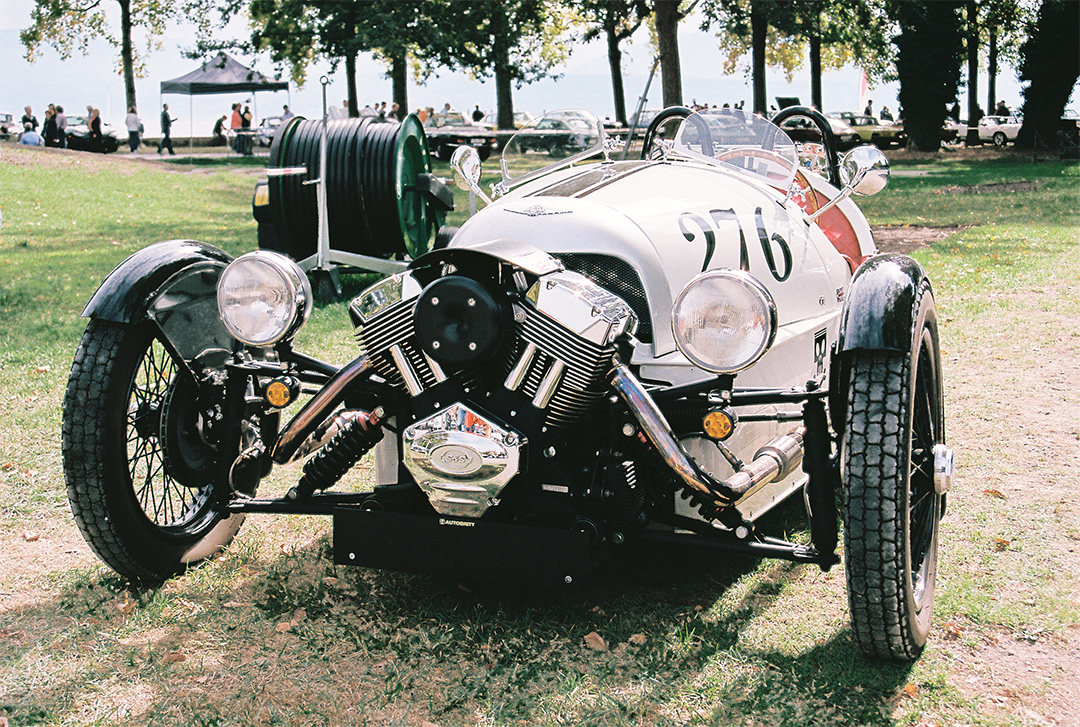
Anyways, I've got a picture I took of a car. I'm trying to remove some of the ugly background from it; mainly the hose roller on the left of the car, probably the blue tent as well.
I made a mask of the upper left area of the picture, not including the car to allow me to work with the healing brush tool without affecting the car area but only the background.
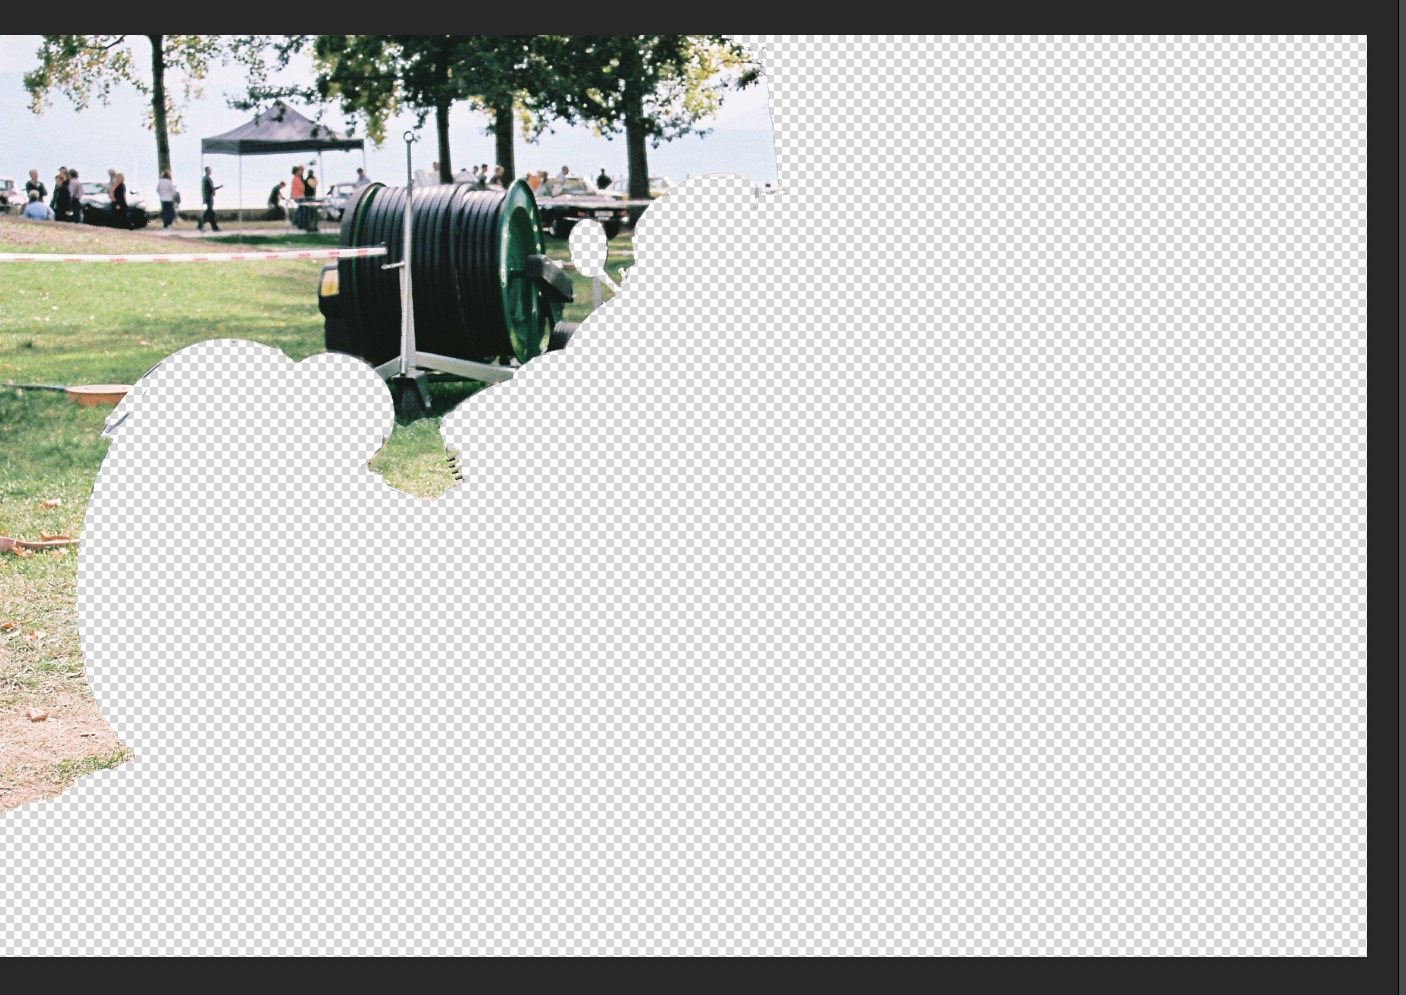
The issue I'm running into is that that black hose roller is large. When I try to sample areas at the left of it with the healing brush, I quickly find myself limited in the scope of material I can sample from. For example, I get a straight border of the left part of the image if I chose "Aligned" or eventually the wheel of the car start appearing.
How can I solve this ?
 2 Correct answers
Hi!
We are so sorry for the delay in getting back to you! Are you still needing help with this image? if so, then I have a couple of suggestions to help you.
I tried recreating your issue with the Healing Brush tool as well as the Patch tool and had the same issue. I thought the Patch tool could help you more than the healing brush, but found that how it tried to blend the images together actually created a mess.
To get the result that you see below, I used the Clone Stamp tool.
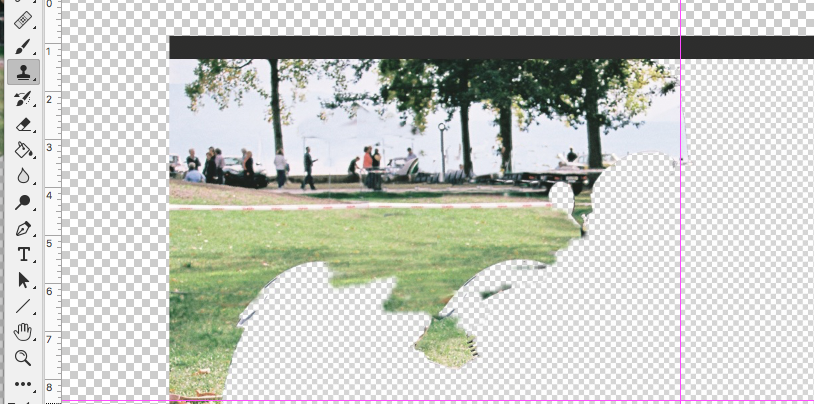
Please know that I w
...There's no easy fix for this. You need to make a clipping path with the Pen tool, and remove the car from the background. For the glass, make a cutout and fill with white on a new layer, and reduce opacity to show some of the new background.

Explore related tutorials & articles
Copy link to clipboard
Copied
Hi!
We are so sorry for the delay in getting back to you! Are you still needing help with this image? if so, then I have a couple of suggestions to help you.
I tried recreating your issue with the Healing Brush tool as well as the Patch tool and had the same issue. I thought the Patch tool could help you more than the healing brush, but found that how it tried to blend the images together actually created a mess.
To get the result that you see below, I used the Clone Stamp tool.

Please know that I was working with the low rez screen version so it looks a little soft but I think that it could be a better tool to get the job done. Especially with your original version that has more resolution to work with.
Are you familiar with the Clone Stamp tool and how it works? If you are, then just skip over the next few lines. If not, then there are some great tutorials online, but here is the short version.
To use the Clone Stamp tool, you sample from an area that you want to use as your source and paint over the area you want to clone out. With a soft edge brush set to 100% opacity, hold down the Option/Alt key and click on the area you want to use. In this case, I used the left side of the image -- the grass and sidewalk-- as my source. Then I moved my brush over on top of the hose and matched the sidewalk so the area would be seamless and started painting out the hose. You can always resample and then paint to fix any imperfections and give it a more realistic appearance. Then, use the water to clone out the popup and add more area to the trunks of the trees. Use the existing pixels to paint out what you don't want in your image.
Like I said above, this is the very short version, but I wanted you to see why the Clone Stamp tool is a great way to get the result you want in your image.
Let us know if you have any questions!
Michelle
Copy link to clipboard
Copied
Hey there,
Thanks for the infos.
I was indeed able to find a solution through another forum.
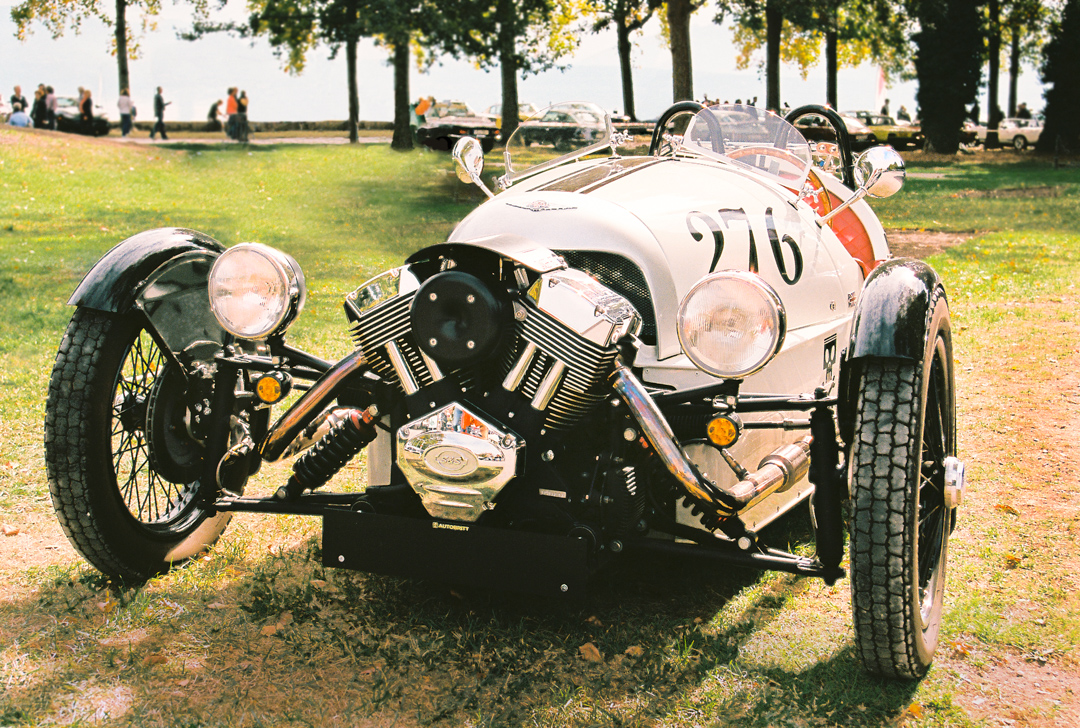
Bellow the final picture after compositing and color grading.
Copy link to clipboard
Copied
Great! Let us know if you have any questions. And, Great Car!
Michelle
Copy link to clipboard
Copied
There's no easy fix for this. You need to make a clipping path with the Pen tool, and remove the car from the background. For the glass, make a cutout and fill with white on a new layer, and reduce opacity to show some of the new background.

Copy link to clipboard
Copied
I believe that I have solved the Oversized Healing Brush problem!
All that I did was to go Display Settings and chose the Resolution one level down from the 3840 x 2160 (Recommended) setting to some lower setting. For me, I was able to set the Display Resolution up to 2560 x 1600. ALSO ... I did not need to adjust the Compatibility Setting within Photoshop to get the Healing Brush or the Spot Healing Tool to function Properly.
Copy link to clipboard
Copied
@RWright61700 wrote:
I believe that I have solved the Oversized Healing Brush problem!
The way the Healing Brush and Spot Healing Brush work is that the sampled pixels are blended with the existing pixels each time you release the mouse button. Changing the resolution will not change the way these brushes work. The answers from @Trevor.Dennis and @mglush are correct and I have marked them so others won't get confused when they see your reply.
Jane


