Inspiring
February 3, 2025
Question

Help: I want to replace a person or at least the head of a person in one photo from another [SOLVED]

  • February 3, 2025
  • 3 replies
  • 3795 views

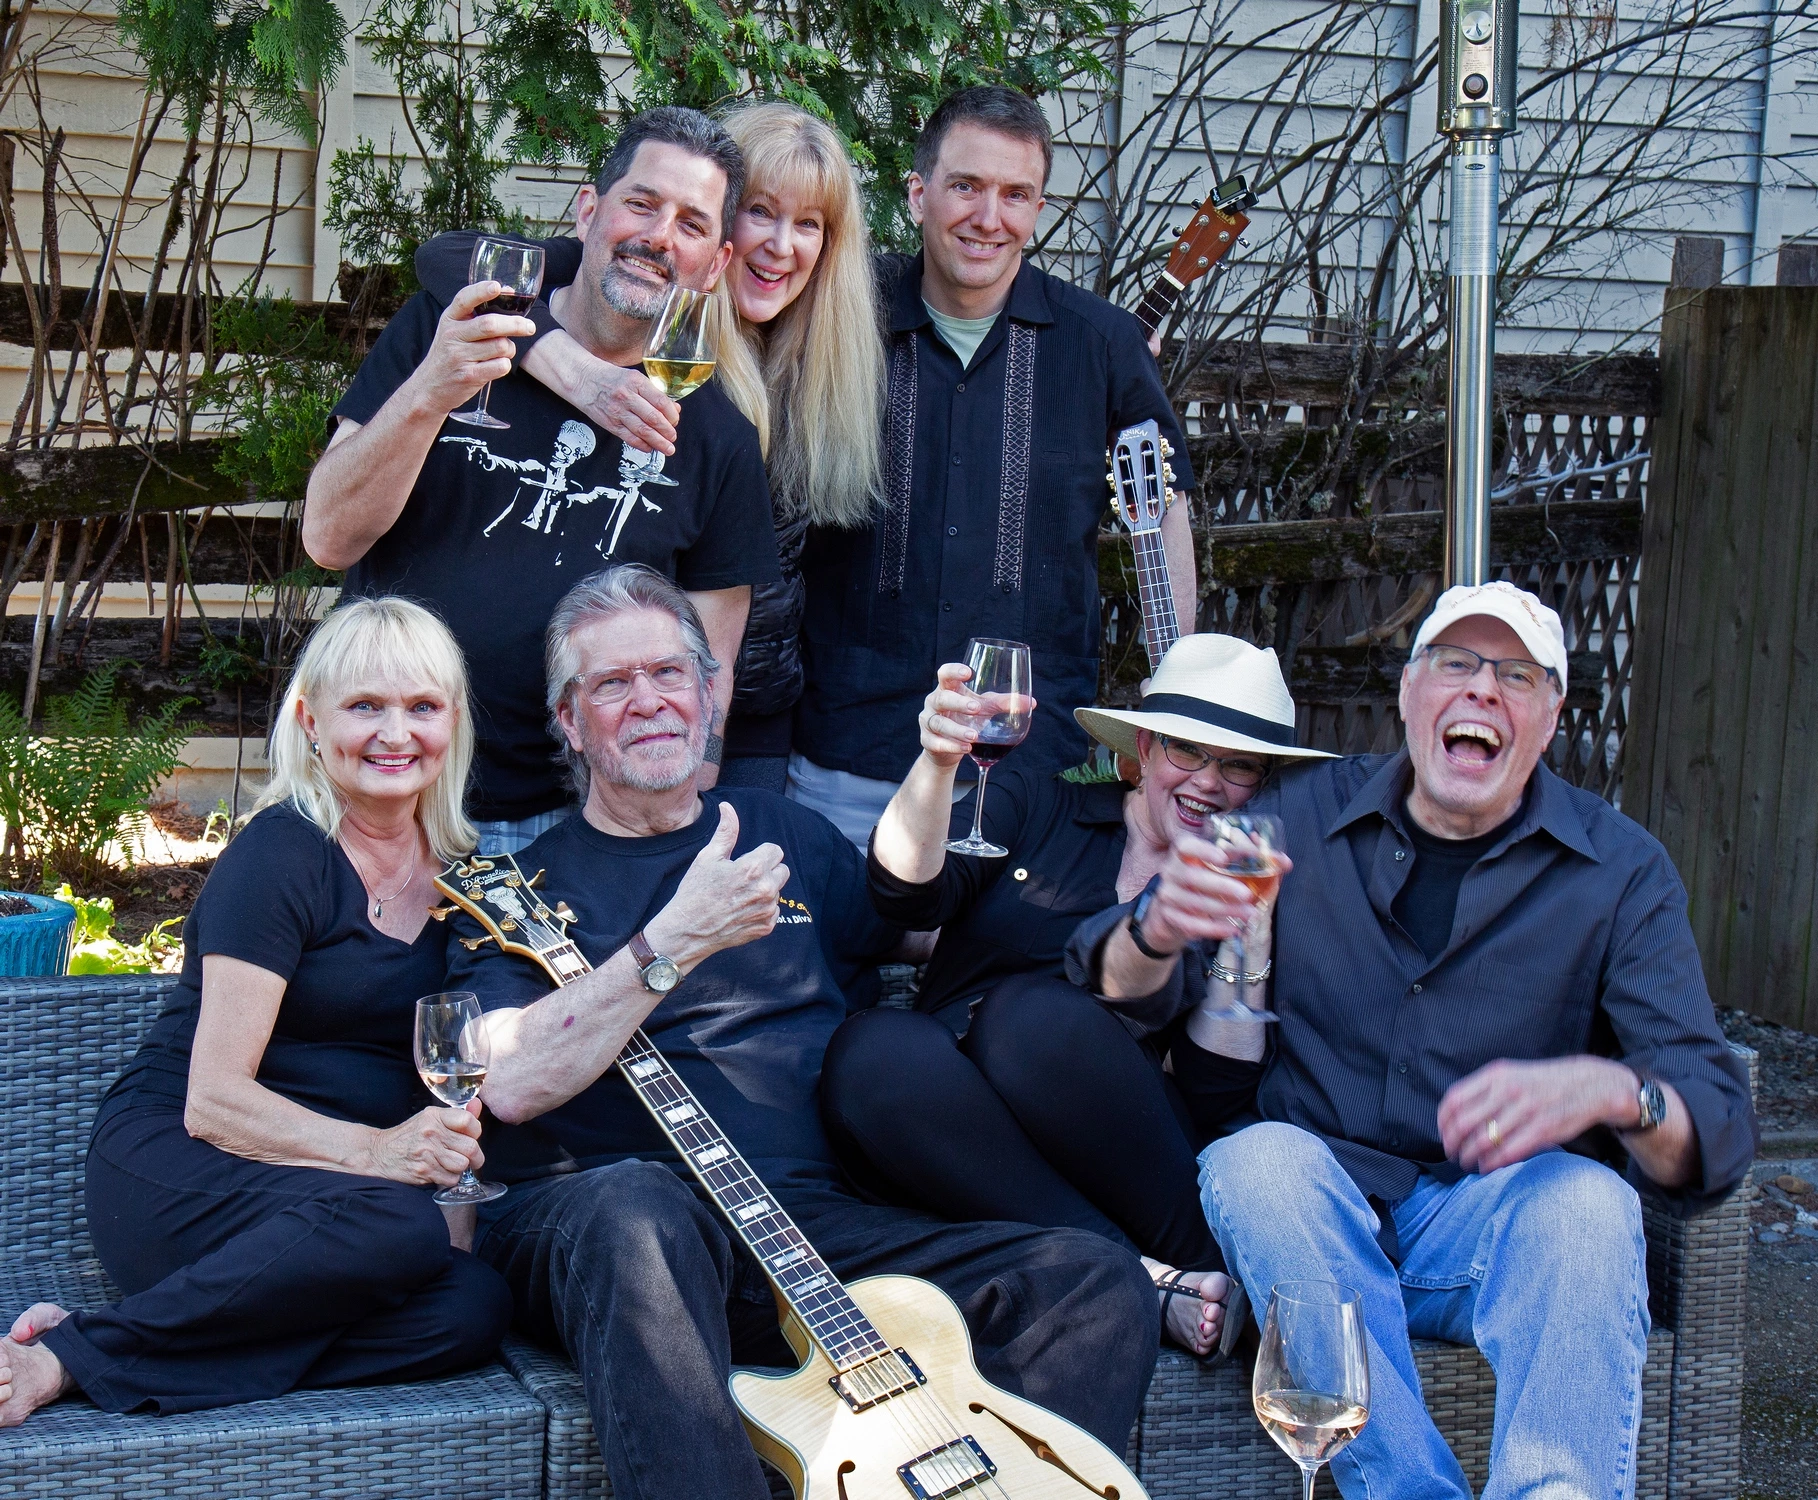
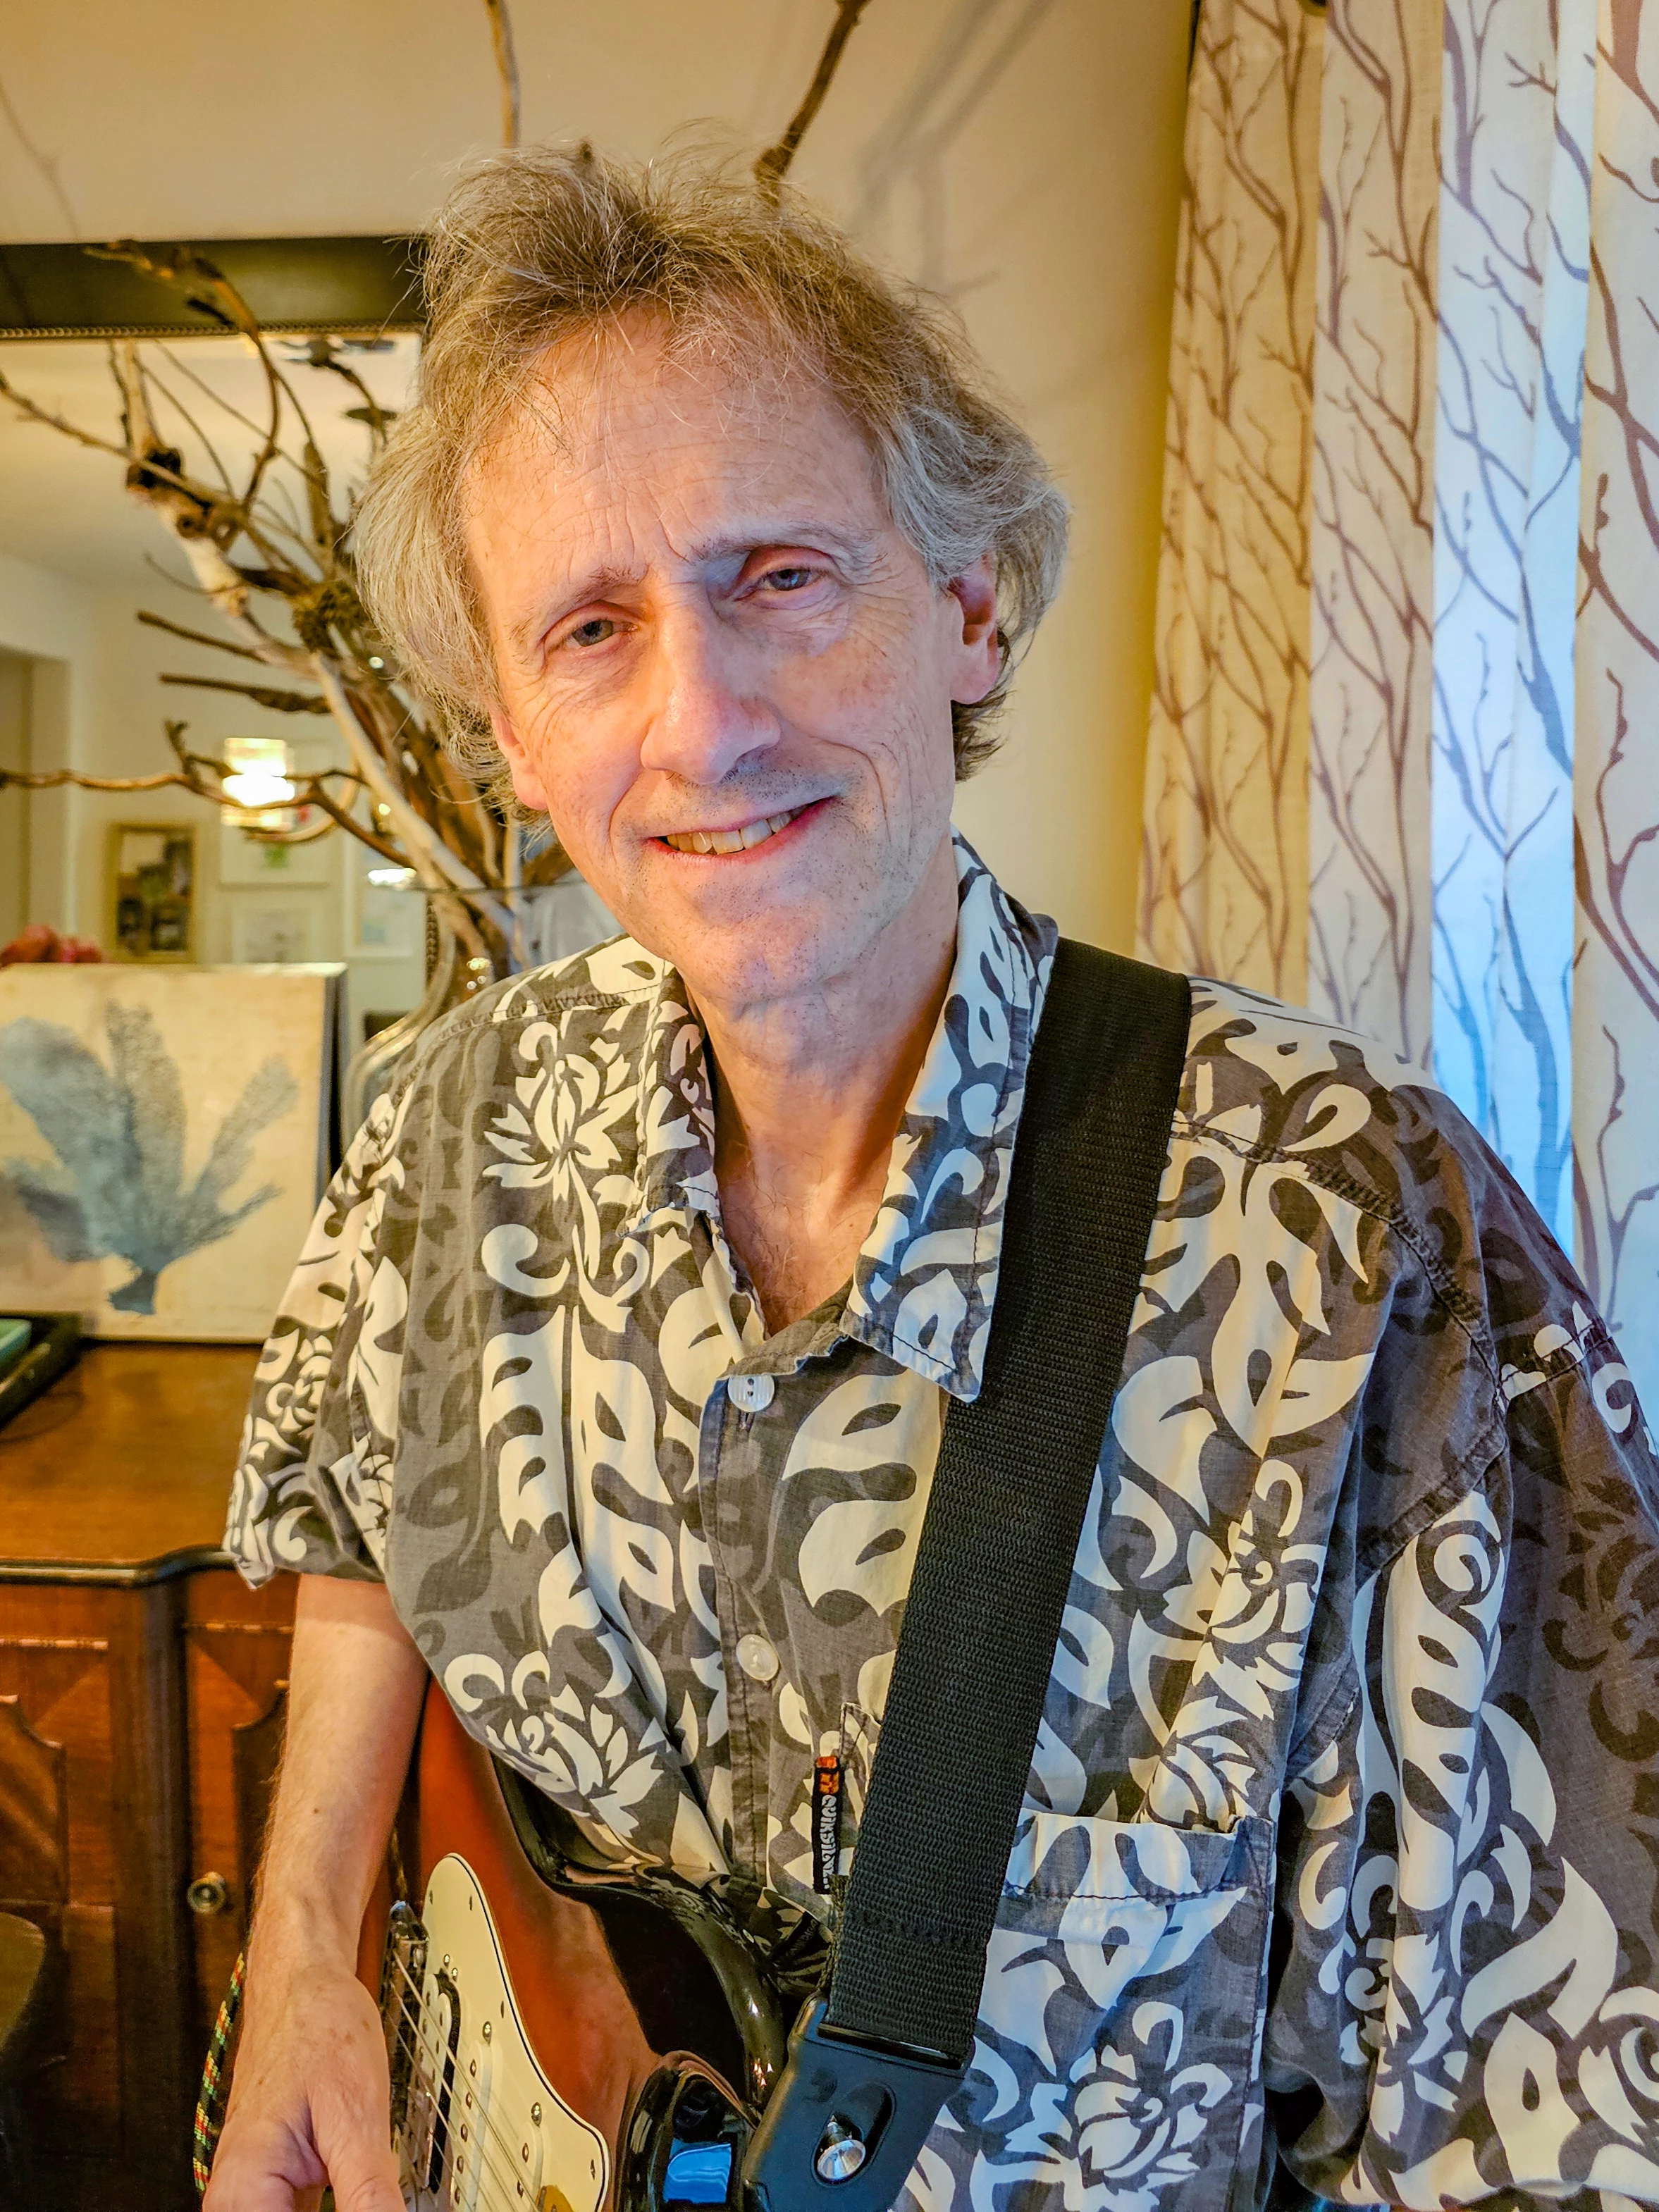
I want to replace the person or at least the head of the person in the attached image with the person or head of the person in my second image.  The person or head I want replaced is the fella standing at the far right in the back row with the person or head of the person in the single image attached here.  I am failing miserably at trying to do this.  Can someone please help?


3 replies

Trevor.Dennis
Community Expert
Community Expert
February 5, 2025
Inspiring
February 5, 2025

Thanks ... I've watched that video before and even again today.  I can't get any of that to work.  When I add the second image it shows it as the background.  According to the video it should be a layer.  

Trevor.Dennis
Community Expert
Community Expert
February 5, 2025

Yes, Photoshop is all about layers and masks.  Thick about those fairground games were wet sponges are thrown at person who has their head through a hole in a board with an image on it.  The photoshop equivalent would be to a) have just the head on a layer above the background layer, or b) effectively have a hole in the background image, and place the head on a layer behind it.  I nearly always use the latter method.


To make a hole in a layer,m we use a layer mask which we can add by clicking on the layer mask icon at the bottom of the layers panel (my green highlight).  To help us remember, we say 'Black Conceals, White Reveals'.  So where I painted with black on the layer mask, we can see through to the red layer behind it.


If we place the single person image behind the group image, we can see part of it through the hole we made in the group layer.  There are two problems.  It is much too big, and has a strong yellow colour cast.


To adjust the size we use Free Transform (Ctrl T) and drag the corner handles.  If you move the curser to just outside a corner handle, you can also rotate the layer.  The size is better now, but we can see that in this case it would be better to place the new head 'ABOVE' the background layer.


To do that we need to make a selection of the new head.  Selections are incredibly easy to do nowadays with Photoshop's newer Ai enhanced tools.  In this case the Object Selection Tool works well.


With a good selection made, we need to refine it with Select & Mask  from the Options Bar.  You are going to have to go search for a video on Select and Mask


I made the layer and maska Smart Object (by right clicking) and added a new mask so I could mask out the nec and shoulders.  Use Transform again to size, rotate and position — I also flipped it horizontally to better match the exisiting head.  That just leaves the colour cast.


A Color Balance adjustment layer is probably the most user friendly way to fix the yellow cast, but note that I have 'clipped' it to the new head (layer 2) by clicking on the icon (my yellow highlight).

We could do more to mage the contrast and light a better match, but I have spent enough time on this.

rayek.elfin
Legend
February 4, 2025

Here ya go. Easy peasy. 😉


Inspiring
February 4, 2025

🙂  now that is funny! 🙂

Trevor.Dennis
Community Expert
Community Expert
February 4, 2025

Are you sure that's what you want?  Looks kind of wrong to me.

creative explorer
Community Expert
Community Expert
February 4, 2025

@Trevor.Dennis OMG you're next 'James Fridman!'

m