


Copy link to clipboard
Copied
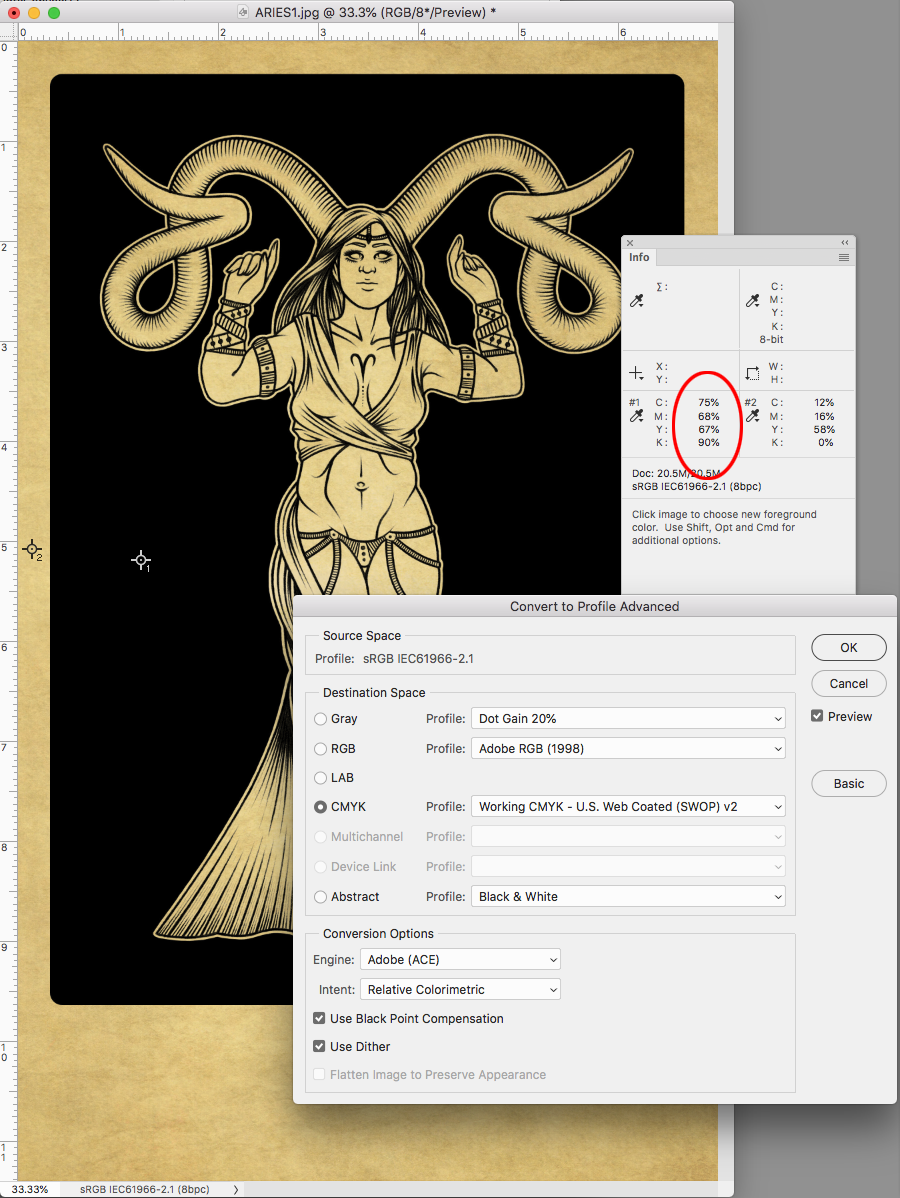
Hey all, I'm just finishing up a set of illustrations and I'm very frustrated with figuring out how to achieve the best black in Photoshop. I have been working in CMYK the whole time because these images will be printed. I understand CMKY dulls the colors quite a bit. The black looks fine in Photoshop (I have tried out a mixture of sliders and now I'm using C=75, M=68, Y=67, B=90.) Any combination I use still ends up looking bad when I save as a PDF in the end. I know printers are capable of printing the black I'm working with, it's just my PDF looks very dull in comparison to what I want. I'm very close to the deadline for this project and need to send PDFs to a printing company first thing Monday morning. I'm worried if I send the grayed PDFs, they will look like that in print. I have attached two images, one is a CMYK jpeg with dulled out colors, and another is an RGB jpeg with the black I want (but I do not like the paper color in this one). There is no way for me to contact the printing company and ask them for help, so I was wondering if someone could help me here. Is there a way for me to save a CMYK PDF with that nice black? Or do I have to send the grayish one and risk the print looking dulled out in the end?


 1 Correct answer

What software are you viewing the CMYK PDF in? Does it have an embedded CMYK profile? This is probably due to colour management.
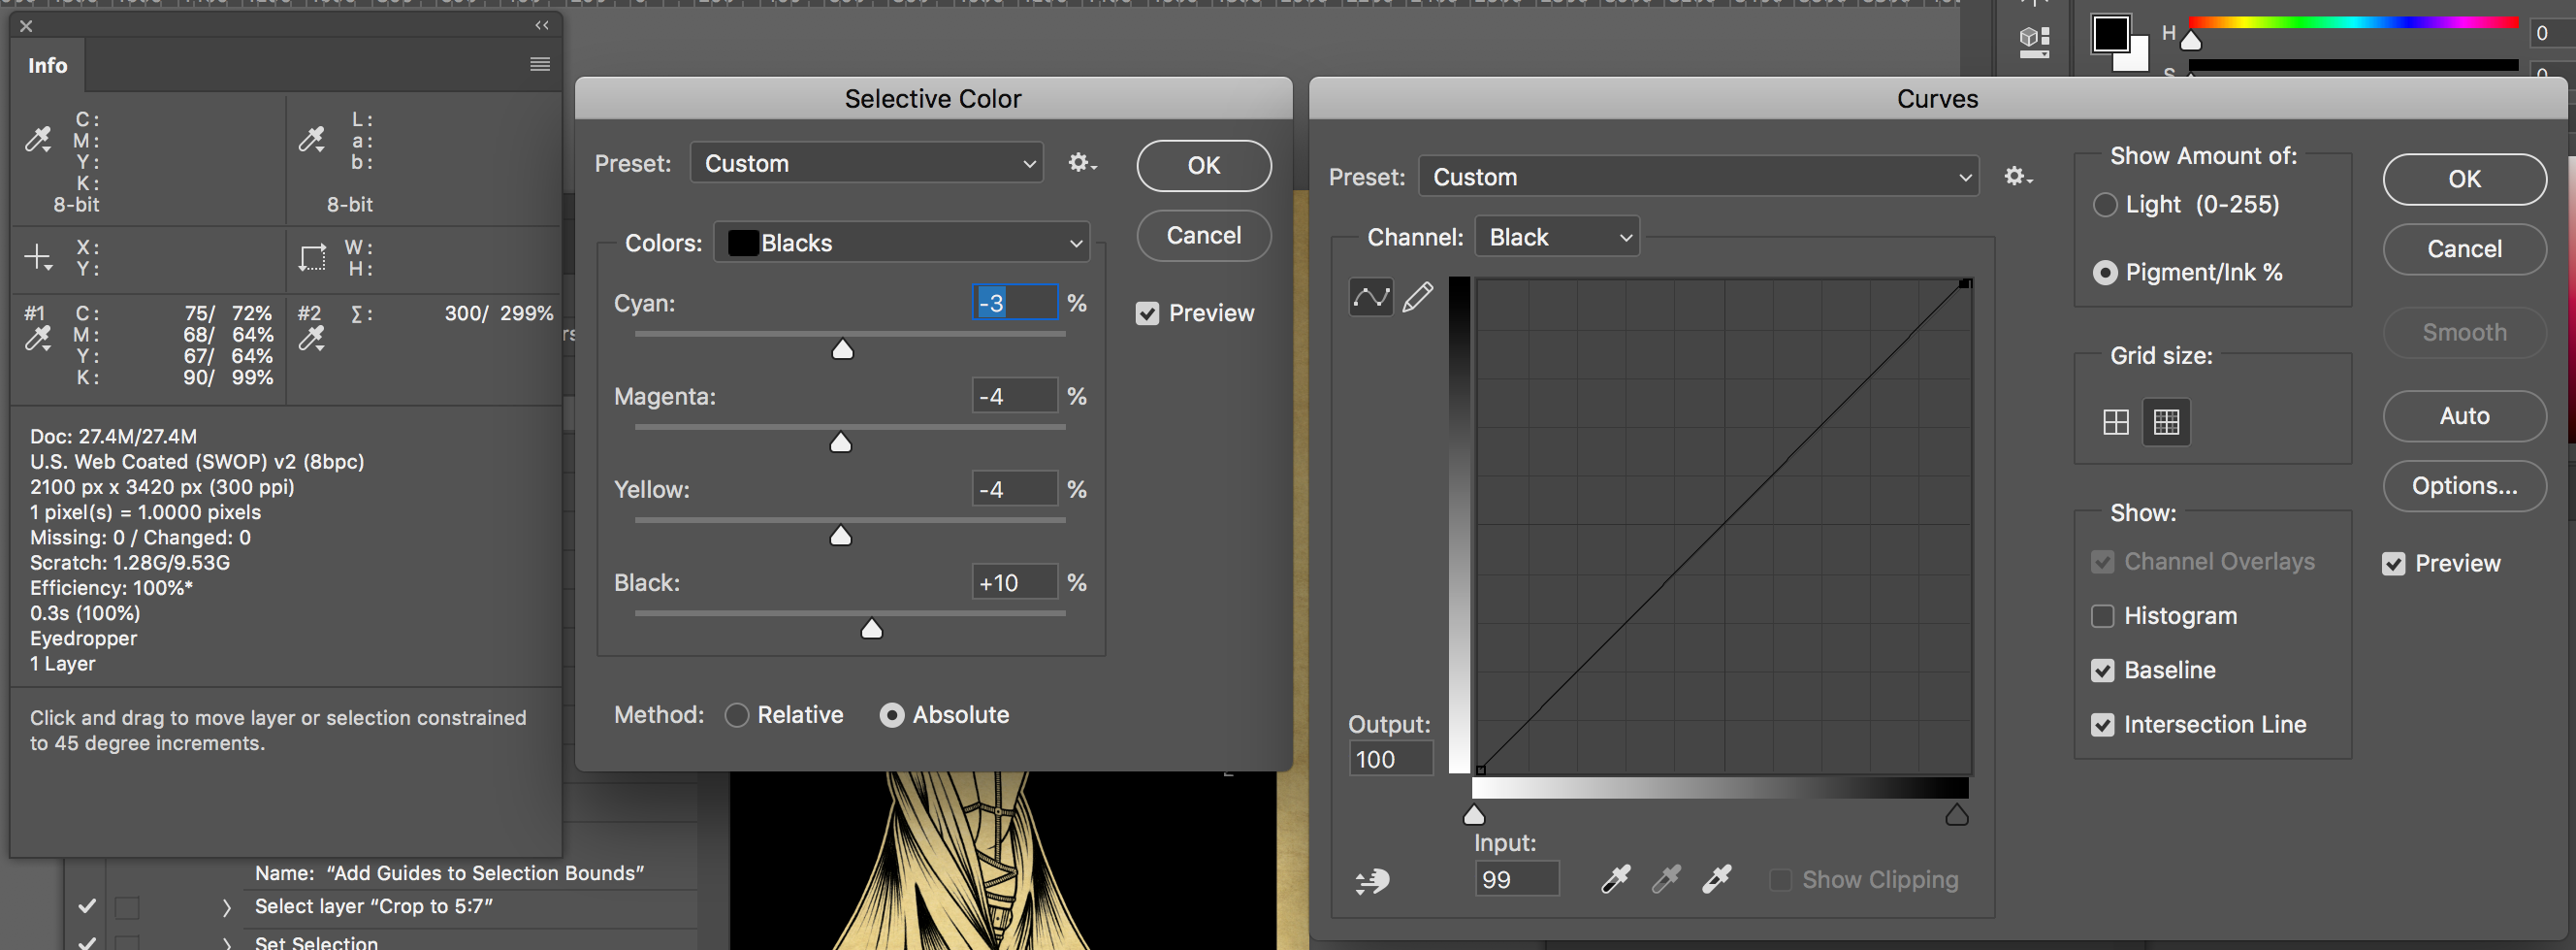
That being said, your rich black is weak. This is not a photo, the illustration would be better with 100% K value than 90% K. I would use a selective colour edit to bump up the K value of blacks and slightly reduce the CMY values so that you still maintain the 300% total ink limit. You will need to darken the black channel using a curve as the selective colour move can’
...Explore related tutorials & articles
 9
Replies
9
9
Replies
9
Copy link to clipboard
Copied
What software are you viewing the CMYK PDF in? Does it have an embedded CMYK profile? This is probably due to colour management.
That being said, your rich black is weak. This is not a photo, the illustration would be better with 100% K value than 90% K. I would use a selective colour edit to bump up the K value of blacks and slightly reduce the CMY values so that you still maintain the 300% total ink limit. You will need to darken the black channel using a curve as the selective colour move can’t make it any darker than 99%.
These two edits can be recorded into an action for use with multiple images.
Copy link to clipboard
Copied
Thank you for the much needed help! I made a few slight adjustments to my blacks. I do think part of my problem is that the PDF looks dull when I view it on preview (I'm also using a relatively old Mac laptop). When I drag the PDF back into Photoshop and InDesign, the richness of the colors are restored. I know the printing company will be using InDesign to set up my files, and my CMYK colors look fine when the PDF is placed within the program.
Once again, thank you!

Copy link to clipboard
Copied
Preview, the Mac app? This has very poor CMYK viewing, so don't trust it for anything. Use Acrobat Pro's Output Preview, choosing the CMYK profile your printer has supplied.

Copy link to clipboard
Copied
Total ink limit (TAC) is built into all CMYK profiles. So the simplest way to ensure the richest possible black is to work in RGB and convert at the very end to whatever destination CMYK is required. Then 0-0-0 is converted to max ink, which is a bit higher, but the deepest black possible within TAC.
But unless your monitor is calibrated accordingly, you will very likely be very disappointed when you see the finished result. Maximum ink in offset print isn't a very deep black - much lighter than native black on any monitor. There is no way you can reproduce monitor black in offset print.
To give you a ballpark figure, native monitor black is usually in the range of 0.2 - 0.3 cd/m² (candelas per m²). To get an on-screen equivalent to offset print black, you often need to raise the monitor black point dramatically, to somewhere between 1.3 and 1.8 cd/m². That's a big difference - but when you see it on screen you can work with it and compensate.
The black level has a big impact on the perceived "punch" of the image. It's the main reason many people say "screen and print can never match" - which isn't true. Not all calibrators let you adjust black level, though.
Copy link to clipboard
Copied
Total ink limit (TAC) is built into all CMYK profiles. So the simplest way to ensure the richest possible black is to work in RGB and convert at the very end to whatever destination CMYK is required. Then 0-0-0 is converted to max ink, which is a bit higher, but the deepest black possible within TAC.
Total ink limit is one thing, but the deepest black is another thing, which is why i suggested raising the 90% K value to 100% K, while lowering the CMY channels a total of 10% to maintain the 300% total area coverage value.
Both of the following mixes have 300% total ink, however one is darker than the other (absolute colorimetric readings):
75c68m67y90k = 13L 0a 1b
72c64m64y100k = 11L 0a 1b
Even a 260% total ink of 60c53m53y100k = 11L 0a 1b
So for U.S. Web Coated (SWOP) v2 there is in theory diminishing returns going over 260% total ink if one has 100% black.
As these are illustrations without any concern of photographic tones filling in and losing detail, I personally would go with solid K over a screened K if the key criteria is getting the darkest black possible.

Copy link to clipboard
Copied
Thanks I was having a similar issue.

Copy link to clipboard
Copied
Also, Stephens’s method works in this case because there’s no black in the yellow background that is affected by the selective color.
The profile you use to make the conversion determines how the black plate is generated as well as the total ink amount. SWOP limits black to 90% and compensates by adding CMY.
Is your printer asking for US Web SWOP? Are they are printing on a web press? For example GRACol Coated doesn’t have the 90% K conversion limit:

Copy link to clipboard
Copied
The main reason I went with a selective colour:black and curve:black edit was that I was presuming final flattened files. If working on a layered file and the background black panel was isolated as a layer or solid fill adjustment layer then one could just edit the isolated black directly.
Also, Stephens’s method works in this case because there’s no black in the yellow background that is affected by the selective color.
Rob, as I used the “black” colour of selective colour as a targeted colour for adjustment, it should not affect any black component of a “yellow” hue anyway.
Here I adjusted the original image to have a black component in the yellow hues, however the selective colour:black adjustment does not affect the yellow hues black channel component.
It is easy enough to add blend-if sliders or layer masks to limit where an adjustment is applied if required.

Copy link to clipboard
Copied
I only brought up the profile’s black ink limit because the OP is converting to the default US Web SWOP, which often (but not always) means the actual press profile is not really known. If the destination is a sheetfed press there might not be a 300% limit and a profile like GRACol or Fogra would produce a somewhat denser black point, with no black ink limit.
Also, it seems like the OP was judging the "blackness" of the PDF black via Apple‘s Preview, which probably doesn’t give a reliable soft proof.

Find more inspiration, events, and resources on the new Adobe Community
Explore Now
 AdChoices