

Help with Perfect Bevel Effect Please

Copy link to clipboard
Copied
Hi everyone.
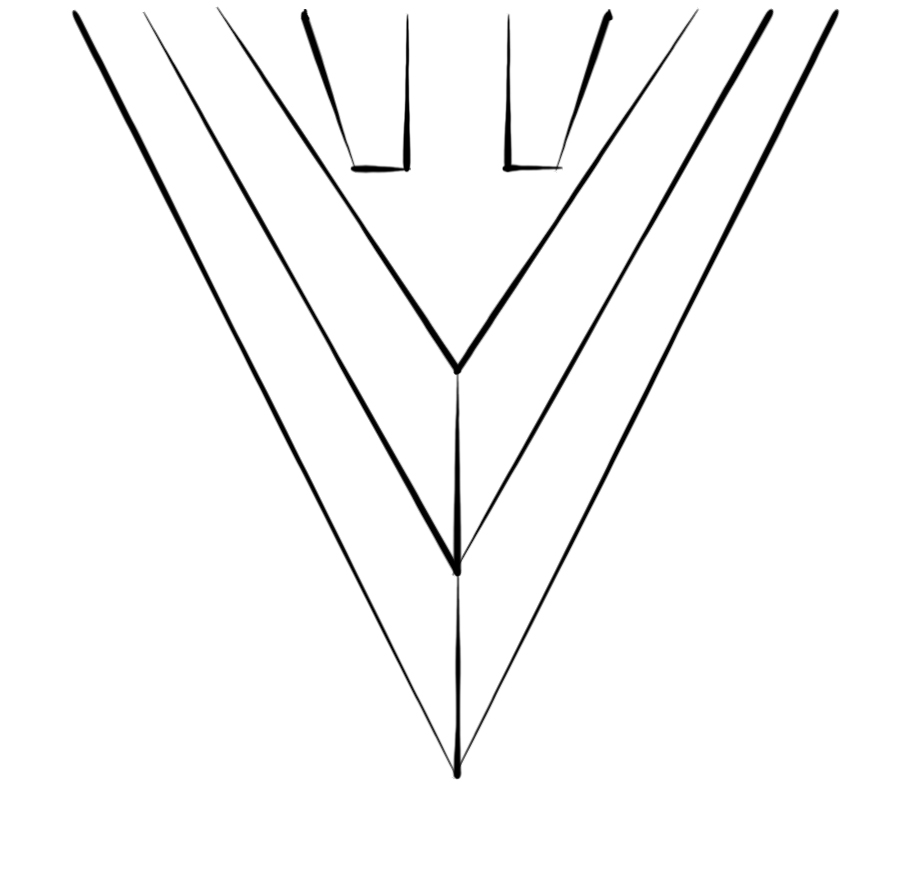
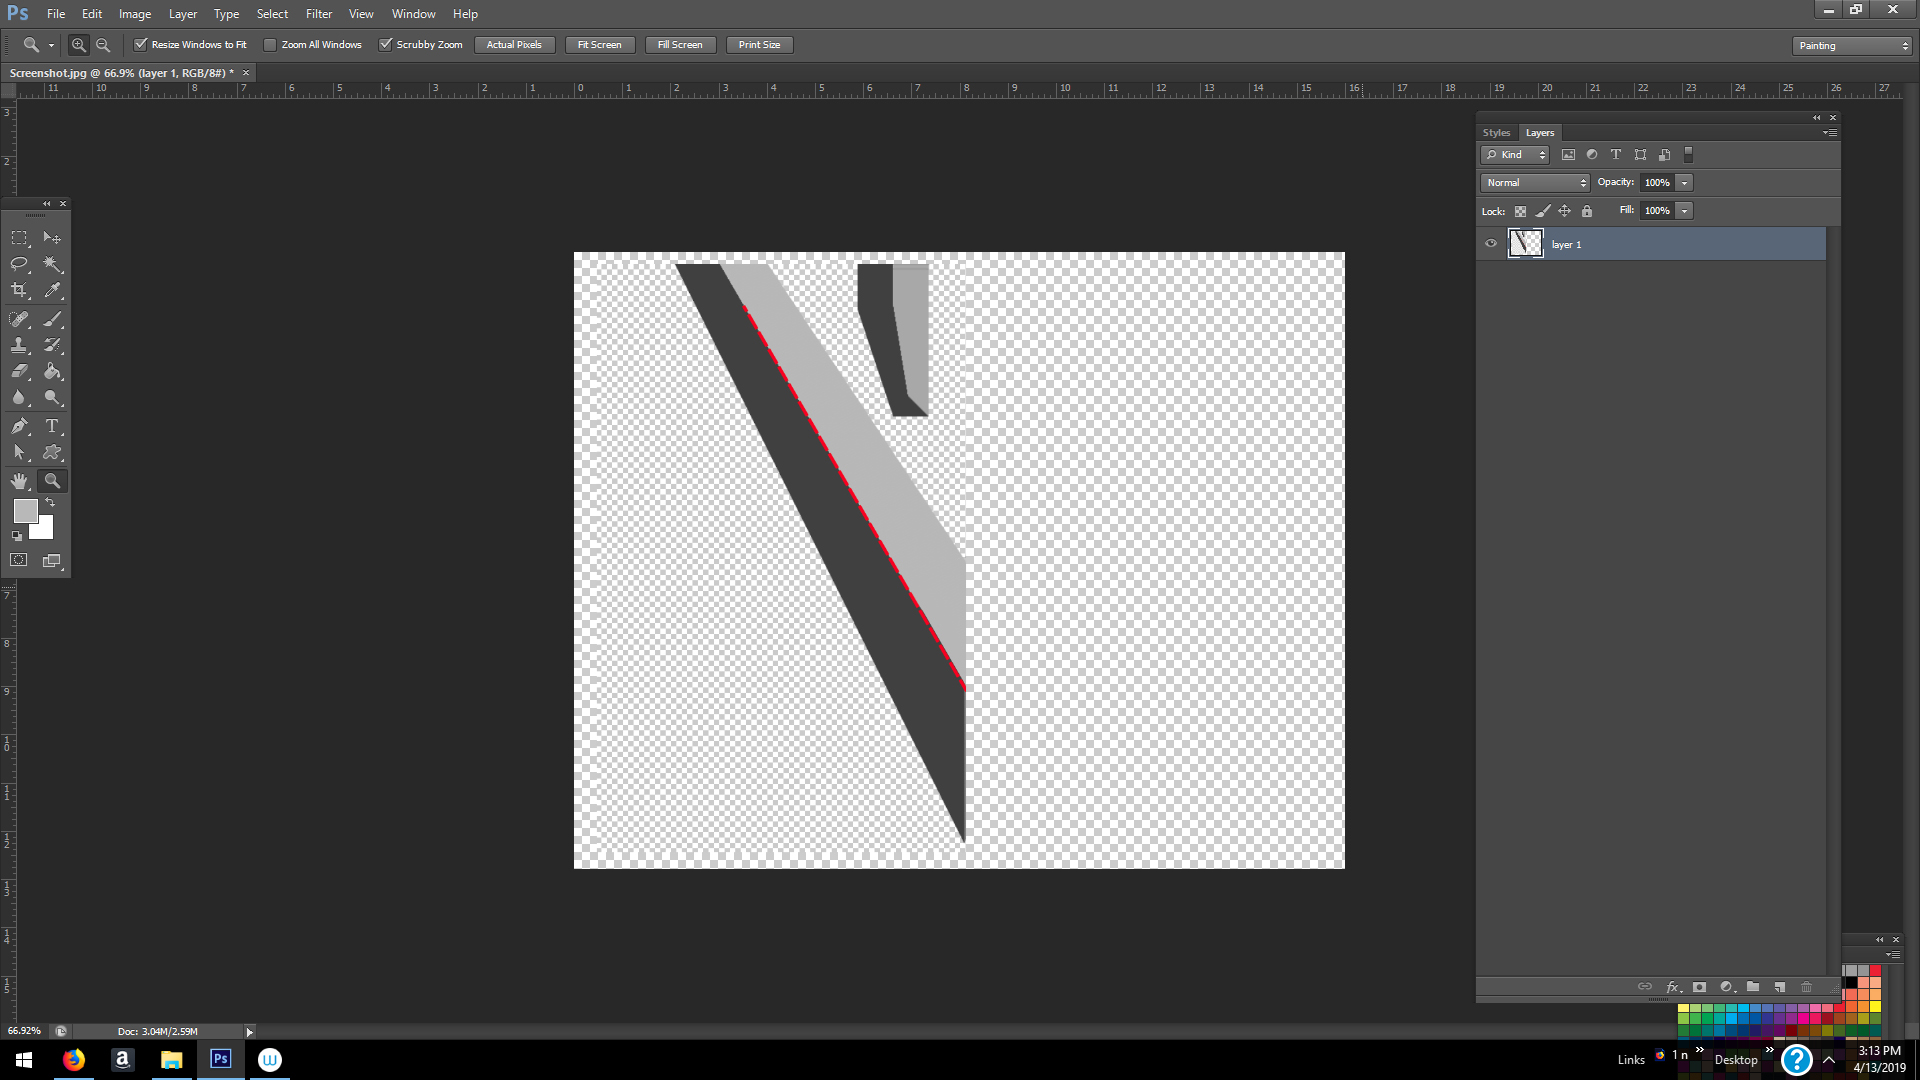
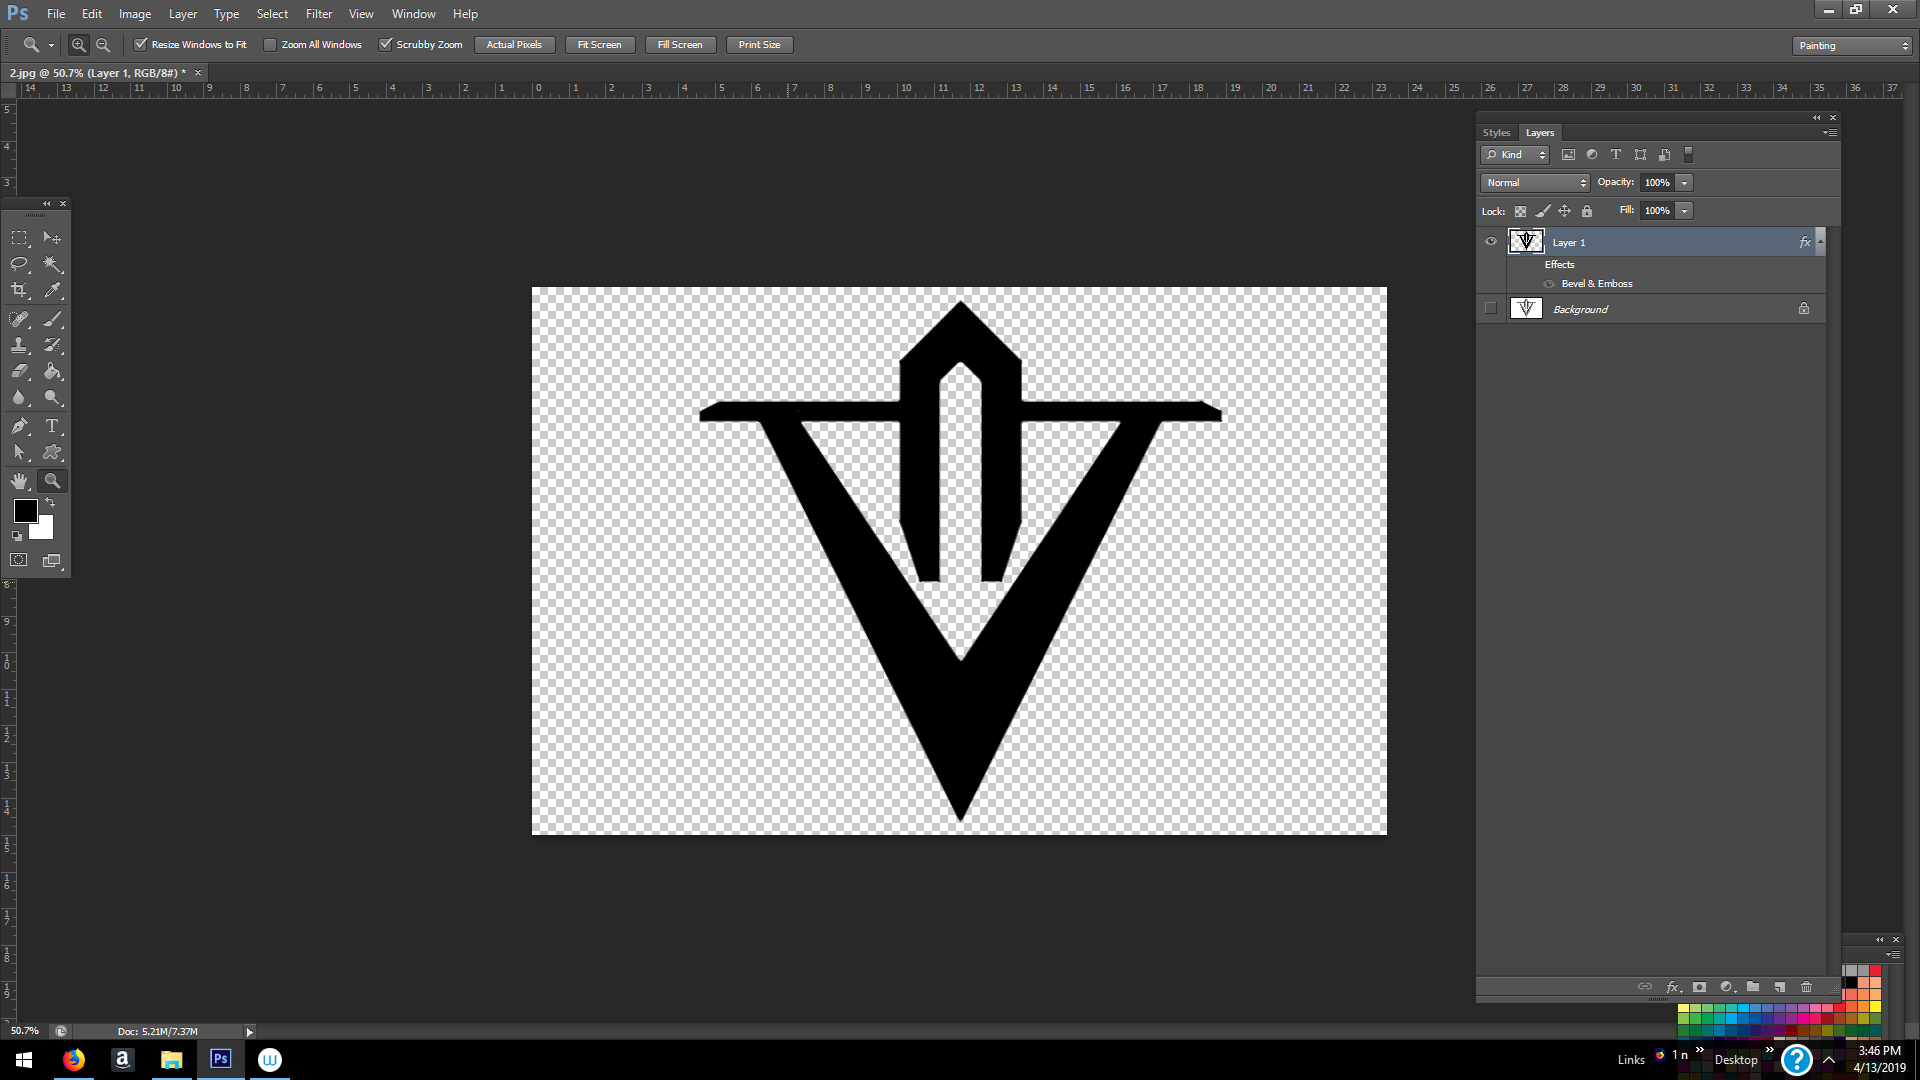
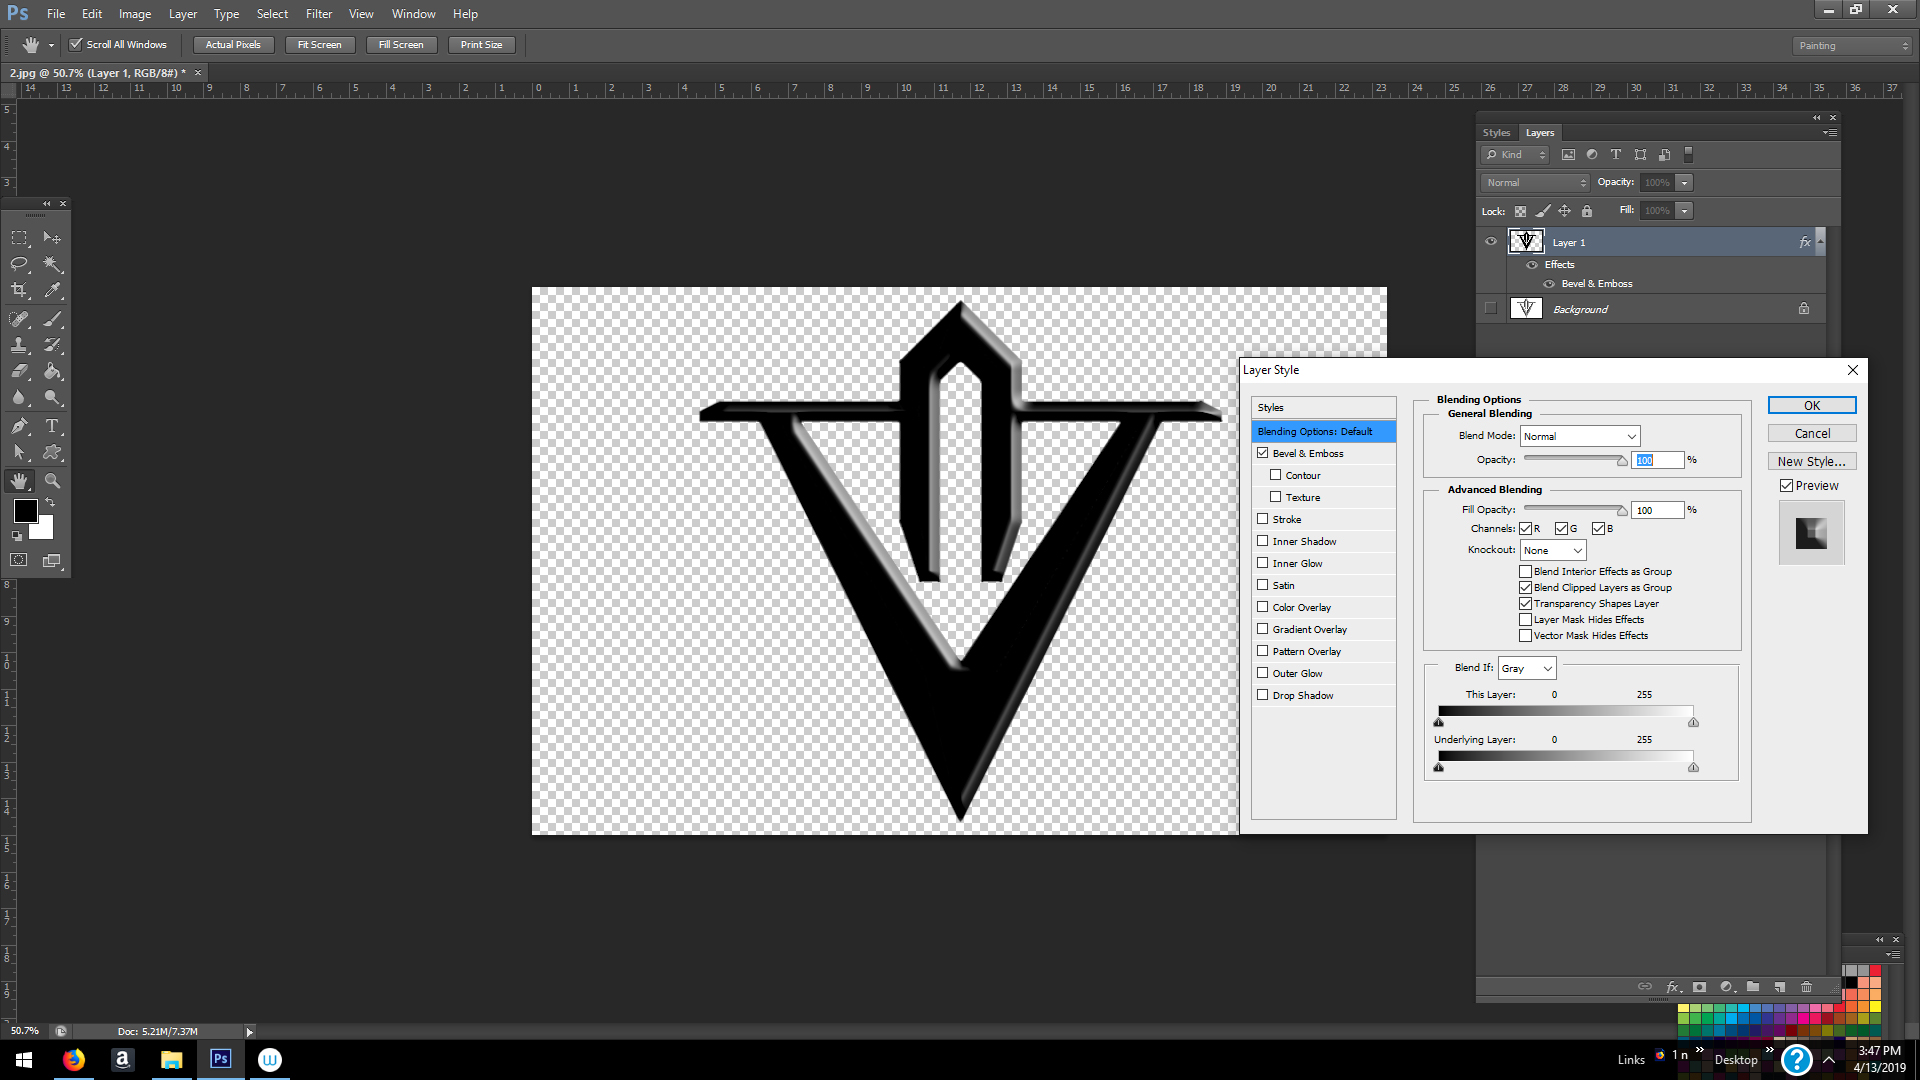
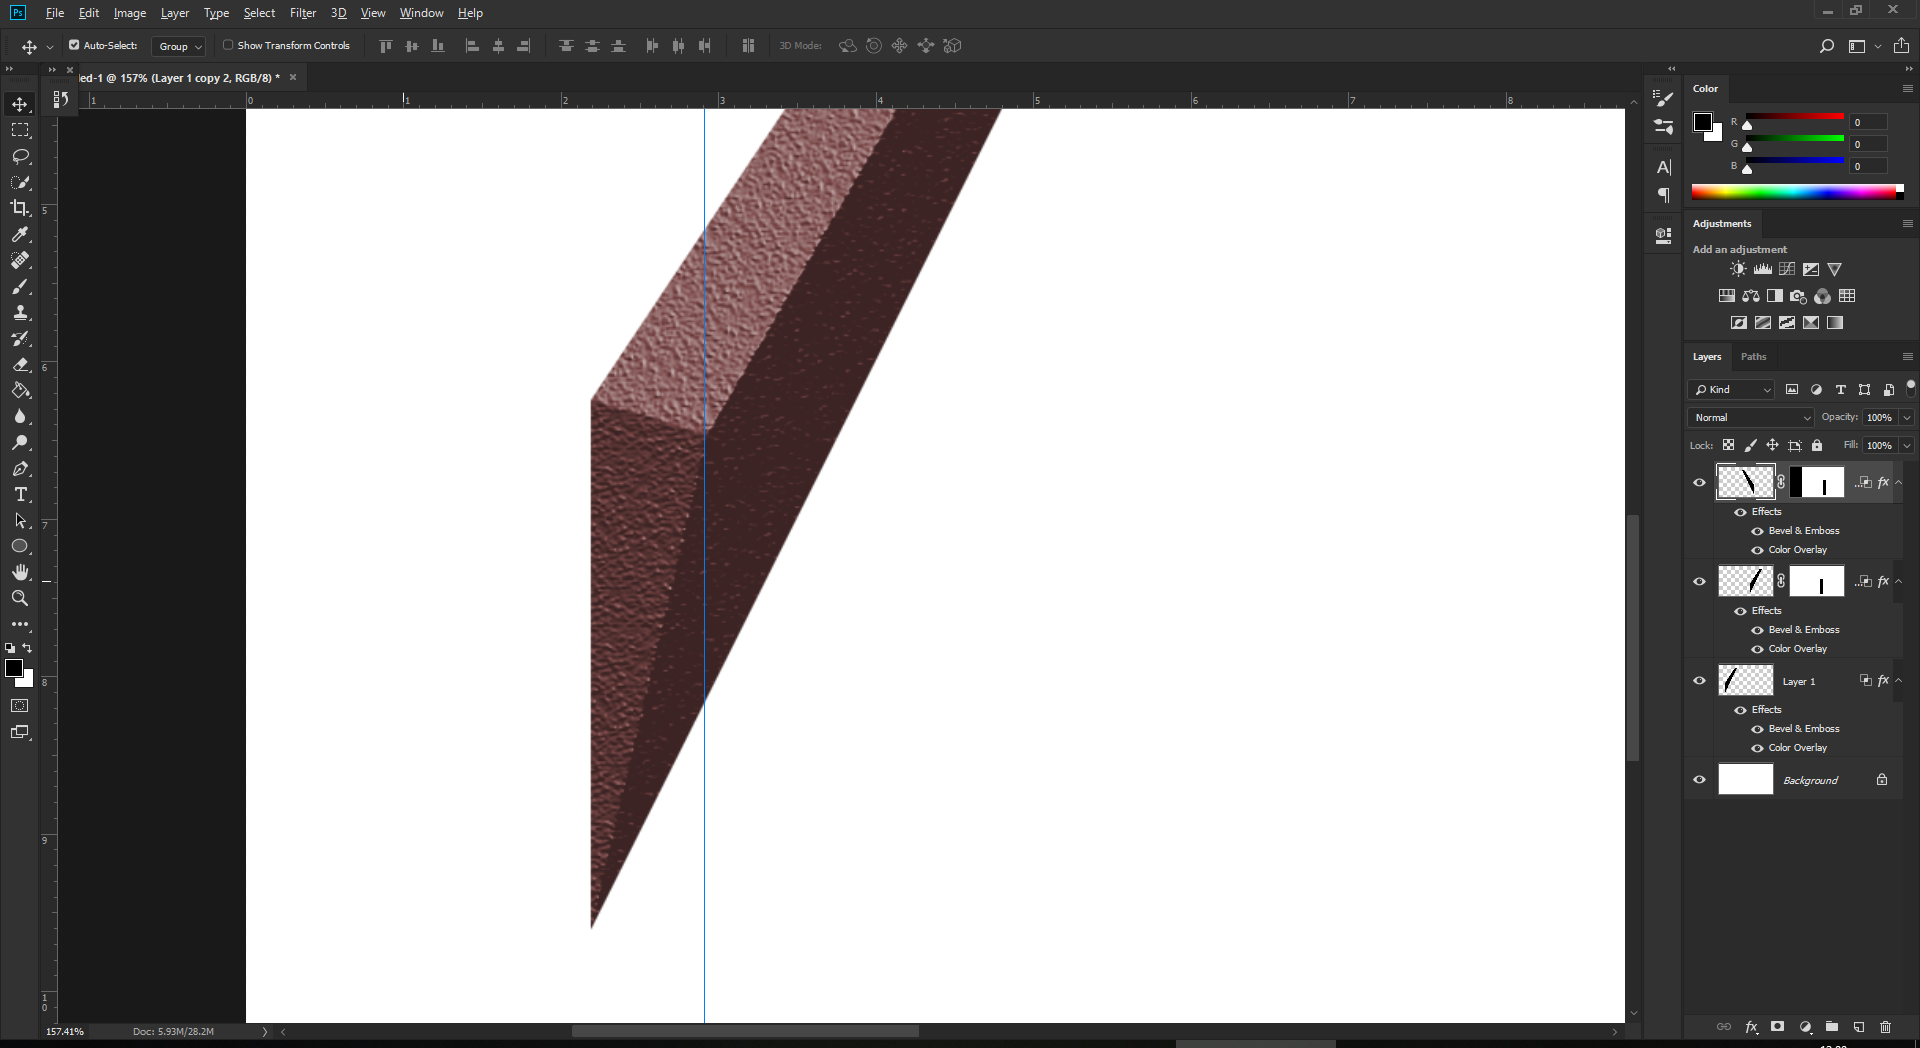
I have this triangular shape in Photoshop, which I'm trying to apply a Bevel & Emboss effect on. Everything works fine until the bevel reaches the angle turn. As you can see from the screenshot the bevel curves around the angle but I'd like it to go straight as displayed by the red dashed lines. The objective is to make the shape look like the attached sketch. If anyone could give me some tips, I'd be infinitely grateful.
Thanks in advance!
P.S. Is there any way to get rid of the broken planes artefact inside the bevel?


Explore related tutorials & articles
 13
Replies
13
13
Replies
13

Copy link to clipboard
Copied
What if you split the sides into 2 separate layers and applied the bevel & emboss to each separately, then joined them together?
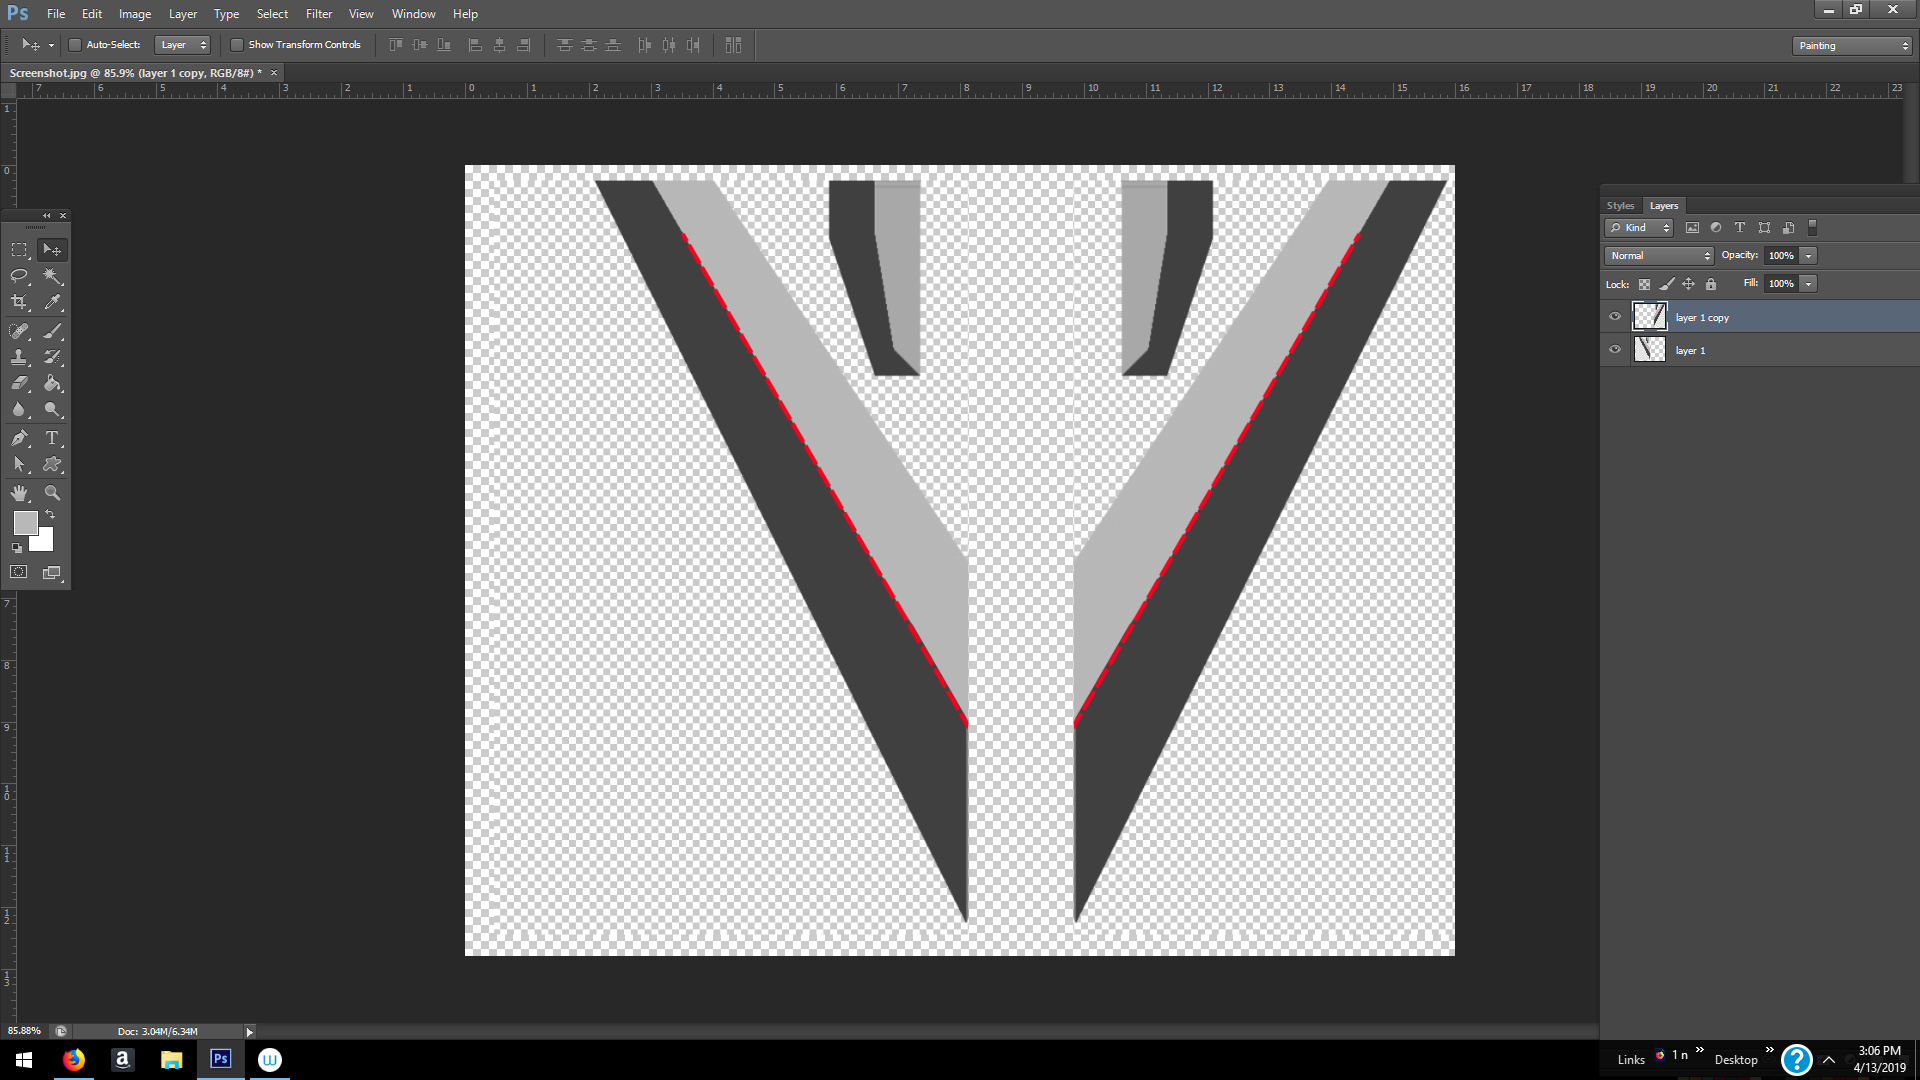
The above isn't exactly how it would look, but you get the idea.
Copy link to clipboard
Copied
Gah I didn't mean apply separately -- I meant to say apply it to the half, then dupe and flip that layer and join them.
Copy link to clipboard
Copied
Hi! Thank you for your quick reply and advice.
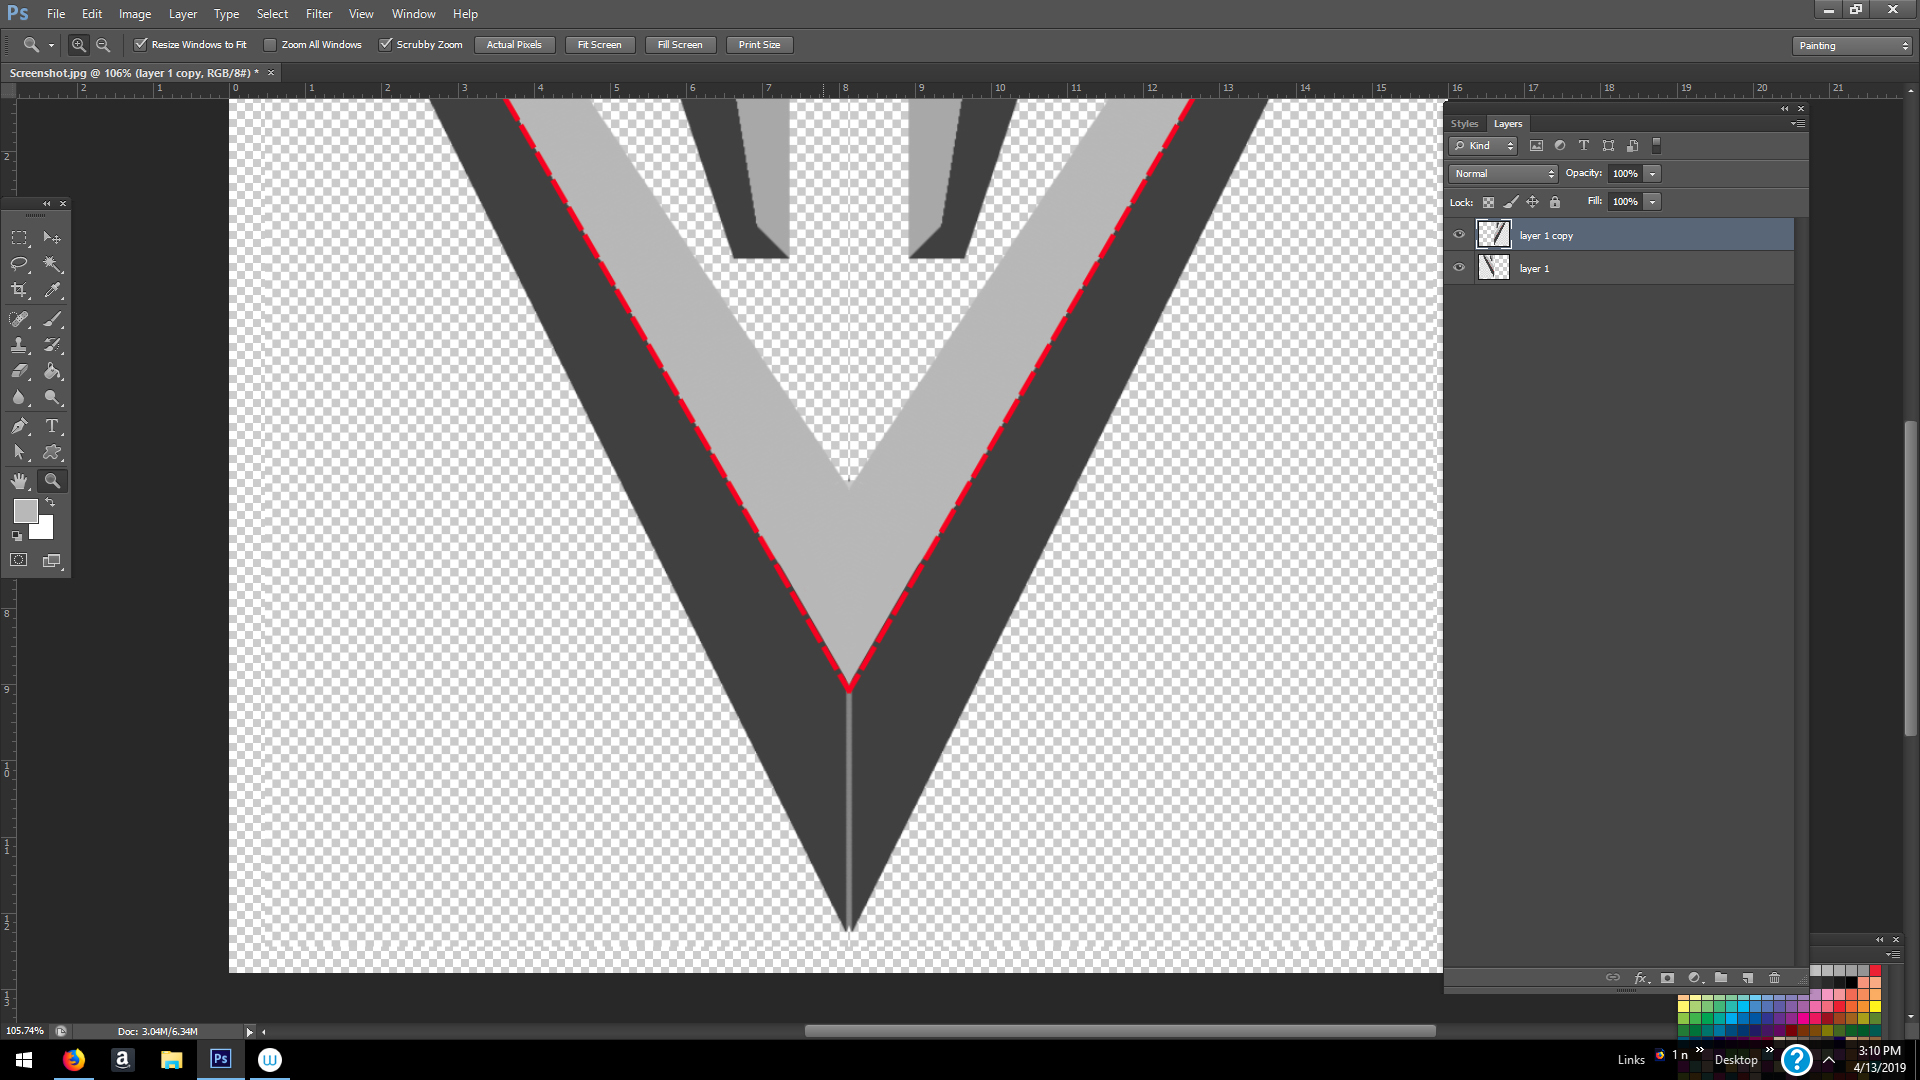
I did what you said but unfortunately this approach creates another plane and the central line of the chisel won't reach the end of the shape. 


Copy link to clipboard
Copied
Rats, I was afraid of some unforeseen thing such as this. Have you played around with the bevel slider?
Copy link to clipboard
Copied
It is indeed frustrating. Yes, I did poke the slider here and there but alas, it doesn't help.
Copy link to clipboard
Copied
Have you tried joining the two sides first and then adding the effect to the whole? You have to fill in any white lines and make a solid shape, then add the effect. Any place that has a break will cause a separate bevel.

Copy link to clipboard
Copied
The pseudo bevel layer effect in Photoshop (and pretty much any other image editor with a similar option) often fail in these cases - or at least, create unexpected results. These algorithms behind these effects have to create a depth effect based on a flat bitmap surface, and the final effect is not very controllable. Another issue that may occur are ugly artefacts and banding in the shading here and there.
Instead, have you tried converting your logo to a 3d object in Photoshop, and controlling the bevel there? Seeing the complexity of the shapes, you may have to separate shapes, and convert each one individually.
Alternatively, use a 3d application like Blender to convert to an actual 3d object. This will give you all the control you need, but at the expense of having to spend more time.
Copy link to clipboard
Copied
I made a quick test in Blender for you. Download the Blender file here:
http://www.upl.co/uploads/beveltest1555207467.zip
You will need Blender 2.8 to open it. Download it here:
Feel free to experiment with the lighting and materials. I just played around a bit to show you what is possible. The lighting is not great, but easily adjustable.
Btw, this is a realtime render in Blender's new awesome Eevee render engine! What you see in the viewport is what you get!

Copy link to clipboard
Copied


Copy link to clipboard
Copied
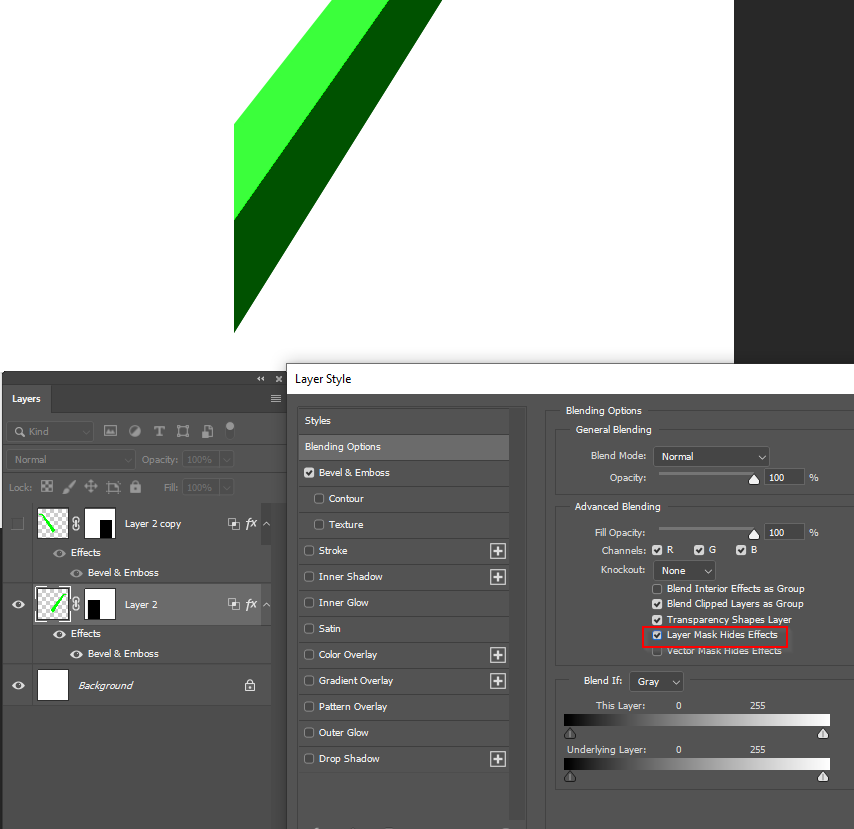
You can fudge it without resorting to 3D by using separate layers for each side, like Ponytail suggested, and checking Layer Mask Hides Effect.

Copy link to clipboard
Copied
Thanks for your input guys!
ponytail1414, I went to bed early yesterday, hence my late reply, sorry. Yes I did make sure there were no white lines, even imported a vector path and filled it, to be 100% sure, but still the same thing happened.
rayek.elfin, I just tried converting the png to a 3D object in Photoshop. Sadly, the same curvature appears as in traditional 2D version. Very impressive job you did there with Blender. I actually do have a correct 3D object, though it's done in SketchUp not in Blender. I remember I tried learning Blender several years ago but dropped it after 15 minutes, because of its UI mess and unnecessary complexity and uncomfortable controls but never stopped admiring works created with Blender. I heard the people behind Blender have plans to remaster the program soon and make it more welcoming, is it true?
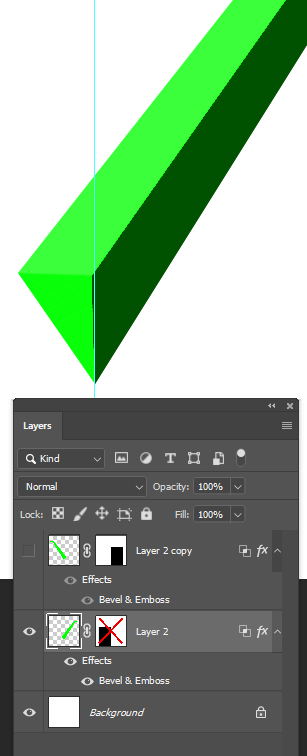
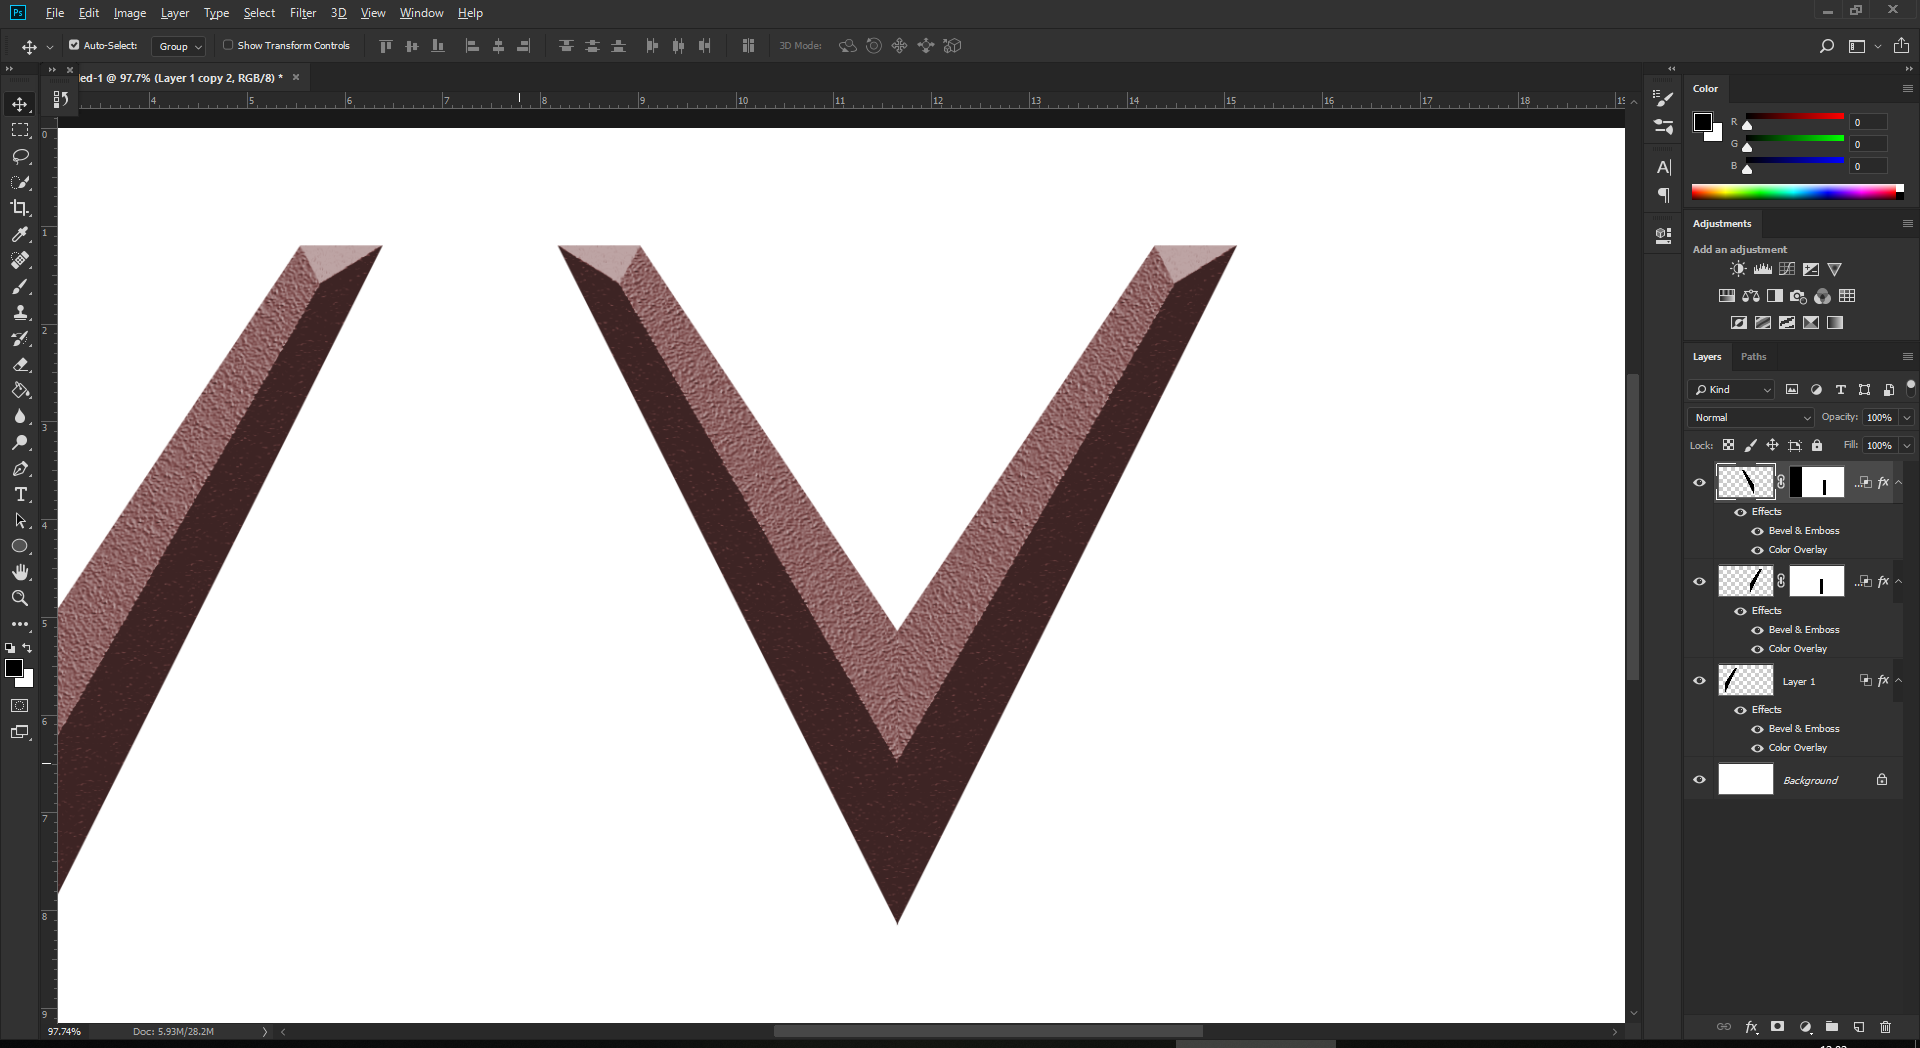
Trevor.Dennis, I hope I understood you right. Please see the screenshots below. Did you mean to mask the area left of the vertical guide and then copy the result and flip horizontally? Here's what I got:
Thanks again guys, for your help. Great community! 

Copy link to clipboard
Copied
Hi
You asked about Blender. The interface has changed considerably in the 2.8 version and a beta is now available to try. Just google Blender 2.8 Beta
Dave
Copy link to clipboard
Copied
VahePogossian wrote
rayek.elfin , I just tried converting the png to a 3D object in Photoshop. Sadly, the same curvature appears as in traditional 2D version. Very impressive job you did there with Blender. I actually do have a correct 3D object, though it's done in SketchUp not in Blender. I remember I tried learning Blender several years ago but dropped it after 15 minutes, because of its UI mess and unnecessary complexity and uncomfortable controls but never stopped admiring works created with Blender. I heard the people behind Blender have plans to remaster the program soon and make it more welcoming, is it true?
In that case you could also import the 3d object as a 3d layer in Photoshop, and work with that. Although Photoshop's 3d rendering is rather old in the teeth (understatement), it should suffice to create an acceptable result, and much more control over lighting than a pseudo bevel effect. Export the 3d file as an obj file, and import it in PS.
As Dave mentions, Blender 2.8's user interface got a complete makeover, and is now actually (arguably) easier to use than some of its commercial brethren, or at least on par. No more right-click to select things, and the latest builds even got an "industry standard" keymap. Try it out some time. The realtime Eevee rendering is a lot of fun.

 AdChoices