

High ISO problem image

Copy link to clipboard
Copied
Hi All,
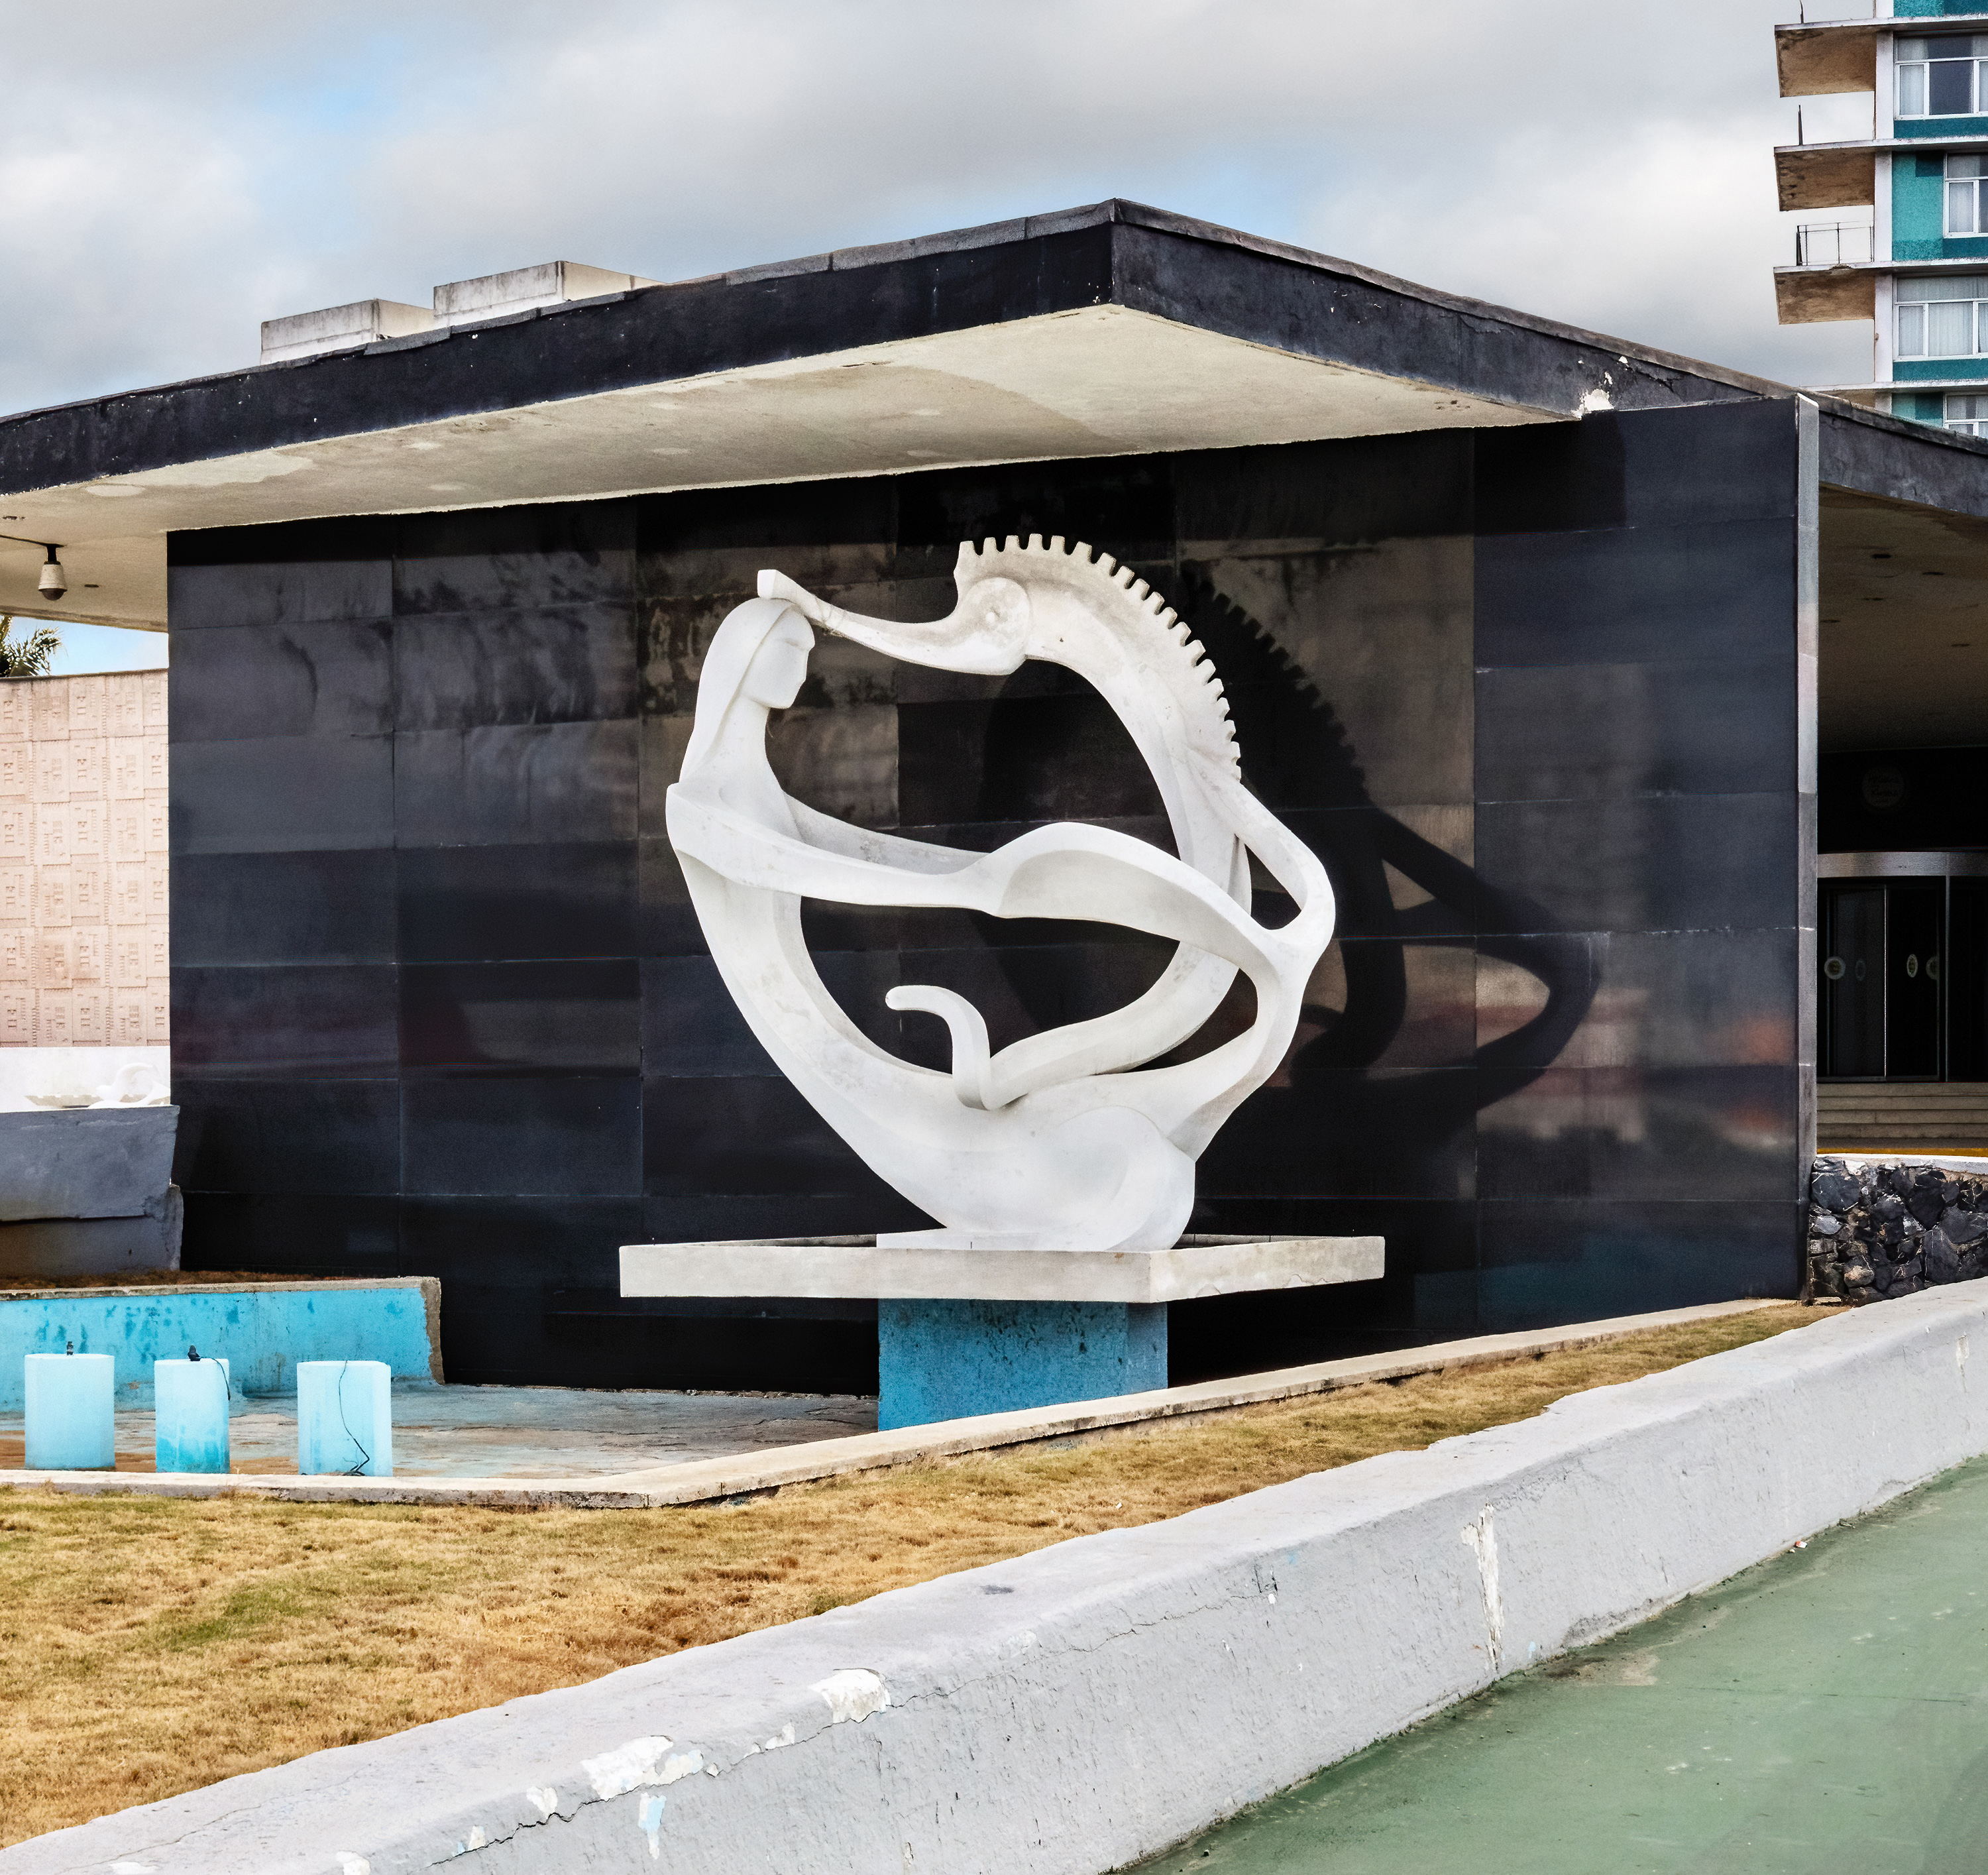
I have an image that is going to be published and it was shot very hastily at ISO 1250, f20, 1/160 on a very sunny day. I had been shooting in a very dark environment and didn't realize I hadn't changed my settings. It's not really soft but it has a weird look to it that I can't really explain. It does end up looking softish. The photo is of a sculpture. Perhaps I did focus on a curb instead of the sculpture. Either way I'm trying to figure out how to make it look better.
I'll attach a detail of it.
I appreciate your help.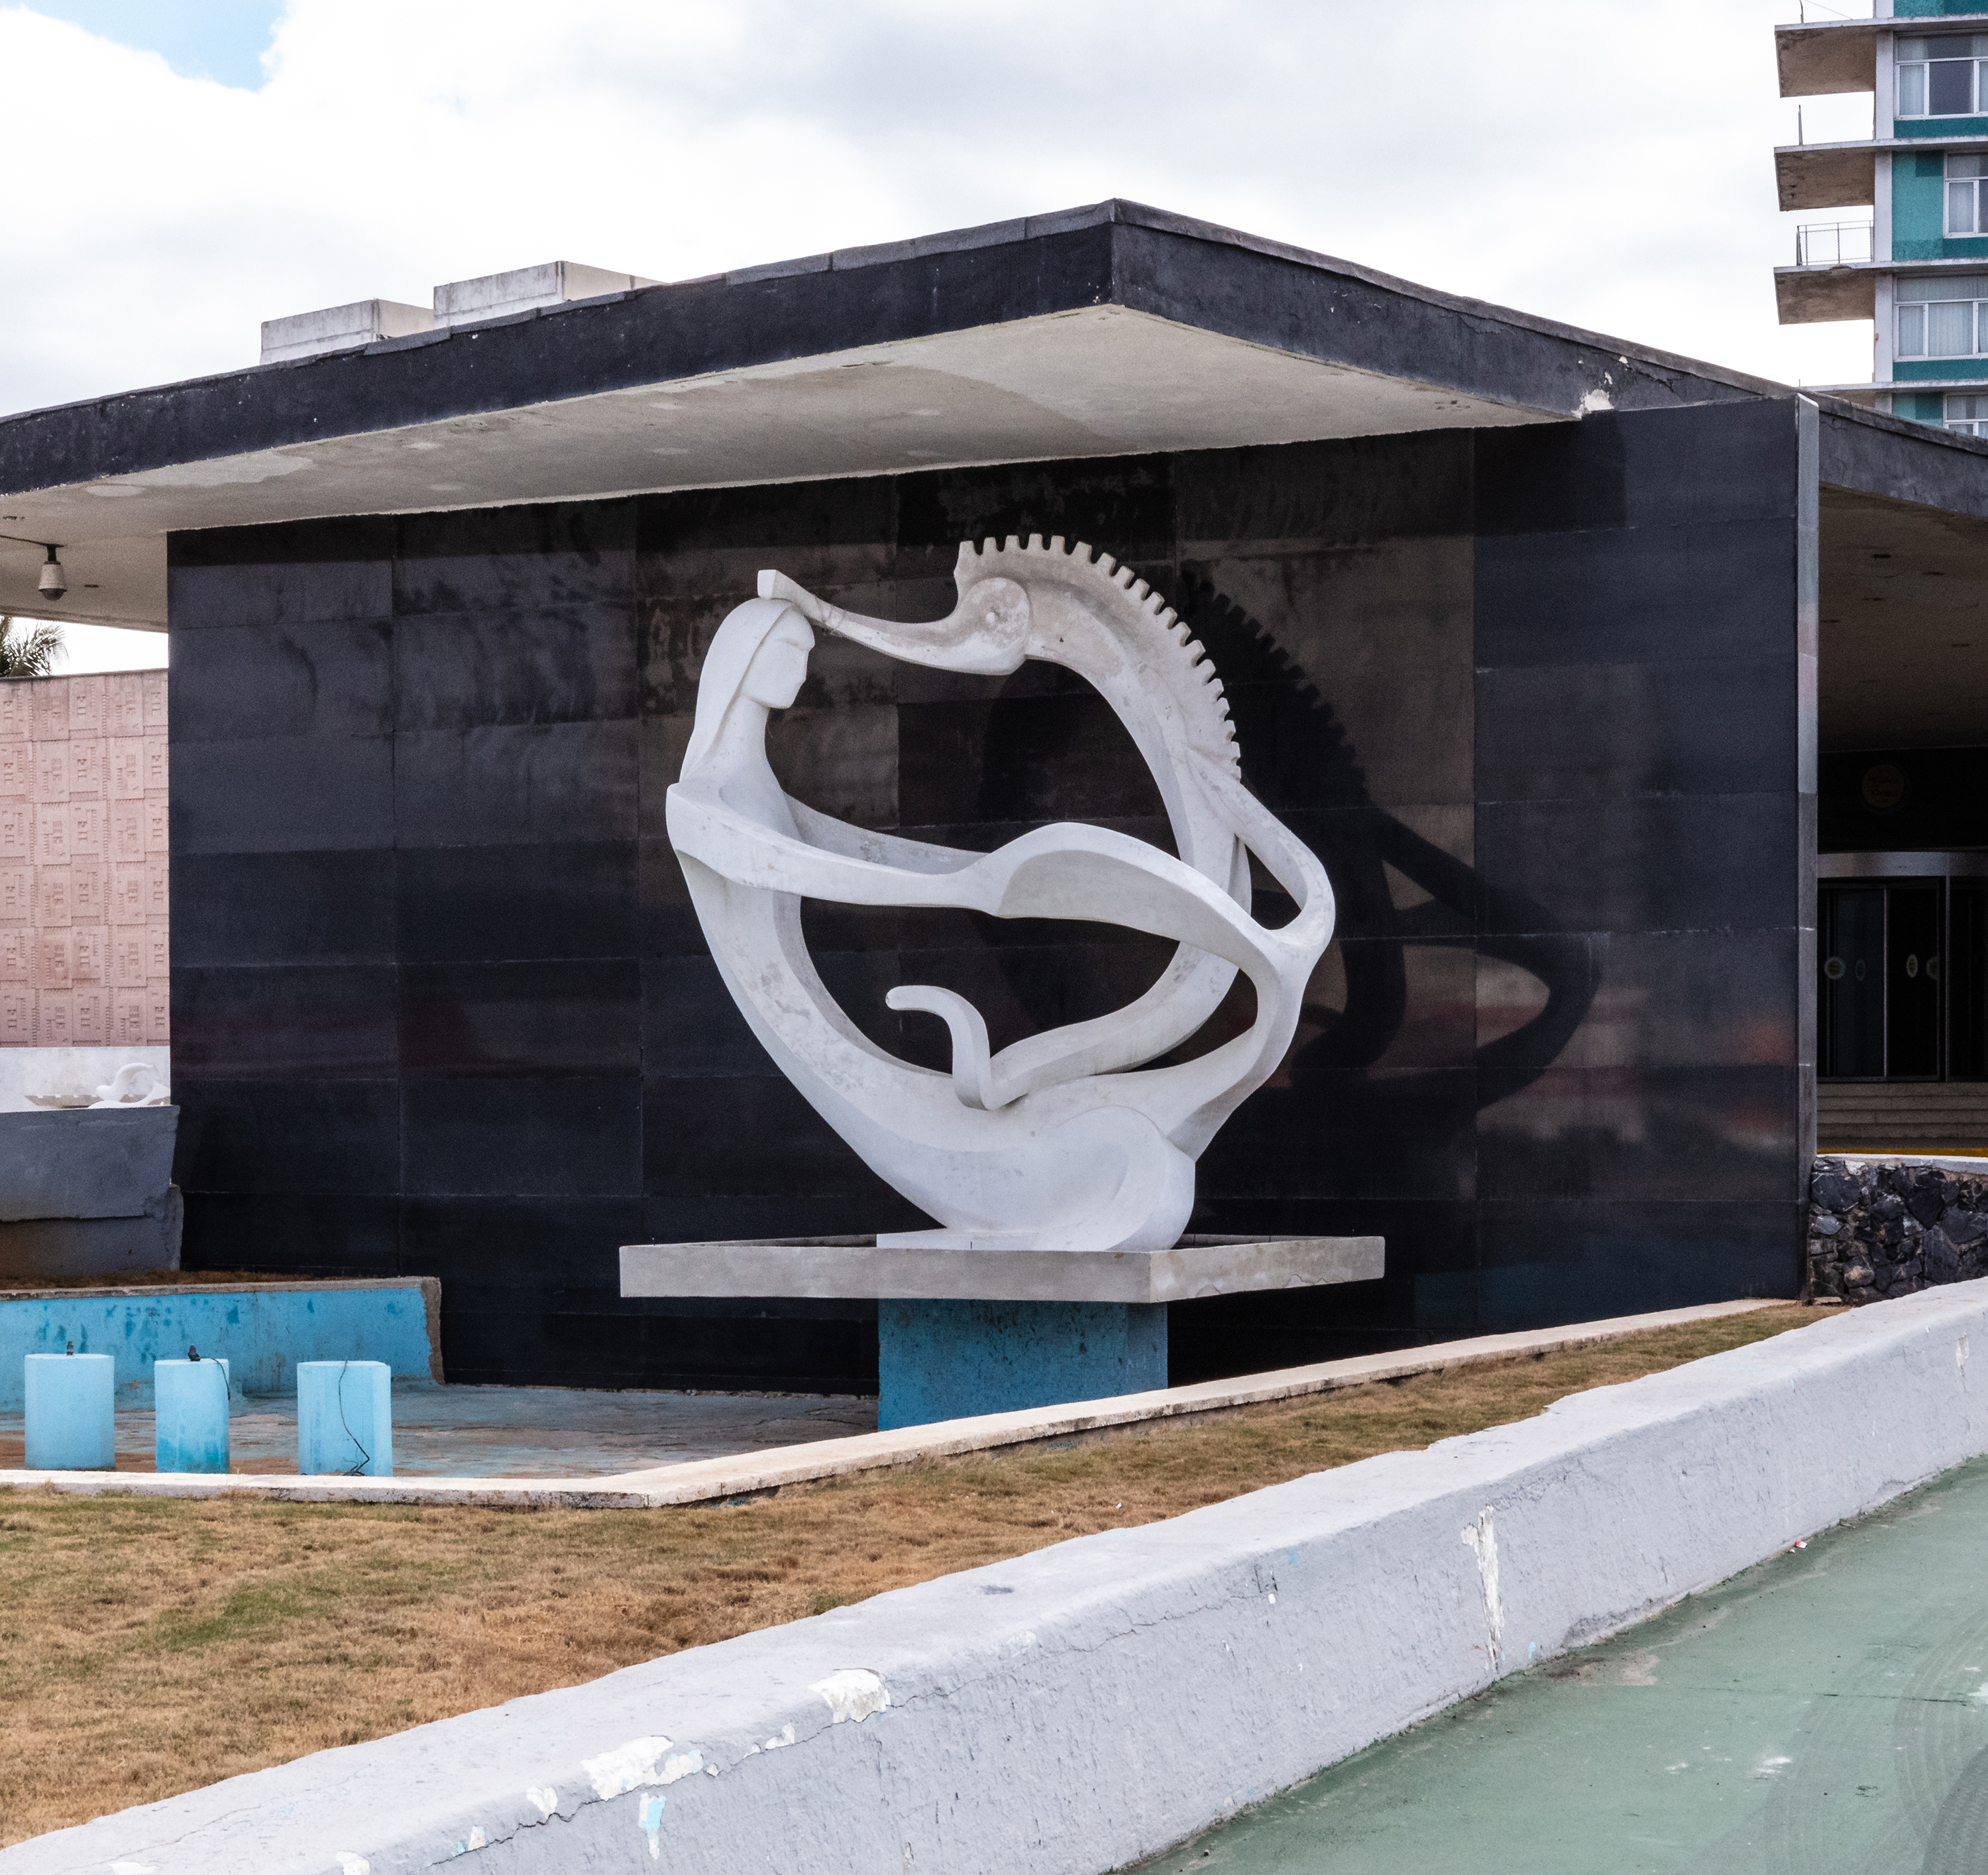


Explore related tutorials & articles
 28
Replies
28
28
Replies
28

Copy link to clipboard
Copied
I'm working on a couple of things i think will help - I'll post my results asap.
Copy link to clipboard
Copied
Great! Thank you.
Copy link to clipboard
Copied
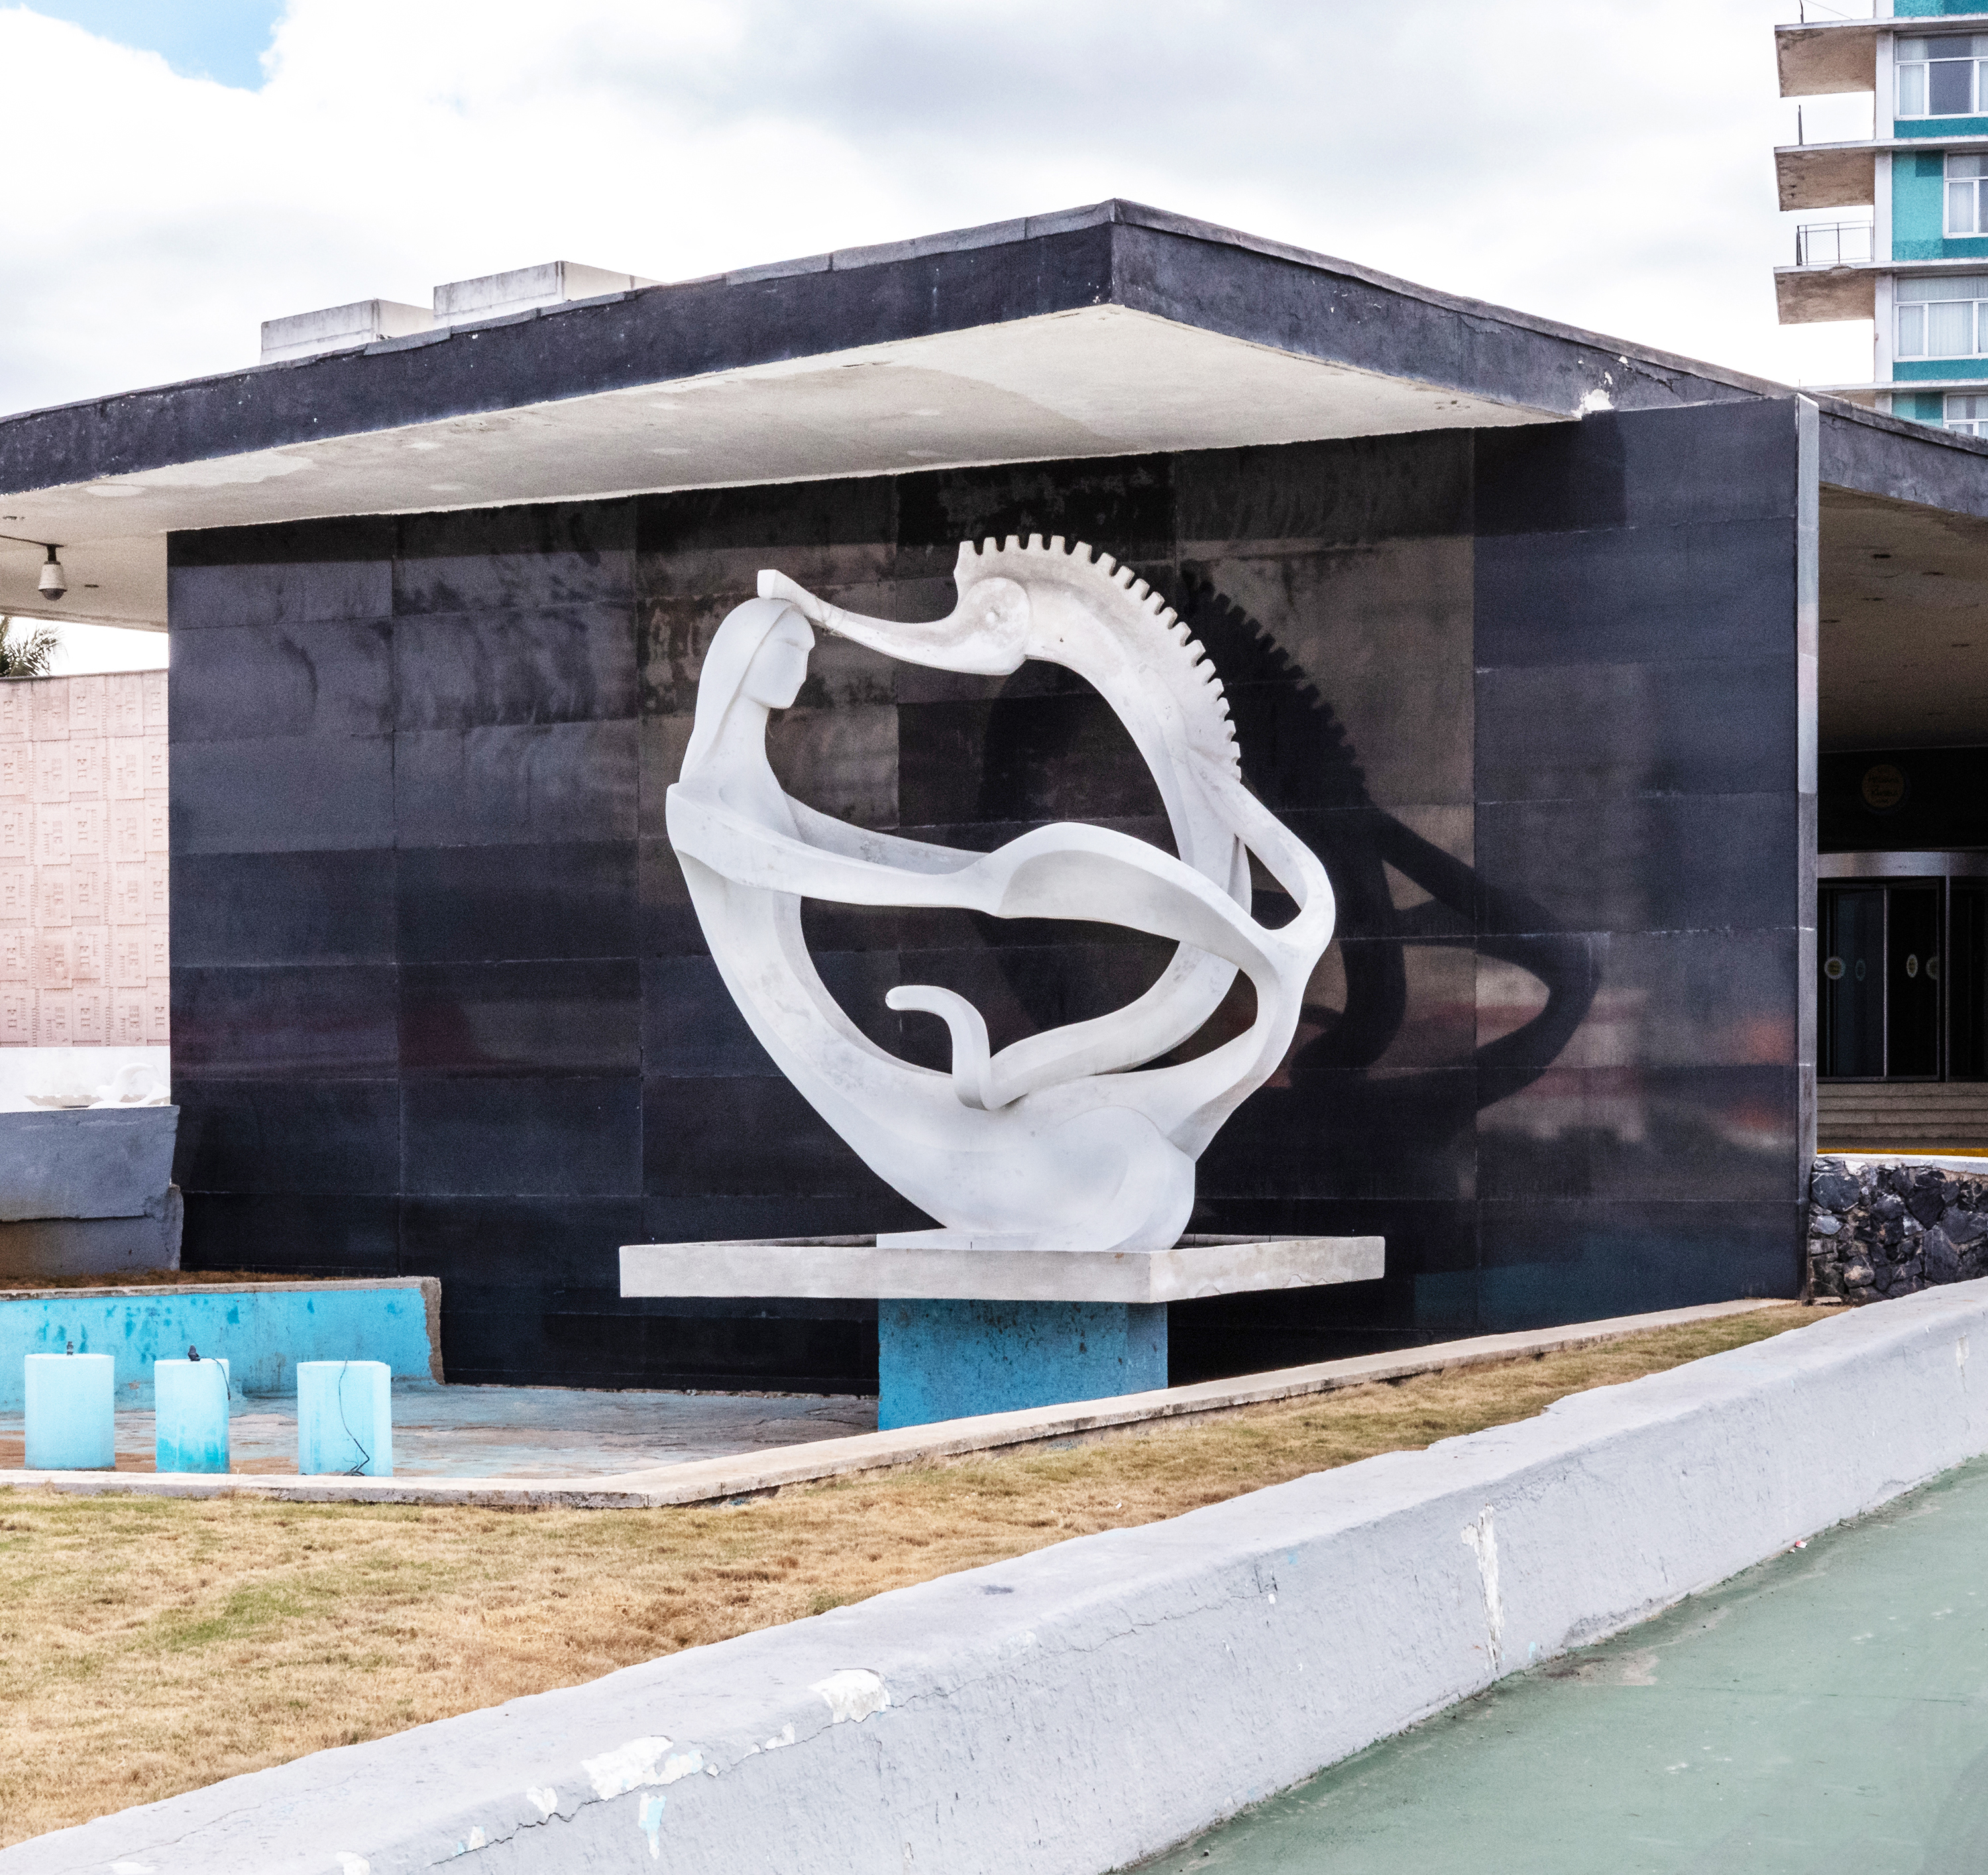
Well, I'm not sure how helpful this is! I brightened it and darkened the blown sky as much as possible (the sky should really be replaced), but there's too much digital noise, due to the ISO issue, for me to do much more. There are noise reduction programs, but they usually result in a loss of detail. Anyway, here's what I came up with for what it's worth:

Copy link to clipboard
Copied
I had a few minutes to spare, so I took the trouble to replace the blown-out sky. That alone makes a lot of difference.
But there's a few more things. The main problem here is actually flare, which gives a blue color cast in the shadows. Hard to put your finger on, but very disturbing. This is exaggerated by the high ISO, which tends to mess up the black point. In this case the black point is shifted towards purple.
So I did two things here: One, neutralized the black point and removed the blue/purple cast in the low end, and two, Increased local contrast here and there with a soft brush.
I didn't touch the noise, which may not be a big problem in print.
Copy link to clipboard
Copied
Could you elaborate on how you did these things....
So I did two things here: One, neutralized the black point and removed the blue/purple cast in the low end, and two, Increased local contrast here and there with a soft brush.
Copy link to clipboard
Copied
silvia1169 wrote
Could you elaborate on how you did these things.....
Here's neutralizing the black point, easier illustrated in the histogram than explaining:
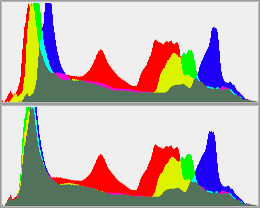
It's easily done with a Levels layer, and this will surprisingly often remove unpleasant color casts and make the image "snap". If you have strong colors it may be masked by gamut clipping, but in that case you can select a neutral area to isolate.
Copy link to clipboard
Copied
D Fosse -- can this be done by selecting your blacks or your whites in LR and holding the option bar until you see black or white?
I guess I'm not sure how this is actually accomplished.
I didn't really understand this,
If you have strong colors it may be masked by gamut clipping, but in that case you can select a neutral area to isolate.

Copy link to clipboard
Copied
My results were very similar to ponytail1414, I've included a link to the .PSD with adjustment layers so you can see how I got my results and experiment with making changes yourself.
https://www.dropbox.com/s/f0jz50jpd5a1e1i/01152019_havana_2596.psd?dl=0
Copy link to clipboard
Copied
Any ideas on how to conquer the noise? Is there a way to mask the noise reduction so as not to get rid of the detail?
Copy link to clipboard
Copied
Personally I don't think there is so much noise that it is really a problem. Saying that, for you there is too much noise.
I would select the camera raw filter, and then select the detail icon, from there you can reduce the noise, BUT, just use the luminance slider, move that up to about 20 or 25, it will reduce the amount of visible noise without blurring the detail too much. Leave the luminance detail slider at 50, if you reduce it, the noise is reduced more but everything becomes very soft and detail is lost.
Copy link to clipboard
Copied
Thanks footprint. Is there a way to do this similarly with the Lightroom sliders?
Copy link to clipboard
Copied
Hi silvia1169,
I don't use Lightroom so I really couldn't say. Although I would assume it is possible as there must a a raw image filter/import option for bringing in raw and digital negative files.
Copy link to clipboard
Copied
Is there a way to mask the noise reduction so as not to get rid of the detail?
In essence no, I do not think you are interested in how reduction works but... if you are interested then I will suggest to you to zoom in heavily on image then drag slider and watch to see what is actually noise reduction. There are plugins which claims that are doing better job but I wouldn't put all my money on that.

Copy link to clipboard
Copied
silvia1169 wrote
Any ideas on how to conquer the noise? Is there a way to mask the noise reduction so as not to get rid of the detail?
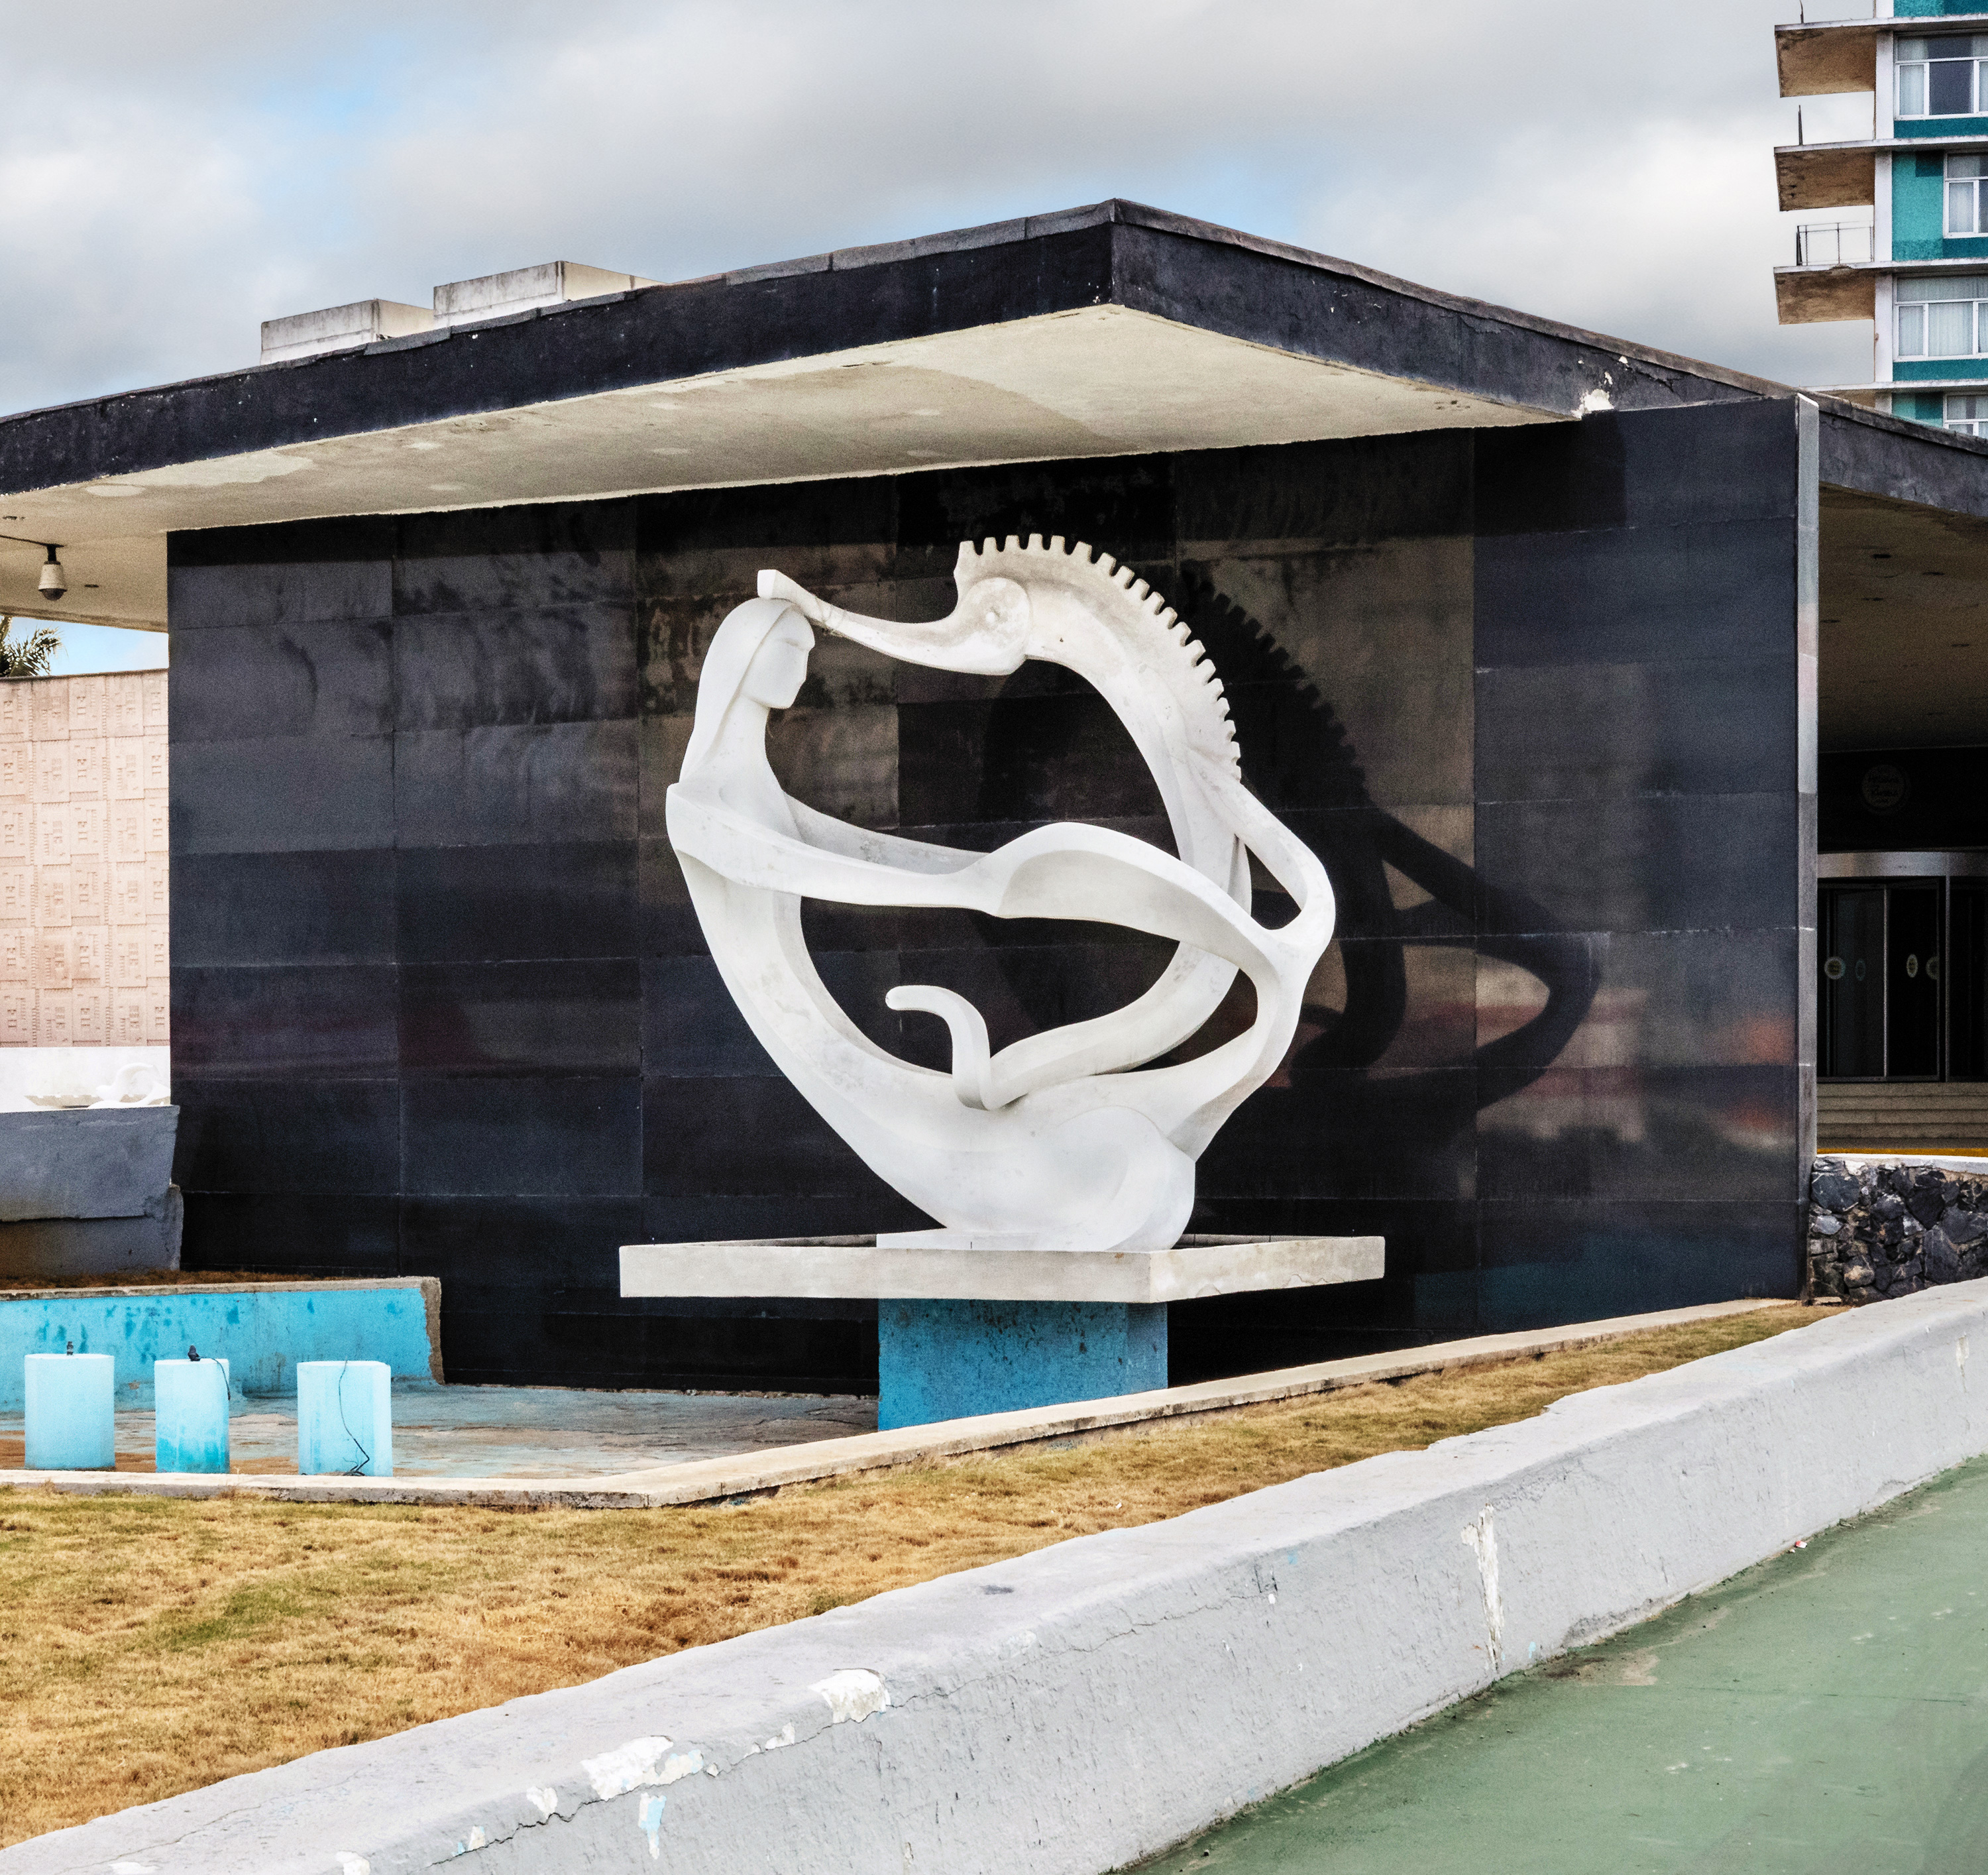
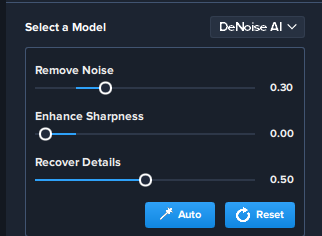
This was done with the Topaz DeNoise AI plugin, see settings below. (I took the liberty of using D Fosse's version for this)
They have a free trial, which I think is fully functional.
Unfortunately this plugin will sharpen some detail, even with Enhance sharpness set to 0. Since the image seems to have been sharpened, this produces some ugly artifacts on the rocks on the right hand side.
I did the noise reduction on a copy of the background layer, and it would be possible to use a layer mask to reduce the artifacts.
Copy link to clipboard
Copied
silvia1169 wrote
it was shot very hastily at ISO 1250, f20, 1/160 on a very sunny day. I had been shooting in a very dark environment and didn't realize I hadn't changed my settings. It's not really soft but it has a weird look to it that I can't really explain.
The image is soft because it was shot at f/20, which will produce a strong diffraction effect.
Diffraction is reduced sharpness caused by a small aperture. The smaller the aperture, the stronger the effect.
At f/8 it is not very noticeable, but from f/11 onwards, it becomes problematic, and progressively worse.
Make it a habit to work at f/8 if it will give you sufficient depth of field. Only use f/11 and smaller if it's absolutely necessary for depth of field.
Copy link to clipboard
Copied
Absolutely f8 is my go-to. But as I mentioned this was done hastily and I had it in shutter priority at this super high ISO because I was shooting somewhere prior to that that was very dark, and I had to move quickly. It was just sloppy on my part to not realize what my settings were at.
Copy link to clipboard
Copied
https://forums.adobe.com/people/Per+Berntsen wrote
The image is soft because it was shot at f/20, which will produce a strong diffraction effect.
Yes, good catch. Diffraction is a real issue (not as academic as it sounds like), and this is what it looks like. I've always had it hard-wired into my nervous system to not go beyond f/11 unless it's an emergency.

Copy link to clipboard
Copied
Does the publisher need the full image? If the image is about the sculpture, then that loose crop is not really adding anything. In fact that building in the top right corner is a huge distraction. I bet that now I have pointed it out, you will have a problem trying to 'not' see it. The overall quality is not terrible IMO — I have seen way way worse quality images in magazines.
There are ways to cheat outlines. You could make a clipping path of the sculpture, for instance, and use it firm the edges by cloning inside and outside the resulting selection.
That would be a bit of work, but what II did below is let Photoshop select the sculpture with Select Subject.
Refine the selection and output to new layer with layer mask.
Give the mask a tiny blur (I used 1.5% Gaussian blur)
Harden up the layer mask with levels.
Ctrl click to harden the mask giving it sharp edges. You need to go as far as you can while retaining enough aa to prevent jaggies)
Ctrl click the layer mask to load as a selection
Then use the clone tool on a new layer inside and outside the select to give it the appearance of being very sharp.

Copy link to clipboard
Copied
Trevor.Dennis wrote
If the image is about the sculpture, then that loose crop is not really adding anything. In fact that building in the top right corner is a huge distraction.
I'm not sure I agree. A bit of context is always good - unless of course it's a complete visual mess. But it's not here. In fact, I'd like to see the crop extended on the right, to include a little more.
Copy link to clipboard
Copied
https://forums.adobe.com/people/D+Fosse wrote
Trevor.Dennis wrote
If the image is about the sculpture, then that loose crop is not really adding anything. In fact that building in the top right corner is a huge distraction.
I'm not sure I agree. A bit of context is always good - unless of course it's a complete visual mess. But it's not here. In fact, I'd like to see the crop extended on the right, to include a little more.
I see what you are saying Dagg. The spatial relationship of the low socioeconomic structure, juxtaposed with the allusion of the whale woman and seahorse, is a reflection of the hopeless nature of the post-Trump macrocosm. The subtle assimilation of white marble into a dark backdrop is cleverly accomplished by the intentional use of deficient photographic technique creating a metaphorical resonance symbolic of an apocalyptic destiny.
I don't know why I didn't see it before matey. 


Copy link to clipboard
Copied
Trevor.Dennis wrote
I don't know why I didn't see it before matey.
I didn’t see that before, either, Trevor...
!!!
But I do see it now. 
Copy link to clipboard
Copied
The sculpture belongs to the building and needs to be seen in context of it. I'm not sure if you were being serious or not but what I have shared is a detail, not the full picture. The full picture will be printed as it is for a project that is documentary in nature.
Copy link to clipboard
Copied
Whoops, my sarcasmometer just broke...
Copy link to clipboard
Copied
Trevor.Dennis --why did you give the mask a blur?
When you say hardening the layer mask, do you mean bringing in the edge of the histogram to where you have information?
How do you Ctrl click to harden the mask giving it sharp edges?
-
- 1
- 2

 AdChoices