Create the Type layer using Baskerville Old Face font
You can see it does not align perfectly with the boat name

Right click the Type layer and Convert to Smart Object (SO)

Free Transform the SO (Cmd T) and drag the corner handles while holding down the Cmd key.
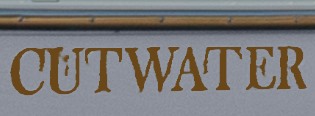
You can see that text still does not align perfectly because there is too much space between the W and A. That spacing is called kerning and can be adjusted in the Character panel

To edit a Smart Object you double click it, and it will open in a new window.
Double click the Type layer when it opens in the new window, and select just the W
Open the Character panel, and adjust the kerning (VA) to -75
OK the type layer

Use Cmd S to save the change, and Cmd F4 to close the window and go back to the boat layers
Continue to adjust the kerning and use Free Transform each time till the type is an aceptable fit to the boat name.

Select the background layer with the boat and use the Marquee tool to drag a selection around the boat name
Selt the Patch Tool and make sure it is set to Source in the Options Bar

Click and drag to a clear area of the hull and the name will be covered up

Double click the SO layer to open Layer Styles and add an Inner Shadow using settings similar to below
You can also change the colour using Color Overlay in Layer Styles

The new name is a bit too perfect for the rest of the photo, so add a tiny bit of Gaussian blur

There are other things you can do to make it look real like add some noise or us Render Clouds in a layer Mask to make the colour a bit uneven.


 7
Replies
7
Replies


 AdChoices