Participant
August 24, 2017
Answered

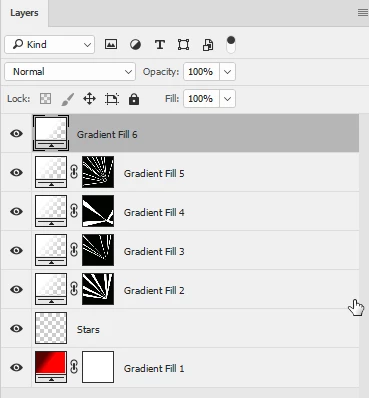
how to create a fanned ray image

  • August 24, 2017
  • 2 replies
  • 618 views

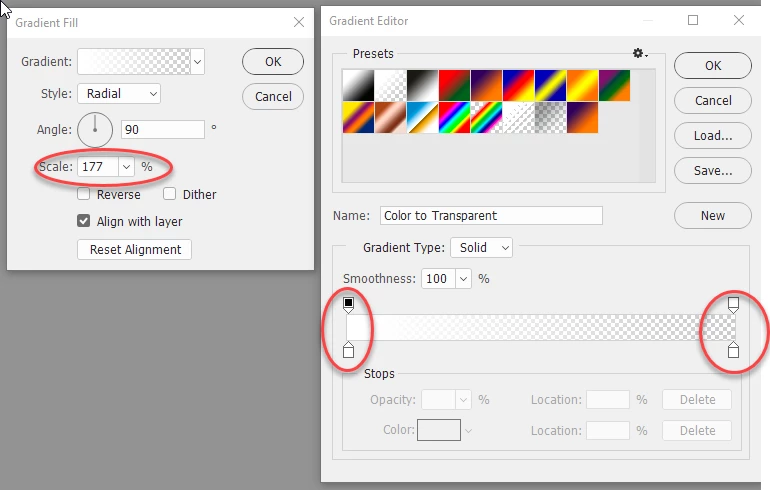
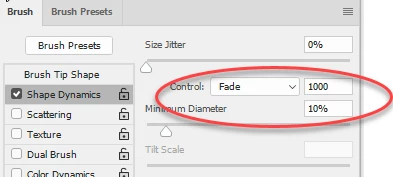
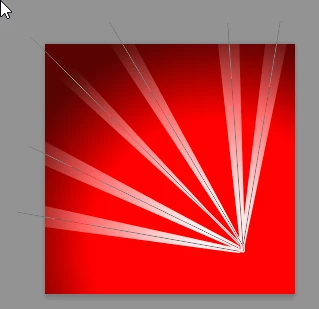
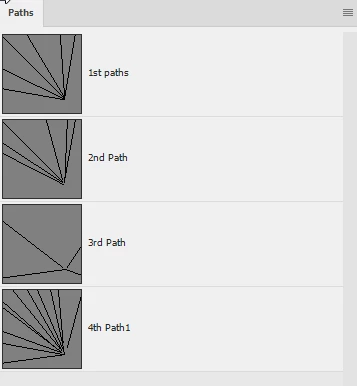
I'm an intermediate Adobe designer and have only learned via free online resources and playing around with the programs myself. I am trying to make a banner image and found an example image online I'd like to try to replicate to some degree. I would like to create the image as close to the same as possible minus the book in the corner. I've played around with a few techniques like Wave effects and Radial Blur, but it's not what I'm looking for.

Thank you for any help, instructions, or link to a step-by-step instruction on completing this style of design.

This topic has been closed for replies.
Correct answer davescm

There are many ways to do it but one way is :

1. Start with a gradient fill layer set to a radial gradient and move it off centre with the move tool

2. Add a second gradient fill layer set to white with a fade and scale it to fade out across your image :

3. Fill the layer mask with black to hide the gradient

4. Use the pen tool to draw several straight paths starting outside the image and converging on a point. You must draw these from the outside inwards or the later stroke will be reversed.

5. Select a solid round brush (100% hardness) and in Shape Dynamics set it to fade in size with the stroke. The length of the fade will depend on the size of your image

6. Select the black mask then go to the paths panel and with the brush set to white, stroke the path with the brush

7 Repeat steps 2 to 6 varying the scale of the gradient and the size of the brush and creating new paths to stroke

8. Add a new gradient fill layer at the top with no mask and adjust it to give the white corner area

9. Finally paint a few stars on an empty layer using a brush set to a short fade

I hope that helps to get you started

Dave

2 replies

c.pfaffenbichler
Community Expert
Community Expert
August 28, 2017

Another option to create »rays« is using a Gradient Layer set to »Angle« and »Noise« which could then be superimposed with a plain radial Gradient.

Edit:

davescm
Community Expert
davescmCommunity ExpertCorrect answer
Community Expert
August 24, 2017

There are many ways to do it but one way is :

1. Start with a gradient fill layer set to a radial gradient and move it off centre with the move tool

2. Add a second gradient fill layer set to white with a fade and scale it to fade out across your image :

3. Fill the layer mask with black to hide the gradient

4. Use the pen tool to draw several straight paths starting outside the image and converging on a point. You must draw these from the outside inwards or the later stroke will be reversed.

5. Select a solid round brush (100% hardness) and in Shape Dynamics set it to fade in size with the stroke. The length of the fade will depend on the size of your image

6. Select the black mask then go to the paths panel and with the brush set to white, stroke the path with the brush

7 Repeat steps 2 to 6 varying the scale of the gradient and the size of the brush and creating new paths to stroke

8. Add a new gradient fill layer at the top with no mask and adjust it to give the white corner area

9. Finally paint a few stars on an empty layer using a brush set to a short fade

I hope that helps to get you started

Dave

Participant
August 24, 2017

Thank you so much! This is exactly what I was looking for and thank you for your clear instruction with pictures. Made it a cinch!

davescm
Community Expert
Community Expert
August 24, 2017

You're welcome

Dave