

How to merge overlay layer to different layers correspondingly to directly visible part?
Here are a background layer (Layer 0), two layers with a red stroke (Layer 1) and blue stroke (Layer 2) correspondingly, and an overlay layer (Layer 3):
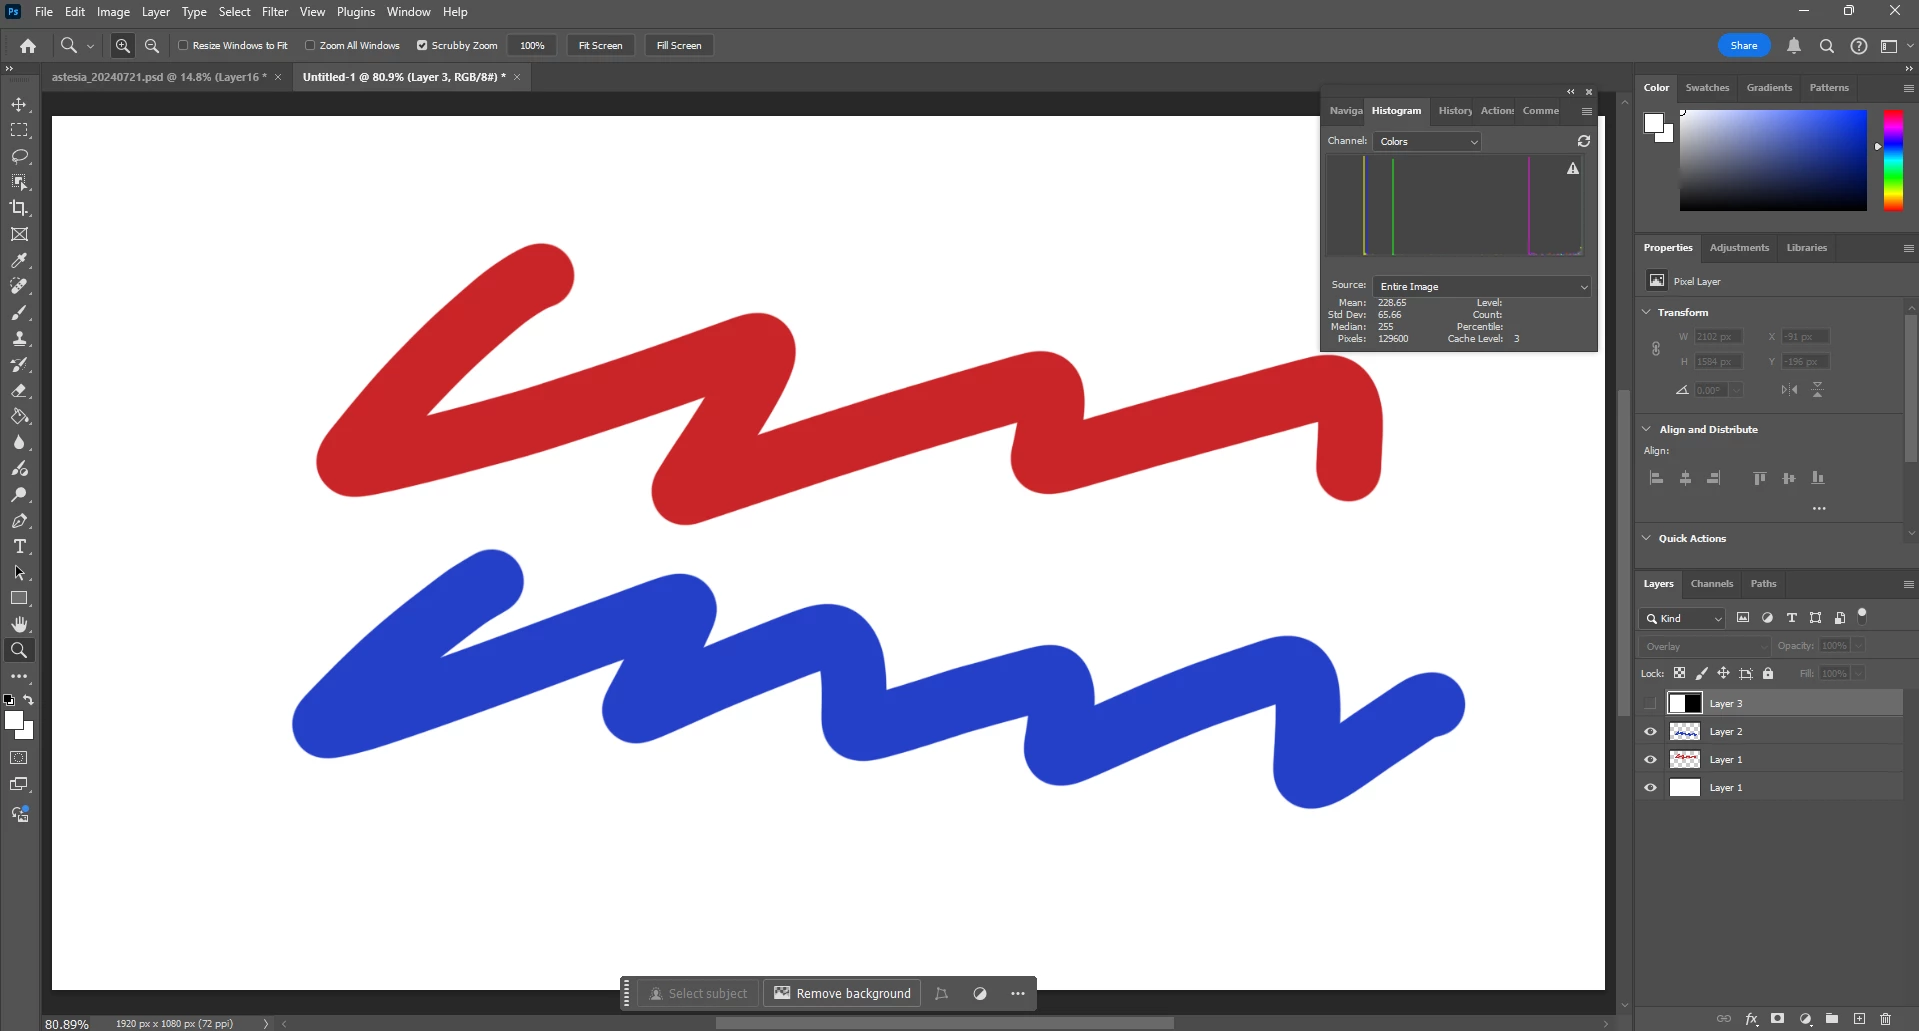
If I turn on the overlay layer, this works perfectly fine:

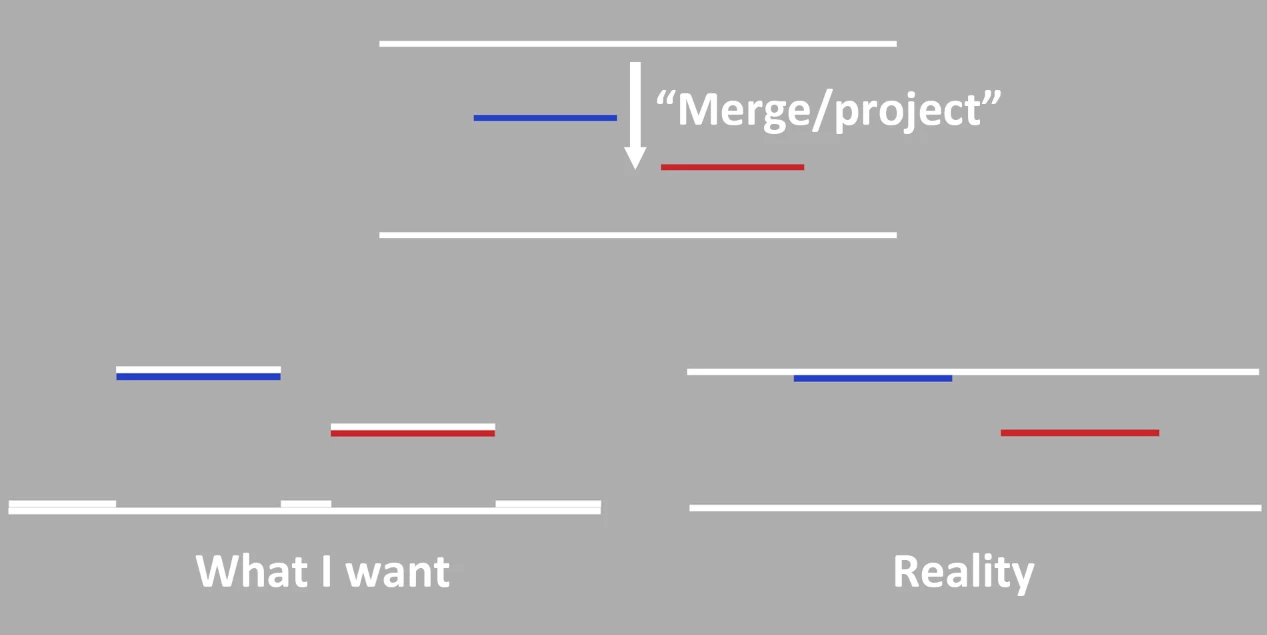
Now I want to merge the overlay layer with all the layers below, so the left half of both strokes will be brightened, the right half will be darkened, and the background will remain unchanged. In other words, I want to "project down" the blending effect; for all the layers beneath the overlay layer, only the directly visible section will be affected. Here is an example of what I want, note the layers:

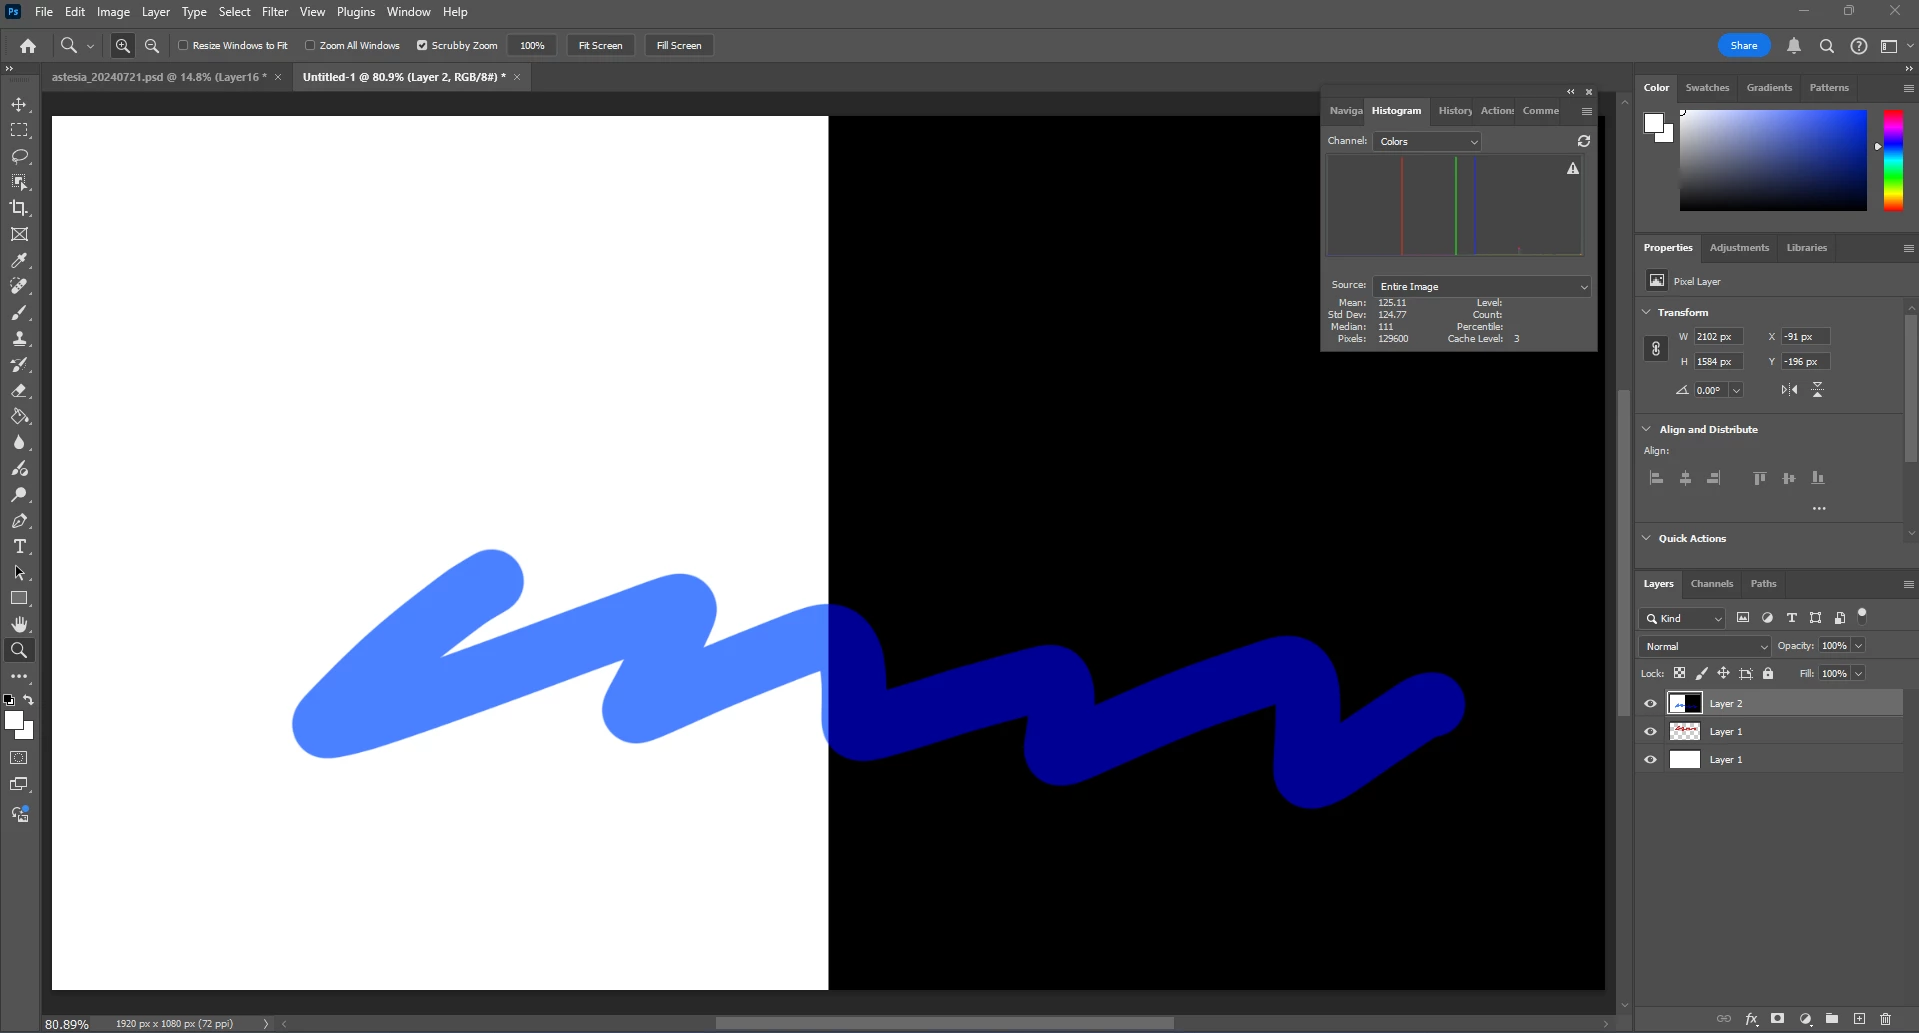
In reality, instead, I got this when merging down, because PS really just merged all the results on my Layer 3 to my Layer 2, ignoring its effect on Layer 1 and 0:
Here is a figure showing what I want, like snowing the overlay layer down that falls on every layer, and what PS does, like dropping a solid panel that hits the top layer and stops there:
Is there a way to make PS do what I want? Currently, my solution is to manually select the corresponding parts in the stroke and background layers, cut those parts out from the overlay layer, and merge each part into the corresponding layers, which first, doesn't work very well as the selection can always miss some details at the boundary and secondly, I need to do that for a 32-layer project...