Copy link to clipboard
Copied
Hi, I'm working on a backdrop project for an exhibition and need help setting up my work file in Photoshop.
I’ll be designing a large art piece that will be split across three smaller panels. Here are the requirements:
In Illustrator, I would normally set this up with artboards for each panel. However, since this project is too large for Illustrator and I’ll be working extensively with images, Photoshop seems more suitable. But I’m unfamiliar with how to set up multiple panels in Photoshop.
I’ve tried using Photoshop’s artboards, but they don’t behave quite like they do in Illustrator. Another idea I considered was not using artboards and instead separating each panel with masks. However, I’m not sure how I could then export each panel as a separate file.
Could anyone suggest an efficient setup or workflow for this project?
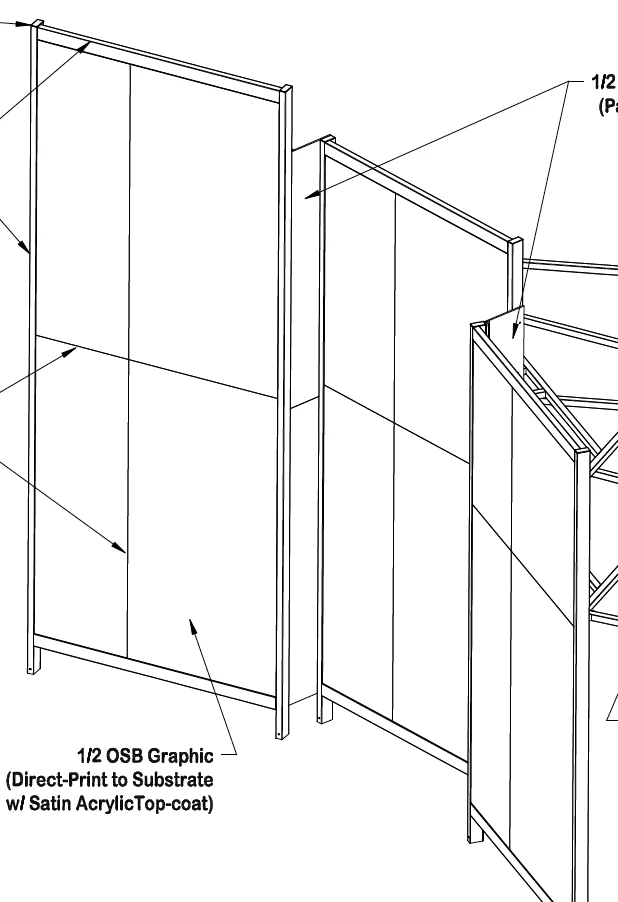
I have attached an example of the backdrop I'm working on.
Copy link to clipboard
Copied
Have you tried the large canvas in Illustrator? https://helpx.adobe.com/illustrator/using/large-sized-artwork.html
If you need to work in Photoshop I think (at least from my experience) such big areas a mostly printed in a lower resolution and the file dimensions can be set up in a 1:10 ratio. Then the file size will also be not as big (you can still keep the resolution at 600 ppi). But make sure to consult with the printer first. Simply use guides to set your areas for designing.
Also ask the printer how he wants the files to be delivered.
Copy link to clipboard
Copied
Photoshop artboards are not the same as Illustrator you are correct @Ronnakrit374620209b9c . My best advice is to first talk with your printer and find out what scale, resolution and format they need your art sent to them as - then work backwards.
You will not/should not be working at 100% actual size full res.
What specific size would be determined through the conversation with your printer - anything else is a guess and could end up making more work in the end.
Copy link to clipboard
Copied
Another idea I considered was not using artboards and instead separating each panel with masks. However, I’m not sure how I could then export each panel as a separate file.
By @Ronnakrit374620209b9c
You can handle this a few different ways.
One thing I do is keep the image and the panel layout as separate documents. Import the image into the panel layout document as a linked Smart Object (using File > Place Linked), and duplicate that to three layers, then mask those Smart Objects. The reason I like this is because if I need to edit the source image further, it’s easy to do in that document and the changes will ripple through to the linked Smart Object layers in the panel layout document. And any edits done in the panel layout document will never degrade the separately stored source image file.
I also use vector masks because they’re a lot easier to adjust than pixel masks.
OK, now that the three copies are on three separate layers, there are some options for exporting them separately.
Option 1: Export them trim.
Choose File > Export > Layers to Files. Each layer will become a new file in the format you choose there. The problem is that this exports the entire canvas, so each export will have a large empty area where the other two panel layers were. You can quickly remove the empty area by opening each export and choosing Image > Trim. Print each export.
Option 2: Duplicate each layer to a new document, then export each document.
For each layer, select it and choose Layer > Duplicate Layer. In there, set Destination to New so that the duplicate layer becomes its own document. Save that duplicate in whatever format and specs you need for printing. If you need to do this a lot, this option can be automated as an Action so that it can run in one click.
Copy link to clipboard
Copied
You're going to submit PDFs to your provider, and you're used to working in Illustrator, so there is no need to consider Photoshop. What you need to do is work to scale. If your project is metric, work at 1:10 (1 cm = 1 m) or 1:20. If it's in the US, work at 1:12 (1 in = 1 ft) or 1:24. Illustrator will do the scaling math for you in the input fields if your arithmetic skills are shaky.
Never work at full size on a grande format project unless you have no choice. Working to scale solves a multitude of problems, not least making your text easier to work with and the overall file lighter. You can assume that the provider knows what size the finished product is supposed to be, and will scale up your PDF accordingly. This is how all billboard artwork has been done since the beginning of vinyl printers. I have never submitted artwork to a billboard provider at full scale.
Copy link to clipboard
Copied
That's true for vector art, but not for raster images. You can "scale" a raster image as long as you don't resample - but then it has no effect on file size so it serves no purpose. And font sizes would be impossibly small because of the high ppi number at small scale.
So is this document vector art or a pixel-based image? If the former, do it in Illustrator where you can scale. If the latter, do it in Photoshop and don't scale.
If it's a combination of vector and raster elements, InDesign is the best tool- with Ai and PS to edit elements as appropriate..
Copy link to clipboard
Copied
This puts me in mind of Bert Monroy's mega projects like his Times Square giga-image. That took several years to complete, and involved thousands of files and goodness knows how many layers. As each image element was completed, a flatterned version would be created (Copy merged Shift Ctrl Alt E) and placed in the master image. This kept the file size managable.
In your case, I'd try using Smart Objects. Double click a particular SO to open it in a new window to edit it, and from that window save it out as a separate PSB file.
In actual fact, looking at your example image I'd probably be using a CAD app. I use SketchUp nowadays because it is easy to use and affordable. It's file sizes are much smaller than a raster app like Photoshop produces. You can get extensions to render a project close to photo-realistic.