bartonlew
Legend
November 16, 2019
Answered

How to target different values of a selection using adjustment layers

  • November 16, 2019
  • 7 replies
  • 2783 views

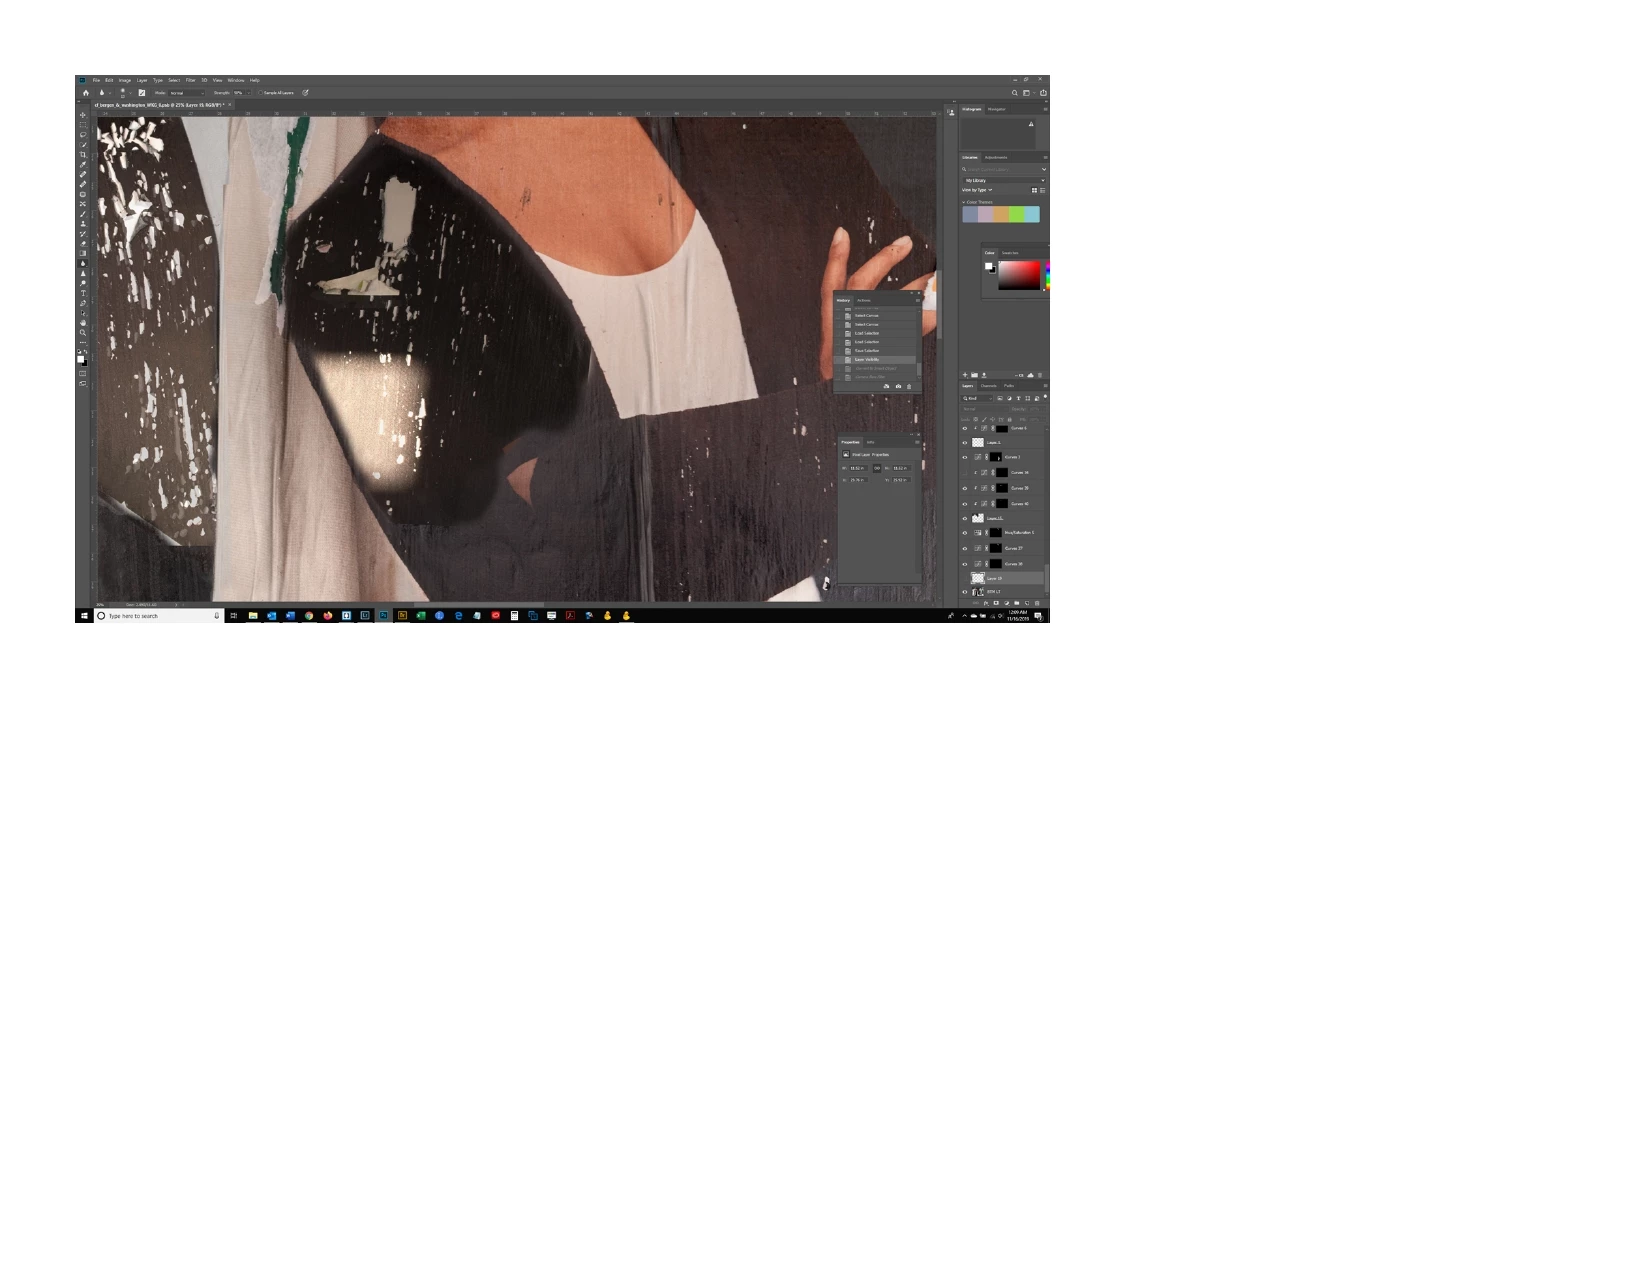
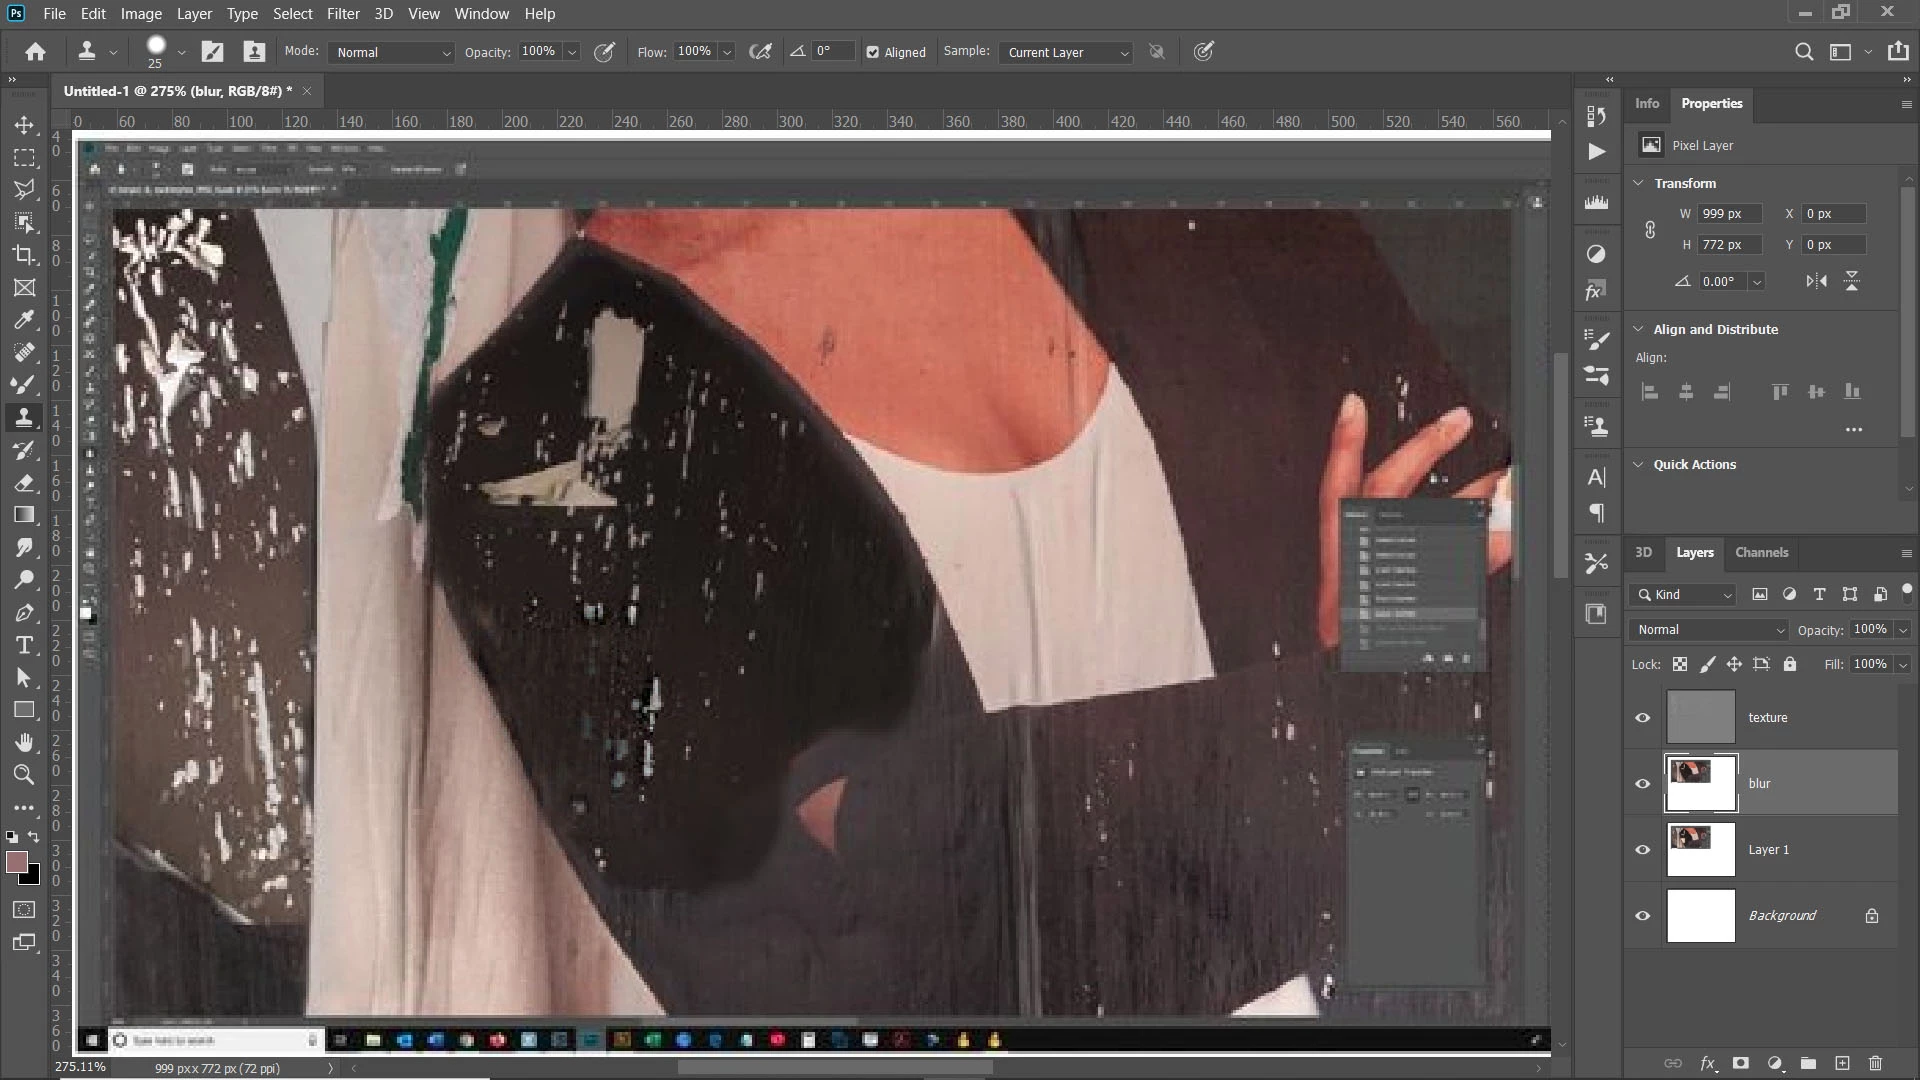
I need to target the blown out patch below the woman's left shoulder in this image.  It contains small tears of white paper against a dark background, so I need to be able to select the dark and light areas separately and modify both.  I made a selection of the area and tried to use luminosity masks to affect the areas but had trouble making it work.  Is this the best way to do this?  Thank you.


This topic has been closed for replies.
Correct answer Chuck Uebele

What exactly do you want to do with that area? Just darken it, or make it the same tone as the rest of the outer area? If you want to get rid of the blown area, but keep the texture that went with it, you can use frequency separation.

7 replies

Chuck Uebele
Community Expert
Community Expert
November 21, 2019

Yes, the interruption were a bit annoying. Mainly unwanted you to see how he was using the mixer brush to blend in the tones. And yes the layer stack could use better explaining. I can go over that if you wish. Mainly I just wanted you to see how to use the mixer brush.

bartonlew
bartonlewAuthor
Legend
November 21, 2019

i am doing better but still not getting the rsults you did.  When I click in the area outside the hotspot, and then start painting inside it, it gets darker but not as dark as the area I have sampled from.  Are the settings right at the 2 arrows I have drawn?

Chuck Uebele
Community Expert
Community Expert
November 21, 2019

You can always add an adjustment layer to darken the area, and just feather in the adjustment with a brush. There are many ways to do this.

Chuck Uebele
Community Expert
Community Expert
November 20, 2019

Here are my setting. All are at 100%, but I have clean brush after every stroke on and Load brush after every stroke off. This is kind of like the smudge tool. What you do is click outside the bright area and just drag the darker color into the lighter area.

Here's a link to an Adobe MAX class with Earth Oliver demonstrating how to use the mixer brush. He goes kind of fast, but watch how he drags in the color.


https://max.adobe.com/sessions/max-online/#29524

bartonlew
bartonlewAuthor
Legend
November 21, 2019

This video was incredibly frsutrating.  He explains okay the set up of the texture and tone layers, but then at around the 28 minute mark, when he starts working with the tool, Sef interrupts him and tells him to just show all these differenr things he can do with it and there is no accompanying step by step instruction.  I guess it's fun if you already know how to do it, but if you don't, it's no help.  At least one can see what a powerful tool it is and hoepfully there are other videos out there that explain how to use it.

bartonlew
bartonlewAuthor
Legend
November 21, 2019

He has this layer stack that he's made when he starts working above the tone and exture layers and he NEVER explains what they're for even though he says he's going to (Sef interrupts him at that piont and says don't explain, jsut show us what you can do).  

Chuck Uebele
Community Expert
Community Expert
November 18, 2019

I thought you might be using CS6, when you said that you didn't have the mixer brush. It should be under the regular brush, and if it isn't,  then you can click on the 3 dots at the bottom of the tool bar to open the tool panel, where you can reset the bar. 

bartonlew
bartonlewAuthor
Legend
November 20, 2019

OK.  I got the mixer brush to load.  I had to right click on the 3 dots and select it, and it appears as the selectd tool.  I didn't really know what to set Wet and Mix to so I have them at 33% and 90%.  Then I right click on Current Brush Load and select Load Solid Colors Only, and alt click in the area outside the sun spot.  When I go to paint on the sunspot Blur layer, nothing happens.  Do you know what I am doing wrong?  Also, ever since Adobe made changes to the forums recently I can't paste screen shots like before directly into the reply.  I have to paste the sceen shot into a Word document, convert that into a jpg, and attach the jpg.  Really annoying.  Do you know why that is?  Thanks.

Chuck Uebele
Community Expert
Community Expert
November 17, 2019

If the spot you want to retouch is all on one layer, then you don't need to do a merge stamp visible. I just wasn't sure what your layer structure looks like. Yes, Frequency Separation can seem a bit daunting, but it's very powerful for various retouching. It's mainly used to retouching portraits, hence the mention of removing skin texure, but it can be used to retouch anything, where you want to separate the texture of the object and the tone. In your case, I wanted to remove the texture of the white torn paper. Like I said earlier, I'm not sure how well it would work on a full res image. With how I did it, it was fairly easy just to bush in a new tonal background with the mixer brush, or even the normal brush, and not have to worry about messing up the texture or trying to get mask to blend the areas together. You could do that, as you originally wanted to with curves and luminosity mask, but you will need to do a fair amount of feathering in the masks to make sure they blend well with the outer area. A combination of luminosity mask and blend if sliders could also work well. There are always many ways to do things in PS.

bartonlew
bartonlewAuthor
Legend
November 17, 2019

OK.  I am up to the very last instruction:  "Use a brush or mixer brush to blend in the tones of the blur layer to get rid of the blown area."  At this point, I want to be back on the background layer, right?  When I choose the brush tool and paint, nothing is happening.  Am I doing something wrong?  Thanks.

Chuck Uebele
Community Expert
Community Expert
November 17, 2019

OK, well I went to that layer and again nothing happened - no change after painting with the brush on the blur layer.  I thought maybe I should have the texture layer turned off to see the change and when I turned it off I could see where I painted had achieved the exact opposite of what I wanted - the painted area was bright white.  What am I doing wrong?


If you're using the mixer brush, you want to drag in the color from the outside. If you're using a regular brush, start with a low opacity of about 20 to 30 and sample the dark surrounding area and gradually paint it in. You can either do it with the texture layer on or off.

Chuck Uebele
Community Expert
Community Expert
November 16, 2019

In a nut shell: With all your layers, you would really need to make a merged stamp visible layer shift-alt-ctrl-E and name it blur. Then duplicate the blur layer and name it texture. Turn off the visibility of the texture layer and select the blur layer. Use median to blur the layer to nearly hide the torn areas. You can run the median filter twice, as it's better not to do too much in one go. Then select the texture layer and use apply image. Select the blur layer as the layer and set the blend mode to subtract, with an scale of 2 and an offset of 128 (8bit images only). Then set the texture layer's blend mode to linear light. Use a brush or mixer brush to blend in the tones of the blur layer to get rid of the blown area.

(typo corrected: change blue to blur as it might have been confusing. PECourtejoie)

bartonlew
bartonlewAuthor
Legend
November 17, 2019

Hi Chuck, thanks, but this looks fairly involved.   I watched a video about frequency separation from PHLEARN on youtube, and it dealt with issues of preserving skin texture while blurring out inconsistencies.  I am not sure how that translates into changing exposure as in my example.  Then there is the question of "stamp visible," which I'm not familiar with.  Do I really need to do that, since even though my document has many layers I am only dealing with the small selection which is its own layer in my document?  If I have to, where do I go before hitting shift-alt-ctrl-E - the layer of the patch which is the 2nd one from the bottom in my document?  Back when I used your technique for blurring a background with guassian blour, you created a nice movie on youtube showing the steps.  I don't know if you have the time and inclination to do that for this technique, but if by any chance yes, that would be super helpful.  Thanks.

PECourtejoie
Community Expert
Community Expert
November 21, 2019

Hello, Chuck uses the steps demonstrated by our friend Earth Oliver in his Max class: https://max.adobe.com/sessions/max-online/#29524 no need to reinvent the wheel...

Chuck Uebele
Community Expert
Community Expert
November 16, 2019

Most the tutorials will have you use gaussian blur for the separation, but in this case, median works better, you can separate out the torn paper, at least on this low res image you supplied. Might be different on the full res image.

PECourtejoie
Community Expert
Community Expert
November 21, 2019

Hello,  For more info about this very technique, check out: https://max.adobe.com/sessions/max-online/#29524

Chuck Uebele
Community Expert
Chuck UebeleCommunity ExpertCorrect answer
Community Expert
November 16, 2019

What exactly do you want to do with that area? Just darken it, or make it the same tone as the rest of the outer area? If you want to get rid of the blown area, but keep the texture that went with it, you can use frequency separation.

bartonlew
bartonlewAuthor
Legend
November 16, 2019

I want to make the dark dress match the area surrounding it, and make the white flecks/tears of paper also be consisttent with the tears of white paper elsewhere in the dress.  Basically, I want to make the transition created by the sun spot disappear and the whole thing appear seamless.

bartonlew
bartonlewAuthor
Legend
November 16, 2019

Frequency separation?  Never heard of it.  What you did looks great.  Guess I need to watch some youtube videos.  Always something new in Photoshop.