- Home
- Photoshop ecosystem
- Discussions
- Incorrect colour when exporting from Lightroom int...
- Incorrect colour when exporting from Lightroom int...
Incorrect colour when exporting from Lightroom into Photoshop
Copy link to clipboard
Copied
Hi all,
I'm having a bit of an issue where whenever I export a photo from Lightroom into Photoshop the colour doesn't match, and I sometimes get slightly strange colour banding. I've checked my export settings in Lightroom and I think this is correct. I've added a screenshot from Lightroom and Photoshop below to show which settings I am using.
Strangley I've noticed that if I switch the colour mode in Photoshop from RGB to CMYK it looks correct and matches exactly what I see in Lightroom. It's as if the wrong colour mode is being exported from Lightroom but I couldn't see an option for colour mode anyway in Lightroom for exporting to Photoshop.
Any ideas where I might look next to try and solve this issue?
For completeness here is a screenshot of the profile that I have assigned in Photoshop:
Explore related tutorials & articles
Copy link to clipboard
Copied
This sounds like a defective monitor profile. Are you using a calibrator? Which one? If not, you're probably getting manufacturer profiles distributed through Windows Update. These profiles are very often bad in different ways.
To test, set sRGB IEC61966-2.1 as monitor profile in Windows color management (or Adobe RGB if the monitor is a wide gamut model). Relaunch both applications when done - the monitor profile is loaded at application startup. This won't be entirely correct, but will confirm whether the monitor profile is the problem.
Although it all ends up in the same monitor profile, the source profiles are different, so it's a different calculation. Lightroom's internal color space is not the same as the standard gamma 1.8 ProPhoto. So one conversion may work and the other fail. In addition, ProPhoto is particularly prone to amplify small errors, because it is so much bigger than the monitor color space it's remapped into.
Note that there is no need for Lightroom and Photoshop color settings to match! Whatever profile comes out of Lightroom will override your working space in Photoshop.
Copy link to clipboard
Copied
I'm not using a calibrator just Windows default. I went to change the colour profile as you said but it was already set to sRGB IEC61966-2.1. I don't actually have an option to select ProPhoto. Thanks for the info about the different calculation used between Lightroom and Photoshop, I'd made the assumption that they would be the same.
Copy link to clipboard
Copied
Are both versions of LR/ACR up to date? There was a bug a few dot releases ago where there was a bug that caused a mismatch due to the image coming from LR to PS didn't have an embedded profile.
Compare PS/LR this way: In LR, always in Develop module with the zoom at 1:1, while in Photoshop, at 100% zoom (those are the same).
Mismatch and banding?
Copy link to clipboard
Copied
I did have a couple of updates that I needed to do. So those have now finished and I've loaded up the image again in both Lightroom and Photoshop but unfortunately that hasn't fixed my issue, they are still a bit different.
I've zoomed into the same area in the photo, the problem seems to be a lot more noticeable in the blues.
Copy link to clipboard
Copied
Yes, I agree that this reads like a defective monitor display profile
Here are some more instructions to help you find out:
display profile issues on Windows
Here's something to try
It'll only take a few minutes and is good troubleshooting.
At least once a week on this forum we read about this, or very similar issues of appearance differing between colour managed applications.
Of course you must not expect accurate colour with programs such as Windows "Photos", because in most versions colour management is not implemented there, so such programs are incapable of providing accurate image display.
Unfortunately, with Microsoft hardware: Windows updates, Graphics Card updates and Display manufacturers have a frustratingly growing reputation for automatically installing useless (corrupted) monitor display profiles.
I CAN happen with Macs but with far less likelihood, it seems.]
The issue can affect different application programs in different ways, some not at all, some very badly.
The poor monitor display profile issue is hidden by some applications, specifically those that do not use colour management, such as Microsoft Windows "Photos".
Photoshop is correct, it’s the industry standard for viewing images, in my experience it's revealing an issue with the Monitor Display profile rather than causing it. Whatever you do, don't ignore it. As the issue isn’t caused by Photoshop, please don’t change your Photoshop ‘color settings’ to try fix it.
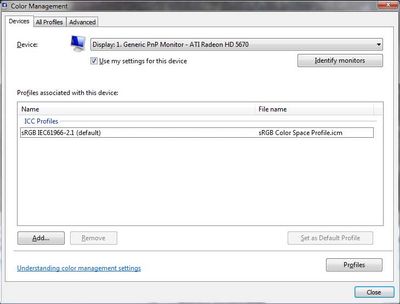
To find out if the monitor display profile is the issue, I recommend you to try temporarily setting the monitor profile for your own monitor display under “Device” in your Windows ‘color management’ control panel to “sRGB IEC61966-2.1”. (If you have a wide gamut monitor display (check the spec online) it’s better to try ‘AdobeRGB1998” here instead as it more closely approximates the display characteristics).
Click ‘Start’, type color in the search box,
then click Color Management. In the Devices tab, ensure that your monitor is selected in the Device field.
You can click to ADD to add “sRGB IEC61966-2.1” (or AdobeRGB1998) if not already listed there.
Again - IF you have a wide gamut display I suggest trying “AdobeRGB1998”
Once it’s selected, be sure to check “Use my settings for this device” up top.
And click on “set as Default Profile - bottom right
Screenshot of Color Management Control Panel
Quit and relaunch Photoshop after the control panel change, to ensure the new settings are applied.
Depending on the characteristics of your monitor display and your requirements, using sRGB or Adobe RGB here may be good enough - but no display perfectly matches either, so a custom calibration is a superior approach.
If this change to the Monitor Display profile temporarily fixes the appearance issue, it is recommended that you should now calibrate and profile the monitor properly using a calibration sensor like the i1display pro, which will create and install its own custom monitor profile. The software should install its profile correctly so there should be no need to manually set the control panel once you are doing this right.
Still got problems?
Perhaps try resetting Photoshop preferences?
Resetting restores Photoshop's internal preferences, which are saved when Photoshop closes. If they become corrupt then various issues can occur.
I can help with detailed instructions on that
I hope this helps
neil barstow, colourmanagement net :: adobe forum volunteer:: co-author: 'getting colour right'
google me "neil barstow colourmanagement" for lots of free articles on colour management
Copy link to clipboard
Copied
You need to correct your macro. Windows "Photos" has been fully color managed for some time.
Copy link to clipboard
Copied
D Fosse, thanks for spotting that update requirement. Do you know, please, just when W/Photos became colour management savvy?
neilB
Copy link to clipboard
Copied
A year or two, but possibly longer. I never use it so I didn't know until Per Berntsen noticed it.
Copy link to clipboard
Copied
thanks
N
Copy link to clipboard
Copied
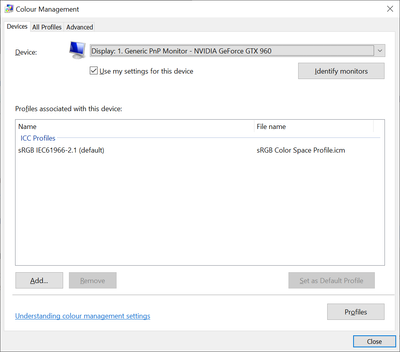
Thank you for your detailed reply and for trying to help me fix this issue. I've now changed my ICC profile to the one you recommended and my settings currently look like this:
I launched Lightroom and Photoshop again to do a comparison but unfortunately I still have the same problem. Again, it's most noticeable in the blues. I reset my Photoshop preferences via the Preferences > General screen and restarted Photoshop. Unfortunately this did not solve my issue either.
Copy link to clipboard
Copied
I'm having a bit of an issue where whenever I export a photo from Lightroom into Photoshop the colour doesn't match, and I sometimes get slightly strange colour banding. I've checked my export settings in Lightroom and I think this is correct. I've added a screenshot from Lightroom and Photoshop below to show which settings I am using.
Please clarify whether you're exporting an image which you then open in Photoshop,
or if you are using the Edit in Photoshop command.
For completeness here is a screenshot of the profile that I have assigned in Photoshop:
Why are you using Assign profile?
It should only be used for untagged images (that don't have an embedded profile), or if you believe that the image does not have the correct profile embedded.
I went to change the colour profile as you said but it was already set to sRGB IEC61966-2.1..
Please post a screenshot of the Devices tab of the Color management dialog, as well as screenshots that show the difference between Lightroom and Photoshop.
Copy link to clipboard
Copied
I am using the Edit in Photoshop command from Lightroom.
I was attempting to use the Assign profile command because I'd read some advice online that said this needed to be done sometimes. So it was just a test to see if it helped.
Here's a screenshot of my Colour Management view:
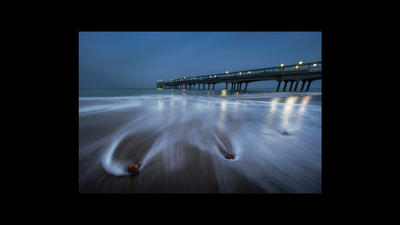
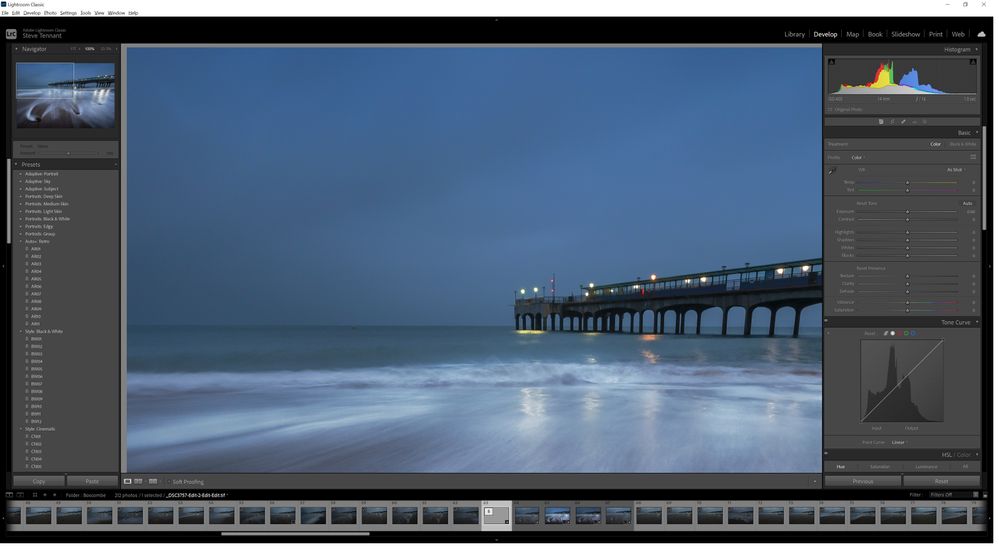
Here's a couple of screenshots of what I'm seeing. The first is Lightroom and the second is Photoshop:
The main areas of difference seem to be around the blues, so it's noticeable in the sky but also the bottom left of the image seems to have more teal in Photoshop.
Copy link to clipboard
Copied
The main areas of difference seem to be around the blues, so it's noticeable in the sky but also the bottom left of the image seems to have more teal in Photoshop.
By @Serberuss
So they are not the same zoom ratio, and AFAIK not 100% zoom (1:1), and there's no indication that the one screen capture from LR was from the Develop module. Can you explain what you did and what you want to gather from the examples provided?
Copy link to clipboard
Copied
Ok, I'll upload another 2 images where the Photoshop screenshot is a little bit closer to Lightroom. In Lightroom, I entered into the Develop module and went into full screen mode and took a screenshot. I did something similar in Photoshop where I just hit my F key until I got full screen mode and zoomed in a bit.
I've attached the screenshots below.
Copy link to clipboard
Copied
What is the zoom ratio of each screen capture???
Copy link to clipboard
Copied
I don't know, how do I find that out?
Copy link to clipboard
Copied
Photoshop: double click on Zoom tool is one way.
LR:
https://jkost.com/blog/2020/07/zooming-in-lightroom-classic.html
Copy link to clipboard
Copied
Copy link to clipboard
Copied
The screenshots you posted are not the same magnification, and also smaller than the screenshots you posted initially, so I dont't think any of them are at 100%.
To view at 100% in Lightroom, go to View menu > Zoom to 100%. (do this in the Develop module)
In Photoshop, go to View Menu > 100%.
Pan the image in both applications so that the same part of the image is visible in both.
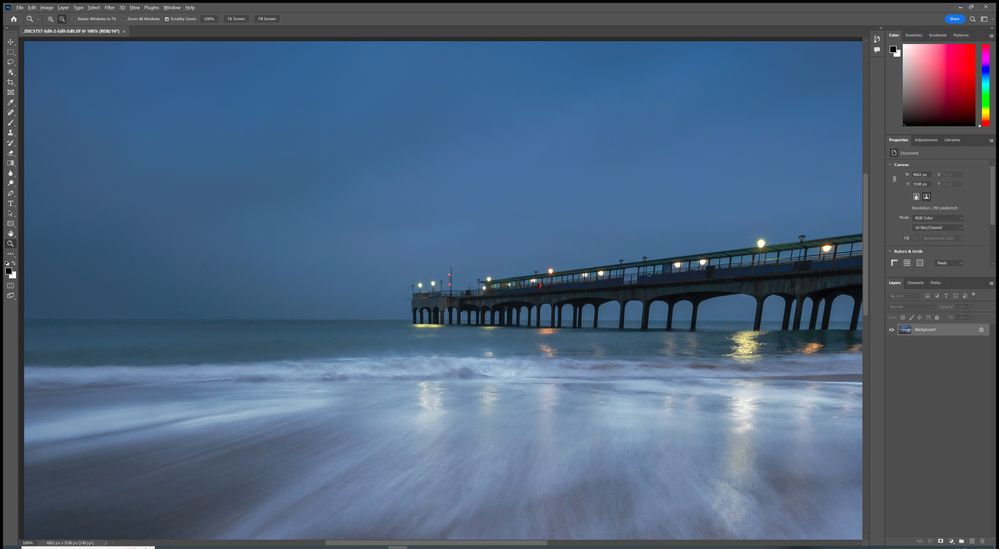
Then take screenshots of the entire application windows, and post them here.
Please do not attach the screenshots, use the Insert Photos icon in the toolbar like you did in your first post.
Copy link to clipboard
Copied
The screenshots you posted are not the same magnification, and also smaller than the screenshots you posted initially, so I dont't think any of them are at 100%.
By @Per Berntsen
Indeed, saw the 2 captures this morning and then decided, I'll let others attempt to get the data we need for an assist here.
Copy link to clipboard
Copied
Indeed, saw the 2 captures this morning and then decided, I'll let others attempt to get the data we need for an assist here.
By @TheDigitalDog
That's what I was thinking too, but nobody else did 🙂
There was a slight color difference (magenta/green balance) in the previous screenshots, but the ones at 100% match, as far as I can tell.
So this underlines the importance of viewing at 100%, not only to evaluate noise and sharpness and other image detail, but also for color accuracy.
100% view is the only view that shows you a true representation of the image – one screen pixel is used to display one image pixel. Any other view will be inaccurate and misleading, because the image has been scaled.
Since you have a 4k monitor (3862 x 2122), you may find it easier to evaluate image detail at 200% view.
The screen pixels are so small that images that appear to sharp at 100% aren't really sharp, which will be revealed at 200%.
Copy link to clipboard
Copied
Ok, I've used the menu this time as you suggested, and didn't use full screen. And here are the results:
Copy link to clipboard
Copied
Ok, I've used the menu this time as you suggested, and didn't use full screen. And here are the results:
By @Serberuss
They appear to match on this end. Despite the difference in the crop (foreground).
Better would be an image with far more colors like:
http://www.digitaldog.net/files/Gamut_Test_File_Flat.tif
Copy link to clipboard
Copied
Interesting, they definitely have differences for me, particularly in the sky. I've just loaded this thread on my phone as well to check and I can see differences there also. I can try and find another photo that has a different colour pallette that also has the same issue if that will help?
-
- 1
- 2
Find more inspiration, events, and resources on the new Adobe Community
Explore Now


