Copy link to clipboard
Copied
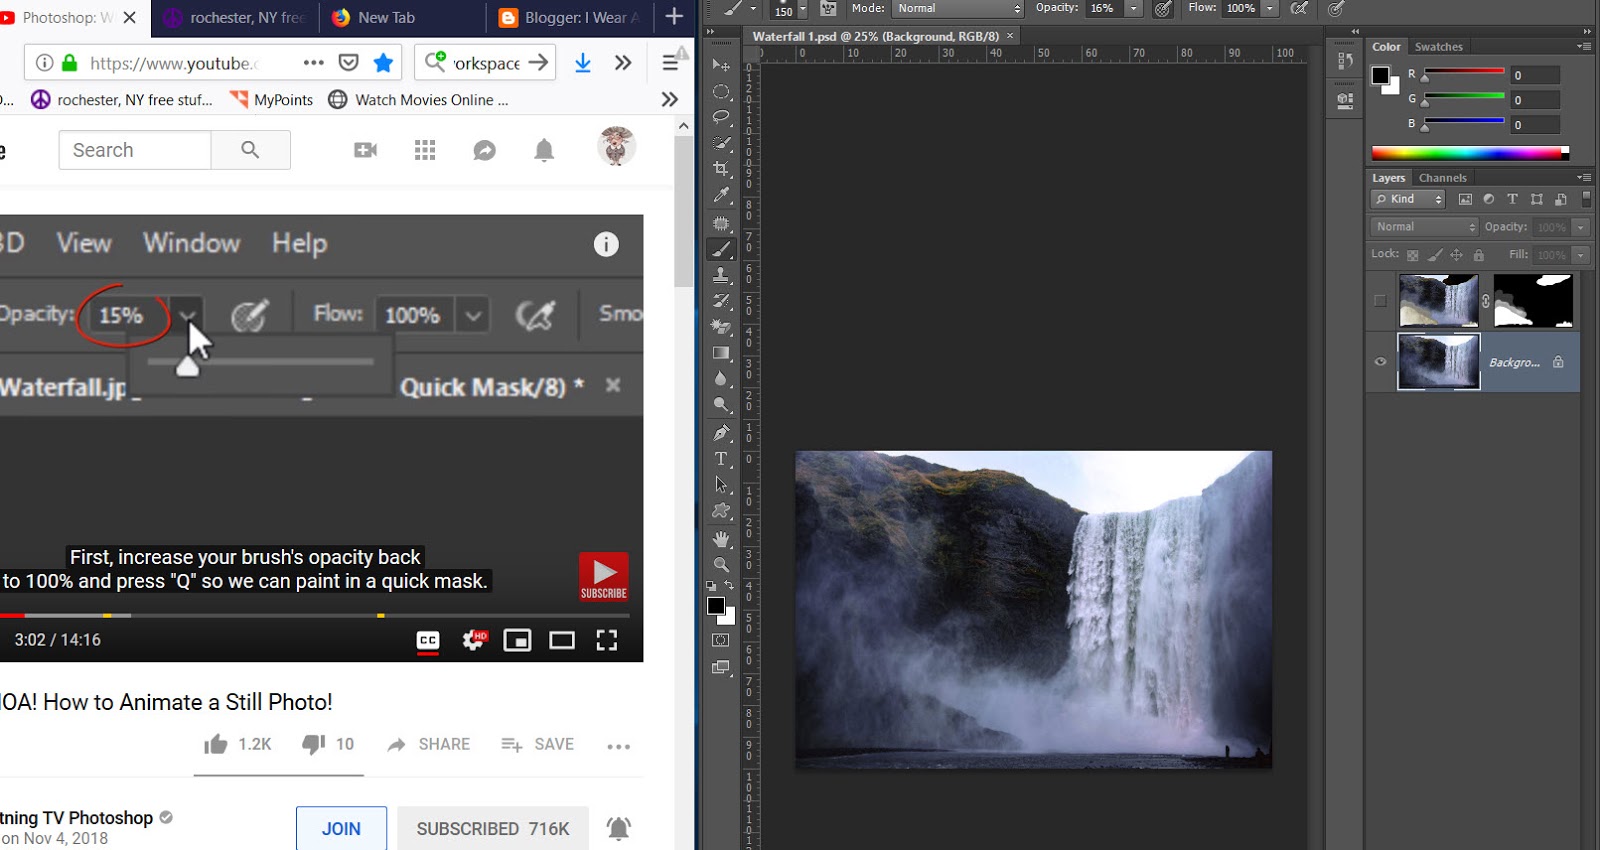
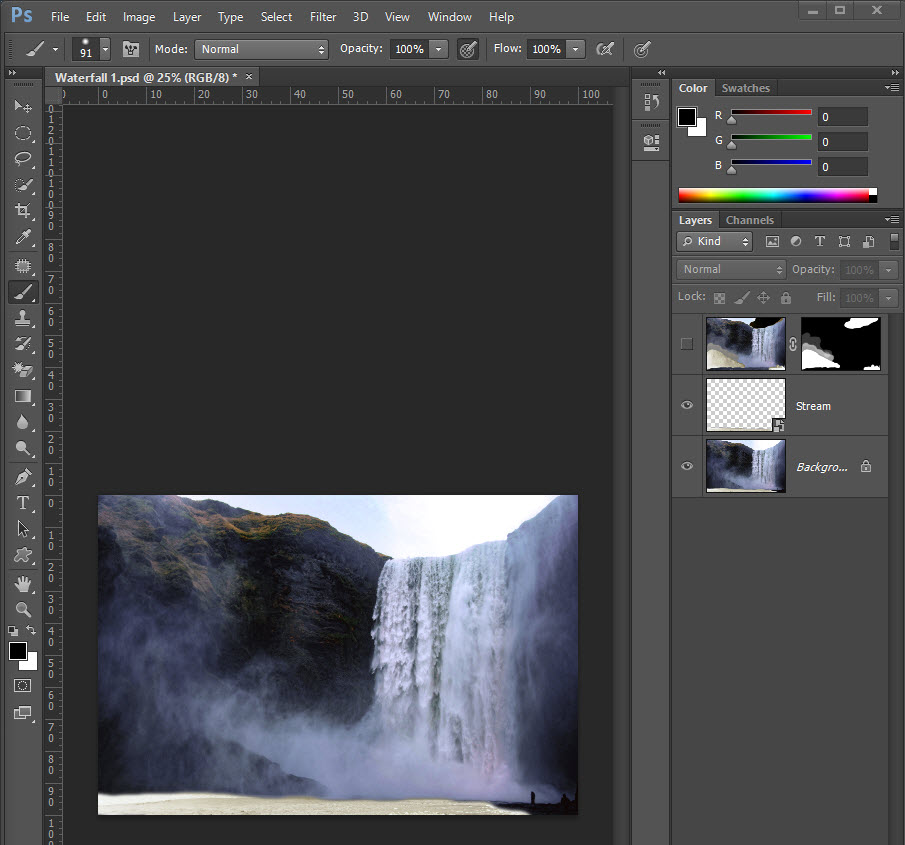
I am following a tutorial on how to animate a photo. After Inverting, is the rock supposed to be cloudy white?
I made it into a smart object and the stream is white? I did it once and the stream was black--I don't know what I did differently.

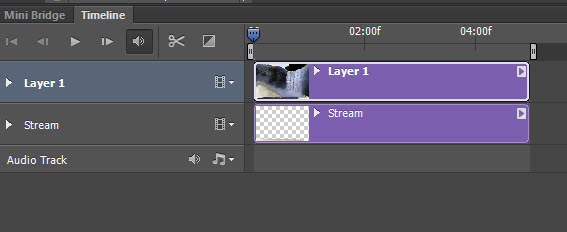
My Timeline

 1 Correct answer
Lucien, it's a better question than you might realise. If you double click the Quick Mask icon at the bottom of the Toolbar, it will open this panel. The default is for the colour to indicate Masked Areas but a lot of people prefer to change it so that it indicates Selected Areas like below. I could only bear to have a very quick look at the video because his voice kind of grates (he sounds like a pre-school TV program) but it looked like he has his set the same as mine.

It does not real
...Explore related tutorials & articles
Copy link to clipboard
Copied
Can you post the link to the tutorial? It looks like you have painted directly on your top layer in addition to the mask - which I would assume is a mistake, but maybe not.
Copy link to clipboard
Copied
Thanks Mellissa, thought I would let you know--I wasn't clicking on the box with the thin white lines before inverting my selection.
Copy link to clipboard
Copied
lucienp8924865 wrote
Thanks Mellissa, thought I would let you know--I wasn't clicking on the box with the thin white lines before inverting my selection.
We all still get caught out on regular occasions. You develop a mental check list.
- What is selected?
- Is it turned on?
- Is it the right type of layer (raster vs vector)
- What is the layer blend mode?
- What is the tool blend mode (in the Options Bar)?
- What else is happening in the Options Bar?
- What is the image size in pixels as well as linear? You might have mistakenly made a new image 1000 x 1000 thinking it is pixels, but the unit was set to inches, and the document turns out to be 30,000 pixels square. Text is set to Points, and you start a text layer and nothing happens. In fact the text is so tiny you can't see it until you zoom in. This gets everyone eventually.
- What colour is the brush/text/shape set to? If it is the same as the background colour, then you won't be able to see anything.
- what tool is selected? If you use a shortcut, and that tool was already selected, then you might have toggled to the next tool wit the same shortcut. This gets me once a month or so, but I don't use the Shift key to toggle (every save key stroke is a bonus).
- Is the layer locked.
- What is happening in the Characters panel? There are a bunch of options that will stay set and affect all text going forward until you turn them off.
That's all I can think of right now, and I am not at home, so don't have Photoshop, but that will get you out of a lot of situations.
Copy link to clipboard
Copied
https://www.youtube.com/watch?v=YmTHX0P9T9M&feature=em-commentshttp://
Marty's tutorials are awesome. I am 78+ and as I grow old, so grows my brain.
Copy link to clipboard
Copied
Lucien, it's a better question than you might realise. If you double click the Quick Mask icon at the bottom of the Toolbar, it will open this panel. The default is for the colour to indicate Masked Areas but a lot of people prefer to change it so that it indicates Selected Areas like below. I could only bear to have a very quick look at the video because his voice kind of grates (he sounds like a pre-school TV program) but it looked like he has his set the same as mine.

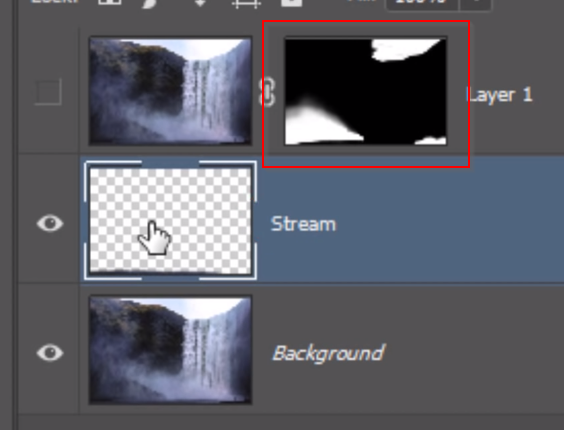
It does not really matter, as it it such a simple matter to invert a layer mask. If your mask does not look the same as his, select the mask (it needs to have a thin white line around it) and use Ctrl i (Cmd i) to invert. Job done.

Copy link to clipboard
Copied
Wow, thank you thank you thank you--I was not clicking on the box with the thin white lines around it. Three days, OMG!
Find more inspiration, events, and resources on the new Adobe Community
Explore Now