Merge nested group into one layer or one smart object
PS CC 2017.1.1 x64, Windows.
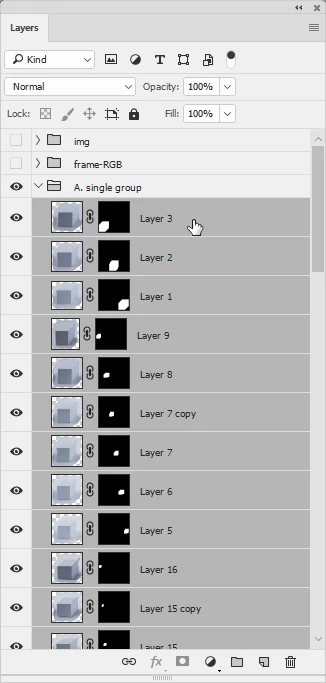
I have 60+ objects inside my ps document. Each object is a simple assembly: small jpg image (cube) + layer mask (pixels), something like this:
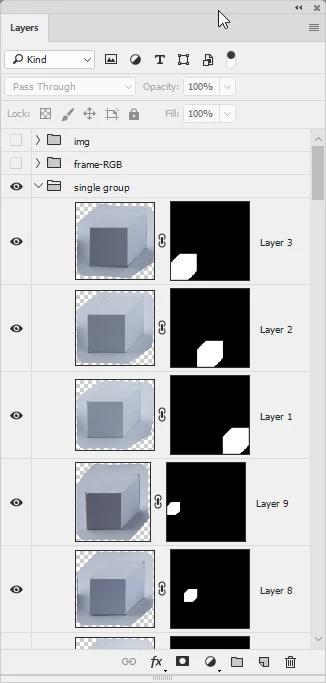
I can put my objects under: A) single group, B) nested group tree, like this:

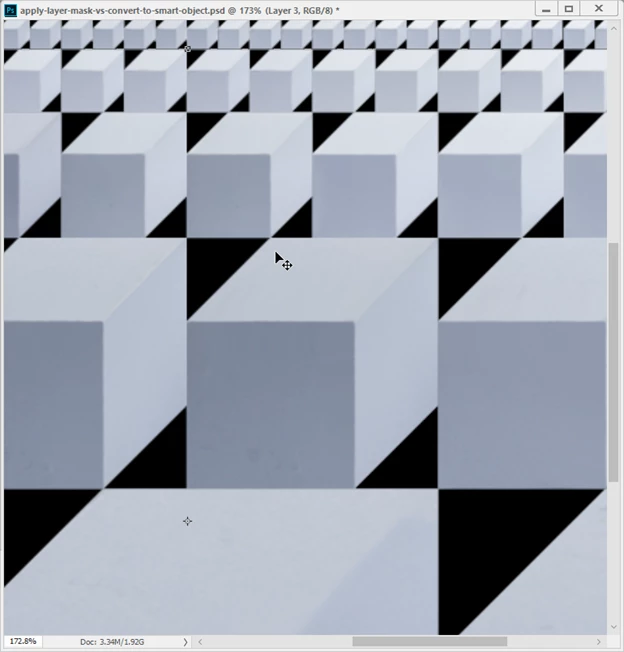
The result is identical, a simple array of objects over a solid, black layer:
Now I would like to merge my objects (multiple layers) into one layer (including layer masks). Here is what I get after merging (Merge Group or Convert To Smart Object command).
Case A. single group:
I am selecting all objects, right-click, Convert to smart object (or Merge Group). This converts my object (cubes) into one single object, layer masks are applied and everything looks identical to the original state (multiple objects, multiple layers). It looks perfect:
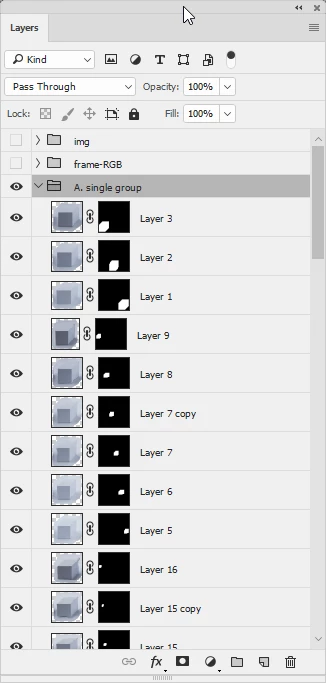
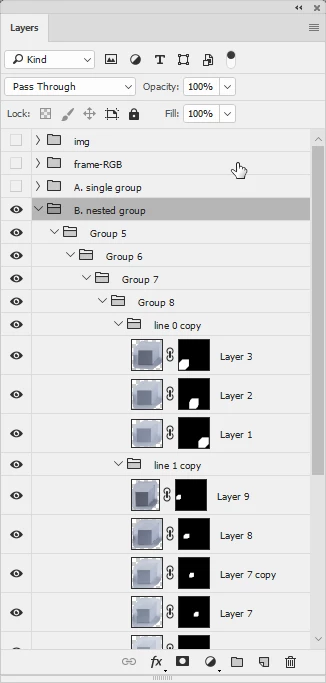
Case B. nested group:
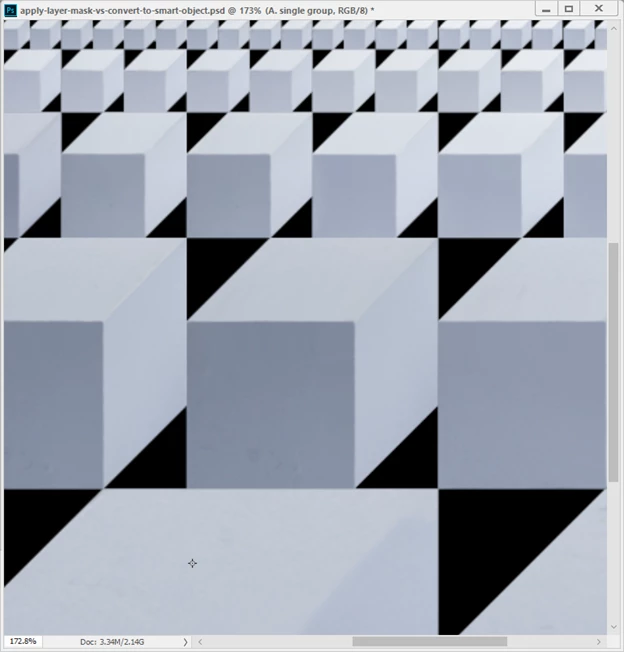
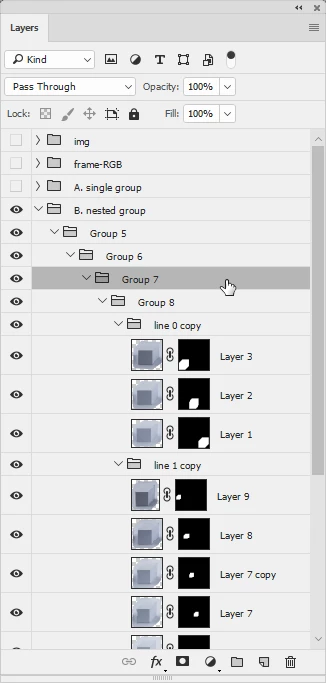
Now, let’s do the same with the nested group. Now, my objects are nested under line 0 copy, line 1 copy, line 2 copy, line 3 copy which are nested under Group 8, Group 7, Group 6, Group 5, B. nested group. I am selecting the top most group inside the nested tree, right-click, Convert to smart object (or Merge Group). And surprise! The new layer (smart objects) differs from the original. Photoshop puts some extra mini-gaps between my objects:
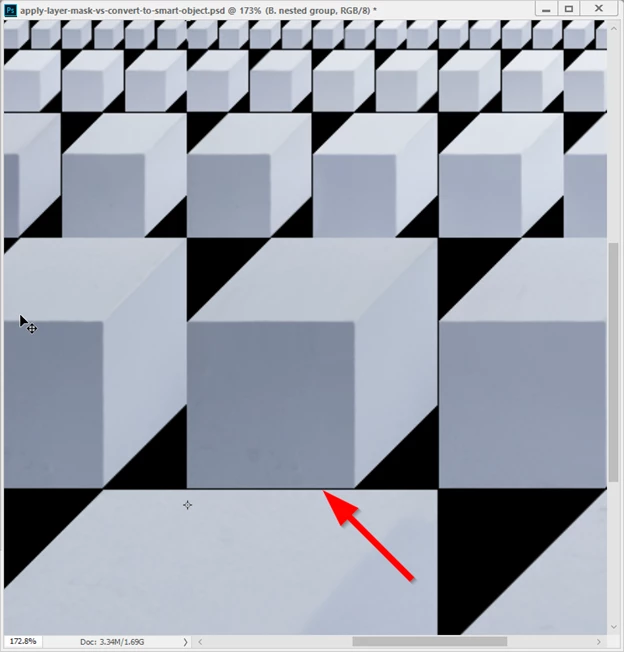
And it seems that the width of those extra gaps depends on how many levels (nested group tree) are merged. For example, if I select Group 7, right-click, Convert to smart object (or Merge Group), I get this – some gaps have been added but its width is smaller:

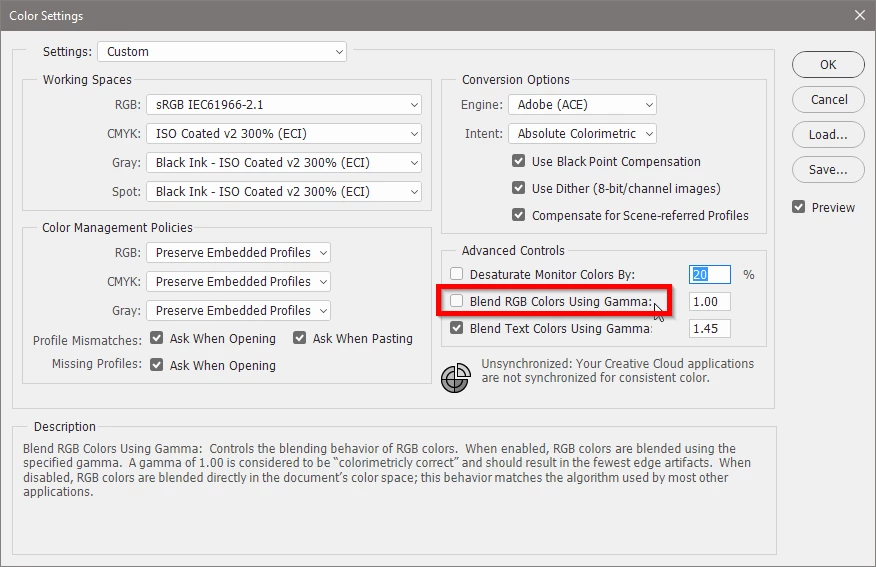
It seems that Photoshop adds some ‘extras’ at each level of the nested group tree and the difference (in reference to the original state) could be really huge. The result is the same for both: Convert to smart object and Merge Group commands. I’ve also noticed similar behaviour while working with adjustment layers. It does matter whether I apply my adjustment layer to the single or nested group. Each level of nested tree seems to add some tiny modifications and the final results could be different.
Did someone experience the same? is there any workaround to this? As for now the only solution I see is to merge my objects manually, step by step, starting from the very bottom of my nested tree. Or I can write a script. But maybe I am missing something and this can be easily fixed by setting some variables/preferences.
Thank you.