EmerMarie
Participant
November 9, 2015
Answered

Photoshop CS6 Stroke Path Greyed Out

  • November 9, 2015
  • 1 reply
  • 53730 views

Hi, I have Photoshop CS6 from the Student Version of CS6 Design and Web Premium package.

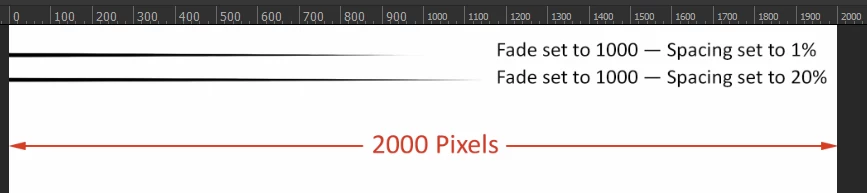
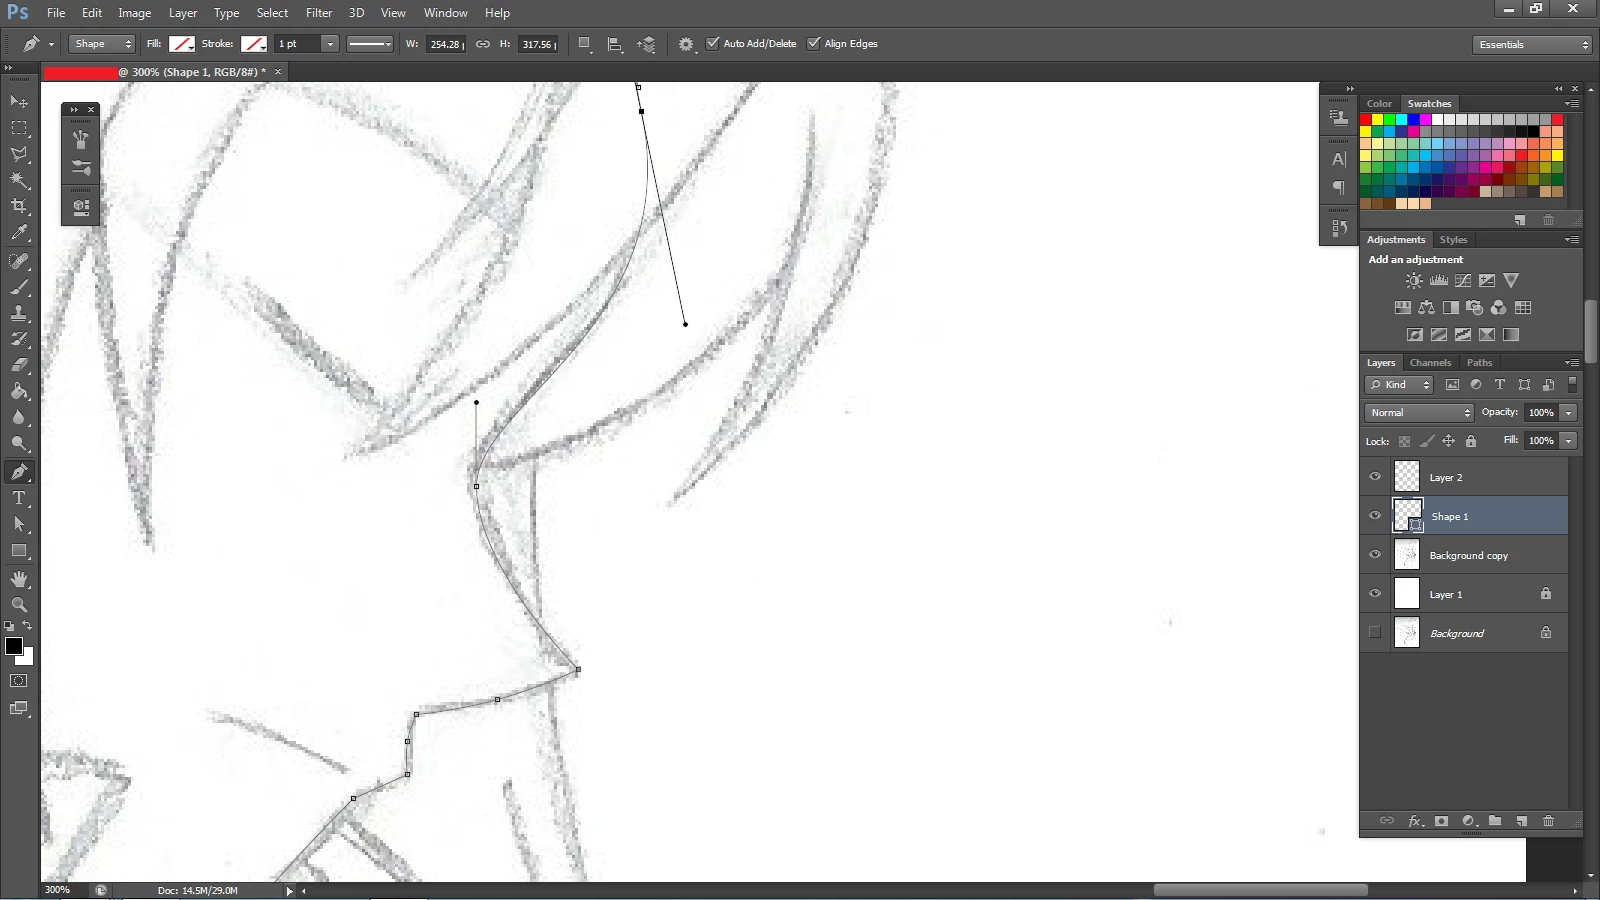
Recently, I started trying out various techniques with the pen tool, but there is one major issue I'm having: the Stroke Path option of greyed out, meaning that I can't use it.

I've tried everything I can think of, and not even the solution here: can't select 'stroke path' in photoshop CS6 to taper pen tool edges is doing me any good. On my end, the size jitter is greyed out even when I have the brush as my current tool on hand. The file itself is RGB and 8-bit.

Too add even further insult to injury, I can't simply contact someone at Adobe by phone, because they directed me to the chat instead... only to find that I can't use the chat for something like this.

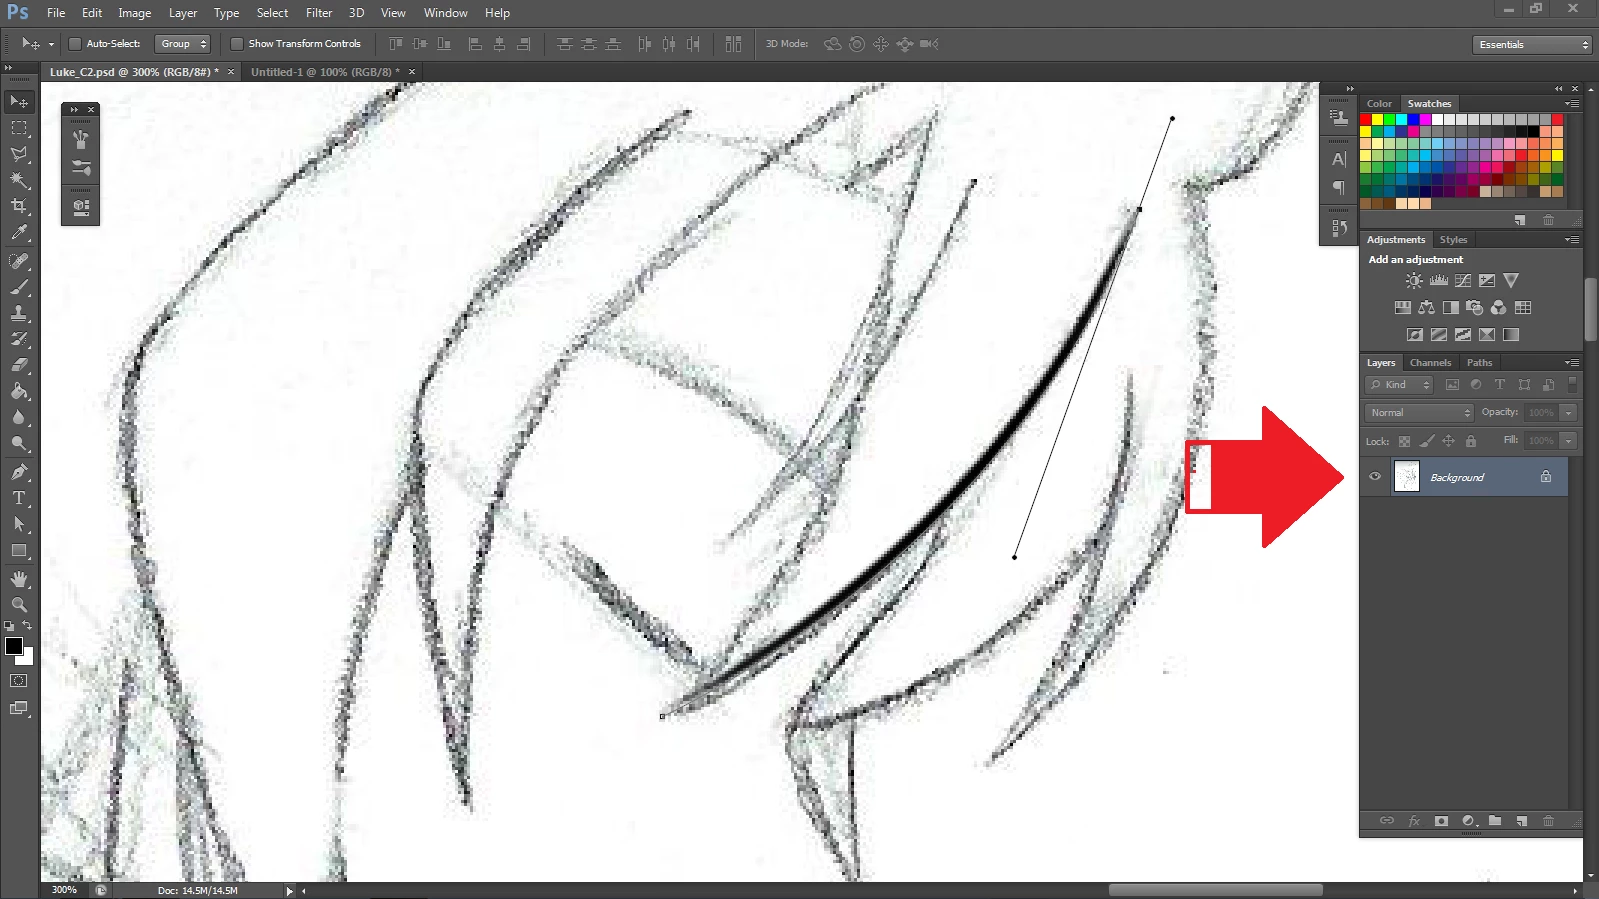
Here's a screenshot of the problem. And before you guys point it out, yes, I know the path layer is selected, and I heard that you need to select an actual layer instead, but every time I do that, then I can't use the path to do squat. I can't even use the "stroke path with brush icon" under the Paths tab (next to Layers) because, again, it's greyed out.

Does anyone have a solution?

This topic has been closed for replies.
Correct answer Trevor.Dennis

No, it's perfectly fine. I'm actually glad you pointed this out. I've been wanted to know how to do that for a long time. Thank you for that, Trevor.

Also, thanks to Semaphoric's post, I've finally been able to get the Stroke Path to work, but now there is one more problem I need to address...

How do I make the lines separate from the background layer? It'd be kind of pointless for me to even use the Stroke Path if I have to use the eraser tool to take out a pixel one by one...

I am really sorry to be bothering you on this.


Just make a new layer for any stroke, or group of strokes you want to isolate.  What I do is make a new layer as soon as I start, and immediately use 'Ctrl (Cmd) a' to select the entire canvas. With the new layer selected, I can practice, and just hit the delete key to clear the layer.  This is a real time saver if using brush preset dynamics — especially Fade where it is not always easy to predict how long the stroke will need from full size to nothing. If your stroke takes a winding path across and around the screen, then it is close to impossible to get the correct value for Fade without practice strokes.  As a guide, the Fade seems to equate to pixels when Spacing is set to 1%, and increase directly proportional to the percentage value of brush Spacing

NOTE: Make sure you don't have your work path selected when hitting the delete key, or you will lose it!

1 reply

Trevor.Dennis
Community Expert
Community Expert
November 9, 2015

You have a Shape layer selected.  Stroke is a raster operation, and needs a normal layer.

EmerMarie
EmerMarieAuthor
Participant
November 11, 2015

...You didn't read the whole post, did you? Look at what I wrote before my screenshot.

I am aware that I have it selected, BUT, every time I try to select a normal layer instead, I still can't use the stroke path. I can't even combine the two. If you can provide me a visual of how it's done, then that would be fantastic.

Trevor.Dennis
Community Expert
Community Expert
November 11, 2015

Whoops!  Sorry.  I look at so many of these in an average day, I am often guilty of skimming. :-(

OK, I'm guessing that the size dynamic is greyed out because you have one of the art brushes selected.  If you select any of the first six standard brush presets, the dynamics will be available again.  Google John Derry for some cool ideas on art brushes use Tool presets.

Regards not being able to stroke the path, you are not looking at work paths as such when a shape layer is selected. Select your shape layer, and then drag the shape layer's path onto the New Path icon at the bottom of the panel.  That will produce a plain vanilla work path from the shape.  Now create or select a raster layer, and you'll be able to stroke that path.

Incidentally, with any of the Shape tools selected, you can can change the result between Live Shape, a Path, or pixels from the left of the Options Bar.

Did I get it right this time?