• Global community
    • Language:
      • Deutsch
      • English
      • Español
      • Français
      • Português
  • 日本語コミュニティ
    Dedicated community for Japanese speakers
  • 한국 커뮤니티
    Dedicated community for Korean speakers
Exit
0

Print size too big. Looks good on monitor. Screen Res. already adjusted

Community Beginner ,
Dec 10, 2016 Dec 10, 2016

Copy link to clipboard

Copied

I need to make a 4Hx6W borderless print of an 8Hx10W image (I know it will have white space on the width ends and that's fine for my purposes)

I have adjusted my screen resolution to 220px based on my monitor resolution and screen width.  I have a 300dpi 8x10 image that I reduced in size to 4x5 at 219 dpi.  I then changed the canvas size to 4x6.  Overlaying a 4x6 pieces of photo paper on the monitor image show a perfect match in size.

If I print the image on 4x6 (borderless) paper with Scale left at 100% and Scale to Media left unchecked, the printed image is too large for the paper and is "cropped" on the top and bottom. 

This is probably a simple fix but I'm wasting too much ink trying to fix it ! Any ideas would be greatly appreciated.
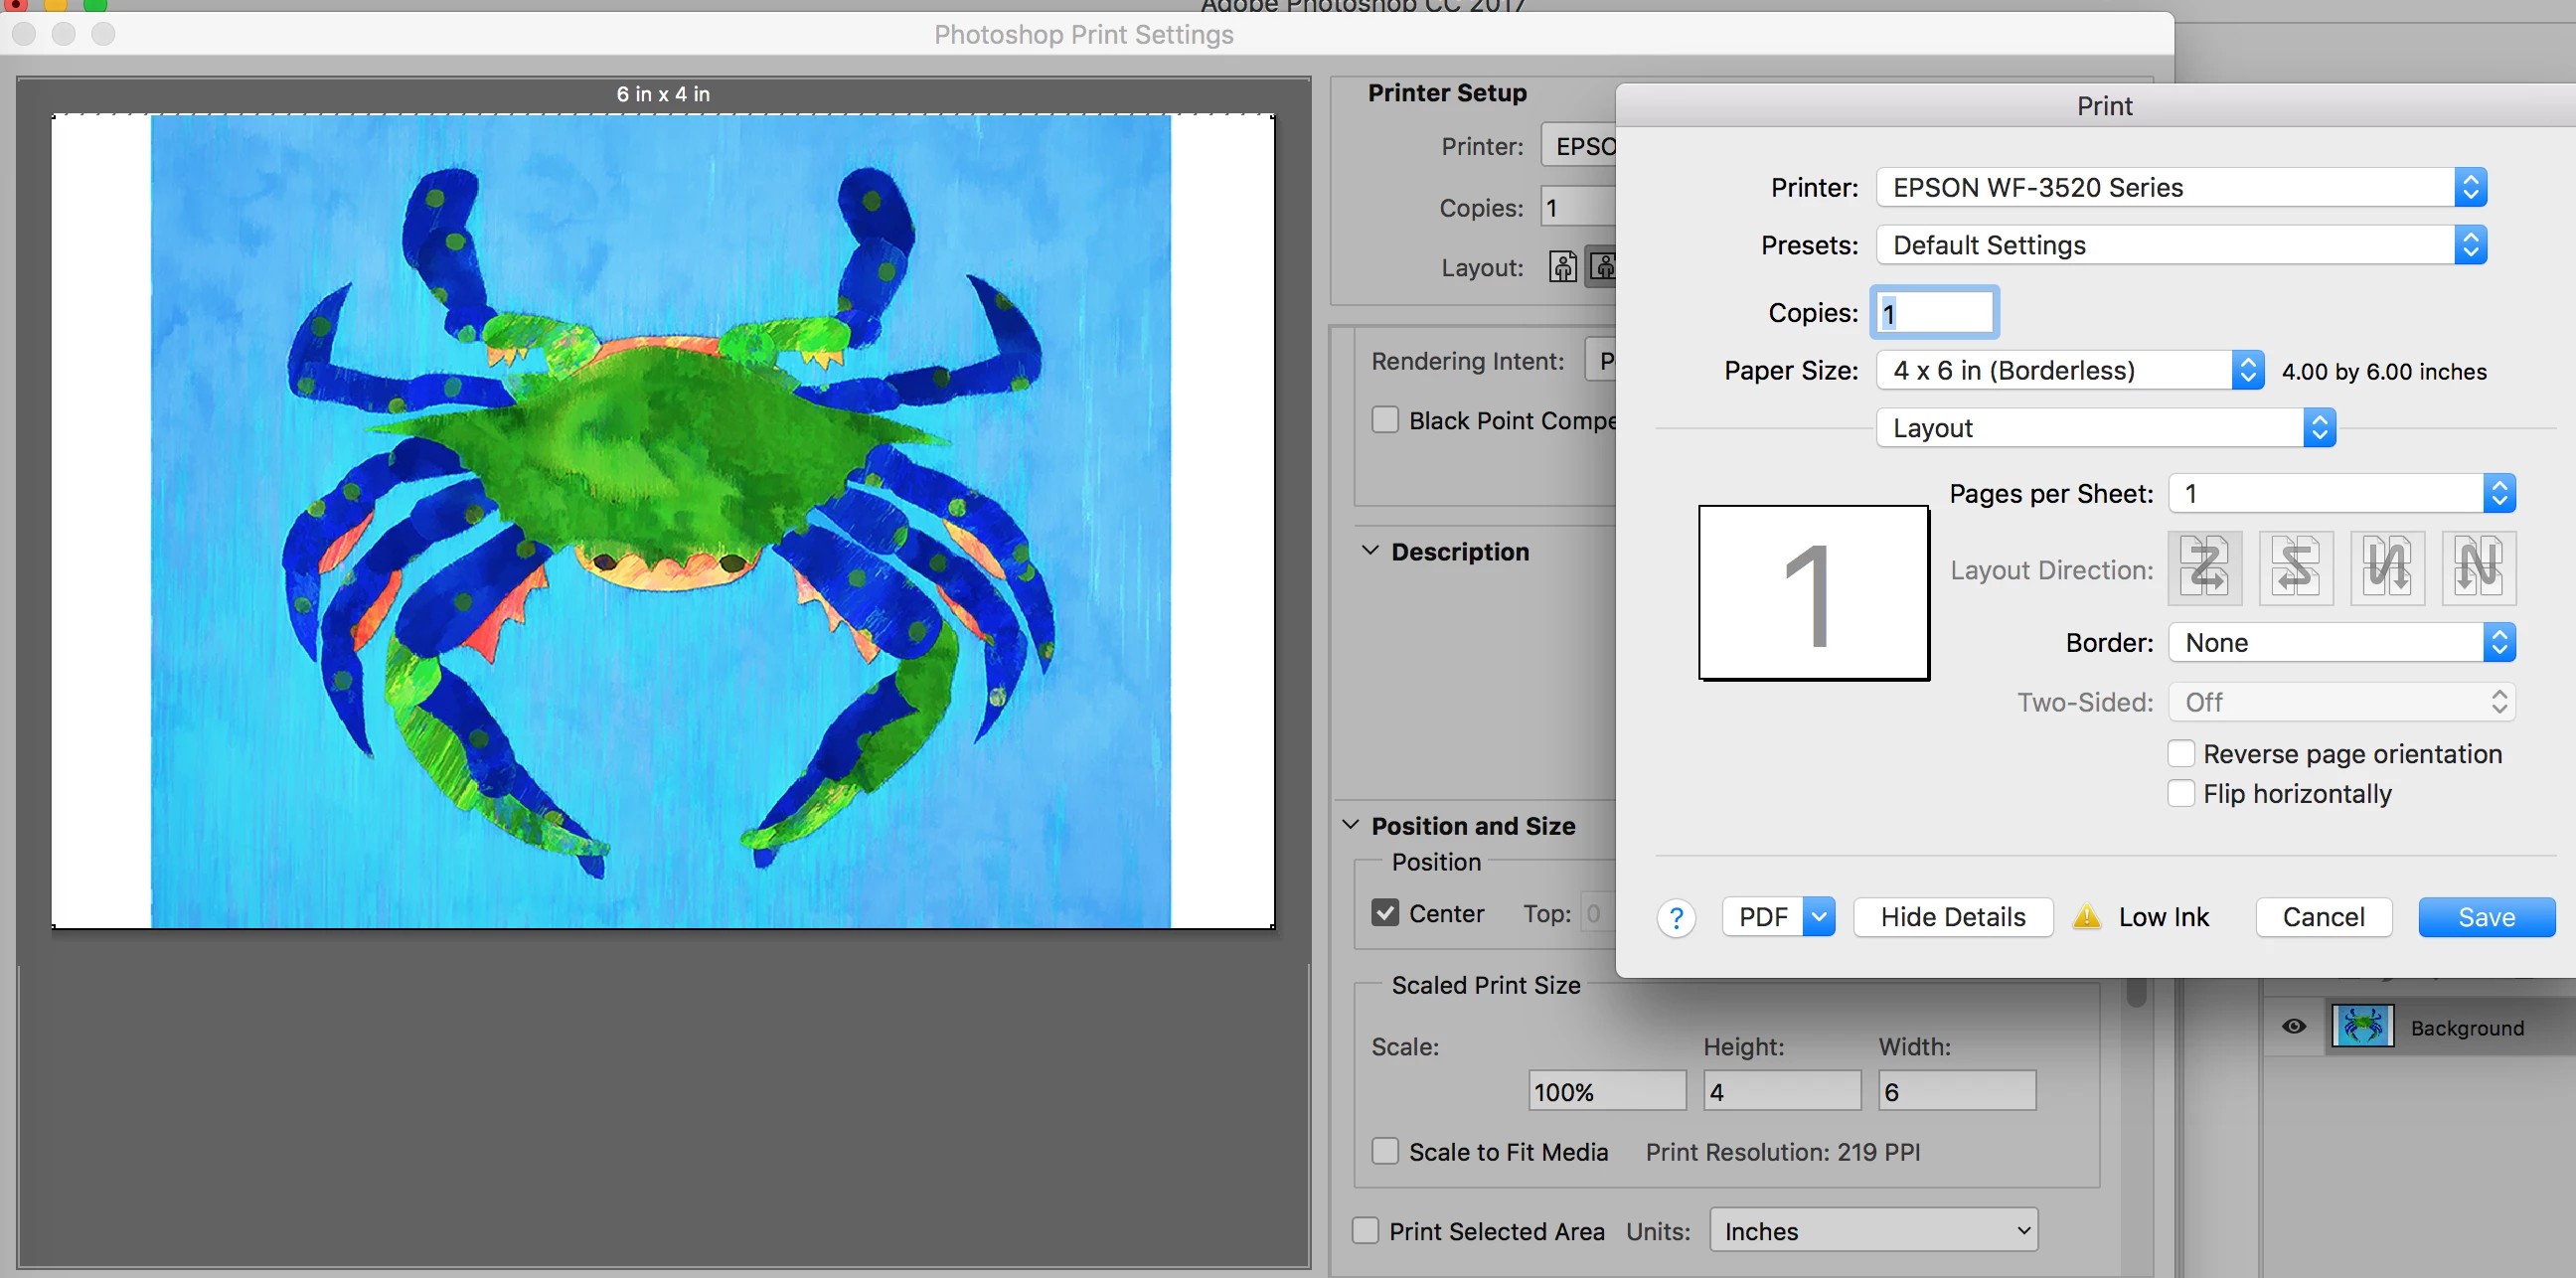
Print Screen:

Print Screen.png

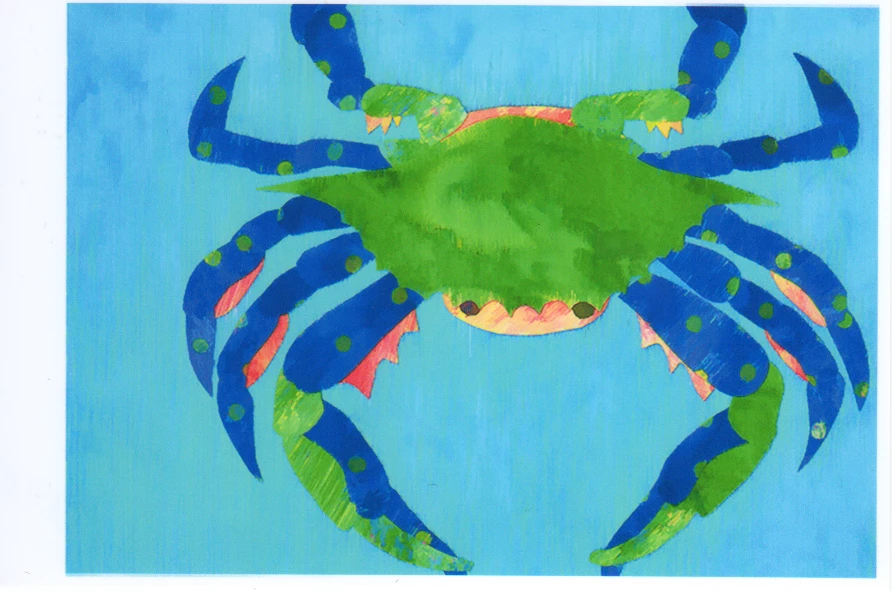
Printer Output  (white borders reflect what is on photo paper after printing)

Scan of Printer Output.jpg

Views

11.3K

Translate

Translate

Report

Report
Community guidelines
Be kind and respectful, give credit to the original source of content, and search for duplicates before posting. Learn more
community guidelines

correct answers 1 Correct answer

Community Expert , Dec 10, 2016 Dec 10, 2016

bluemoontug wrote:

If I print the image on 4x6 (borderless) paper with Scale left at 100% and Scale to Media left unchecked, the printed image is too large for the paper and is "cropped" on the top and bottom.

My guess is that the problem is not with Print Size, and that you have measured your screen correctly and entered the numbers correctly.

I think the problem is related to the fact that you are printing borderless on (going by your screen shot) an Epson printer.

If you print a 4-inch image edg

...

Votes

Translate

Translate
Adobe
Community Expert ,
Dec 10, 2016 Dec 10, 2016

Copy link to clipboard

Copied

You can not adjust you screen resolution to 220px your display has a fixed ppi resolution and displays the number of  pixels your display is manufactured with. You can set you display's driver to have your display to only display 220px wide.

If you want a print 8" x 10"  that has a 300dpi resolution set your document's canvas size to  8" by 10" with a 300 DPI resolution.   Place your image(s) into this document.   Use Photoshop zooming to fit your work area to on your display the size you wish to work at. If you want  a 4" x 6" 300dip print use that canvas size.

JJMack

Votes

Translate

Translate

Report

Report
Community guidelines
Be kind and respectful, give credit to the original source of content, and search for duplicates before posting. Learn more
community guidelines
Community Beginner ,
Dec 10, 2016 Dec 10, 2016

Copy link to clipboard

Copied

Thanks for the reply. You said "You can not adjust you screen resolution to 220px"  Of course you're right - I wasn't clear in what I did..  What I should have said was that I adjusted Photoshops screen resolution so it matched my display (219.5px x 13.125" ~= 2880 which is my display's res.)

I'm not sure I understand your 2nd paragraph and how that helps me get a 4x5 canvas/image to print on a 4x6 sheet of photo paper (borderless).  Thanks for your patience.

Votes

Translate

Translate

Report

Report
Community guidelines
Be kind and respectful, give credit to the original source of content, and search for duplicates before posting. Learn more
community guidelines
Community Expert ,
Dec 10, 2016 Dec 10, 2016

Copy link to clipboard

Copied

Hi

From your screen shot is looks like your image is being scaled. It also looks like you have Photoshop set up not to do any scaling but it could happening be in the printer driver.

Are there any driver scaling options that are not shown on your screenshot?

I use Windows not Mac here and am using an Epson 3800 so not sure if you have the same options - however in my Epson driver if set printing to Borderless the default is for the image to Auto expand beyond the paper edge. It does that to prevent any white edges down a borderless print , if the paper is mis-aligned.  I always set that off i.e. to "Retain Size". If you have such an option it will be worth checking.

Have you tried printing with a border to see if that prevents the scaling?

If it does, and you have no other controls other than those on your screenshot, you may need to scale down your image Photoshop to leave an edge border that can then be chopped off by the print driver when printing borderless.

Dave

Votes

Translate

Translate

Report

Report
Community guidelines
Be kind and respectful, give credit to the original source of content, and search for duplicates before posting. Learn more
community guidelines
Community Expert ,
Dec 10, 2016 Dec 10, 2016

Copy link to clipboard

Copied

bluemoontug wrote:

If I print the image on 4x6 (borderless) paper with Scale left at 100% and Scale to Media left unchecked, the printed image is too large for the paper and is "cropped" on the top and bottom.

My guess is that the problem is not with Print Size, and that you have measured your screen correctly and entered the numbers correctly.

I think the problem is related to the fact that you are printing borderless on (going by your screen shot) an Epson printer.

If you print a 4-inch image edge-to-edge on 4-inch paper, if the paper is not absolutely perfectly aligned going through the printer, there is always a chance that one side is going to be slightly off and you'll have a white unprinted area where it was misaligned. To make sure the image prints edge to edge without gaps, when you choose a Borderless paper size in the Epson printer driver, it slightly enlarges the image so that it extends past the paper edge. That's why you're seeing a slightly enlarged image.

Your Epson printer driver probably has an "Expansion" option that lets you decide how much to enlarge the image to get a seamless borderless print. Right now, yours is probably set up to enlarge the image for borderless. Note that this is separate from, and on top of, the normal "Scale" option; even if "Scale" is set to 100%, choosing a Borderless paper size will enlarge the image.

Epson Workforce Borderless.jpg

If you don't want the image to be enlarged, what can you do? In traditional printing, you design your artwork with an overlap on the trim edges of the paper (called a "bleed"), along with crop marks for trimming the paper afterwards. Then you print on a larger piece of paper so that there's something to trim. If you decide to do this, use a non-borderless paper size so that the image is not scaled up.

Votes

Translate

Translate

Report

Report
Community guidelines
Be kind and respectful, give credit to the original source of content, and search for duplicates before posting. Learn more
community guidelines
Community Expert ,
Dec 10, 2016 Dec 10, 2016

Copy link to clipboard

Copied

Hi Conrad C         

Looks like we were both typing the same thing at the same time

Dave

Votes

Translate

Translate

Report

Report
Community guidelines
Be kind and respectful, give credit to the original source of content, and search for duplicates before posting. Learn more
community guidelines
Community Expert ,
Dec 10, 2016 Dec 10, 2016

Copy link to clipboard

Copied

Well, the nice thing is that between us we've covered it for both Mac and Windows!

Votes

Translate

Translate

Report

Report
Community guidelines
Be kind and respectful, give credit to the original source of content, and search for duplicates before posting. Learn more
community guidelines
Community Beginner ,
Dec 10, 2016 Dec 10, 2016

Copy link to clipboard

Copied

Thanks to both Conrad C and Davescm.  I'll take a look at the scaling and either give you both a correct answer or post findings.

Bill

Votes

Translate

Translate

Report

Report
Community guidelines
Be kind and respectful, give credit to the original source of content, and search for duplicates before posting. Learn more
community guidelines
Community Expert ,
Dec 10, 2016 Dec 10, 2016

Copy link to clipboard

Copied

If it works - give Conrad C the correct answer - he typed it first

Dave

Votes

Translate

Translate

Report

Report
Community guidelines
Be kind and respectful, give credit to the original source of content, and search for duplicates before posting. Learn more
community guidelines
Community Beginner ,
Dec 10, 2016 Dec 10, 2016

Copy link to clipboard

Copied

Well you guys were right.  It was on the printer side.  I had a conflict between the Paper Size setting (4x6 borderless) and the Destination Paper Size setting under Paper Handling (5x7) and expansion was set to max.  I set both paper size options to 4x6 borderless, set expansion to mid and all is right!  Thanks for pointing me to the printer.  I rarely look at the Paper Handling section but will be sure to from now one.  Thanks again.

Printer Settings.jpg

Votes

Translate

Translate

Report

Report
Community guidelines
Be kind and respectful, give credit to the original source of content, and search for duplicates before posting. Learn more
community guidelines
Community Expert ,
Dec 10, 2016 Dec 10, 2016

Copy link to clipboard

Copied

Also all printers can not print borderless even when there may be a borderless setting availavle.  Sone printer diiver may set a smaller printable area your the 4"x6" paper.  If you have 4"x6" paper and the printable area is smaller than 4"x6" Photoshop print preview will have some hash marks in the unprintable areas. Your 4"x6" document will be a little too large for 4"x6" paper's printable area but, Photoshop print dialog can scale it down to fit into your 4"x6" paper's printable area.

Capture.jpg

JJMack

Votes

Translate

Translate

Report

Report
Community guidelines
Be kind and respectful, give credit to the original source of content, and search for duplicates before posting. Learn more
community guidelines
Explorer ,
Apr 10, 2023 Apr 10, 2023

Copy link to clipboard

Copied

LATEST

Conrad C, PERFECT answer for me. For years, I had left my print settings for 4x6 paper as whatever it automatically chose for me to start with (Borderless). Most of the time I was actually trying to print something through InDesign that was actually 4 x 6, and liked that it was borderless. Today, I was printing a 3.5" x 5" image floating within the 4 x 6 paper space so that I could use it in a picture frame of that size after trimming it down. It kept enlarging the picture on the printout beyond the desired 3.5" x 5" size. After finding the choice of simply 4x6 rather than 4x6 that was borderless, my problem was solved. I created a print preset for future use when I want my images to print the exact size that I designed. No more automatic borderless expansion of images. In fact, that "Expansion" choice was grayed by not choosing the "borderless" setting which confirmed I was in luck.


Votes

Translate

Translate

Report

Report
Community guidelines
Be kind and respectful, give credit to the original source of content, and search for duplicates before posting. Learn more
community guidelines