Because your images are captured consistently, a possible simple alternative is to customize the Auto button settings for a Levels or Curves adjustment layer. This would let you brighten the paper white simply by clicking the Auto button, which will apply your customized adjustment.
The steps below are basic. If you want more background about how the options work, read the following article by Bruce Fraser. Although it was written 22 years ago, it still works today. The advice about colors is mostly about photos, so that might not apply to these drawings.
Don’t Underestimate Photoshop’s Auto Color
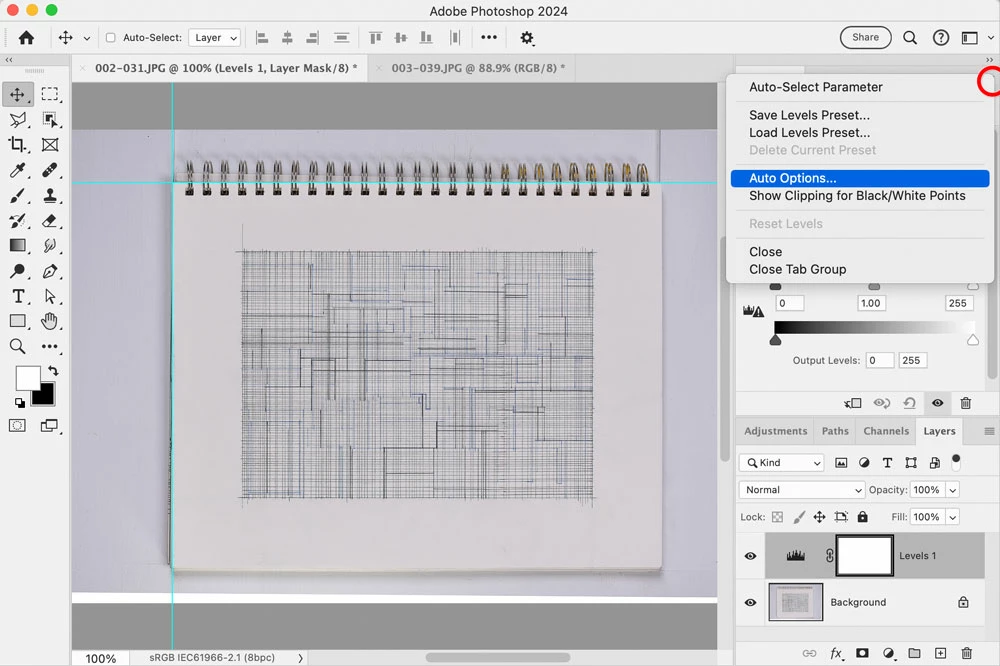
Start by adding a Levels adjustment layer, then click the Properties panel menu and choose Auto Options.
Select Find Dark & Light Colors. (Or maybe for these drawings, if you are confident their white balance is consistent, Enhance Monochromatic Contrast might be just as good.) Also select Snap Neutral Midtones.
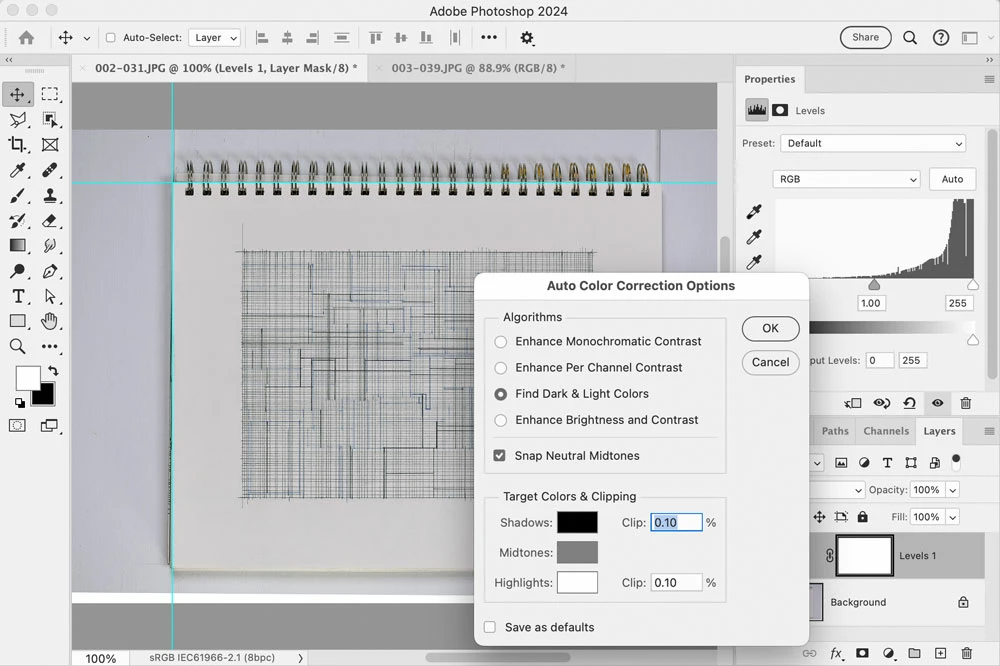
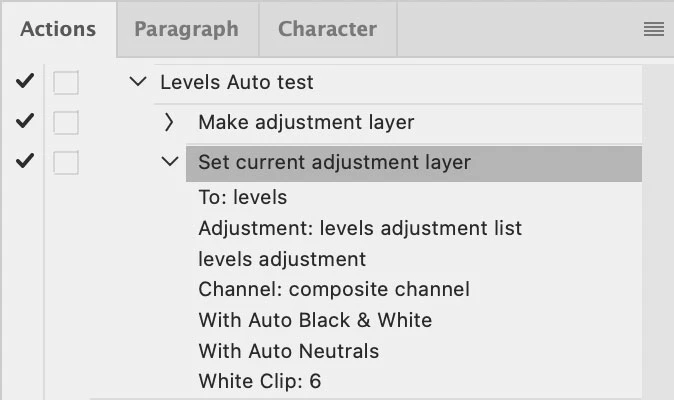
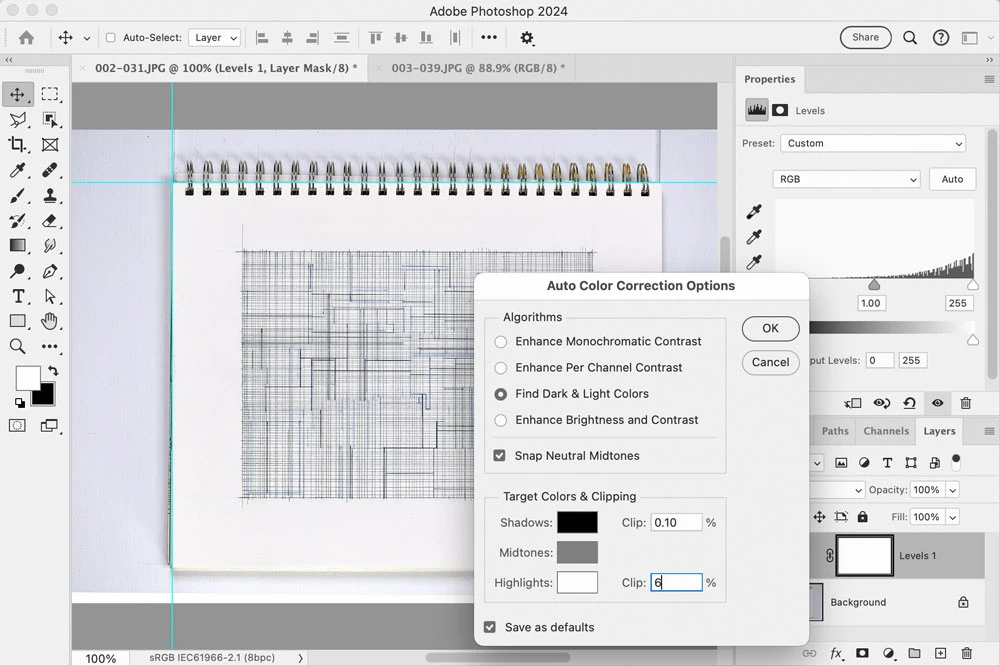
Increase the Highlights Clip value; the maximum is 9.99%. This shifts the white point down, making the lightest tones brighter. The reason I stopped at 6% is that higher values appeared to cause more unwanted highlight clipping (potential loss of paper detail), but if you aren’t concerned about that you can enter a value higher than mine. Select Save As Defaults (to make your changes stick and therefore alter what the Auto button does), and then click OK.
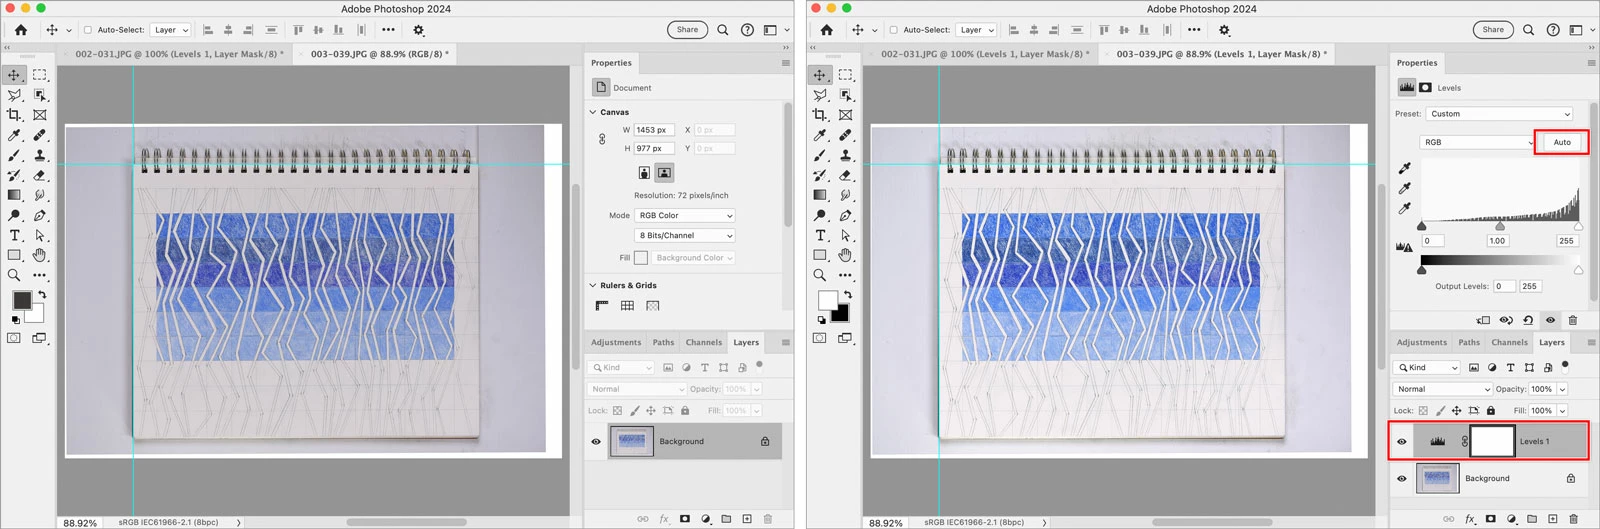
Because you changed the Auto button defaults, the next image should be a one-click deal. Open another image, add a Levels adjustment layer, and click Auto. It should apply your customized Highlights Clip default percentage, so if the image tonal levels are consistent with the earlier image, the customized Clip value should brighten the highlights in this image by the same amount as the previous image.
If you want to create an action for that so you can batch it, I tried recording it and it works. The second step below is where it records me clicking the Auto button.