Refine Edge Problem
Copy link to clipboard
Copied
After doing some google searches, I've decided to bring the question a new.
I am using Adobe CS5 on Windows Vista (32-bit).
My refine edge tool has stopped working properly. Rather than refining my edge selection, it sort of blends my selection into transparency, making the final product look extremely sloppy (the point to be made here is that the tool does not funciton as it does on tutorials and examples).
I have already tried:
1.) Setting up a new user account on my computer
2.) Resetting tool presets
3.) installing updates
The problem remains. Any wisdom on this issue?
Explore related tutorials & articles
Copy link to clipboard
Copied
Hello,
My refine edge tool has stopped working properly.
So it used to work properly and now it does not?
Can you post some examples (including the refine edge dialog)
And are you using the RE brush too? Is that working as expected?
Refine Edge is a pretty intelligent tool, but in the end it is just making educated guesses. Some images works better than others with it. Adobe and others tend to use the images that work best in tutorials.
Copy link to clipboard
Copied
Thank you for the response.
Yes, the tool worked better at first (or at least it seemed to me to be the case).
Here are screen shots of picture that show the issue. I should have been clearer in my earlier post. It is the Refine Radius that seems to be the issue.
First, the original selection:
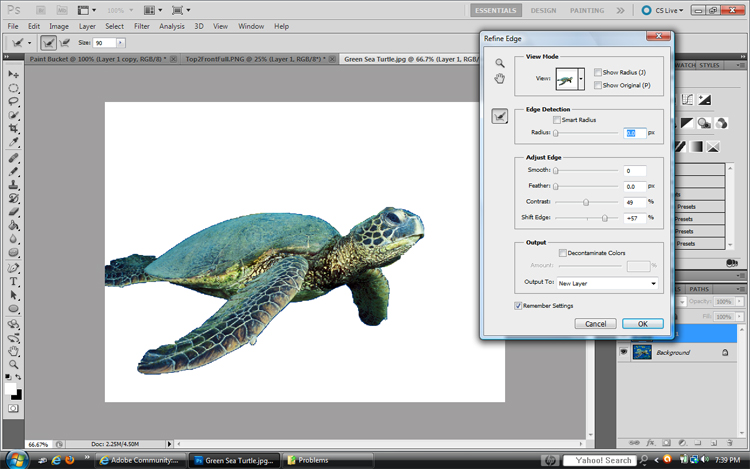
Second, refine radius with no other adjustments in the dialogue box:
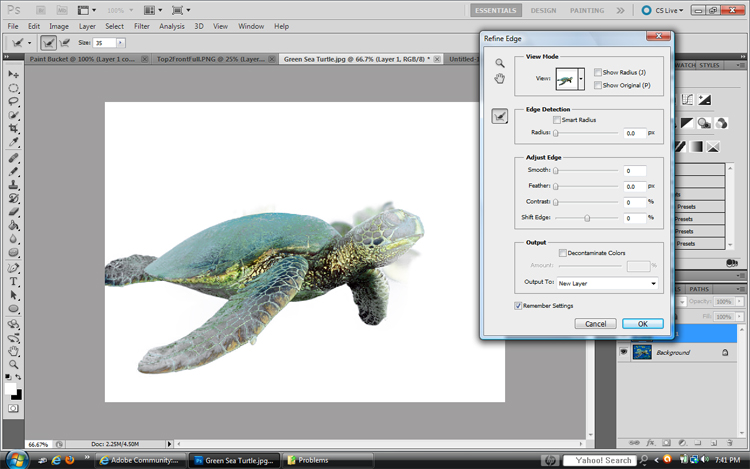
Note the transparency and the addition of outer elements.
Now, if I adjust contrast and shift edge, I can get better results, but still problematic:
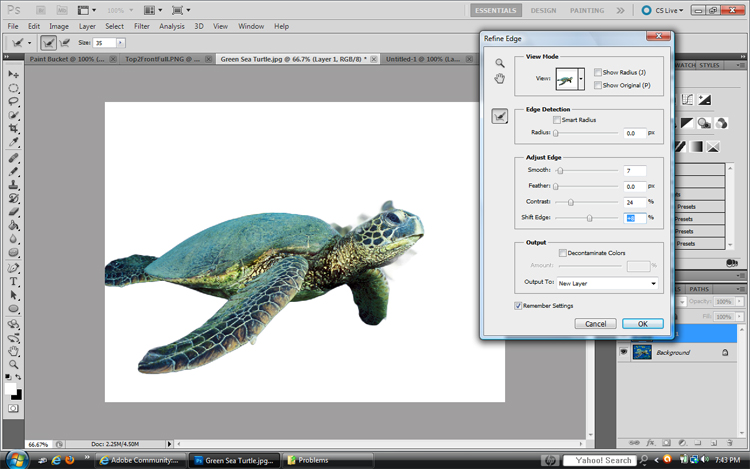
The edge is generally much better, but problematic around the face.
Copy link to clipboard
Copied
Thanks for posting examples. It really helps a lot.
It looks like you are using too large of Refine Radius brush. And edge detection is set to zero.
Try adjusting edge detection first, then use Refine Radius brush on areas that need more/less transition.
In the case of the turtle head, I think you want a pretty small radius brush.
If you check "show radius" you can see how much area Photoshop is looking at to transition in the mask.
Hair (which... I don't think turtle have any of) may need a large radius. But skin or hard edges need a small radius for transition.
Copy link to clipboard
Copied
Charles,
Let me first take the time to thank you. I very much appreciate your efforts to help me. At the very least, you're helping me to refine my issue.
I have another set of pics to show the problem better in light of your comments.
Starting picture (the stark black background seems like I should be able to get a decent selection):
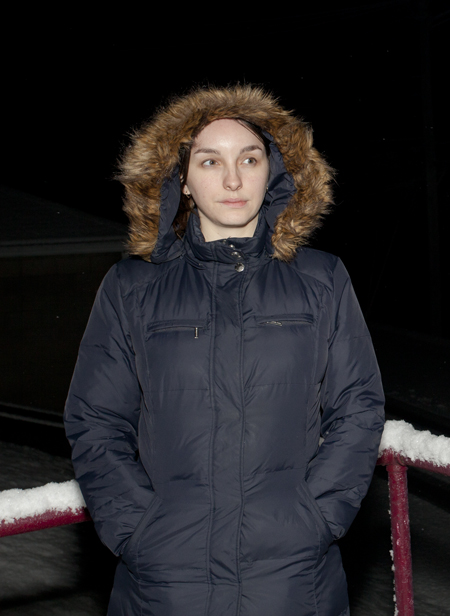
First, a picture of the general selection made using quick select in refine edge (note no settings are applied at the moment):

Second, the same selection with radius set to 30.0 (smart radius applied):
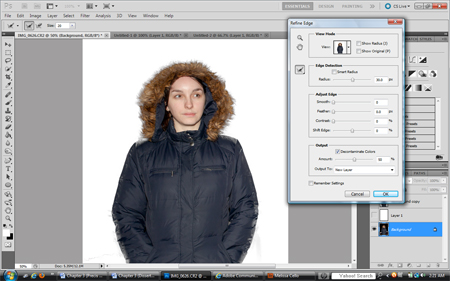
Note already there are colors taken away from the original selection and an odd transparency going on with the edges (I know the "decontaminate color" is checked here, but that made no difference to the photo.
Here is the same screen zoomed in to show the problem more clearly:
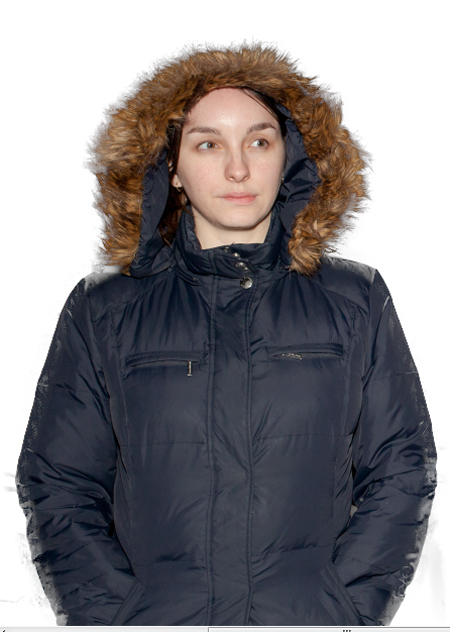
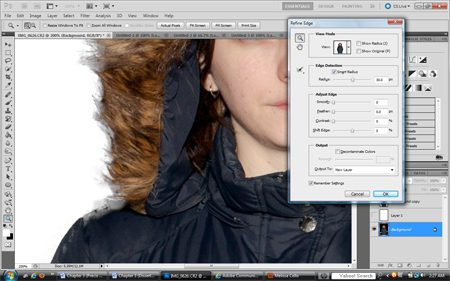
The problem continues (and intensifies) when I attempt to apply the refine radius tool. Here is a close of the original with the radius at 30.0:
Here is after I applied the refine radius tool:
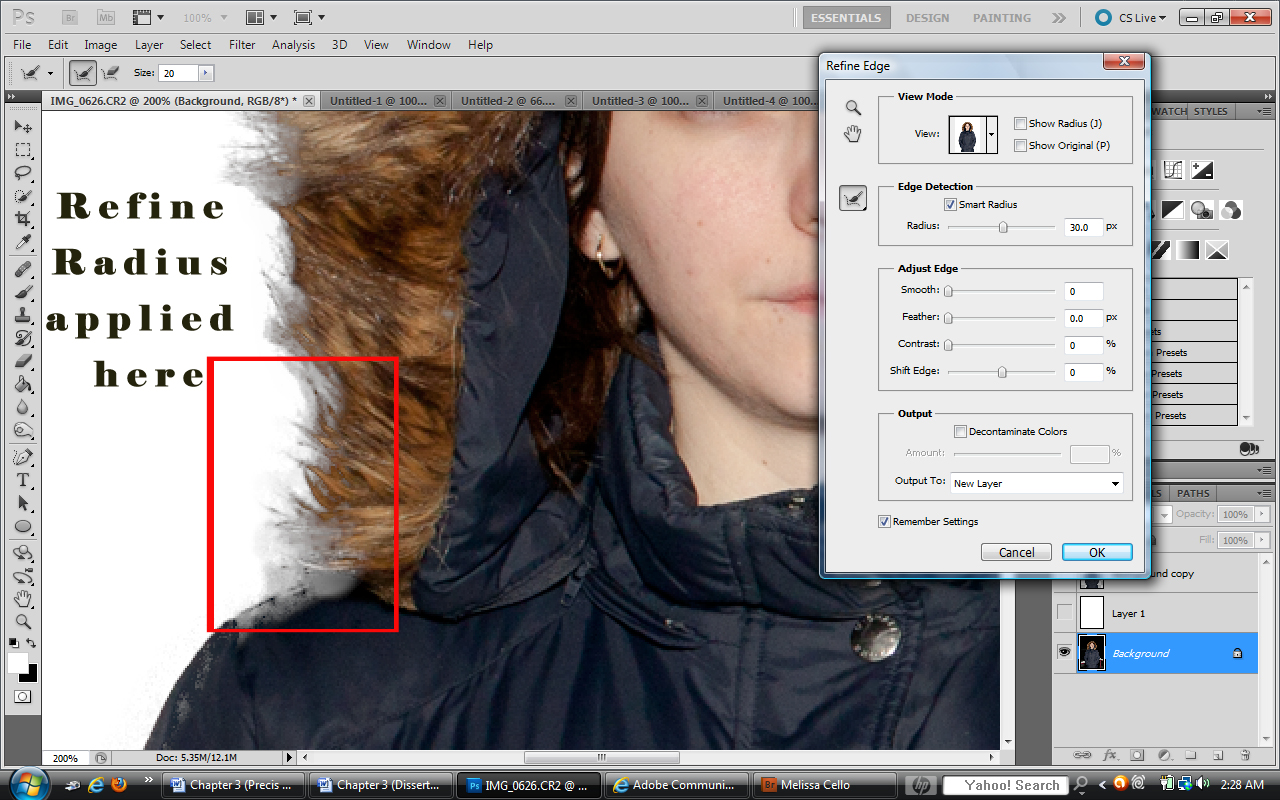
Not only does it not help, it makes the thing look worse.
Finally, here is the selection when I adjust shift edge and contrast:
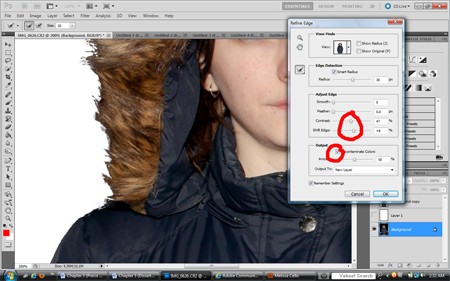
I just seems to me like something is wrong with the program/tool. I'm going to connect with Adobe tomorrow and try to work through this issue. I hate not being able to get the results that I know are supposed to be acheivable with the program.
Copy link to clipboard
Copied
Thanks for posting the examples.
I see what you are saying, but I'm still not completely convinced the problem isn't just too big of brush with Refine Radius Tool.
Try trashing preferences:
http://forums.adobe.com/message/4209421#4209421
(you said you has reset tools, but do this if you have not)
I would a use small Refine radius brush on jacket edge, and a larger brush size on hair... careful not to overlap.
Can you post a screen grab of Show Radius of the problem area? (A high res one like pic #6)
Here is a good video on using refine edge dialog and refine radius tool:
http://photoshopnews.com/2010/04/30/refine-edge-hair-masking-in-photoshop-cs5/
and this from Dr. Brown:
http://tv.adobe.com/watch/the-russell-brown-show/masking-basics-in-photoshop-cs5/
Copy link to clipboard
Copied
I have EXACTLY the same problem. I’ve spent 15-20 hours looking at 20-30 adobe and youtube examples along with books and step by step internet examples of how to use refine edge and I get these exact same bad results. Mr. Browns video above was one of those 20-30. I’ve already reset my preferences as suggest above also.
I get those semi-transparent / opacity issues with any radius above zero (the larger the radius the larger the band of transparency). I also get the same results by using the “+” brush and yes it is set to Plus. I've searched for and found several other forums where people have this problem, but the there is never a solution presented other than offering video's of "how to do it right."
You know it’s getting bad when your swearing at pictures of your baby granddaughter! I’ve tried other pictures with the same results, although I can’t say I’ve used a turtle.
Copy link to clipboard
Copied
I'm torn on the issue. I can see how being more careful with the refine radius tool somewhat mitigates the problem. But the opacity precedes the use of that tool.
Mister Cato, I too have scoured the web for information. And I too have always found people with similar issues but no solutions other than ones I have already tried.
I think I’m going to contact adobe directly—just to see what they say. I’ll let you know what I find.
Copy link to clipboard
Copied
So encounter with Adobe has not been fruitful. Apparently chat support is only for the most recent products. I've been on hold (phone) forabout 20 minutes now.
But I will say that I've tried something different to put my complaint to the test.
I went to the following tutorial: http://www.infiniteskills.com/blog/2012/08/adobe-photoshop-cs6-tutorial-refine-a-selection/
I watched it full screen. Just before he did his refine edge, I paused the video, copied the screen, pasted it in photoshop, and cropped it so I had the same exact picture he was working with. I then duplicated his action with the same settings. Surprisingly, I found that my end product was similar to his. Mr Cato, could you try that and let me know if you get similar results?
Yet, when I use those same settings in my own photo, I get different results--or at least it seems.
I've read it is helpful to make separate selections for a single picture (e.g., one for hair, one for clothes).
I guess I'm back to trial and error ![]() Thanks to charles for his insights.
Thanks to charles for his insights.
Onward and what not.
Copy link to clipboard
Copied
I still think it may just be improper use of the Refine Radius brush, or expectations that it works differently than it actually does. Nothing you have posted indicates Refine Radius is not working correctly.
again,
If you can you post a screen grab of Show Radius of the problem area (where the hair meets the jacket)? (A high res one like pic #6)
I can tell you if the problem lies in too large of radius setting for your brush.
Copy link to clipboard
Copied
Ok... here are the pics you requested, charles. Let me know your thoughts.
Here is the original radius of my quick select tool adjusted to a radius of 0.5 (smart radius applied):
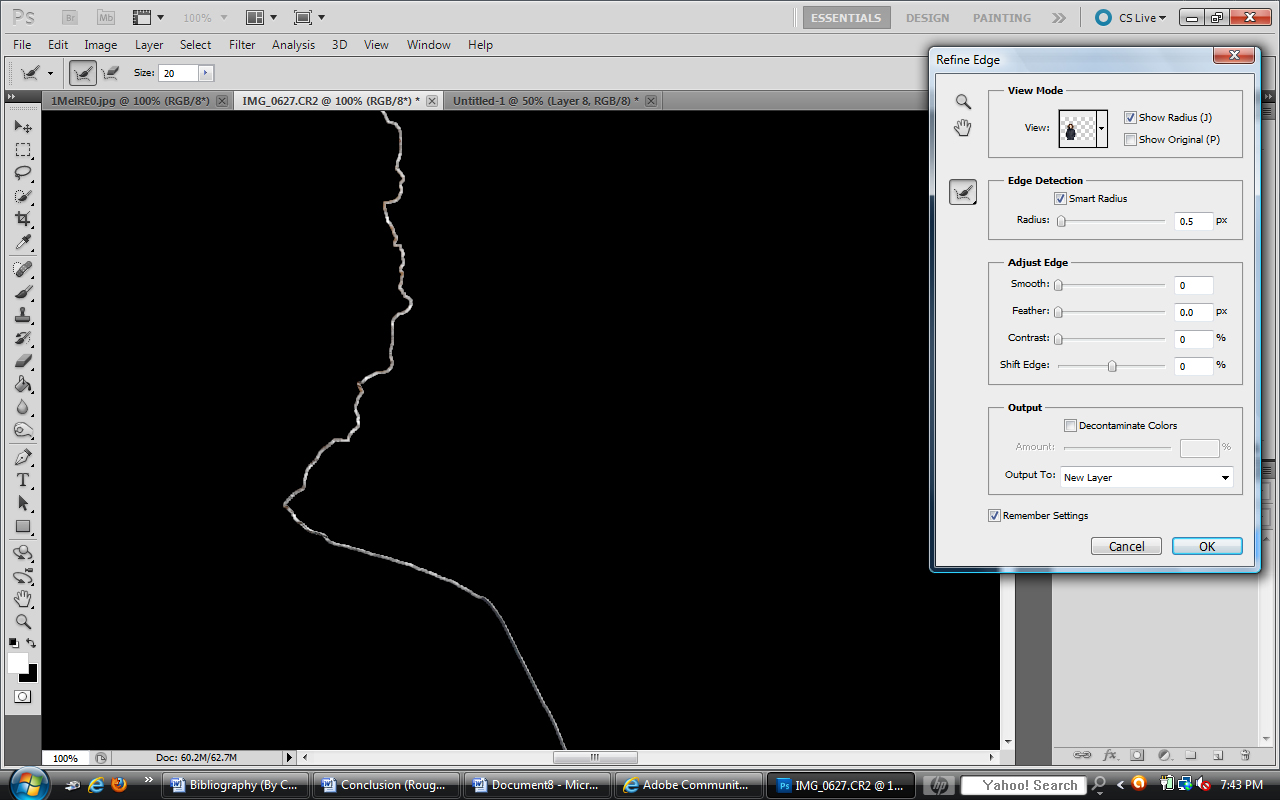
Here is the same picture with a slightly larger radius to capture more of the fur:
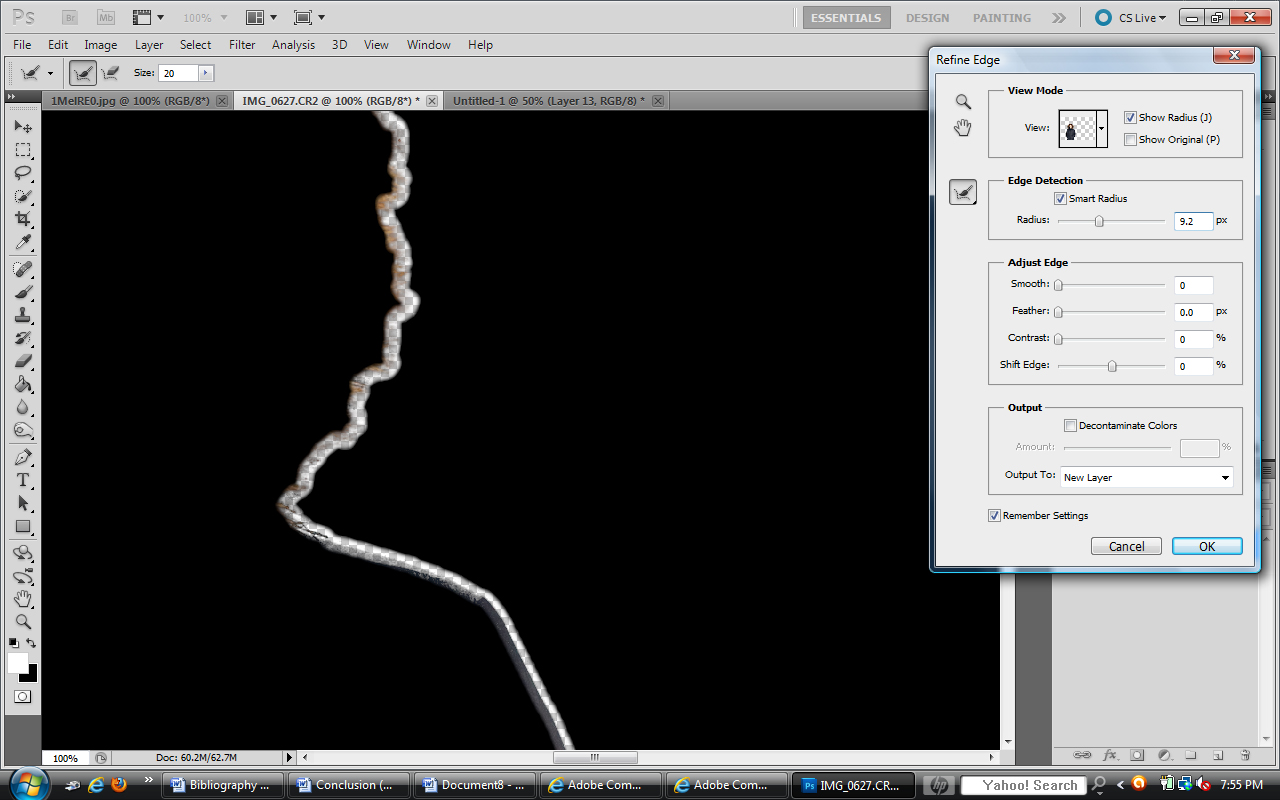
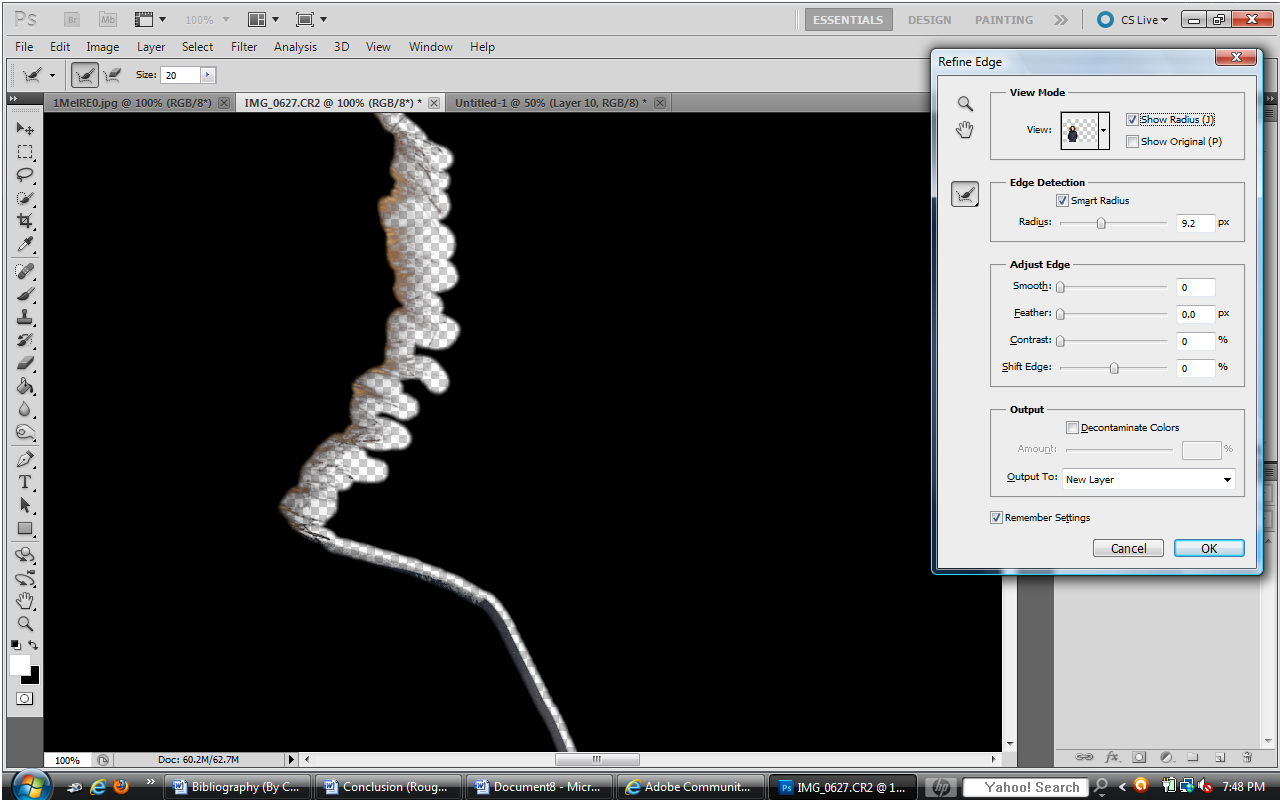
Here is my refine radius selectioin set against the original layer (brush size = 20)
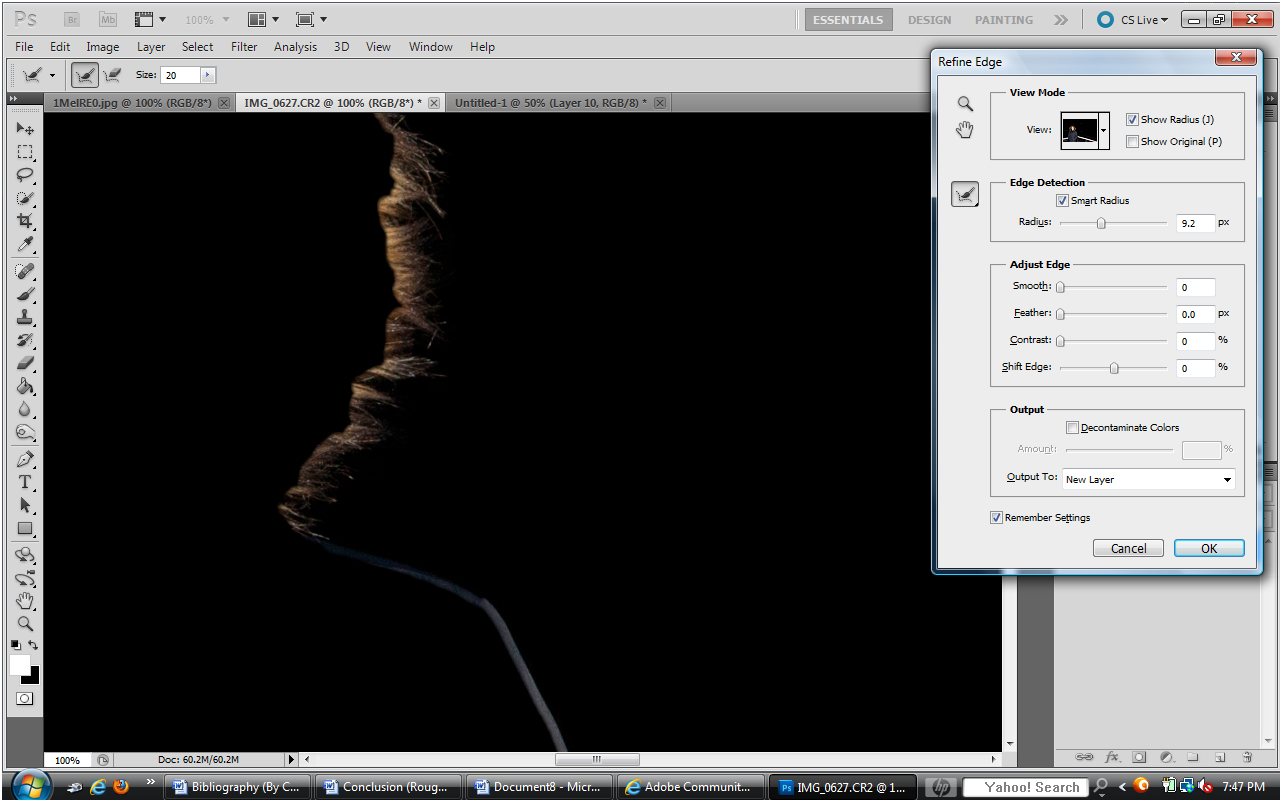
Here is the result with the original radius showing:
Here is the result set against a white background:
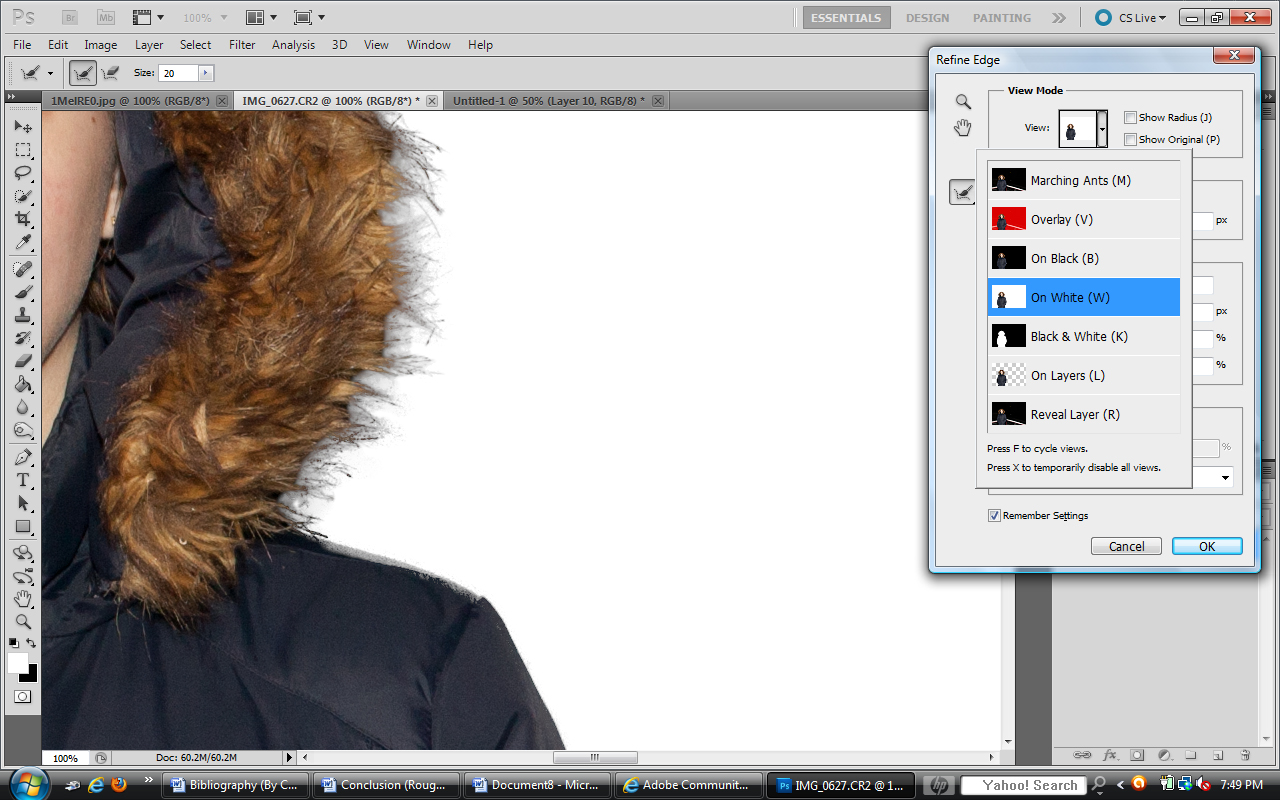
What do you think?
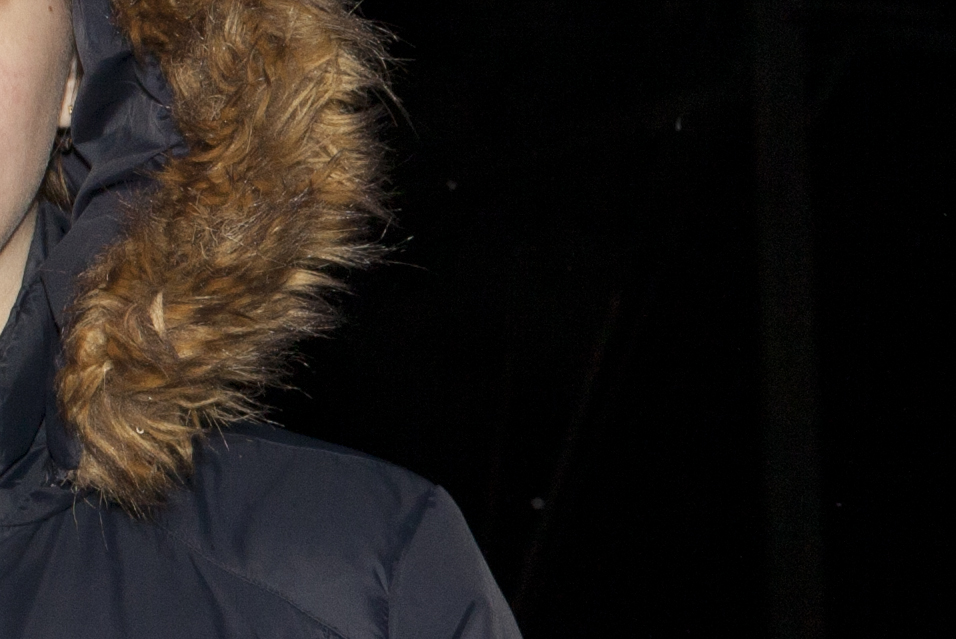
Also, here is the original selection of the photo, cropped. Perhaps if you tried to refine edge in your program we could see if you get the same results or not. That would settle the issue for both of us, I think.
Copy link to clipboard
Copied
To me that seems like Refine Radius is working as expected. In your example you are trying to knockout an image from a black background (with a dark jacket) to display on pure white. Realize that all the edges in the original are transitioning into black. A good mask still may take some manual intervention. I would probably tackle the jacket with the pen tool. And let Photoshop deal with the hair.
All edges are a transition, it helps if the target background is close to the background the image was extracted from.
Copy link to clipboard
Copied
I see what you mean. Perhaps I just harbored overly optimistic expectations of the program. Thanks for the guidance.
Copy link to clipboard
Copied
Here are my screen shots. Fortunately your being extremely responsive and helpful, but I have to work today and won't be able to try your solutions until tomorrow.
That's real disappointing that Adobe doesn't see the need to support a $600 product that was only released 2 1/2 years ago.
Thanks
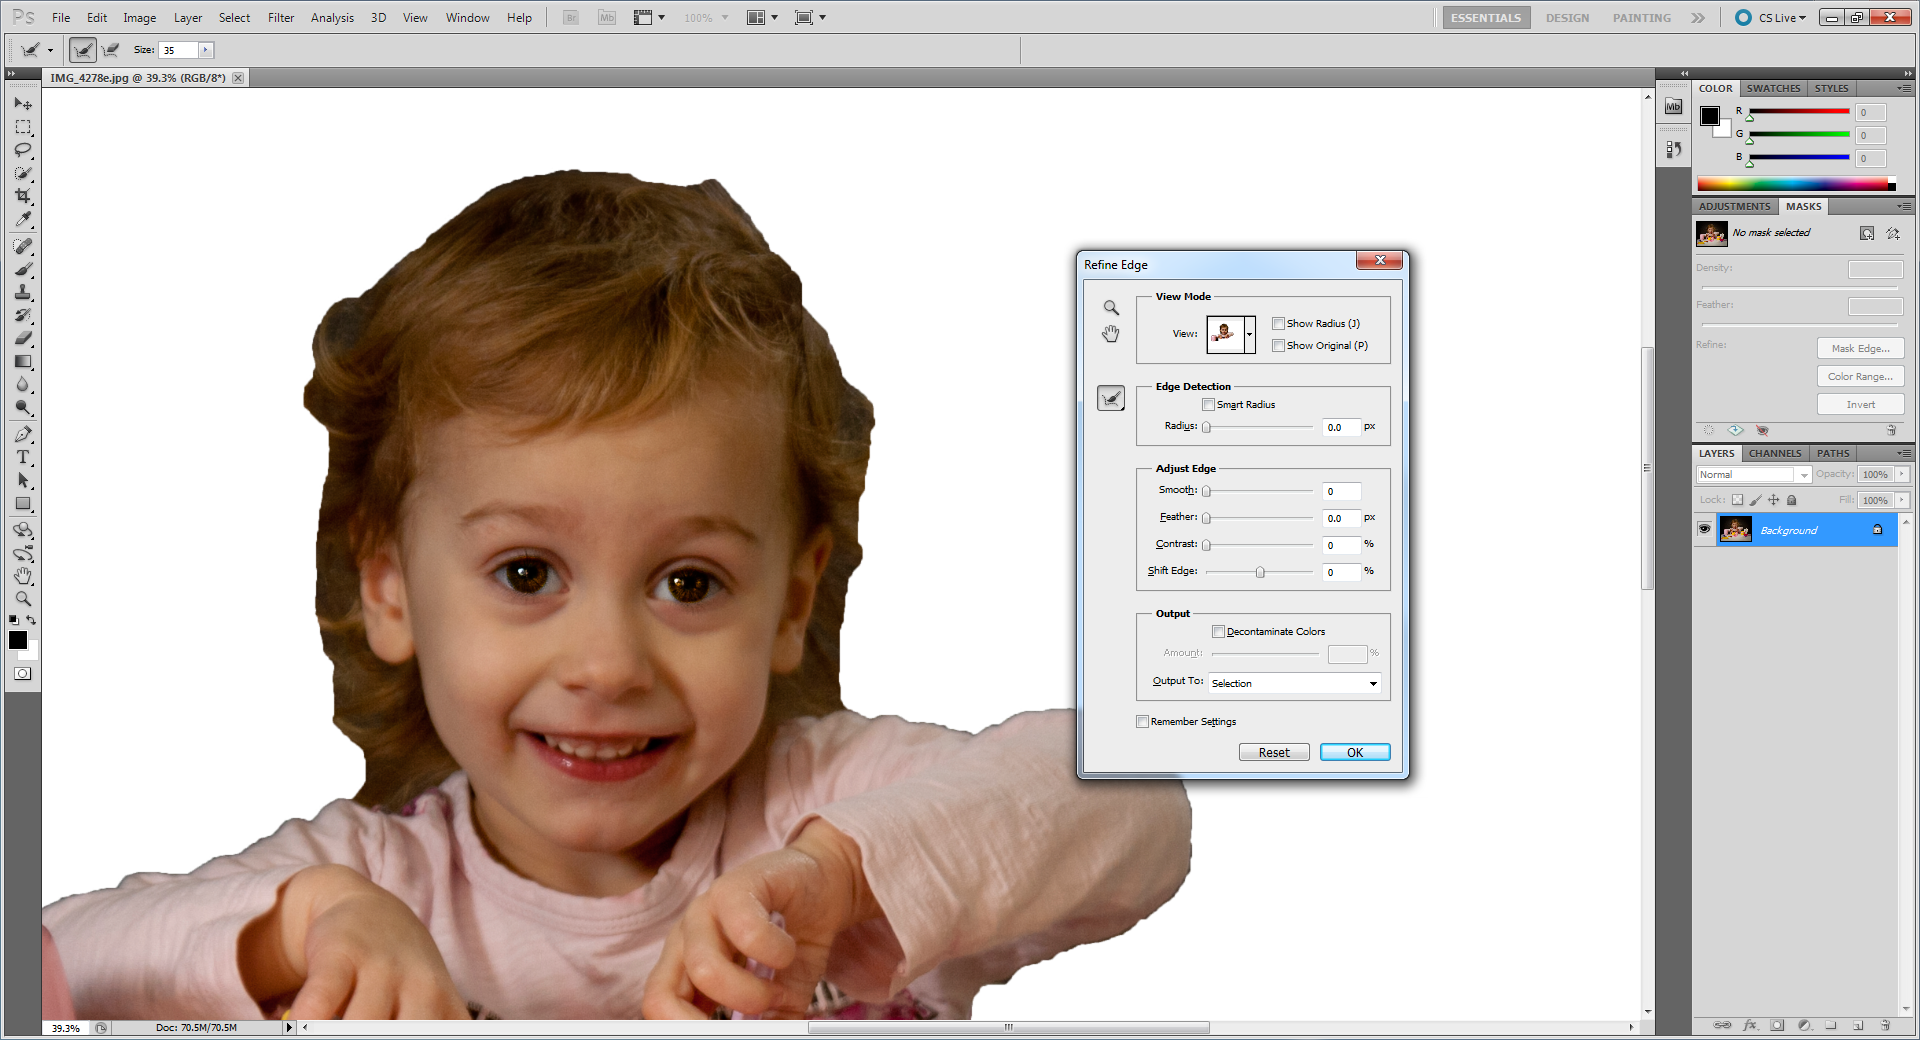
With Edge Detection Radius set to 100
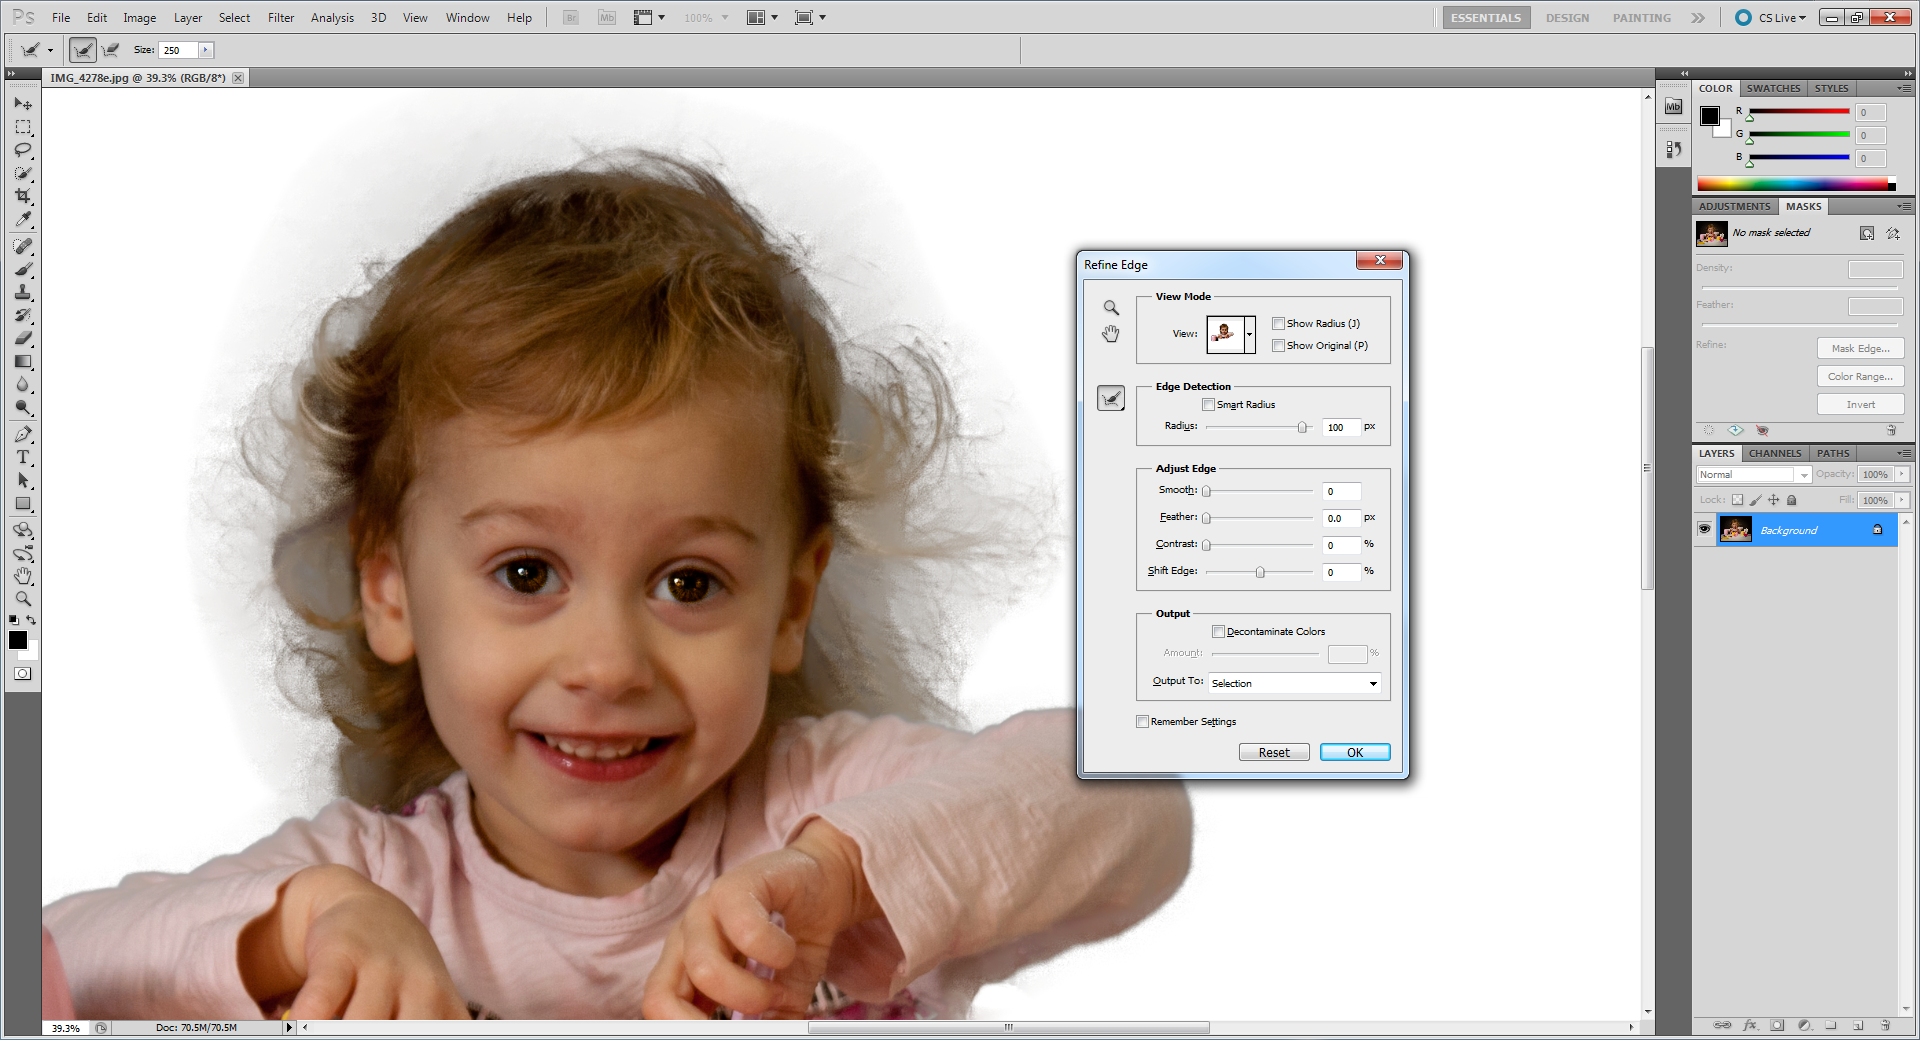
After using Refine Radius Tool “+”
It seems to be erasing the image with a low opacity
Copy link to clipboard
Copied
Mr C,
No screenshots posted. You need be logged into the Adobe forum site from a computer (not portable device) to post images.
Copy link to clipboard
Copied
I keep getting an "error below." maybe it's because I'm copying in to many pictures. I'll try one at a time.
Copy link to clipboard
Copied
I guess I need to learn how to load pictures in this forum. I'm logged in and the copy of my piture was in the space when I clicked post but I see it's not there now. I was using cut/paste. I'll try saving each screen shot as a file and using the insert now.
Copy link to clipboard
Copied
I used the insert button to load the first three

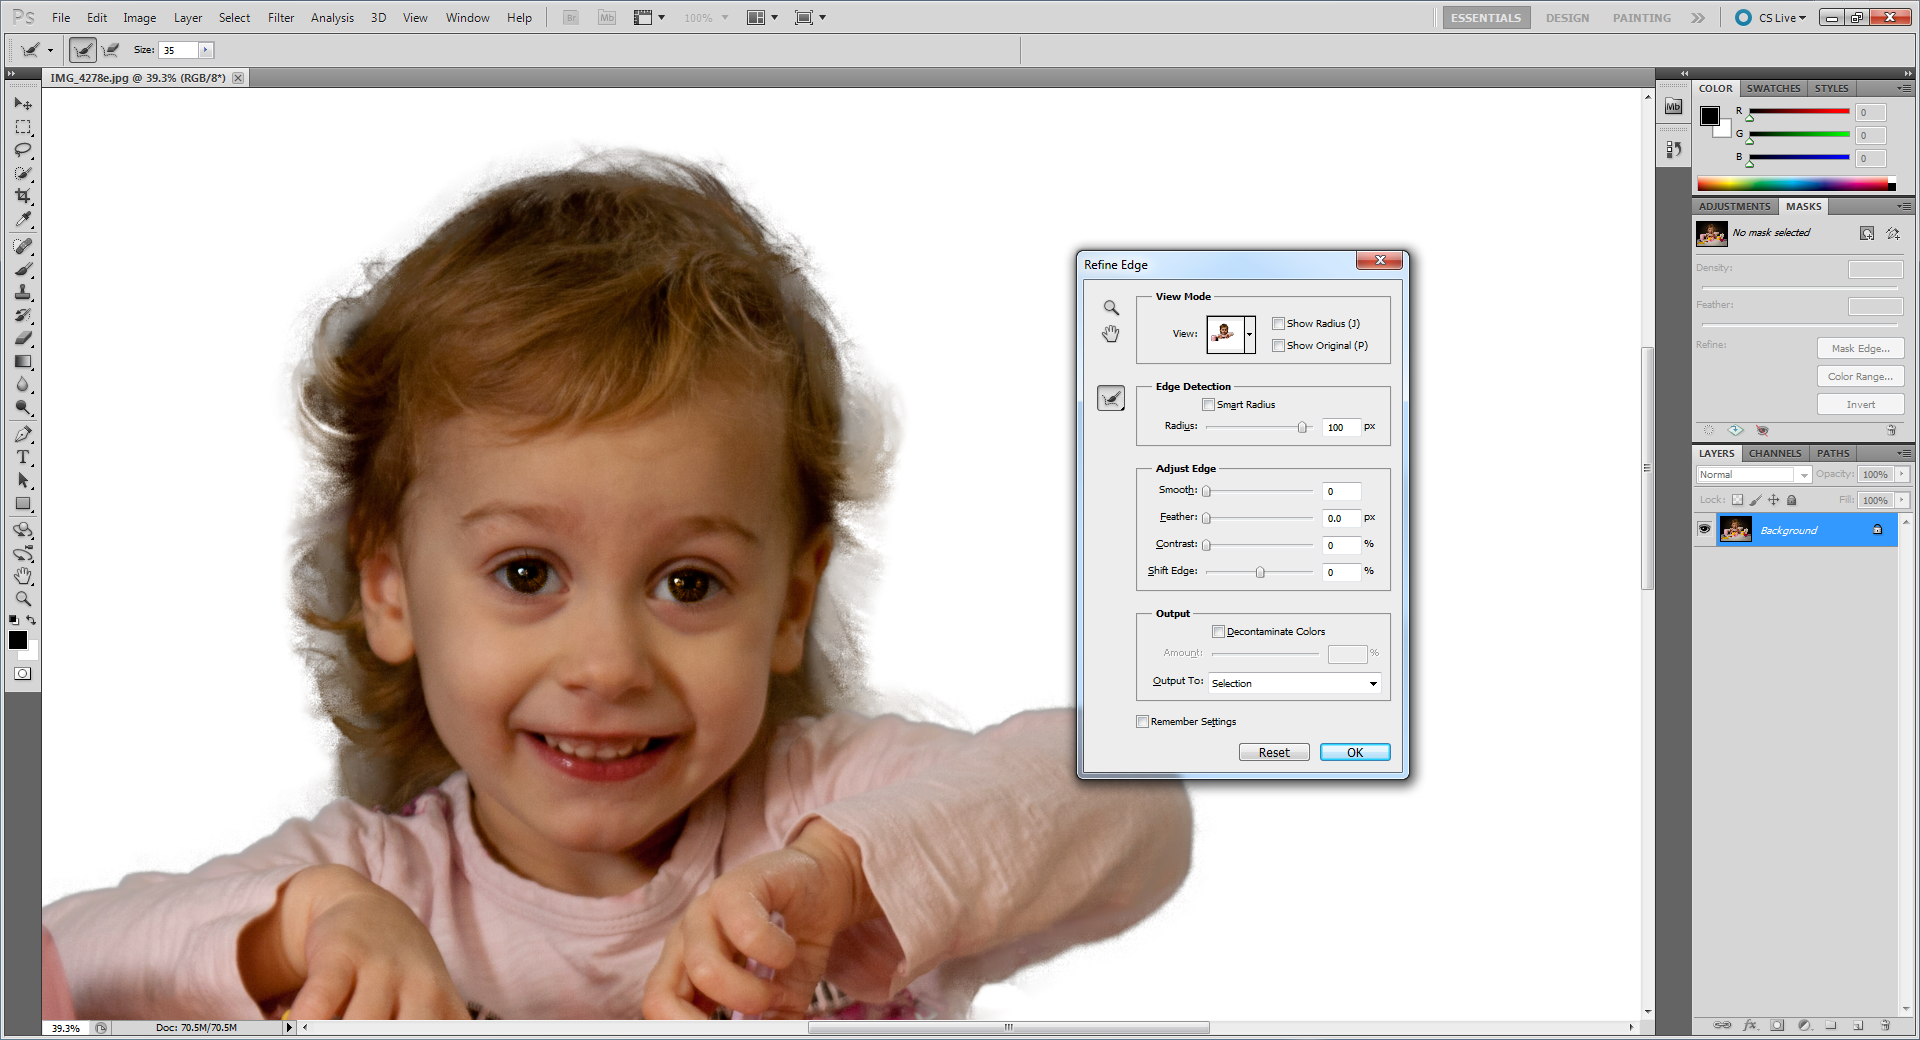
Copy link to clipboard
Copied
After using Refine Radius Tool “+”
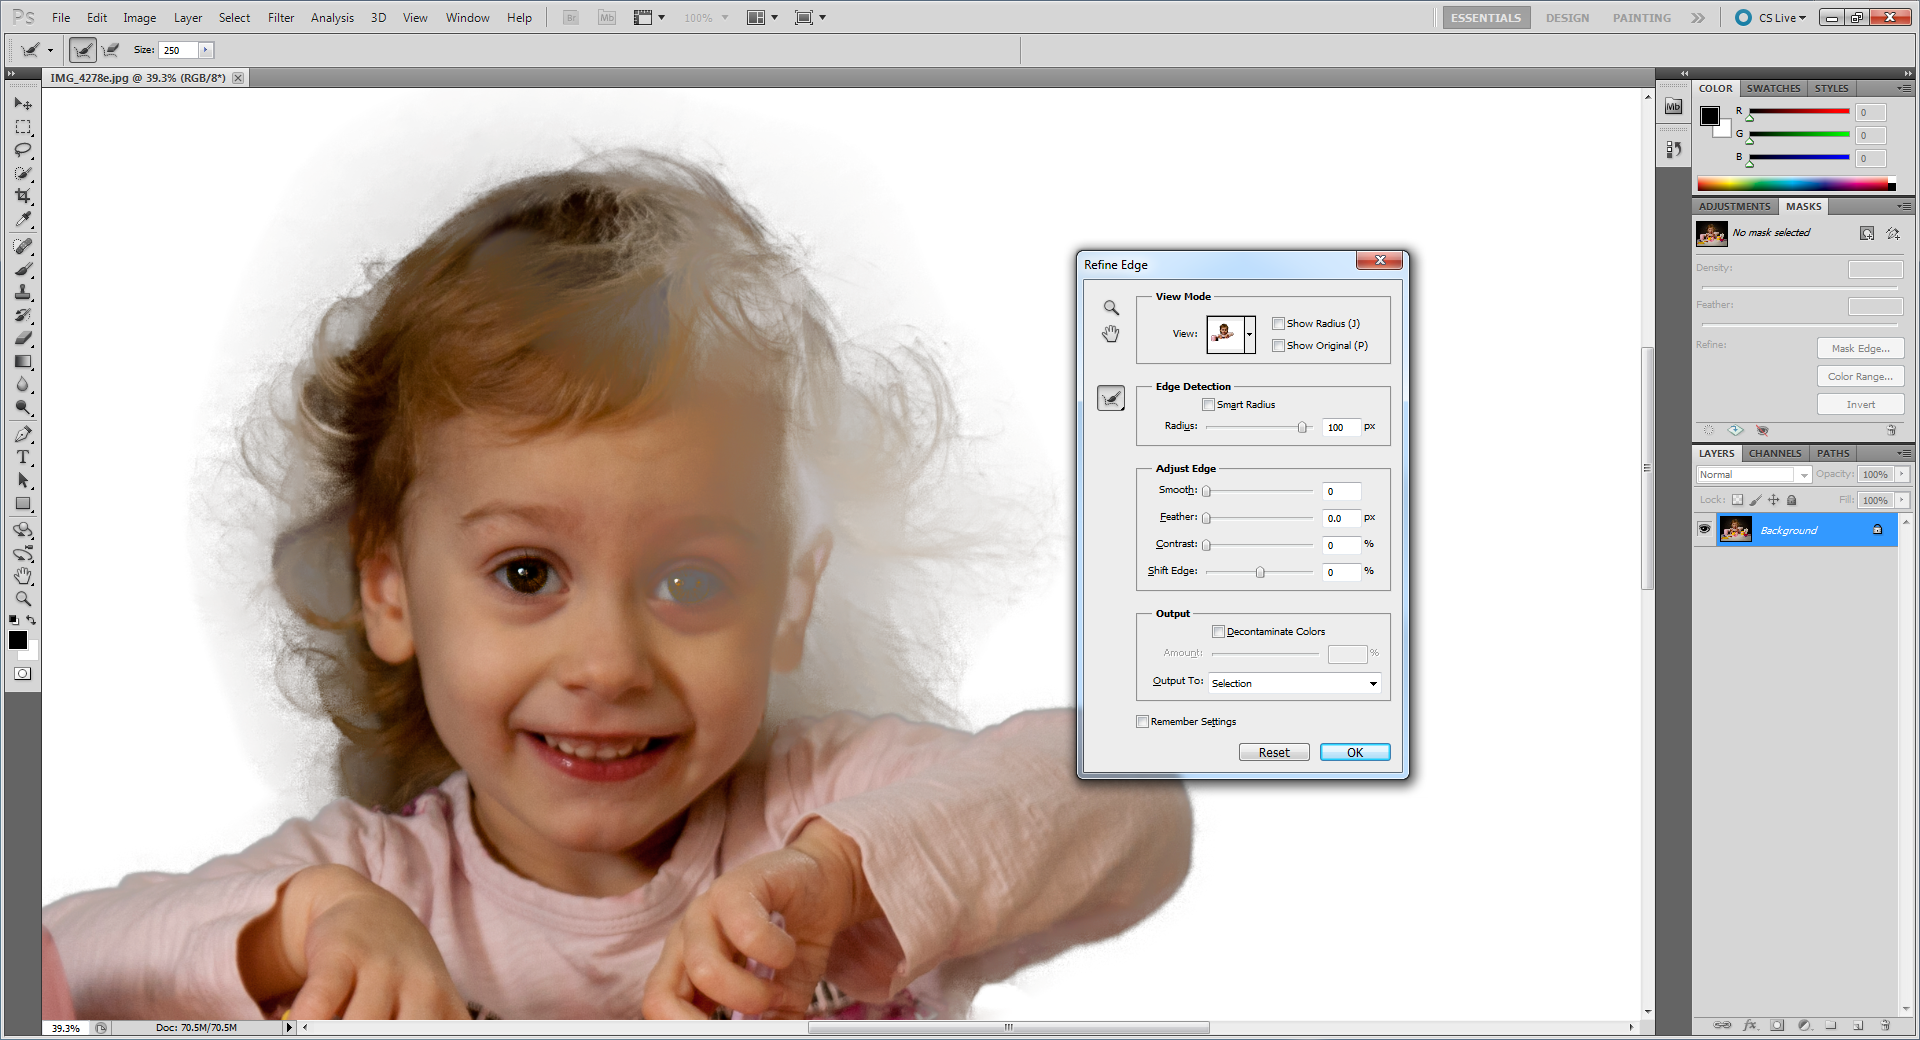
After going overboard with Refine Radius Tool “+” on her left side of face
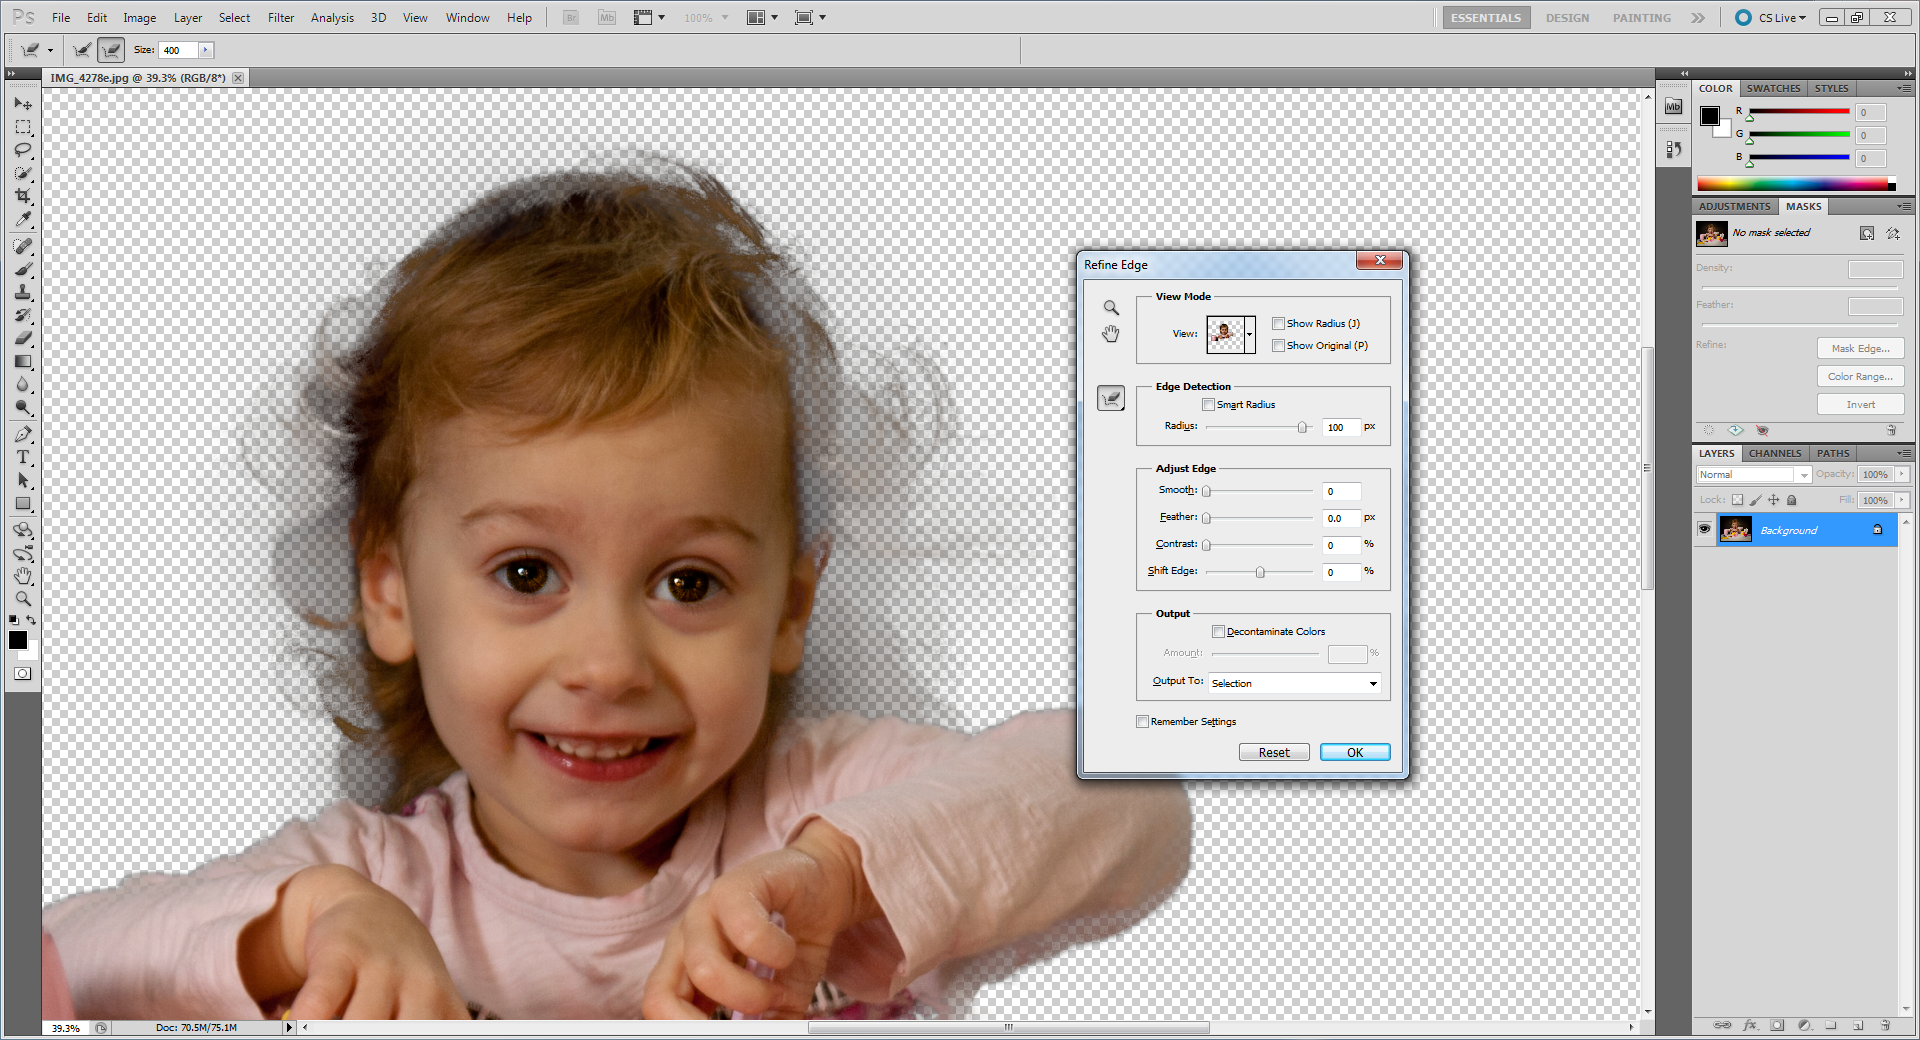
After using Erase tool on her face

Copy link to clipboard
Copied
Mr. C.,
I took your photo and saw what results I could get (only using the quick tools or refine selection and refine radius).
Here's what I got (you can see my settings and I used refine radius a bit):
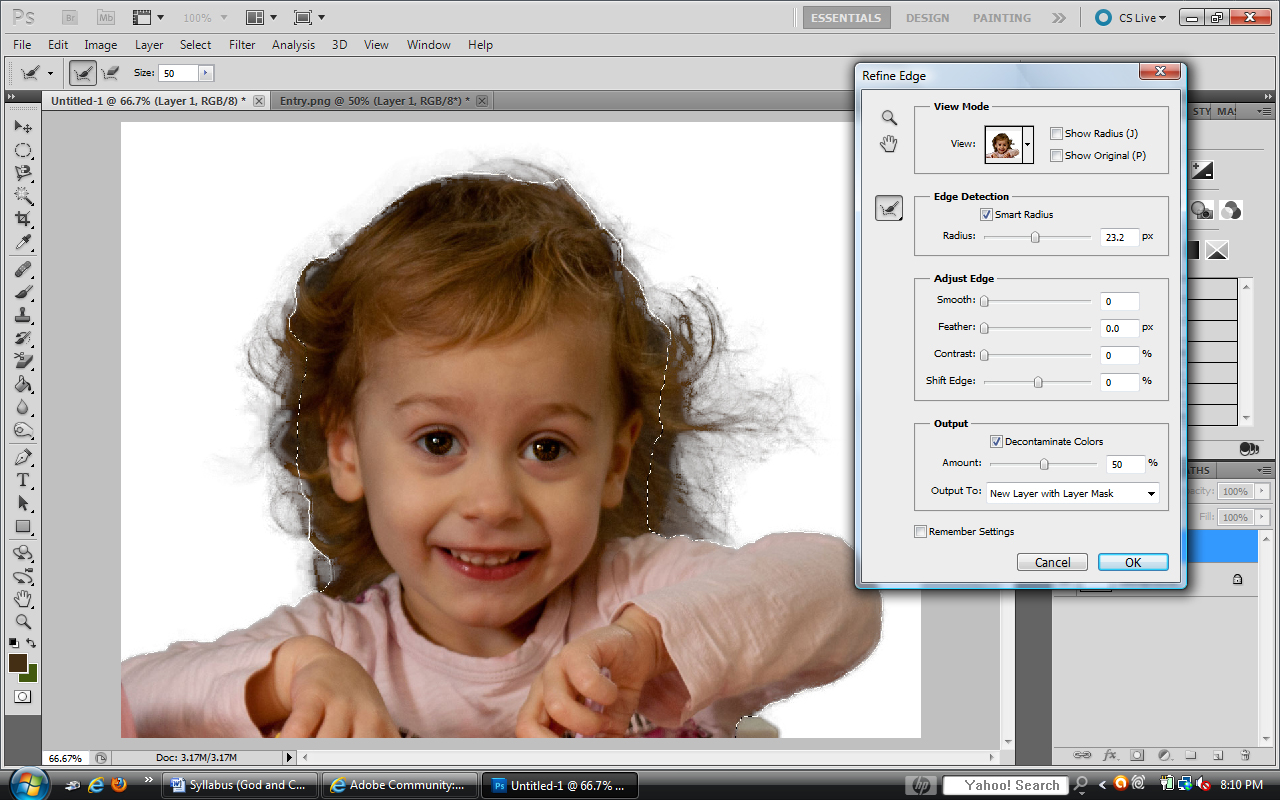
I know it still looks choppy and what not, but as charles pointed out, with some more care it might be ok against an acutal background. This is an awful example, but I just threw something behind it:
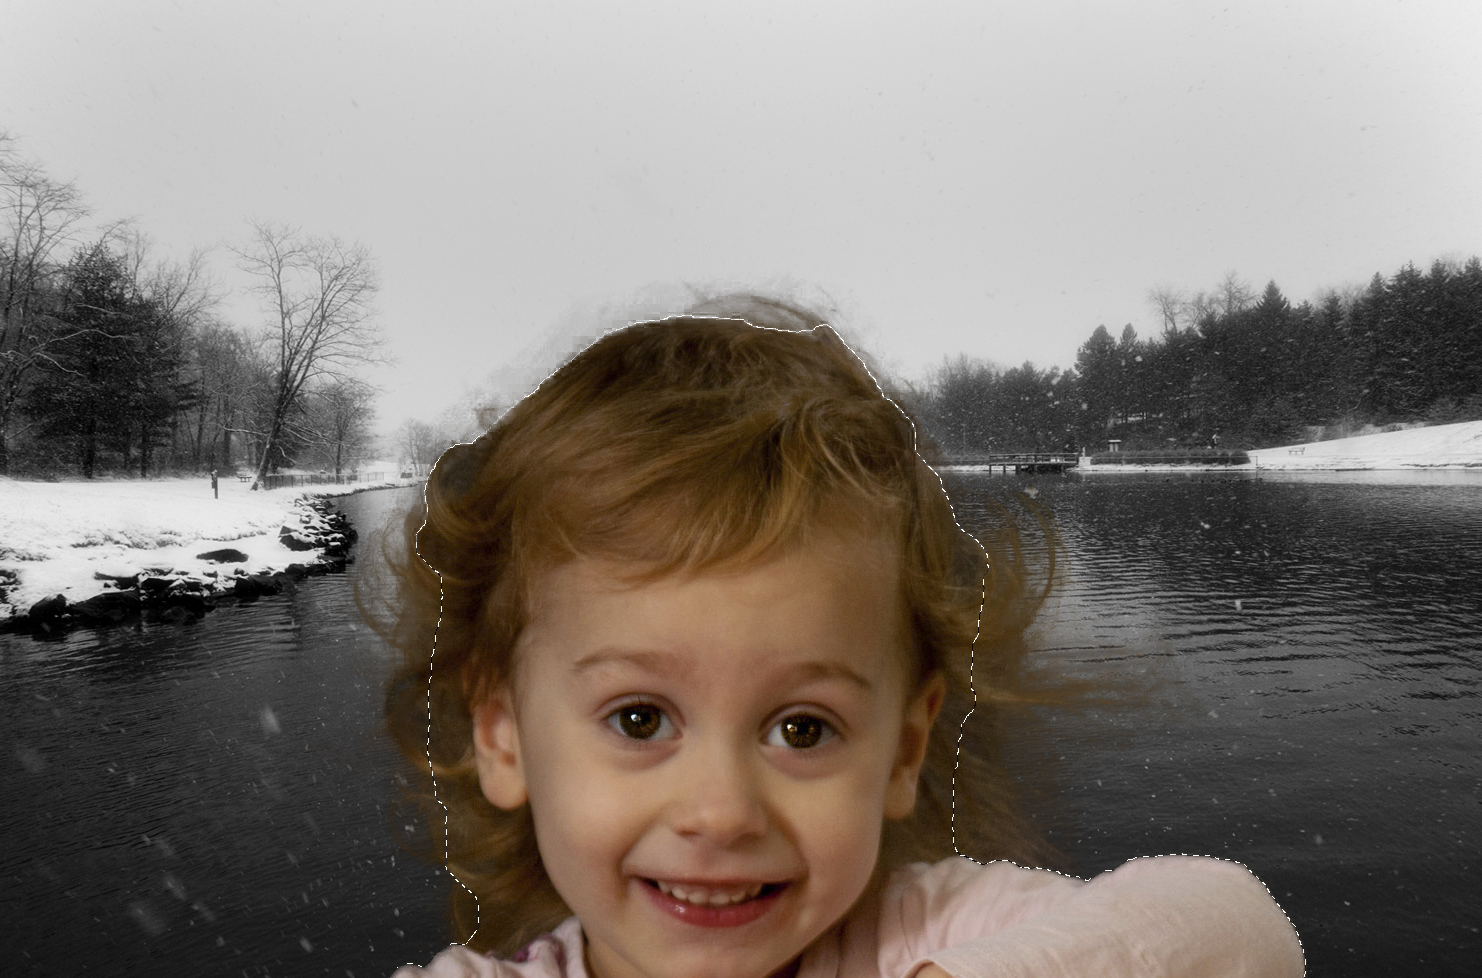
Of course that's a black and white picture (I used it mainly for contrast)... but you get the idea?
What do you think?
Copy link to clipboard
Copied
The original is transitioning into black. So pixels showing hair graduate into pixels showing black. VERY difficult to knock out and have look normal on a white background. Decontaminate color may do some good. But I think some manual manipulation is required to make it look its best.
Copy link to clipboard
Copied
It looks great compared to what I've been able to get. My question is where was your original selection? In the demo's they show closer to the face than what I have here but liberally using the brushes.

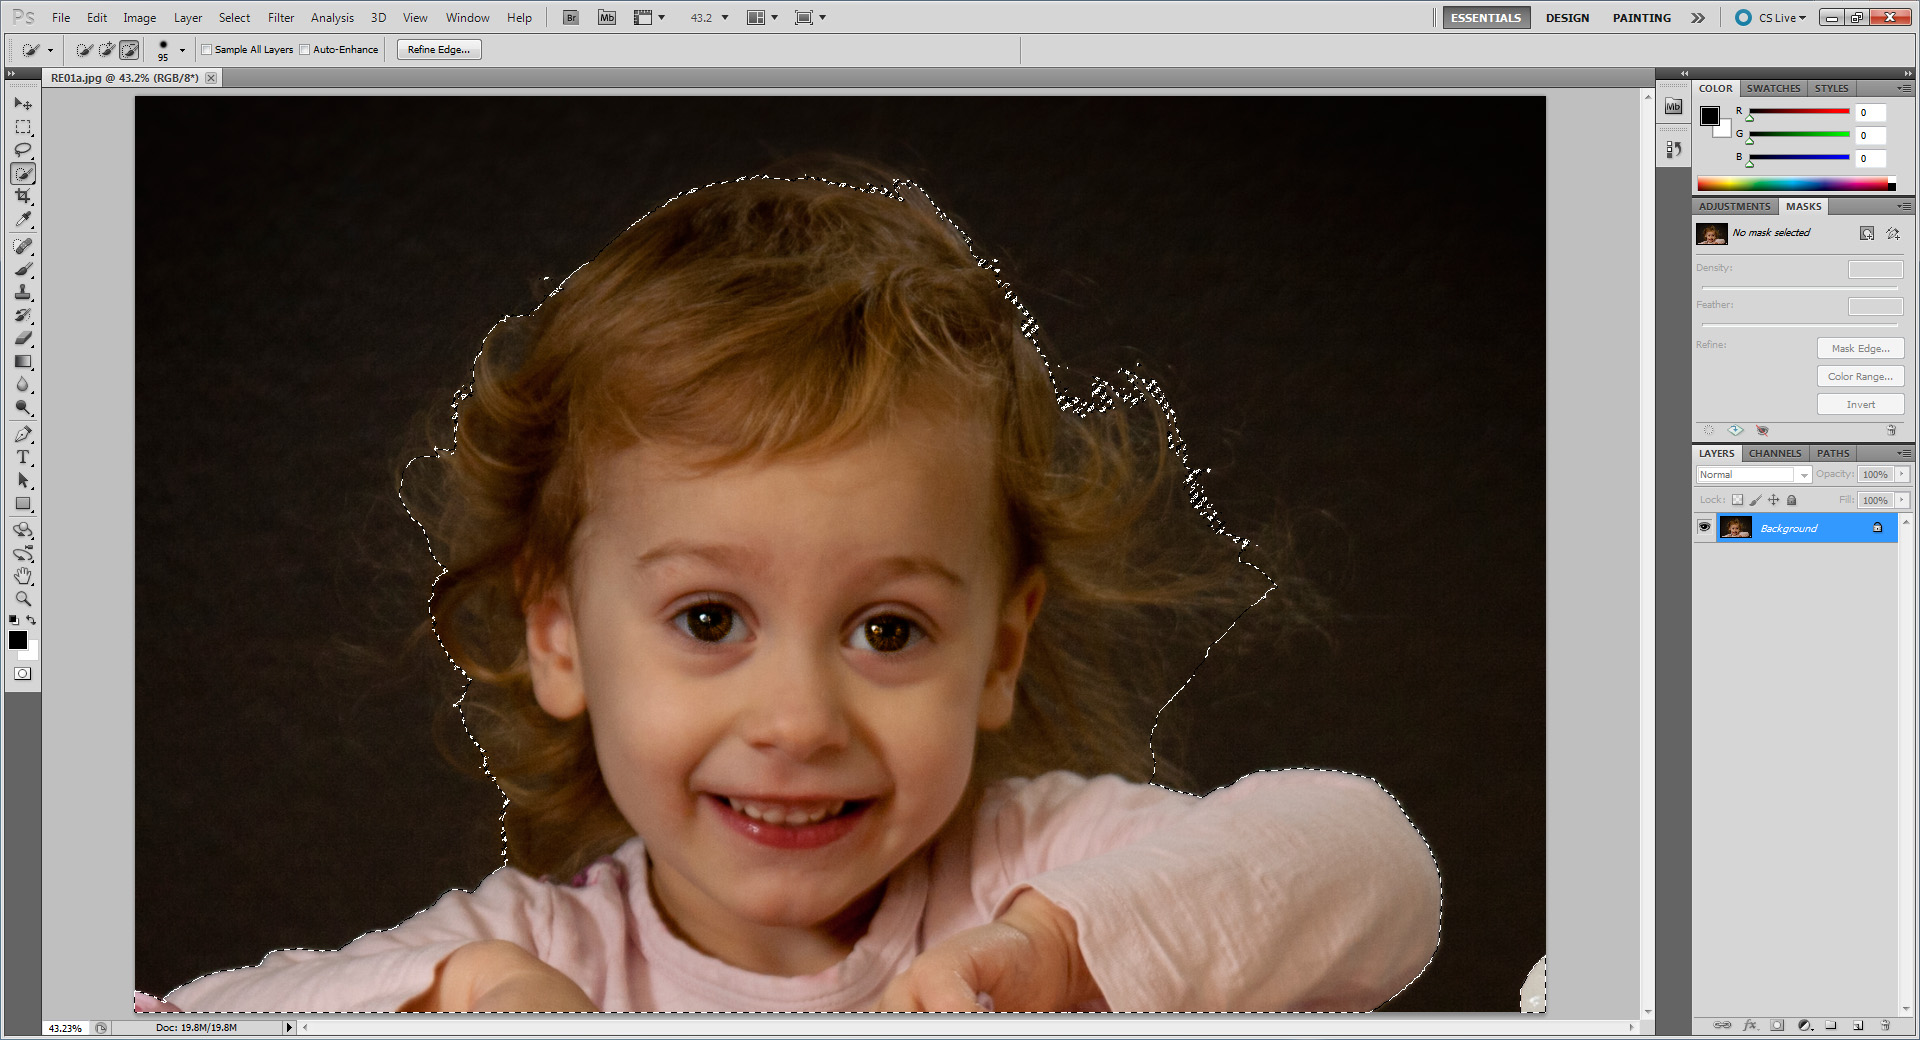
With Refine Edges as shown and NO brush use with refine refine radius “+” or Erase “-“
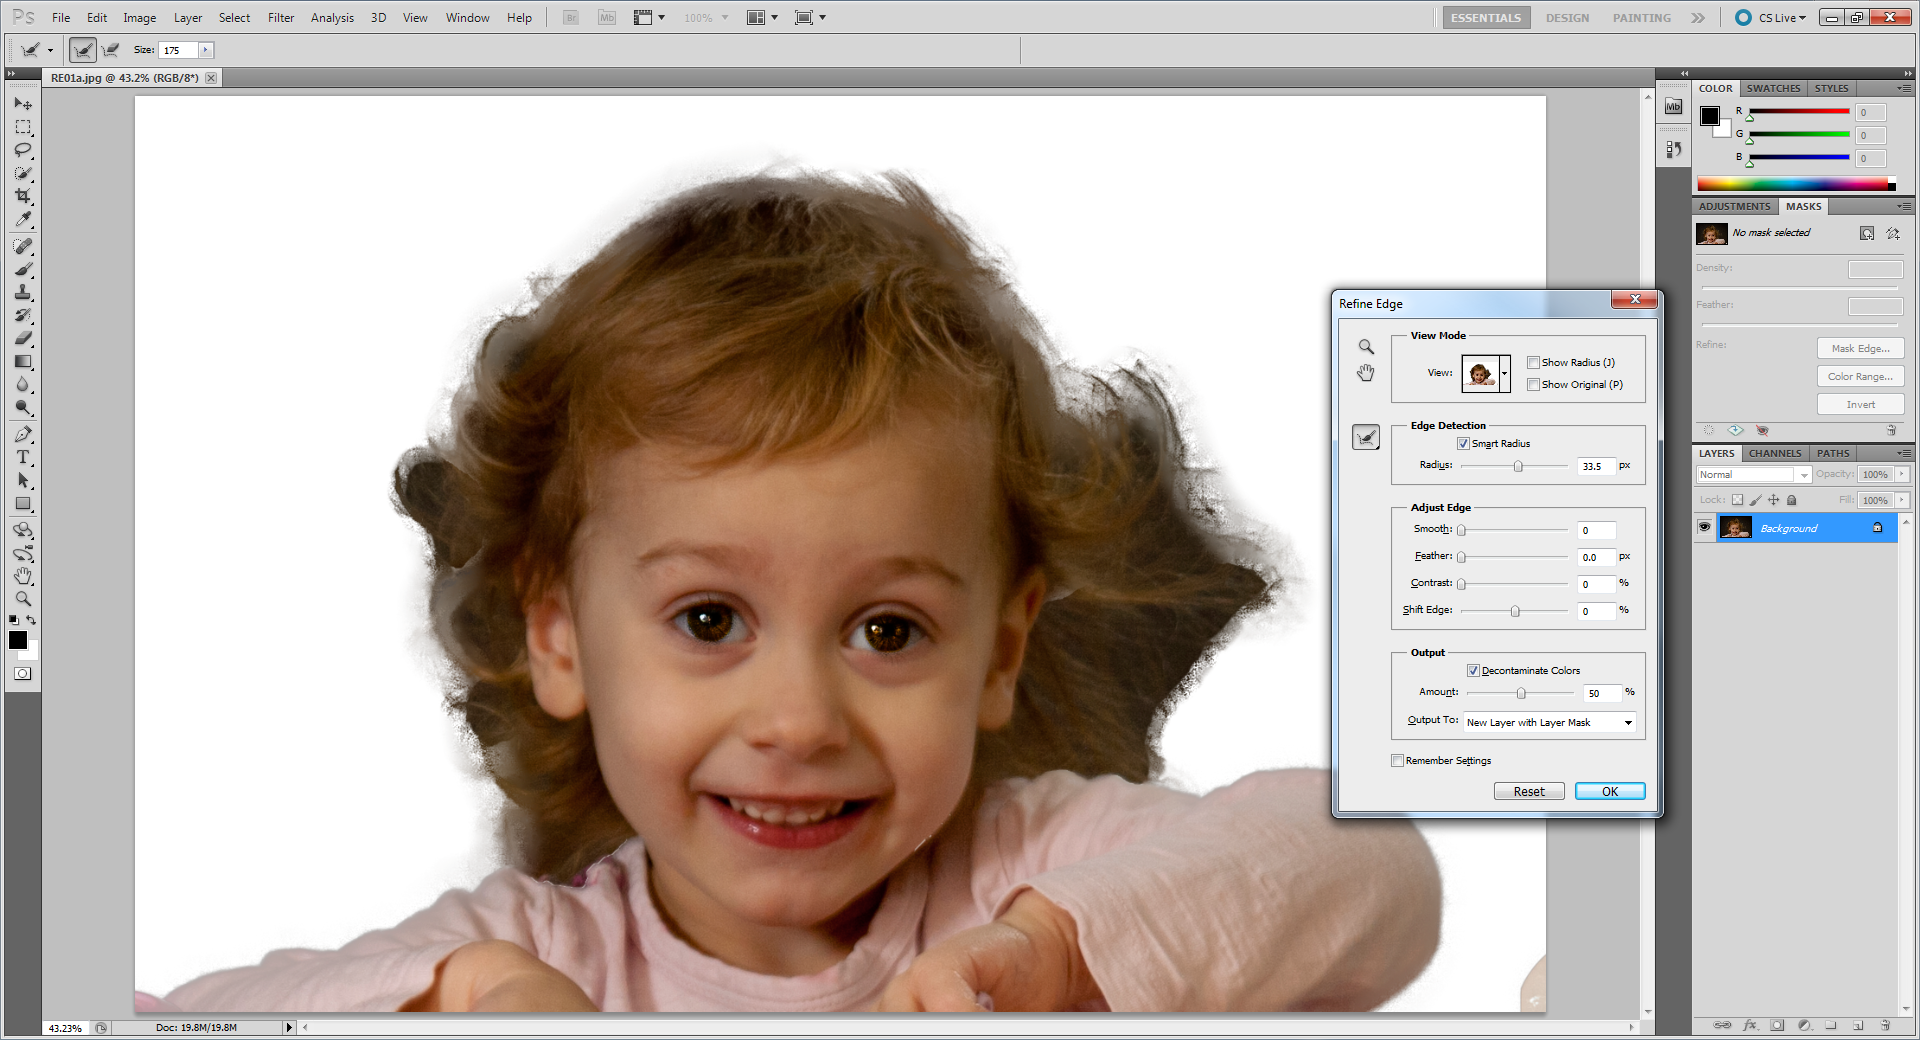
With Brush “+” on the right side only going all the way to the face.
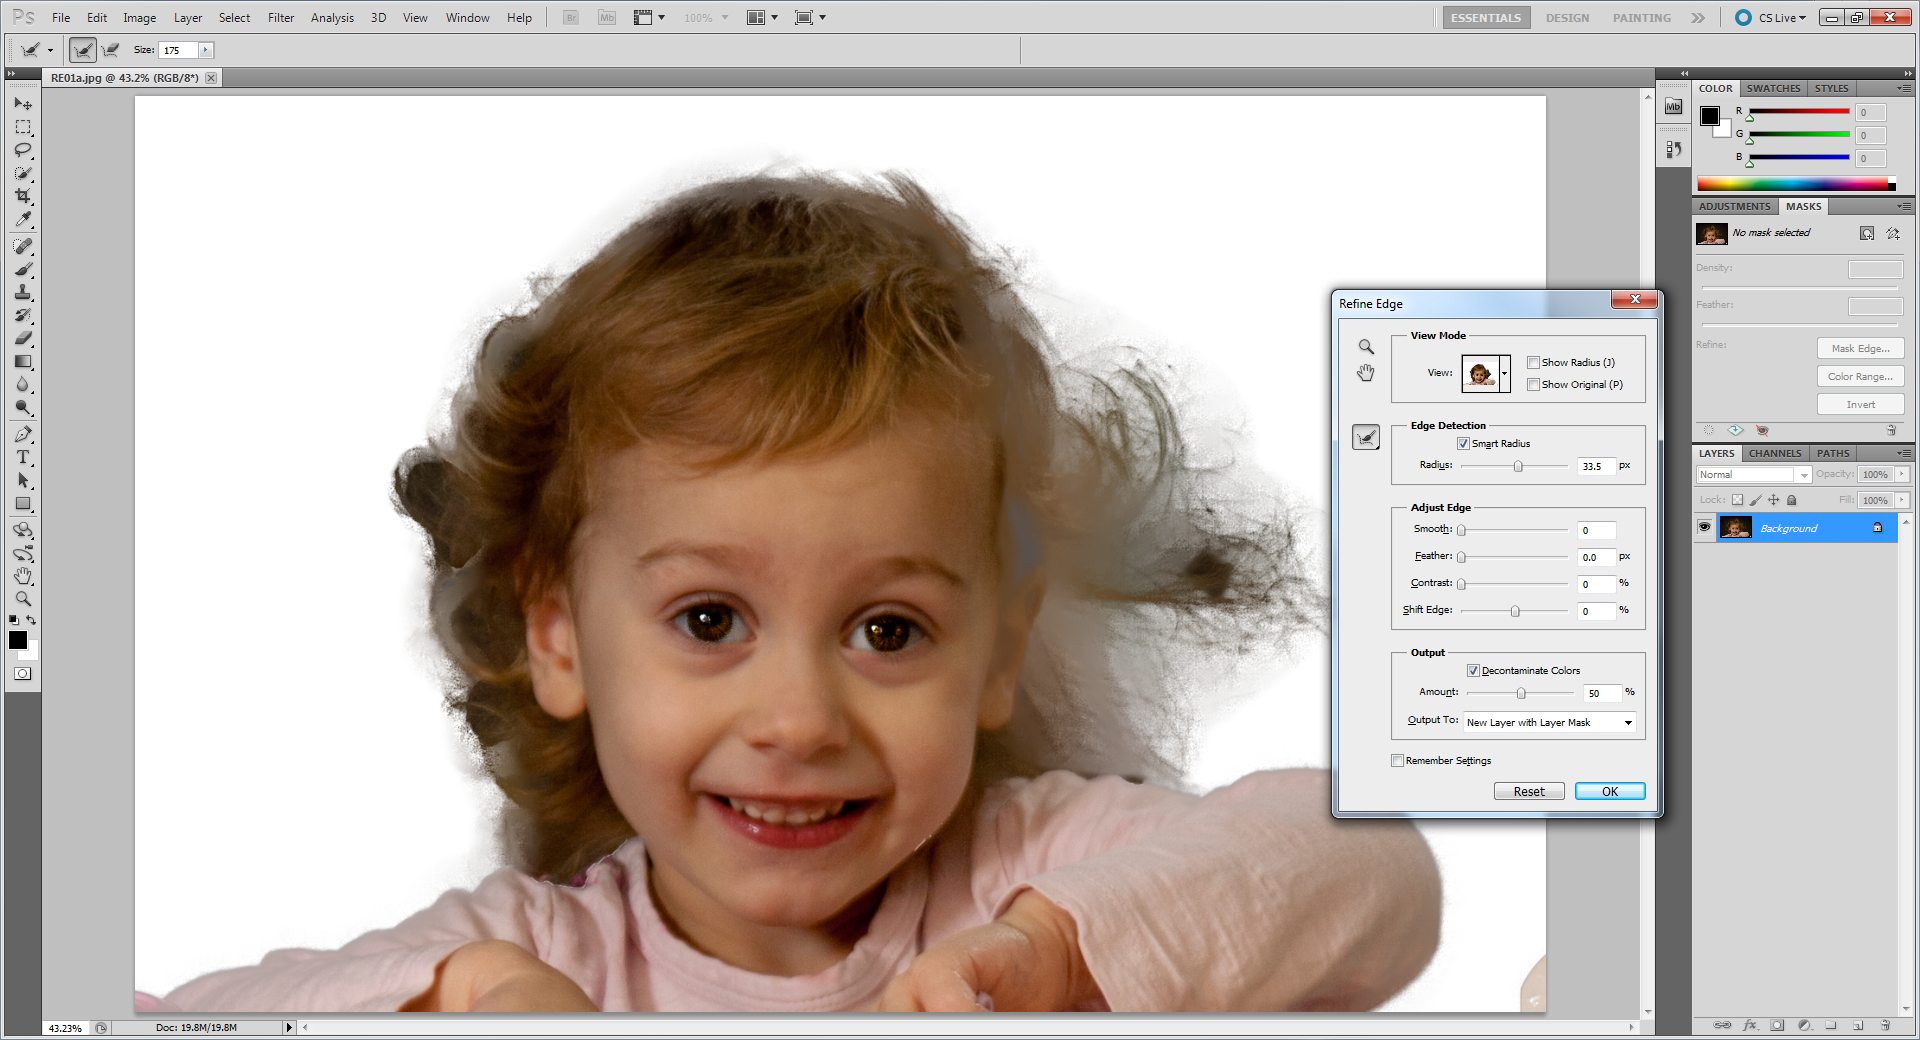
Undo the previous and then only using the brush on the outer hair. In the demo’s they show using a big brush. Do I need to use a tiny brush and only hit each hair strand?
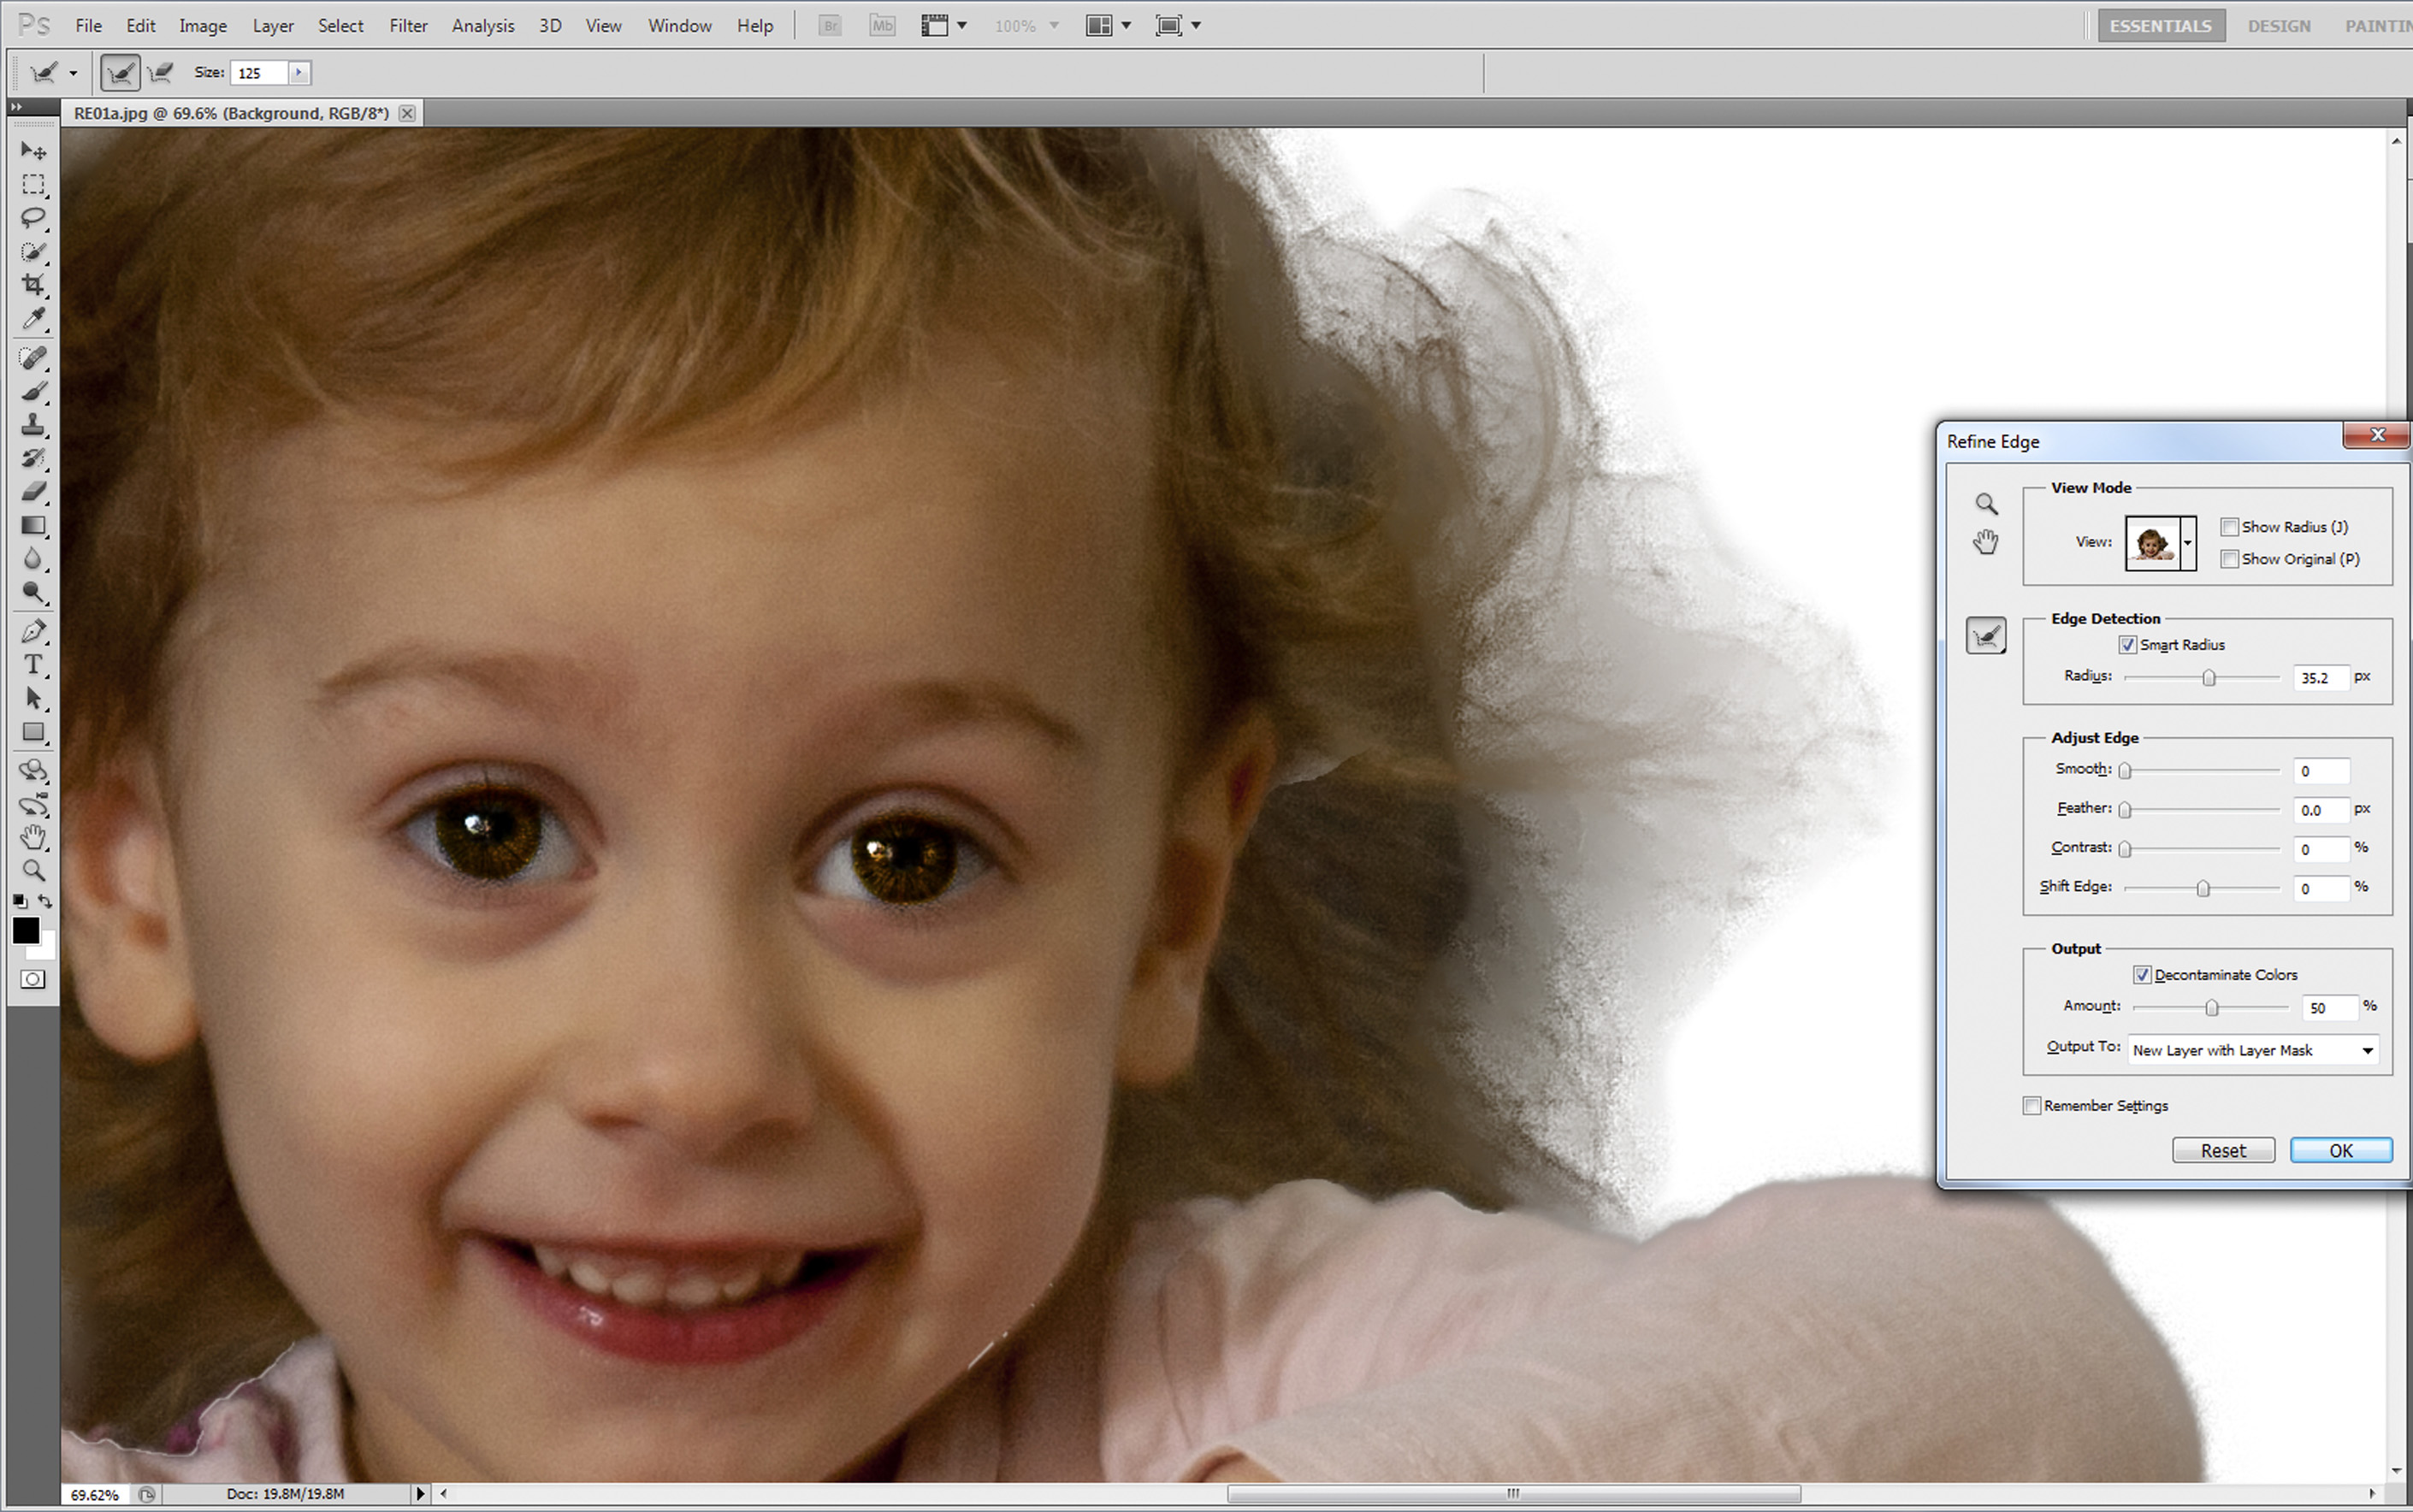
Next question. Just to eliminate other possibilities. I'm wanting to reinstall the program I know I need to unauthorize first. What else do I need to do to make sure I get a fresh install?
Thanks again for all your help.
Copy link to clipboard
Copied
hello sir, I also have a problem with my refining tool... i am stuck
everytime i about to refine some edges...
Copy link to clipboard
Copied
Uncheck the "Show Original" box up the top of the Refine Edge dialogue box.
Copy link to clipboard
Copied
I'm experiencing a similar problem on photoshop cc, the "show original" box is unchecked and so far adobe has been unhelpful. Do you have any other suggestions?