• Global community
    • Language:
      • Deutsch
      • English
      • Español
      • Français
      • Português
  • 日本語コミュニティ
    Dedicated community for Japanese speakers
  • 한국 커뮤니티
    Dedicated community for Korean speakers
Exit
0

Removing scan textures

Explorer ,
Feb 26, 2021 Feb 26, 2021

Copy link to clipboard

Copied

Hi,

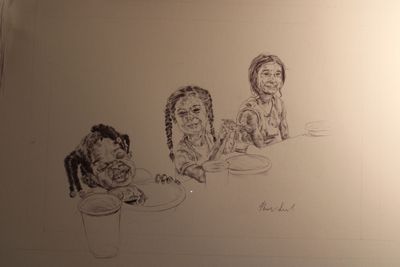
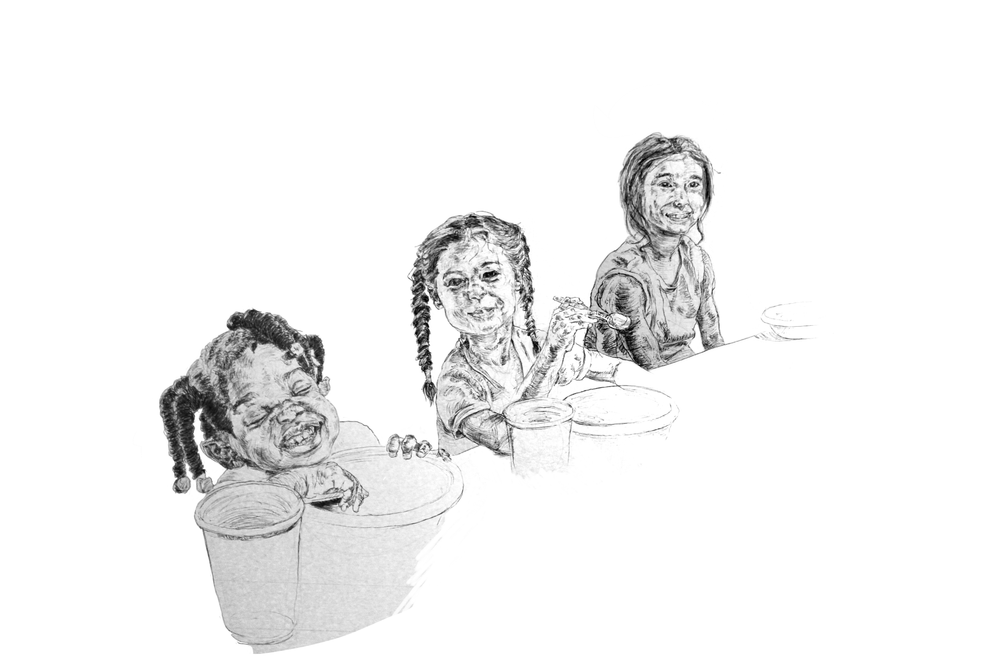
I have a drawing I created from a scan. I selected its marks using channels and extracted as much as I could get. But I still have textures from the paper. Is there a nice way to remove them to get the cleanest drawing yet still have it representational to the medium? Thank you.


Mike the Illustratordrawing.png 
Views

589

Translate

Translate

Report

Report
Community guidelines
Be kind and respectful, give credit to the original source of content, and search for duplicates before posting. Learn more
community guidelines

correct answers 2 Correct answers

Community Expert , Feb 28, 2021 Feb 28, 2021

You could try »stepped« Adjustments. 

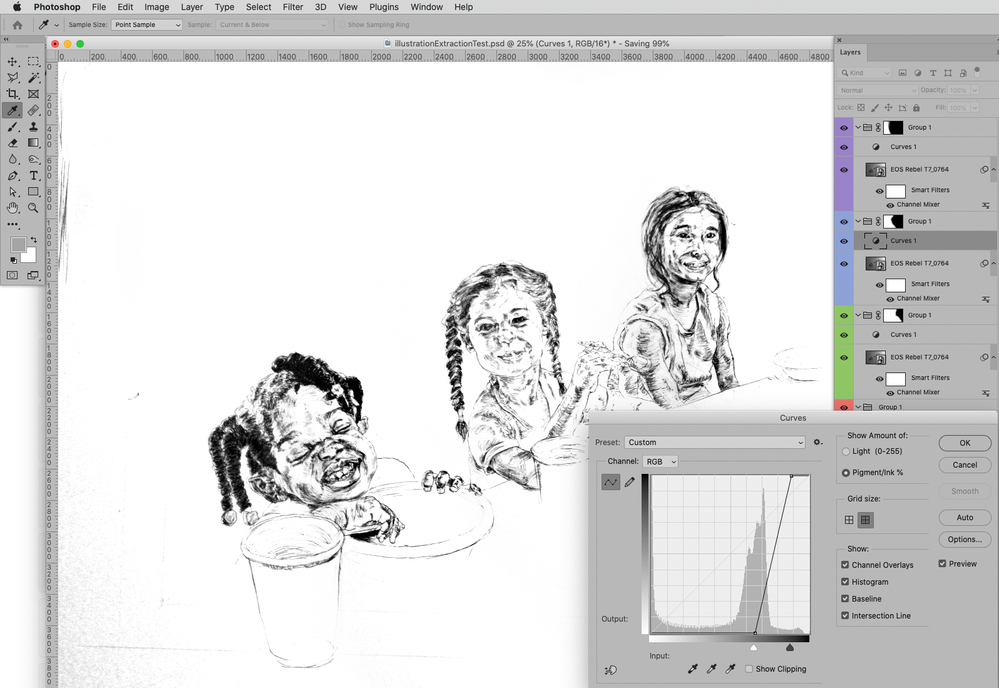
Screenshot 2021-02-28 at 11.25.21.png

Votes

Translate

Translate
Community Expert , Feb 28, 2021 Feb 28, 2021

The most important thing here is to even out the light, then set the white point.


With that done, you may not need to do anything more, except perhaps some spotting.


Whatever you do, don't start with selecting and masking the drawing! That will get you down the wrong track and quickly into a lot of trouble.

Votes

Translate

Translate
Adobe
Community Expert ,
Feb 26, 2021 Feb 26, 2021

Copy link to clipboard

Copied

What exactly you want to remove? You can use mask, or any other technique like Curves adjustment to deal with grey values on your scan.

Votes

Translate

Translate

Report

Report
Community guidelines
Be kind and respectful, give credit to the original source of content, and search for duplicates before posting. Learn more
community guidelines
Community Expert ,
Feb 27, 2021 Feb 27, 2021

Copy link to clipboard

Copied

Could you please post the unedited image. 

Votes

Translate

Translate

Report

Report
Community guidelines
Be kind and respectful, give credit to the original source of content, and search for duplicates before posting. Learn more
community guidelines
Community Expert ,
Feb 27, 2021 Feb 27, 2021

Copy link to clipboard

Copied

You can try making several scans, rotating the original in the scanner, then combing the images.

Votes

Translate

Translate

Report

Report
Community guidelines
Be kind and respectful, give credit to the original source of content, and search for duplicates before posting. Learn more
community guidelines
Explorer ,
Feb 27, 2021 Feb 27, 2021

Copy link to clipboard

Copied

EOS Rebel T7_0764.jpg

@c.pfaffenbichler  it's not a scan, which is the challenge- it's a very poor photo of a drawing.

@Bojan Živković I'd like to remove as much of the paper as possible just leaving the pen (I'm a masochist, I know)

@Chuck Uebele That's interesting, why rotate the image in the scanner? 


Thank you!


Votes

Translate

Translate

Report

Report
Community guidelines
Be kind and respectful, give credit to the original source of content, and search for duplicates before posting. Learn more
community guidelines
Community Expert ,
Feb 27, 2021 Feb 27, 2021

Copy link to clipboard

Copied

It is suppose to even out shadowing of the paper texture. By rotating the original and blending the scans with lighten mode, it fills in the shadows. However, if you're working with a photo of a drawing, and not the original drawing, that will not work. 

Votes

Translate

Translate

Report

Report
Community guidelines
Be kind and respectful, give credit to the original source of content, and search for duplicates before posting. Learn more
community guidelines
Community Expert ,
Feb 28, 2021 Feb 28, 2021

Copy link to clipboard

Copied

You could try »stepped« Adjustments. 

Screenshot 2021-02-28 at 11.25.21.png

Votes

Translate

Translate

Report

Report
Community guidelines
Be kind and respectful, give credit to the original source of content, and search for duplicates before posting. Learn more
community guidelines
Community Expert ,
Feb 28, 2021 Feb 28, 2021

Copy link to clipboard

Copied

The most important thing here is to even out the light, then set the white point.


With that done, you may not need to do anything more, except perhaps some spotting.


Whatever you do, don't start with selecting and masking the drawing! That will get you down the wrong track and quickly into a lot of trouble.

Votes

Translate

Translate

Report

Report
Community guidelines
Be kind and respectful, give credit to the original source of content, and search for duplicates before posting. Learn more
community guidelines
Community Expert ,
Feb 28, 2021 Feb 28, 2021

Copy link to clipboard

Copied

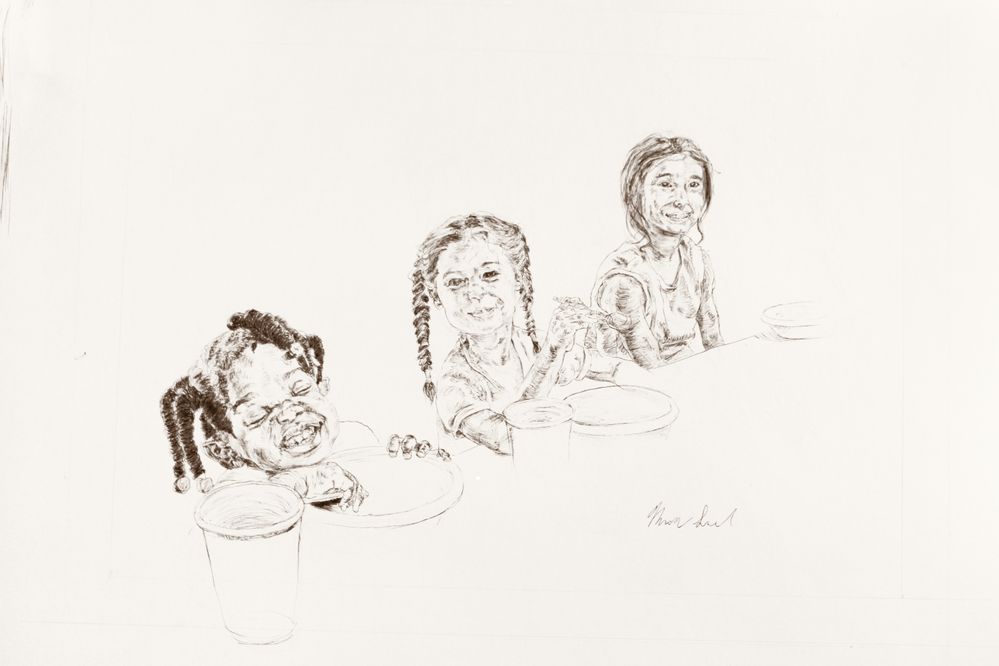
Here's what you can do with general and global adjustments, without any masking of the drawing itself:

corrected_2.jpg


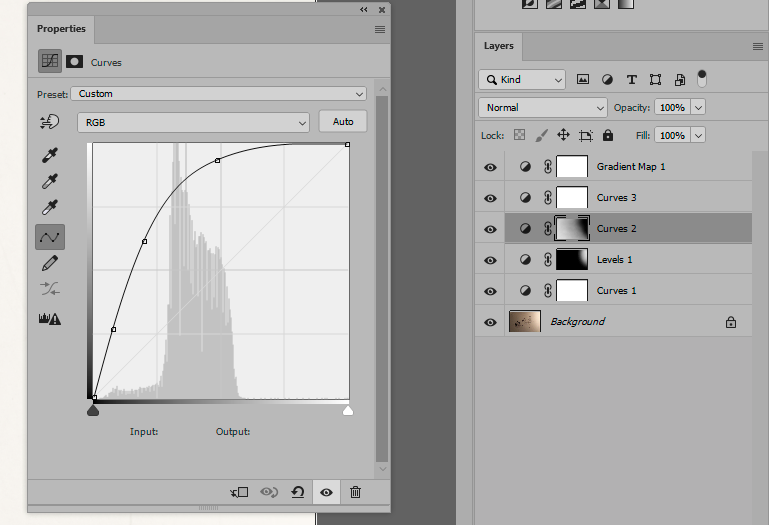
Here's the layer setup. In chronological order, bottom to top:

  • Curves 1 is just to kill the worst of the yellow color cast, using the eyedroppers. This doesn't have to be accurate, it's just to let you see what you're doing.
  • Levels 1 is to dampen the hot spot to the right, in conjunction with
  • Curves 2 which is the main adjustment. This lifts the extreme underexposure. Note the soft masks.
  • Curves 3 is to set the final curve.
  • Gradient Map sets the finished color. Here I intentionally kept a very slight warm sepia tone.


layers.png

Votes

Translate

Translate

Report

Report
Community guidelines
Be kind and respectful, give credit to the original source of content, and search for duplicates before posting. Learn more
community guidelines
Explorer ,
Mar 02, 2021 Mar 02, 2021

Copy link to clipboard

Copied

LATEST

@D Fosse @c.pfaffenbichler 

You guys are fantastic! Thank you for your posted solutions. 

Votes

Translate

Translate

Report

Report
Community guidelines
Be kind and respectful, give credit to the original source of content, and search for duplicates before posting. Learn more
community guidelines