Doc_Pit
Inspiring
November 8, 2019
Answered

Rotating the clone stamp source: Is there a better way?

  • November 8, 2019
  • 3 replies
  • 786 views

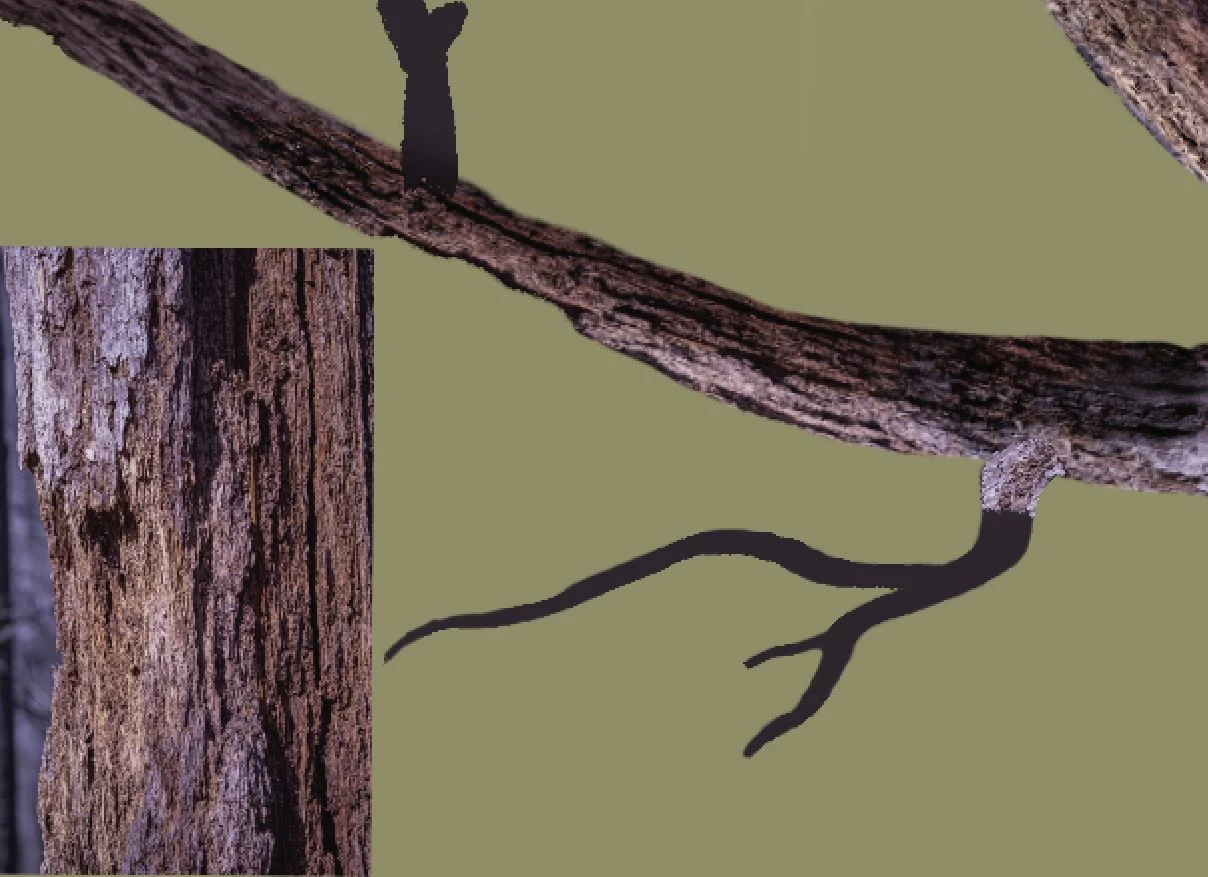
Hello, Everyone.  This image illustrates the problem I'm trying to solve.

The larger branches of this dead tree were created by slicing, dicing, warping, and blending strips from images of dead trees that I have in my database.  Transform>Warp allows me to make a decent attempt at getting the tree textures to follow the form of the branches.  Using the same method to create smaller branches is impractical.  I painted in some smaller branches.  I could attempt to hand paint textures on to those smaller branches.  Sad to say, I lack the skill to match the detail in a photo.  An alternative is to clone textures on to the painted branches, rotating the clone stamp source from the angle section in the clone stamp panel to try to get the textures to follow the form.  Given the twists of those smaller branches, that would be extremely time consuming.  


If it were only a matter of laying a texture on to the branches, I could use a clipping mask strategy.  The problem is getting the "grain" or texture to follow the twists of the branches.  Rotating the source through the clone stamp panel is the only approach I can think of.  Is there a better way?


This topic has been closed for replies.
Correct answer barbara_a7746676

You could try putting the texture on a separate layer above the branch with a layer mask in the shape of the branch (or you could clip the texture layer to the branch layer (Alt or Option click the divider line between the two layers. Then you could use Filter > Liquify to distort the texture to the shape of the branch.

3 replies

Semaphoric
Community Expert
Community Expert
November 9, 2019

Adobe Capture allows you to turn  graphics into  brushes you can use in Adobe Photoshop Sketch, which are like a raster version of Illustrator's Art Brushes, but sadly, they do not work in Photoshop itself. They would be a natural for something like this.

Chuck Uebele
Community Expert
Community Expert
November 8, 2019

I would use puppet warp to make the texture follow the branch. And as Barbara mentioned, you could put the texture on a separate layer by using frequency separation.

Doc_Pit
Doc_PitAuthor
Inspiring
November 9, 2019

I think the clipping mask is the way to go.  I tend to use puppet warp more often than liquify, but puppet warp--while it allows a lot of control--is tedious.  Thanks very much for the advice.

barbara_a7746676
Community Expert
Community Expert
November 9, 2019

I'm glad that worked for you. There's usually more than one way, and as you said, either puppet warp or liquify could work. Either one could be used with a Smart Object Layer. 

barbara_a7746676
Community Expert
barbara_a7746676Community ExpertCorrect answer
Community Expert
November 8, 2019

You could try putting the texture on a separate layer above the branch with a layer mask in the shape of the branch (or you could clip the texture layer to the branch layer (Alt or Option click the divider line between the two layers. Then you could use Filter > Liquify to distort the texture to the shape of the branch.