mirza5313
Known Participant
May 1, 2017
Answered

Simple action to replace image from walls

  • May 1, 2017
  • 4 replies
  • 10277 views

I have record an action that replace image from wall and save as jpg actually i want this via File->Automate->Batch here is action file if any one want to see

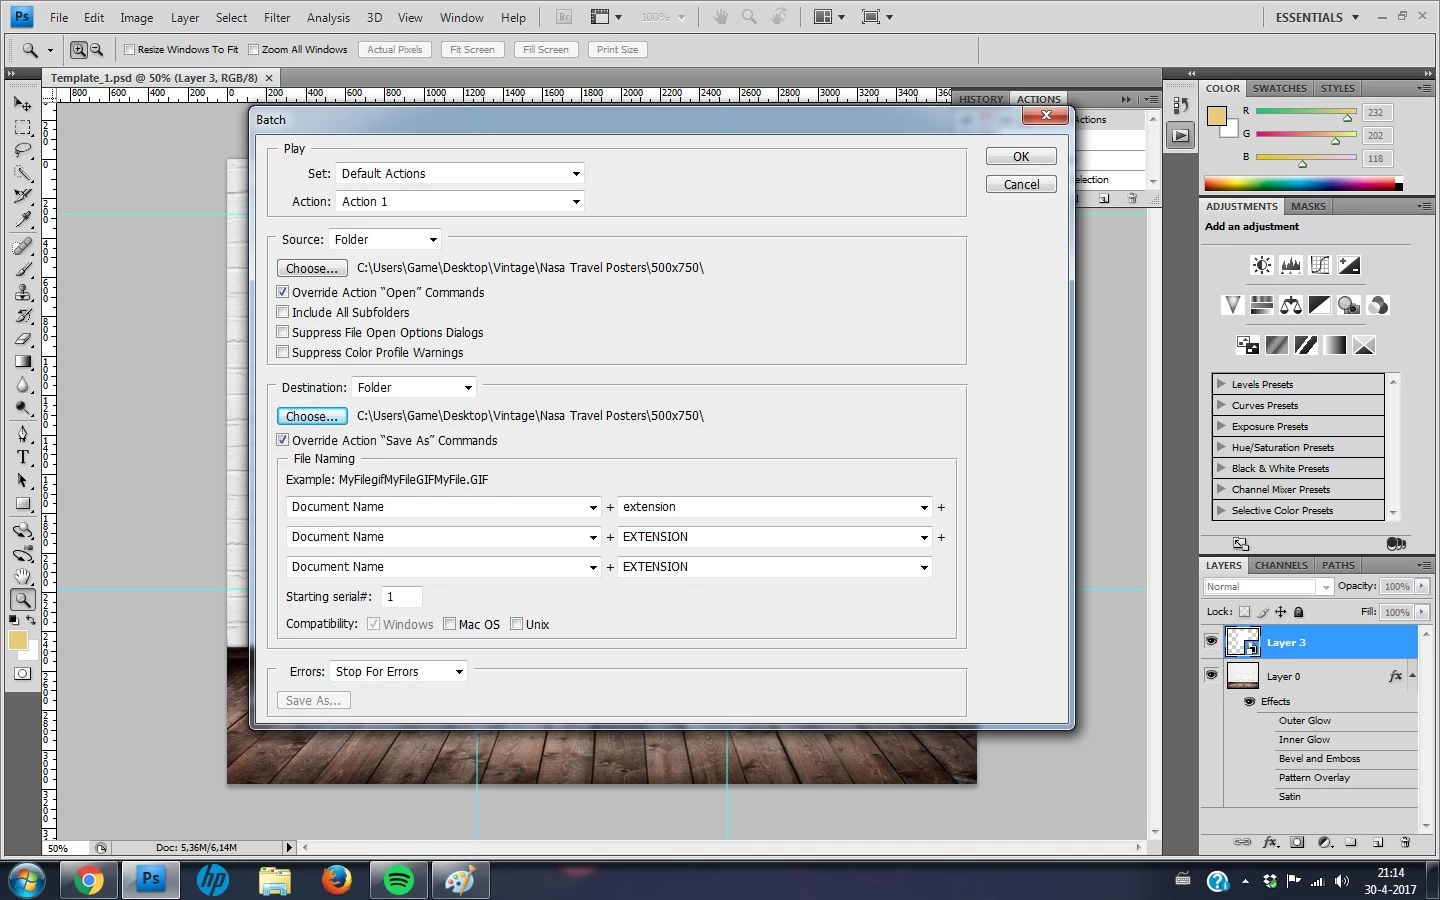
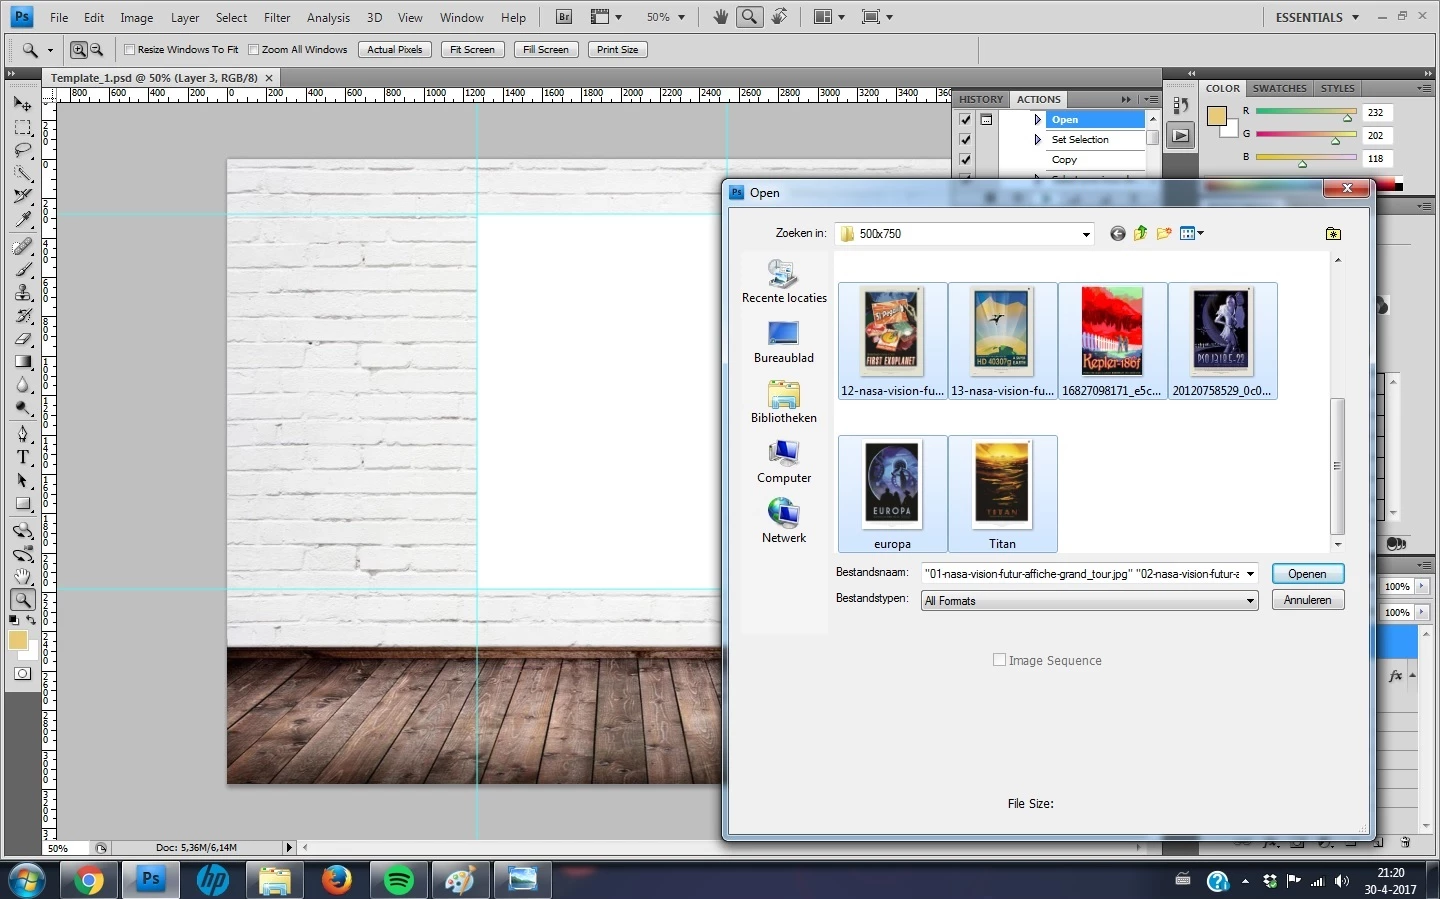
So, after creation this action I went to File>Automate>Batch and with the settings (first image attached) I tried to select all the files in the folder (2nd image attached), but then get a ''The command 'Edit Contents' is currently not available'' message (photo 3).

When I select the images one by one, the action does its work, but after the 3rd image it automatically keeps replacing the 3rd image that I did. Is it possible to just select all the images at once and let the action do its work to save all the outcomes at once?

NOTE: I have all images in same sizes to put on wall i.e 500x750px almost 500+ photos to do batch process....

Thank you so much for you help...

This topic has been closed for replies.
Correct answer Stephen Marsh

I'm really sorry, But its not working getting with errors... I have changed with place step but action stuck and says "command set is currently not available..


mirza5313 I am not sure why you are getting that error… Close the template image if it is open in Photoshop.

Try creating a new blank document, 1500px wide x 1250px high.

Create a brand new action set and action, the record on the new action should auto start.

Use the File > Place Embedded menu and select your template image. Then press enter or the check/tick mark on the menu bar to place/scale/transform the image to the centre of the document, automatically sized to the document width/height.

The new action should now contain one step. Stop recording the action. Delete the placed image and run the action again to test that it correctly places the template image. It can’t get any simpler or easier than a single step action!

If you have no more errors, then you can now do one of two things:

1) Drag the recorded step of placing the template file into the action that I provided, removing my original place step

or

2) Recreate the other four steps in my action or drag my recorded steps into your new action

As long as all of your poster images are sized 500x750px as the examples that you previously provided, there should be no other issues with performing this task as I have described. If your poster images are not all the same size/proportion as the 500x750px examples, then extra steps will be required.

I have tried to keep this simple, all of the info provided so far points to a simple method for a simple problem. Alternatively, if you need a more complicated and robust method, JJMack can help.

4 replies

JJMack
Community Expert
Community Expert
May 7, 2017

images are populated in the sequence of the alpha Chanels image 1 image 2 image 3  File in file name sort order.  If you read the documentation you will know how to use the package and the images will be where you want the populated

JJMack
JJMack
Community Expert
Community Expert
May 7, 2017

1) A single image split into a faux triptych

or

2) 3 separate images, combined into a single/split image

Two very different things my scripts do the second  1 to 53 images can be batch populated into a template a template can have 1 to 53 image locations.

Spiting up an image my scripts do not do.   However you could populate an single image and overlay the populated image with a mat the has three openings to show three parts of the image.

JJMack
JJMack
Community Expert
Community Expert
May 2, 2017

Actions have limitation because the can not use logic. The also have problems with saving multiple files.  Actions can be batch well with Photoshop features like Batch and Image processing scripts.   Normally  one image is process at a time and save the the next image is processed in the batch.

When you want to replace one or more image is a document Scripting it is a better approach.   You can point the script at the template image and point it to to a source if image file to use as replacements.   The source image could be any size a script can easily scale and mask images into place.  It best that the image have matching orientations  need not be exact same aspect ratio  just landscape to landscape and portrait to portrait.  Changing a image orientation looses to much of an images composition. The script can include additional options in its dialog a script can be a batch process an interactive process or  fully automate populating a template and left open in Photoshop

Photo Collage Toolkit

Photoshop scripting is powerful and I believe this package demonstrates this A video showing a 5 image collage PSD template  being populated with images:

The package includes four simple rules to follow when making Photo Collage Template PSD files so they will be compatible with my Photoshop scripts.

  1. Size the photo collage templates for the print size you want - width, height and print DPI resolution.
  2. Photo collage templates must have a Photoshop background layer. The contents of this layer can be anything.
  3. Photo collage templates must have alpha channels named "Image 1", "Image 2", ... "Image n".
  4. Photo collage templates layers above the background layers must provide transparent areas to let the images that will be placed below them show through.

There are fifteen scripts in this package they provide the following functions:

  1. HelpPhotoCollageToolkit.jsx - Online Help
  2. TestCollageTemplate.jsx - Used to test a Photo Collage Template while you are making it with Photoshop.
  3. CollageTemplateBuilder.jsx - Can build Templates compatible with this toolkit's scripts.
  4. LayerToAlphaChan.jsx - Used to convert a Prototype Image Layer stack into a template document.
  5. InteractivePopulateCollage.jsx - Used to interactively populate Any Photo Collage template. Offers most user control inserting pictures and text.
  6. ReplaceCollageImage.jsx - use to replace a populated collage image Smart Object layer with an other image correctly resized and positioned.
  7. ChangeTextSize.jsx - This script can be used to change Image stamps text size when the size used by the populating did not work well.
  8. PopulateCollageTemplate.jsx - Used to Automatically populate a Photo Collage template and leave the populated copy open in Photoshop.
  9. BatchOneImageCollage.jsx - Used to Automatically Batch Populate Collage templates that only have one image inserted. The Collage or Image may be stamped with text.
  10. BatchMultiImageCollage.jsx - Used to Automatically Batch Populate Any Photo Collage template with images in a source image folder. Easier to use than the interactive script. Saved collages can be tweaked.
  11. PasteImageRoll.jsx - Paste Images into a document to be print on roll paper.
  12. BatchPicturePackage.jsx - Used to Automatically Batch Populate Any Photo Collage template with an image in a source image folder.  Images Rotates for best fit.
  13. BatchPicturePackageNoRotate.jsx - Used to Automatically Batch Populate Any Photo Collage template with an image in a source image folder.
  14. PopulatePicturePackage.jsx - Used to Automatically populate a Photo Collage template Fill with the same single image and leave the populated copy open in Photoshop.
  15. PCTpreferences.jsx - Edit This File to Customize Collage Populating scripts default setting and add your own Layer styles.

Documentation and Examples

JJMack
Stephen Marsh
Community Expert
Community Expert
May 1, 2017

Offhand I can think of two ways to do this. One way is using Variables (Data Driven Graphics) …however that is probably overkill.

The second way is with a simple batch run like you are looking at. There are likely many ways to get to the desired goal, this is just something fast that I knocked together at the end of a hard day, with a fresh start and more time I could probably do it better.

Action steps are pretty simple:

Then run the batch:

The final result (output folder is the result of the batch, the graphics folder are the files run by the batch, the wall.psd file is the static background that does not change):

As you can see, the larger gray wall has been combined with the smaller variable colour graphics.

Explanation:

Basically all five of the action steps are (the first two steps may not be required if all images are known to be layers and not flattened) –

1. Flatten

2. Ensure that the variable graphic image is a layer

3. Resize the canvas of the smaller image to accommodate the larger image

4. Place the larger image into the correct position

5. Move/stack the larger image behind the smaller image

mirza5313
mirza5313Author
Known Participant
May 1, 2017

Thanks Stephen_A_Marsh but I'm really sorry I do not understand about variable, I am really new in Photoshop can you please explain more simple words how to adjust this action to get desired Batch image start working?

JJMack
Community Expert
Community Expert
May 7, 2017

With a good template design the process can be quite strait forward but by no means is it simple.


What is simple is my PSD template design.   This make template easy to  create. You can get very creative there only are four simple rules you need to adhere to.  The are not very confining and they are simple.

  1. Size the photo collage templates for the print size you want - width, height and print DPI resolution.
  2. Photo collage templates must have a Photoshop background layer. The contents of this layer can be anything.
  3. Photo collage templates must have alpha channels named "Image 1", "Image 2", ... "Image n". These map your images Location Position, Shape and size.
  4. Photo collage templates layers above the background layers must provide transparent areas to let the images that will be placed below them show through.
JJMack